
On this page
Start here
Quick answer
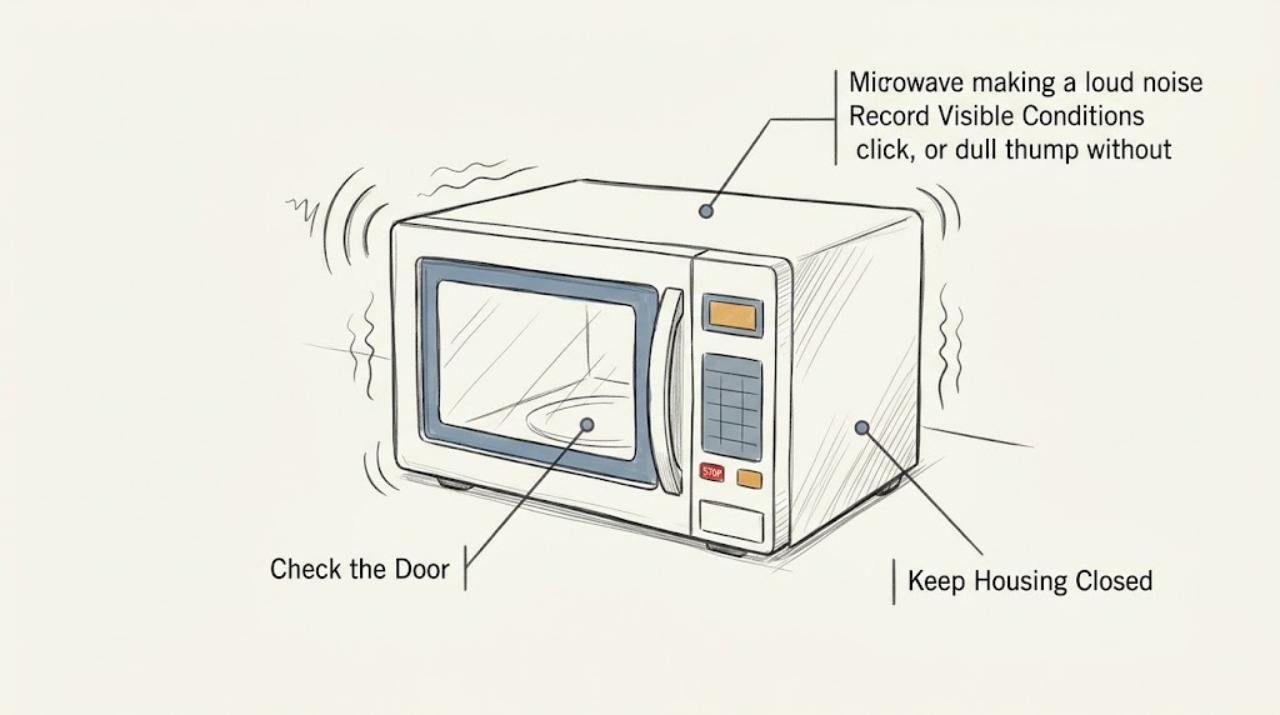
GE lists JES1145SHSS as a 1.1 cu. ft. countertop microwave, so do not apply over-the-range vent-fan advice to it. First record whether the sound is a low hum or click at a reduced power level, an internal fan during or briefly after cooking, a turntable rattle, or a pop, snap, buzz, or arc. GE's JES1145 manual says a dull thumping sound during defrost or another setting below High can be normal, while GE says food, spills, tight food membranes, metal or metal trim, an empty cavity, or an incorrectly seated turntable can produce different noises. With the oven off and cool, check only the cookware, visible spill, turntable seating, counter stability, open ventilation, cord, door, and cavity. Never run this microwave empty, open the cabinet, defeat the door interlock, or perform a live or leakage test. Stop immediately for sparks, continuing arcing, smoke, burning or electrical odor, cavity or door damage, abnormal heat, a damaged cord or outlet, or a harsh mechanical or electrical noise, and arrange qualified microwave service.
Work through in order
Diagnostic checks
Use only checks that match the exact appliance or system and its official guide.
-
Check 1
Read the front rating label and record JES1145SHSS, the serial number, and whether the oven is sitting as a countertop unit. From a dry position, describe the sound as hum, click, thump, fan, rattle, drag, pop, snap, buzz, or arc and note whether it starts at Start, at reduced power, during heating, when the tray moves, or after cooking.
Expected result: The label confirms JES1145SHSS, the oven is countertop-installed, the sound has a repeatable phase, or the identity or sound source cannot be recorded safely.
Next step: Save the label, installation position, sound description, and timing for the matching service path. If the sound is an arc, spark, harsh electrical pop, or unexplained mechanical noise, leave the oven off without trying to reproduce it.
Stop if: Do not move a heavy or unstable oven, remove trim, open the cabinet, operate with a damaged cord or door, or continue if there is smoke, burning odor, abnormal heat, water near electricity, or a breaker trip.
Why this matters
Why: GE identifies JES1145SHSS as a countertop model, while its manual and support pages distinguish lower-power operation, fan behavior, turntable movement, food-related popping, and abnormal electrical or mechanical sound. Installation type matters because over-the-range vent behavior does not establish a cause for this model.
-
Check 2
If the sound is a hum, click, or dull thump without sparks, odor, cavity damage, or loss of heating, note the selected power level and whether it occurs immediately after Start or during a reduced-power cycle. Do not repeatedly start and stop the oven to amplify the sound.
Expected result: The sound occurs only below High, during defrost or another reduced-power setting, as a brief relay click, or instead is a harsh buzz, electrical pop, or continuous mechanical noise at every setting.
Next step: Monitor once only if the sound matches the documented lower-power pattern and all safety conditions remain normal. Leave the microwave off and arrange qualified service for a harsh, new, continuous, or setting-independent sound.
Stop if: Stop immediately for an electrical or mechanical pop, arc, spark, smoke, burning or electrical odor, abnormal heat, or any sign that the door or cavity is damaged.
Why this matters
Why: The JES1145 manual says a dull thumping sound during defrost is normal when the oven is not at Power Level 10. GE also documents magnetron cycling and relay clicks as normal possibilities, but a harsh electrical or mechanical sound is not cleared by the fact that the oven still heats.
-
Check 3
With the microwave unplugged or otherwise safely unpowered, the cavity cool, and the door open normally, inspect the removable glass turntable and support for visible spill, debris, off-center seating, or damage. Confirm the tray and support are in place and unrestricted; clean only plainly visible residue with a soft, nonmetallic cloth.
Expected result: The tray is off-center, the support is not seated, visible debris is under the support, the tray is cracked or damaged, or the tray is correctly seated but the rattle, drag, or grinding remains.
Next step: Correct only visible seating or residue according to the manual and stop if the tray or support is damaged. If the sound persists, the tray will not turn, or anything is lodged beneath the cavity floor, leave the oven off and request service.
Stop if: Do not run the oven without the turntable, reach through the cavity floor, remove a motor, use sharp tools, hand-force a jammed tray, or run it empty to test the sound.
Why this matters
Why: The JES1145 manual requires the turntable and support to be in place and unrestricted. A visible seating or spill issue can explain a tray rattle, but a persistent harsh mechanical sound with a correctly seated tray is not a safe basis for identifying a motor or drive part.
-
Check 4
If the sound is popping or sizzling, stop cooking and let the cavity cool. Check only the food and cookware from a safe position: visible grease or spill, a tight skin or membrane, metal or metallic trim, a probe or other object left inside, and a turntable or support that is loose. Use only cookware and arrangements allowed by the JES1145 manual.
Expected result: The sound tracks high-fat food, a tight membrane, a spill, metal or metal trim, an object left inside, or a loose tray; or it continues with ordinary microwave-safe cookware and a clean, correctly assembled cavity.
Next step: Remove the food only when safe, clean the visible spill, and use the manual-approved cookware once the cavity is cool. If arcing recurs or the cause is not clearly food or setup, keep the microwave off and arrange qualified service.
Stop if: Do not run the microwave empty, use metal or metallic trim, touch a hot or arcing item, scrape the cavity with metal, inspect the waveguide, or continue after sparks, smoke, odor, or a burned cavity spot.
Why this matters
Why: GE identifies food, spills, tight membranes, metal, a probe, and an incorrectly positioned rack as causes of popping or arcing. A pop that continues without a food or setup explanation is not safely classified as normal, especially if it is electrical or mechanical in character.
-
Check 5
For a fan-like sound, remember that JES1145SHSS is a countertop model. From outside, note whether an internal fan runs during cooking or for a short period after the cycle, and check that the recommended side, top, and rear air clearances are not blocked by a wall, appliance, cloth, or stored item. Do not remove a fan cover.
Expected result: The fan sound is limited to cooking or brief cool-down, the clearances are open, or the fan scrapes, rattles, vibrates, overheats, or remains abnormal after cooking.
Next step: Clear only loose external obstructions and allow normal cool-down. If airflow is blocked, the cabinet is unusually hot, or the fan remains harsh or abnormal, leave the unit off and arrange appliance service rather than changing the installation or opening the case.
Stop if: Do not place the oven in a sealed space, cover vents, remove the outer case, insert objects into openings, or continue if the cord, outlet, cabinet, or door is hot or damaged.
Why this matters
Why: GE says an internal component fan can run while the microwave is operating and for a few seconds after a cycle. The JES1145 manual gives recommended countertop clearances and says not to cover or block openings. A new scraping or persistent abnormal fan noise is not proven normal by timing alone.
-
Check 6
With the oven off and cool, inspect only the visible cavity, door screen and frame, glass tray, power cord, plug, outlet, and countertop for scorch marks, cracks, exposed metal, moisture, tipping risk, or contact with nearby objects. Do not perform a leakage, interlock, voltage, or live electrical test.
Expected result: No visible damage is present and the sound matches a documented operating or food condition, or there is arcing, a cavity hole, door damage, moisture near electricity, a hot or damaged cord or outlet, abnormal heat, or repeated breaker operation.
Next step: For any damage or electrical warning, stop using the microwave and arrange qualified microwave or electrical service. Provide the model, sound timing, food or tray condition, visible damage, and whether heating changed.
Stop if: Stop immediately for active arcing, sparks, smoke, burning or electrical odor, a damaged door or cavity, abnormal heat, water near electrical parts, or a repeated breaker trip.
Why this matters
Why: A safe visible setup issue can be corrected externally, but GE says an electrical or mechanical pop should be serviced and the JES1145 manual restricts adjustment or repair to qualified personnel. Visible damage or electrical symptoms override a normal-sound explanation.
Use your observations
Decision map
Find the observation that best matches what you see, then follow the next safe action.
-
PATH 01Next step
What you see
The sound is a brief dull thump or hum only during defrost or another setting below High, or a short relay click after Start, with normal heating and no arc, odor, damage, or unusual heat.
Do this next
Record the setting and monitor once without repeated starts. Arrange service if the sound becomes harsh, changes suddenly, occurs at every setting, or is joined by poor heating or a safety symptom.
Why this path and its safety boundary
Why it matters: GE's documented lower-power magnetron cycling or relay operation is more likely than an immediate internal failure.
-
PATH 02Next step
What you see
Popping or sizzling follows high-fat food, a tight membrane, a spill, metal or metallic trim, an object left inside, or a loose tray, and it stops after the safe setup issue is removed.
Do this next
Use the manual-approved cookware and a clean, correctly assembled tray. Stop and request service if popping or arcing returns without a clear food or setup cause.
Why this path and its safety boundary
Why it matters: Food or cavity setup is the stronger explanation, but an empty run or metal use can cause arcing and damage.
-
PATH 03Next step
What you see
The glass tray rattles, drags, or hesitates and is visibly off-center, upside down, obstructed, damaged, or not seated; or it remains noisy after visible seating and residue checks.
Do this next
Correct only the plainly visible tray or support condition with the oven off and cool. Leave the unit off for persistent grinding, a tray that will not turn, or a lodged object and arrange service.
Why this path and its safety boundary
Why it matters: A visible tray or support condition is more likely when correction changes the sound. A persistent harsh mechanical noise is unresolved and does not identify a replacement motor.
-
PATH 04Next step
What you see
A fan runs during cooking or briefly afterward with open countertop clearances and no heat or odor, or instead scrapes, rattles, vibrates, overheats, or remains abnormal after cool-down.
Do this next
Keep the countertop clear and allow normal cool-down. Stop using the microwave and request qualified service for persistent fan noise, blocked openings, abnormal heat, or damage.
Why this path and its safety boundary
Why it matters: Normal internal cooling is more likely in the first pattern; a persistent harsh fan symptom or blocked installation needs service rather than a guessed fan part.
-
PATH 05Next step
What you see
The sound is an electrical or mechanical pop, harsh buzz, arc, or snap; it continues after food and tray checks; heating changes; or there is smoke, odor, spark, cavity or door damage, abnormal heat, water near electricity, or a breaker trip.
Do this next
Stop using the JES1145SHSS and arrange qualified microwave or electrical service from a dry, safe position. Do not run it empty, open the case, test leakage, defeat interlocks, or repeatedly reset the breaker.
Why this path and its safety boundary
Why it matters: An internal high-voltage, control, fan, turntable, shielding, or power fault may be involved, and no user-level test can safely distinguish it.
When checks do not resolve it
Need a professional?
Arrange qualified GE or microwave service when the JES1145SHSS has a recurring unexplained noise, persistent turntable or fan fault, electrical or mechanical popping, cavity or door damage, loss of heating, or an installation issue that cannot be corrected from ordinary countertop access. Provide the full model and serial, sound character and timing, power setting, food and cookware, tray condition, visible damage, and whether the oven still heats. Do not identify a magnetron, transformer, motor, fan, control, or shielding part from sound alone.
Common questions
FAQ
Is a loud hum or thump normal on the GE JES1145SHSS?
A dull thump during defrost or another reduced-power setting can be normal because the magnetron cycles; brief relay clicks and an internal cooling fan can also be normal. A harsh, continuous, electrical, or mechanical sound is not cleared by this explanation and should be serviced.
Why is the GE JES1145SHSS making a popping sound?
Check for high-fat food, a tight membrane, a visible spill, metal or metallic trim, an object left inside, or a tray or support problem. Never run the microwave empty. If popping or arcing continues without a clear food or setup cause, stop using it and arrange service.
Does JES1145SHSS use an over-the-range vent fan?
GE's Owner Center identifies JES1145SHSS as a countertop microwave. Internal cooling-fan guidance may apply, but over-the-range vent-fan behavior should not be assumed for this model; keep the countertop air openings clear and use its manual for placement.
Read the exact guide
Official sources
- Microwave - Normal Operational CharacteristicsGE Appliances · General GE microwave guidance used only for symptom classification; countertop model identity and manual control installation-specific details.
- Microwave - Food Taking Too Long to CookGE Appliances · General GE microwave airflow guidance used only for the blocked-opening and abnormal-heat boundary; it does not diagnose a JES1145SHSS component.
- GE JES1145 Microwave Oven Owner's Manual, 49-40735 Rev. 1GE Appliances · Opened from the exact JES1145SHSS GE Owner Center; use the complete model label if a later revision differs.
- User Manual & Care for JES1145SHSS | GE AppliancesGE Appliances · Exact GE JES1145SHSS model page; the complete rating label remains controlling for service and manual matching.
- Microwave - Arcing or Making SoundsGE Appliances · General GE microwave guidance; the exact JES1145 manual controls cookware and operation for this model.
Community feedback
Share a repair observation
Share a plain-text repair observation. Accepted observations are published automatically; this page may take a moment to update.