
On this page
Start here
Quick answer
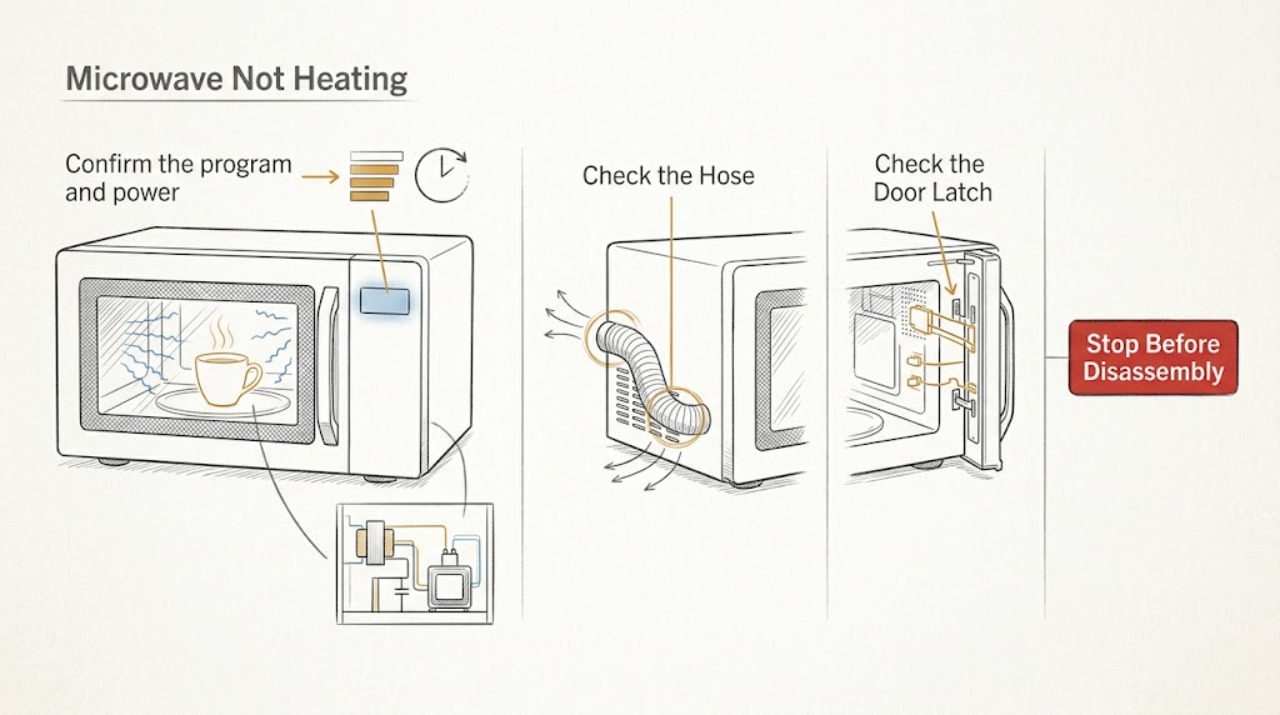
If a GE microwave runs but does not heat, first confirm that you used a cooking function rather than Timer, the door closes firmly, and the selected power level is appropriate. Test with a heat-safe glass bowl of water only if the oven is intact and the model instructions allow it; never put a thermometer inside the cavity and never run the microwave empty. Slow heating can result from low power settings, unsuitable cookware, food quantity or placement, or blocked ventilation and temporary overheating. If a high-power test still shows little or no temperature rise, or there is arcing, a damaged door or seal, burning odor, smoke, repeated shutdown, or breaker operation, stop using the oven and arrange qualified microwave service. GE does not provide do-it-yourself repair instructions because an unplugged microwave can retain a dangerous high-voltage charge.
Work through in order
Diagnostic checks
Use only checks that match the exact appliance or system and its official guide.
-
Check 1
Stop and inspect the microwave from outside before testing. Check the door, hinges, latches, seals, cavity walls, turntable, cord, and outlet for visible damage, scorch marks, liquid, or loose parts. If there is smoke, burning odor, arcing, a damaged door or seal, or a breaker trip, disconnect power only when safe and do not operate it again.
Expected result: Record whether the fan, light, turntable, and countdown run; whether the display shows Timer or a cooking function; whether the door closes squarely; and whether any spark, odor, noise, or heat appeared.
Next step: Continue only if the cavity and door are intact and there is no safety symptom. Otherwise keep the oven unplugged or isolated and arrange qualified microwave service.
Why this matters
Why: A normal-looking cycle with no temperature change differs from a door or safety problem, while arcing or physical damage is an immediate stop condition. A fan or light alone does not establish that the heating circuit is working.
-
Check 2
Confirm the program and power level using the exact model manual. Make sure Timer was not selected instead of Cook or Time Cook, enter a fresh cooking time, choose High power for a basic check, and press Start. Do not assume the button sequence or available power levels from another GE model.
Expected result: The oven heats after a fresh High-power cooking program, heats only at a different setting, or runs with a countdown but the food and a safe test load remain cold.
Next step: Use the model-approved setting for normal cooking. If the oven still runs without heating after the program and door checks, stop at the user-level diagnosis and arrange service; do not open the case.
Why this matters
Why: A timer selection or low power setting can explain an apparent no-heat condition. Persistent cold food during a genuine High-power cooking program is more consistent with a fault than with recipe timing.
-
Check 3
If food is only warming slowly, inspect the external case vents and clearance, then use microwave-suitable cookware and a load whose size, density, and placement match the model instructions. Do not cover or block vents, and do not run the oven empty while trying to judge heating.
Expected result: The vents are blocked, the cookware is stoneware or otherwise absorbs microwave energy, the power is below High, the food is unusually dense or cold, or the oven still produces no heat after these conditions are corrected.
Next step: Restore external airflow and use the exact model's cookware and placement guidance. If heating remains absent, do not continue cycle after cycle; arrange qualified service.
Why this matters
Why: GE identifies blocked airflow, low cooking wattage or power level, unsuitable cookware, and food quantity or arrangement as causes of slow or poor cooking. A clear setup with no heating points toward service.
-
Check 4
For a non-damaged oven that appears to have overheated or stopped heating during a long cycle, remove external obstructions and allow it to cool for about 30 minutes as GE's general guidance describes. If the unit uses an over-the-range or combination installation, use the exact model's air-clearance instructions; do not spray or pour water into the cavity or case.
Expected result: Power and heating return once after cooling and clear airflow, or the oven shuts down again, remains cold, has a hot or discolored case, or trips the breaker.
Next step: Stop using the microwave and arrange service for recurrence, abnormal heat, smoke, odor, arcing, or power loss. Do not inspect the thermostat, magnetron, fan, fuse, capacitor, or control board.
Why this matters
Why: Temporary thermal cycling from blocked airflow or a long run is more likely when one cooling period restores normal operation. Recurring shutdown or a no-heat condition after cooling is not a safe user adjustment.
-
Check 5
If the cavity and door are intact, perform GE's optional heating-performance check with a heat-safe glass bowl containing 1 quart of water at 59–75°F, centered in the cavity, for exactly 2 minutes 30 seconds on High. Measure the water only after removing it; never place a thermometer in the microwave, and handle hot water carefully.
Expected result: The water temperature rises about 28–40°F, rises much less, or does not become warm. Stop immediately if arcing, smoke, unusual odor, or abnormal sound occurs.
Next step: If the result is below the official range or the oven shows any safety symptom, unplug or isolate it when safe and arrange qualified service. Do not repeat the test excessively or attempt internal repair.
Why this matters
Why: GE treats a 28–40°F rise as evidence that the microwave is heating properly. A small or absent rise during a correct test supports a heating fault, but it does not identify a particular internal part.
-
Check 6
Document the model number, selected mode and power level, whether the timer or door behavior was involved, the airflow condition, test-load result, and any shutdown or display message for the service provider. Keep the oven out of use while waiting if it has a no-heat result or any damage.
Expected result: The failure is present in every cooking attempt, only one mode or setting, or only after the oven warms; note whether the rest of the controls still work.
Next step: Arrange qualified microwave service for persistent no heat or a mode-specific heating failure. Do not remove the cover, bypass safety switches, or perform live measurements even if the oven is unplugged afterward.
Why this matters
Why: These patterns help a qualified technician distinguish a programming or thermal symptom from a door-interlock, high-voltage, control, or mode-specific failure without exposing the owner to internal testing.
Use your observations
Decision map
Find the observation that best matches what you see, then follow the next safe action.
-
PATH 01Next step
What you see
The microwave counts down or runs its fan but the food stays cold.
Do this next
Select a real cooking program and close the intact door firmly once. If the oven still does not heat, stop and arrange qualified service; do not inspect high-voltage parts.
Why this path and its safety boundary
Why it matters: A timer or door-start issue is more likely in the first pattern; a genuine no-heat result after those checks points to an internal heating fault.
-
PATH 02Next step
What you see
Food heats, but much more slowly than expected.
Do this next
Correct the accessible setting, cookware, placement, or vent obstruction using the model manual. Escalate if the oven remains weak on High with a suitable load.
Why this path and its safety boundary
Why it matters: A setting, cookware, food, or airflow condition is more likely than total heating failure.
-
PATH 03Next step
What you see
The oven stopped heating after a long run or loses power while operating.
Do this next
Clear only external airflow and allow model-approved cooling once. Stop using the oven and arrange service for recurrence, heat damage, odor, smoke, arcing, or breaker operation.
Why this path and its safety boundary
Why it matters: Temporary thermal cycling is more likely only when the symptom clears once after airflow and cooling. Recurrence suggests a fault or unsafe installation condition.
-
PATH 04Next step
What you see
The correct High-power water test shows little or no temperature rise.
Do this next
Keep the microwave out of service and arrange qualified repair. Do not repeat the test excessively, run the cavity empty, open the cover, or bypass an interlock.
Why this path and its safety boundary
Why it matters: The oven is not meeting the documented heating-performance check, but the result does not identify which internal component failed.
Helpful context
Understand the symptom
Confirm that the oven is actually cooking
A running fan, light, turntable, or countdown does not by itself prove that microwave energy is being produced. GE says the Timer function can be selected accidentally, and a door that appears closed may not engage the safety mechanisms. Start with the selected function, power level, and secure door before treating the symptom as a heating-component failure.
Slow heating is not always no heating
Low power cycles microwave energy on and off, and food size, density, starting temperature, cookware, and placement affect results. GE also warns that blocked case airflow can make the magnetron cycle off until it cools. Remove external vent obstructions and use a model-approved cooking setting before concluding that the oven produces no heat.
Microwave internals are a professional-only boundary
Do not remove the outer cover, inspect a fuse or magnetron, discharge a capacitor, defeat a door interlock, or perform live measurements. GE specifically states that no do-it-yourself microwave repair advice is offered because the internal high-voltage capacitor can retain a charge after the oven is unplugged and special diagnostic equipment is generally needed.
When checks do not resolve it
Need a professional?
Arrange qualified microwave service if a genuine High-power program and correct door still produce no heat, the water performance test is below GE's documented range, heating fails after a cooling period, the breaker trips, or there is arcing, smoke, burning odor, a hot or damaged case, bent door, broken latch, damaged seal, or liquid intrusion. GE states that microwave repair is not a do-it-yourself procedure because the internal high-voltage capacitor can retain a charge after unplugging. Do not remove the cover, bypass door interlocks, run the cavity empty, place a thermometer inside, or perform live tests.
Common questions
FAQ
Why does my GE microwave run but not heat?
First confirm that Timer was not selected, the door closes firmly, and a real cooking program is set to High power. If a suitable load remains cold after those checks, GE treats the condition as needing service because the internal microwave heating circuit is hazardous to diagnose or repair at home.
How can I safely test whether my GE microwave is heating?
GE's performance procedure uses a glass bowl with 1 quart of water at 59–75°F, heated for exactly 2 minutes 30 seconds on High; a 28–40°F rise indicates proper heating. Measure the water only after removing it—never put a thermometer inside the microwave—and stop for sparks, smoke, odor, or abnormal operation.
Can blocked vents make a GE microwave stop heating?
Yes. GE says the magnetron generates heat that must be removed by airflow; blocked case vents can make it cycle off until it cools. Restore only the model's external clearance and allow the unit to cool as instructed. If the no-heat or shutdown symptom returns, arrange qualified service.
Read the exact guide
Official sources
- Microwave - Runs But Does Not HeatGE Appliances · GE microwave timer, door, no-heat, and repair-safety boundary
- Microwave - Power is OffGE Appliances · GE microwave overheating, external power, and blocked-vent guidance
- GE Microwave Oven Safety GuideGE Appliances · GE microwave door-interlock, arcing, empty-cavity, and qualified-service safety
- Microwave - Food Taking Too Long to CookGE Appliances · GE microwave airflow, power, cookware, food, and placement factors
- Microwave - Performance TestGE Appliances · GE microwave heating-performance water test
- Microwave - Benefit of Power LevelsGE Appliances · GE microwave power-level behavior and model-dependent controls
Community feedback
Share a repair observation
Share a plain-text repair observation. Accepted observations are published automatically; this page may take a moment to update.