
On this page
Start here
Quick answer
Start by identifying whether the GE refrigerator gasket is only dirty, pulled out of its groove, folded or creased, or actually cut, torn, hardened, or unable to seal around the closed door. GE says its easy-remove gaskets should sit fully in the mating groove with a smooth sealing surface contacting the case all the way around; style-specific guidance differs for top-freezer, side-by-side, and French-door designs. Clean the gasket with the applicable GE cleaning guidance, avoid bleach, ammonia, petroleum-distillate products, and abrasive treatment, and match any replacement to the exact model before ordering. If the door will not close or cold air, condensation, frost, or food-temperature problems persist, limit use and arrange model-specific service rather than forcing the door or guessing a part.
Before you begin
Safety first
- This no-model guide is limited to visible gasket inspection, model-appropriate cleaning, and checking the closed-door seal. Do not use bleach or ammonia, glue the gasket, force the door, alter hinges or retainers, remove protected panels, or apply heat unless the exact GE instructions allow it.
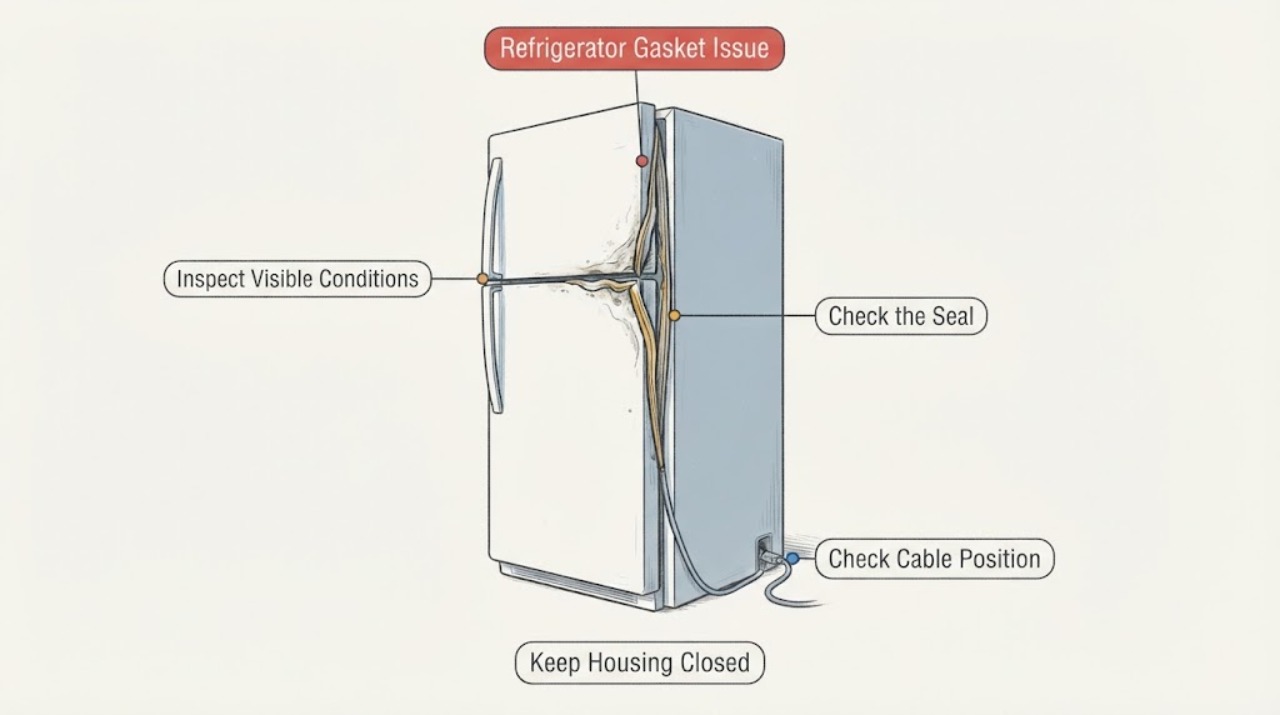
Work through in order
Diagnostic checks
Use only checks that match the exact appliance or system and its official guide.
-
Check 1
With the refrigerator closed, inspect the gasket around the entire door or drawer perimeter. Look for a section pulled out of its groove, a folded sealing lip, visible dirt or mildew, cuts or tears, hardening, and a section that does not meet the cabinet; note whether the door closes without being forced.
Expected result: The gasket is seated and smooth, dirty but intact, loose or creased, visibly torn or hardened, or leaving a visible gap when the door closes.
Next step: Use the matching cleaning, reseating, deformation, or replacement branch below. Do not force the door or diagnose a refrigeration component from the gasket appearance alone.
Why this matters
Why: GE's easy-remove guidance treats full groove engagement and continuous contact as the sealing condition; a visible gap or damaged material is not corrected by cleaning alone.
-
Check 2
If the gasket is dirty or has mildew but is still intact, wipe the accessible seal and groove using GE's applicable cleaning instructions. For mildew or mold, GE's gasket-care page specifies one quart of warm water with one tablespoon of baking soda; rinse the gasket and wipe it dry.
Expected result: The residue comes off and the gasket remains flexible and continuous, or the residue, odor, or damage remains after safe cleaning.
Next step: If the seal is clean and closes continuously, monitor door closure and temperature. If contamination or damage remains, identify the model and arrange the appropriate gasket or service path; do not mix cleaners.
Why this matters
Why: Cleaning can remove surface contamination, but it cannot restore a torn, hardened, or permanently deformed sealing surface. GE warns against bleach, ammonia, petroleum-distillate products, and other products that may damage the gasket.
-
Check 3
If a section has pulled away or the gasket is folded or creased, compare it with the exact GE style guidance before touching it. On an easy-remove design, check that the rear dart is fully pushed into the door mating groove and that the sealing surface lies flat; do not pry trim or remove a door without model instructions.
Expected result: The gasket can be fully seated by the documented external adjustment, or it will not stay in the groove, remains sharply deformed, or requires access not covered by the model guidance.
Next step: Use the model manual or GE's matching style article for any permitted adjustment. If it will not remain seated or the door still has a gap, stop and request service or a model-matched replacement.
Why this matters
Why: GE gives style-specific adjustment and replacement instructions, and a folded replacement gasket may need to be flattened according to its packaging instructions. A no-model refrigerator cannot support a universal adjustment method.
-
Check 4
If the gasket has a cut, tear, split, hardened section, or persistent open gap, photograph the door style and read the complete GE model number from the appliance label before selecting a replacement. Keep the door closed as much as practical and protect perishable food if temperature is rising.
Expected result: The gasket is visibly damaged or the refrigerator cannot maintain a continuous closed-door seal, or the exact model cannot be confirmed.
Next step: Use GE's model-specific support or service route. Do not substitute a gasket based only on dimensions, color, brand name, or a similar-looking refrigerator family.
Why this matters
Why: GE's top-freezer guidance says cuts, tears, and rips require replacement or service, while GE's parts pages warn that a gasket must be checked against the appliance model for compatibility.
-
Check 5
After the safe external check, watch for continuing frost or condensation around the door, food-temperature concerns, a door that springs open, or a seal that cannot be made continuous. Do not remove covers, use adhesive, alter the hinge or retainer, or use heat unless the exact GE manual expressly permits that operation.
Expected result: The door seals normally with stable temperatures, or the gap and performance symptoms persist or access beyond the gasket is needed.
Next step: Continue normal use only when the door closes and seals continuously without a safety or temperature concern. Otherwise stop relying on the refrigerator for temperature-sensitive food and arrange GE service.
Why this matters
Why: A gasket issue can affect air leakage and food storage, but these observations do not identify an evaporator, defrost, hinge, or control failure. Persistent symptoms need model-specific diagnosis.
Use your observations
Decision map
Find the observation that best matches what you see, then follow the next safe action.
-
PATH 01Next step
What you see
The gasket is dirty or has light mildew but remains continuous, flexible, and seated in the groove.
Do this next
Clean using the applicable GE method, rinse and dry it, then confirm that the closed door contacts the case all the way around. Request service if the gap or temperature problem remains.
Why this path and its safety boundary
Why it matters: The immediate issue is surface contamination rather than proven gasket failure.
-
PATH 02Next step
What you see
A section is loose, folded, or lightly creased but the material is not torn.
Do this next
Follow the exact GE style or owner-manual guidance for reseating or adjustment. Stop if the gasket will not stay in place or if the procedure requires unverified door or trim access.
Why this path and its safety boundary
Why it matters: The seal may be out of its retainer or deformed, but the correct adjustment depends on the refrigerator style and model.
-
PATH 03Next step
What you see
The gasket is cut, torn, hardened, permanently deformed, or still leaves a visible gap after permitted adjustment.
Do this next
Record the exact model and use GE's model-matched part or service route. Do not choose a replacement from a generic dimension or another GE refrigerator.
Why this path and its safety boundary
Why it matters: Cleaning cannot restore the sealing surface, and GE's guidance treats tears and rips as replacement or service conditions.
-
PATH 04Next step
What you see
The gasket gap is accompanied by persistent frost or condensation, rising food temperature, a door that will not close, or a need to open protected refrigerator areas.
Do this next
Limit door opening, protect temperature-sensitive food, and arrange GE service. Stop using the appliance if the cord, cabinet, water line, or surrounding area is wet or damaged.
Why this path and its safety boundary
Why it matters: The problem exceeds a confirmed visible gasket adjustment and may affect food safety or require model-specific diagnosis.
Helpful context
Understand the symptom
A gasket complaint does not by itself prove that the refrigerator needs a replacement seal. Look at the full perimeter with the door closed: dirt, a loose section, a crease, a tear, and a gap at the cabinet have different next steps. GE's general guidance says the gasket must sit fully in its mating groove and seal smoothly against the case.
Clean only from a safe, accessible position and use the cleaning method applicable to the exact model. GE's gasket-care page gives warm water and baking soda for mildew or mold and warns against bleach, ammonia, petroleum distillates, and other damaging products. Do not scrub, stretch, glue, or heat a gasket simply because it looks misshapen.
GE publishes separate guidance for top-freezer, side-by-side, and French-door refrigerators. A loose or creased gasket may be adjustable on some designs, while cuts, tears, or a seal that remains open require a correctly matched replacement or service. Without the model number, keep the article at the visible inspection and service-routing level.
When checks do not resolve it
Need a professional?
Arrange GE service when the gasket is torn, hardened, permanently deformed, will not remain in its groove, leaves a persistent gap, or is associated with rising food temperature, heavy frost or condensation, a door that will not close, or a need for internal access.
Safety scope: This no-model guide is limited to visible gasket inspection, model-appropriate cleaning, and checking the closed-door seal. Do not use bleach or ammonia, glue the gasket, force the door, alter hinges or retainers, remove protected panels, or apply heat unless the exact GE instructions allow it.
Common questions
FAQ
Can I push a GE refrigerator gasket back into place?
Sometimes. GE says an easy-remove gasket must be fully seated in the door mating groove, but adjustment depends on the refrigerator style. Confirm the model and use the matching GE guidance; do not pry trim or remove the door based on a generic video.
What should I use to clean mildew from a GE refrigerator gasket?
GE's gasket-care guidance specifies one quart of warm water with one tablespoon of baking soda for mildew or mold, followed by rinsing and drying. It warns against petroleum distillates, detergent, bleach, and ammonia on the gasket. Follow the exact owner manual if it gives a more specific instruction.
Can I order any GE gasket that looks the same?
No. GE parts guidance says to search by the appliance model to confirm compatibility. Record the complete model number before choosing a replacement or ask GE service to identify the correct part.
When is a gasket issue urgent?
Treat it as a service issue when the door will not close, the seal remains open, food temperature is rising, heavy frost or condensation develops, or the gasket is torn or hardened. Protect perishable food and avoid forcing the door or opening protected areas.
Read the exact guide
Official sources
- French-Door Refrigerator - Adjusting or Replacing the Door GasketsGE Appliances · Opened GE French-door guidance describing magnetic fresh-food and freezer-drawer gaskets, with separate adjustment and replacement instructions.
- Top Freezer Refrigerator - Adjusting or Replacing the Door GasketsGE Appliances · Opened GE top-freezer guidance recommending power disconnection before work, reseating a pulled-loose gasket, replacement for cuts/tears/rips, and model-specific handling for deformation.
- Refrigerator, Freezer and Standalone Ice Maker - Care and Cleaning of Interior and GasketGE Appliances · Opened GE guidance for cleaning refrigerator gaskets, including baking soda solution for mildew or mold and warnings against petroleum distillates, detergent, bleach, and ammonia.
- Refrigerator and Freezer Troubleshooting and Support | GE AppliancesGE Appliances · Opened GE refrigerator support page for model-specific troubleshooting and qualified service routing.
- Refrigerator - Easy to Remove GasketGE Appliances · Opened GE guidance saying an easy-remove gasket peels away without tools, must be fully seated in the mating groove, and must seal smoothly around the closed door; it directs owners to style-specific guidance and model matching.
- Refrigerator - How to Clean the InteriorGE Appliances · Opened GE cleaning guidance describing power-off precautions, baking soda solution, gasket cleaning, and restrictions on bleach and abrasive cleaners.
- Side-by-Side Refrigerator - Adjusting or Replacing the Door GasketsGE Appliances · Opened GE side-by-side guidance describing magnetic gaskets in a groove retaining channel and separate adjustment and replacement instructions.
Community feedback
Share a repair observation
Share a plain-text repair observation. Accepted observations are published automatically; this page may take a moment to update.