
On this page
Start here
Quick answer
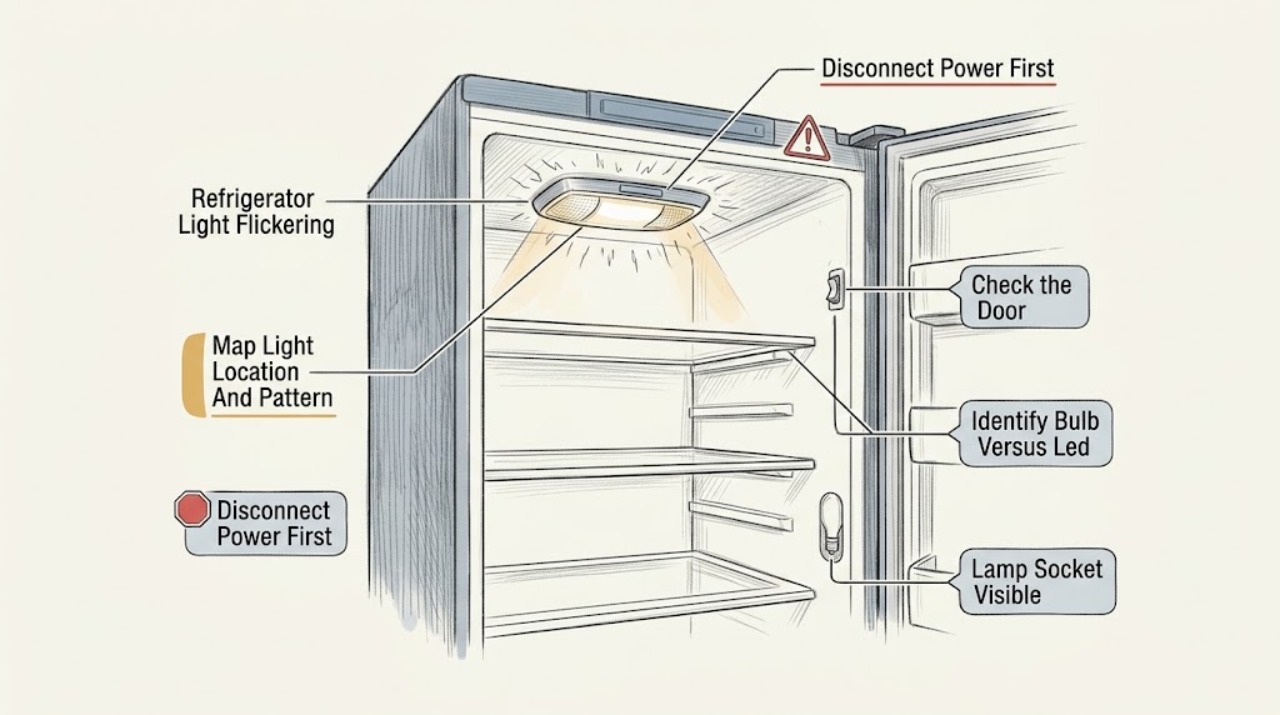
First determine whether the flicker is an interior lamp, a dispenser lamp, a drawer light, or the refrigerator's external control display, and whether the appliance uses a screw-in incandescent bulb or an LED assembly. Open and close the door slowly: GE says that on most models the interior light should go out when the door is nearly closed, and a misaligned door can leave the light on. If the light is an accessible incandescent bulb, unplug the refrigerator before checking or replacing it, use only the exact manual's bulb type and wattage, and do not treat a generic bulb as a fit. If the refrigerator uses an LED light board, light column, or individual LED assembly, GE says authorized service is required; do not pry open a sealed light module or substitute a part based on appearance. If several lights flicker together, the dispenser/control panel also resets, or the flicker follows a power event, record the pattern and check only the accessible plug/outlet and model-documented controls. Stop for burning or electrical odor, smoke, sparks, a hot or damaged cord/outlet, liquid near electrical parts, repeated breaker trips, or a light that stays on and warms the cabinet. Persistent flickering after the correct bulb or one safe model-approved reset needs model-specific service.
Before you begin
Safety first
- Unplug before touching a bulb, cover, socket, or light shield. Do not pry open LED assemblies, remove control panels, disconnect door harnesses, bridge switches, replace internal fuses, or perform live electrical tests. Stop using and disconnect power when safe for smoke, burning/electrical odor, sparks, abnormal heat, water near electrical parts, a hot/damaged cord or outlet, or repeated breaker trips.
Work through in order
Diagnostic checks
Use only checks that match the exact appliance or system and its official guide.
-
Check 1
Observe the flicker without dismantling anything. Record whether it is in the fresh-food section, freezer, temperature-controlled drawer, dispenser, or external display; whether one lamp or several are affected; and whether it starts with door opening, dispensing, compressor operation, or a power event.
Expected result: One screw-in bulb flickers; several interior LEDs pulse together; a whole light column dims; only the dispenser lamp flickers; the drawer light changes color/brightness; or the external display fades instead.
Next step: Continue with the confirmed location and exact model manual. Do not use interior-bulb instructions on a dispenser LED, drawer light assembly, or control display.
Stop if: Stop immediately for smoke, sparks, burning/electrical odor, abnormal heat, liquid near electrical parts, a hot/damaged cord or outlet, or repeated breaker trips.
Why this matters
Why: Location and shared timing identify the applicable lamp architecture and whether a common door/control/power path is more likely than one failed bulb. GE documents different interior, drawer, dispenser, and LED arrangements by model.
-
Check 2
Close the refrigerator door slowly while watching the interior light from a safe angle, and check that shelves, bins, food, and the gasket are not preventing full closure. Do not push on or bypass the door switch.
Expected result: The light goes out near the almost-closed position; it remains on; the door is visibly misaligned or rebounds; or only a drawer/dispenser light remains affected.
Next step: Remove only a visible obstruction and verify the gasket/door closes normally. Use the exact manual for alignment guidance; arrange service for a failed switch, hinge, harness, or persistent light-on condition.
Stop if: Do not force the door, adjust internal wiring, defeat the switch, or continue if the light or surrounding plastic becomes hot or smells electrical.
Why this matters
Why: GE says most interior lights should go out when the opening is reduced to about one inch and that a misaligned door can leave the light on. A lamp that remains on can create heat and confuse the symptom with flicker.
-
Check 3
With power disconnected, use the model manual or visible lamp shape to determine whether the affected light is a screw-in incandescent bulb, a shaped LED bulb, an LED board/light column, or a sealed drawer/dispenser assembly. Do not remove an LED cover just to identify it.
Expected result: The manual confirms an owner-replaceable incandescent bulb; it confirms a shaped LED bulb; it shows an LED board/column or drawer assembly; or the lamp type cannot be confirmed.
Next step: For a confirmed owner-replaceable bulb, continue to the exact bulb check. For an LED board, column, drawer, or uncertain design, document the model and arrange authorized service.
Stop if: Do not pry a sealed LED assembly, touch an exposed socket with power connected, or substitute a bulb by visual similarity.
Why this matters
Why: GE says lamp size and wattage vary, some shaped LED bulbs can be owner-replaced, and newer LED boards or assemblies require service. An uncertain lamp identity is not a safe basis for ordering a part.
-
Check 4
Only for a confirmed owner-replaceable bulb, keep the refrigerator unplugged, inspect the bulb for darkening or damage, and verify it is seated according to the manual. If replacement is required, use the exact model's specified type, size, and wattage; do not overtighten or touch a hot bulb.
Expected result: The bulb is loose, visibly damaged, or wrong for the model; the bulb and socket look normal; the cover/shield is not seated; or the replacement still flickers when power is restored.
Next step: Correct the documented bulb or shield issue once, reconnect power, and observe. Escalate persistent flicker, socket damage, heat, or any multi-lamp symptom to model-specific service.
Stop if: Do not handle the socket with power connected, use a higher-wattage bulb, bypass a cover, or continue with arcing, smoke, odor, or a hot socket.
Why this matters
Why: A bulb or seating issue can explain an isolated flicker, but a normal bulb with a flickering socket, repeated flicker, or multiple affected lamps points toward the light circuit or control. GE warns that lamp specifications vary by model.
-
Check 5
For a dispenser, drawer, or external control symptom, check only the model manual's user-accessible light setting and whether the flicker follows dispensing, door movement, or display wake/sleep. Do not remove the dispenser trim, drawer top, door harness, or control panel.
Expected result: Only the dispenser lamp flickers; a drawer light changes as documented when opened; the external display fades/wakes normally; or the symptom affects several areas at once.
Next step: Use only the documented user setting or bulb procedure. Arrange service for an LED dispenser/drawer assembly, harness symptom, persistent display flicker, or multi-area flicker.
Stop if: Do not spray into the dispenser, force a drawer, disconnect a door harness, bridge a switch, or work with power connected.
Why this matters
Why: GE documents separate dispenser lamp types, non-consumer-replaceable drawer LEDs, and control displays that can sleep or fade. A shared symptom is more consistent with a control, harness, or supply issue than a single bulb.
-
Check 6
If several lights or controls changed after a known power interruption and there is no hazard, use the exact model manual's single power reset by disconnecting the refrigerator for the documented interval. Restore power once and record whether the same lamp pattern returns; do not repeatedly cycle the refrigerator.
Expected result: The flicker clears; the same lamp returns to flickering; the dispenser/control panel also loses power; or the outlet/breaker trips, heats, sparks, or smells.
Next step: Arrange model-specific authorized service for a returning flicker, multi-lamp issue, LED assembly, or control symptom. Keep the appliance disconnected for any electrical hazard or repeat trip.
Stop if: Do not keep resetting a tripping breaker, open the control compartment, make a live measurement, or operate with smoke, odor, sparks, abnormal heat, or water near electrics.
Why this matters
Why: A one-time control reset can separate a transient control state from a persistent light circuit or assembly fault, but it cannot identify a compatible LED board or wiring repair. GE recommends service for LED replacement and persistent refrigerator control symptoms.
Use your observations
Decision map
Find the observation that best matches what you see, then follow the next safe action.
-
PATH 01Safety boundary
What you see
Only one confirmed owner-replaceable incandescent bulb flickers, the door closes normally, and no heat, odor, or electrical symptom is present.
Do this next
Unplug, inspect and reseat or replace once using the exact manual specification, then observe. Service a recurring flicker or damaged socket.
Why this path and its safety boundary
Why it matters: A bulb, seating, shield, or socket issue is more likely than a shared LED/control fault, but GE's bulb type and wattage are model-specific.
Safety stop: Do not use a higher-wattage or guessed bulb, handle the socket while powered, or continue if it arcs, overheats, smokes, or smells electrical.
-
PATH 02Safety boundary
What you see
Several interior lights, a full LED column, or a drawer assembly flicker together, especially after one lamp first became dim or intermittent.
Do this next
Record the model, locations, door timing, and video of the flicker; arrange authorized service rather than changing individual modules or ordering an unverified board.
Why this path and its safety boundary
Why it matters: A shared LED assembly, light-control path, or wiring issue is more likely than separate replaceable bulbs. GE says LED boards and assemblies require authorized service.
Safety stop: Do not pry open an LED module, access harnesses, bridge switches, or continue with heat, smoke, odor, sparks, or water near electrics.
-
PATH 03Safety boundary
What you see
The light remains on as the door nearly closes, the door is misaligned or rebounds, or the flicker changes when the door is moved.
Do this next
Remove visible food or bin interference and verify normal closure; follow the exact model alignment instructions. Arrange service for a switch, hinge, harness, or persistent light-on condition.
Why this path and its safety boundary
Why it matters: The door closure, switch actuation, gasket, hinge, or door harness becomes more likely than a lamp-only fault. GE warns that a light left on can add heat to the refrigerator.
Safety stop: Do not force the door, defeat the switch, or touch wiring behind the door or hinge.
-
PATH 04Safety boundary
What you see
Only the dispenser light flickers, the external control display also fades/resets, or the symptom follows dispensing or door movement rather than one interior bulb.
Do this next
Use only documented user settings or an exact incandescent-lamp replacement procedure; arrange service for an LED lamp, harness, panel, or repeated control reset.
Why this path and its safety boundary
Why it matters: The dispenser lamp type, display sleep behavior, door harness, or shared control/power path needs model-specific interpretation. A dispenser LED is not interchangeable with an interior bulb.
Safety stop: Do not remove dispenser trim, disconnect harnesses, spray into controls, or work while powered.
-
PATH 05Safety boundary
What you see
Flicker persists after the correct bulb check or one model-approved reset, or there is a hot socket, burning/electrical odor, smoke, spark, liquid near electrics, damaged cord/outlet, or repeat breaker trip.
Do this next
Disconnect power when safe and arrange qualified GE refrigerator service or electrical assessment. Provide the model, lamp location/type, video, door timing, and power observations.
Why this path and its safety boundary
Why it matters: The issue exceeds safe user-level diagnosis and may involve internal wiring, a light-control board, power supply, or damaged lamp assembly. The visible flicker cannot establish a safe part or repair.
Safety stop: Keep the refrigerator disconnected for smoke, odor, sparks, abnormal heat, water near electrics, damaged power parts, or repeat trips; do not open the cabinet or control compartment.
Helpful context
Understand the symptom
Flicker location changes the diagnosis
A single screw-in bulb that flickers is a different problem from a full LED light column that pulses, a dispenser lamp that flickers only while dispensing, or an external control display that fades. GE documents several refrigerator light designs and explicitly separates LED assemblies from replaceable bulbs. Before touching anything, note the exact location, whether one or several lamps are affected, whether opening the door triggers it, and whether refrigeration or the control panel also changes.
Use the pattern, not the appearance alone
Flicker isolated to one replaceable incandescent bulb points toward the bulb, seating, or socket after power is disconnected. Several LEDs flickering together, a light column going dim, or a dispenser and interior light changing together points toward a shared assembly, door/control signal, or power issue that cannot be identified safely without the model. A lamp that stays on with the door nearly closed can warm the cabinet and indicates door alignment or switch behavior rather than a normal flicker.
Make the light circuit safe before inspection
Unplug the refrigerator before touching a bulb, cover, socket, or accessible light shield. Keep hands and cloths dry, do not spray cleaner into a lamp or switch, and restore every cover before reconnecting power. Do not probe wiring, bridge a door switch, pry apart an LED module, replace a fuse, or make a live electrical test. Stop for smoke, burning/electrical odor, sparks, abnormal heat, a hot or damaged cord/outlet, water near electrics, or repeat breaker trips.
When checks do not resolve it
Need a professional?
Call authorized GE refrigerator service for persistent flickering, multiple affected LED lights, a drawer or dispenser LED, a damaged socket or switch, a returning control/display symptom, or any suspected wiring or light-control fault. Stop immediately for smoke, burning odor, sparks, abnormal heat, water near electrics, a hot/damaged cord or outlet, or repeat breaker trips.
Safety scope: Unplug before touching a bulb, cover, socket, or light shield. Do not pry open LED assemblies, remove control panels, disconnect door harnesses, bridge switches, replace internal fuses, or perform live electrical tests. Stop using and disconnect power when safe for smoke, burning/electrical odor, sparks, abnormal heat, water near electrical parts, a hot/damaged cord or outlet, or repeated breaker trips.
Have this ready
- Exact model, affected location, bulb versus LED architecture, one-versus-many lamp pattern, door/dispenser timing, whether the light stays on when nearly closed, power-event history, reset or bulb check performed, and any heat, odor, smoke, spark, liquid, cord, outlet, or breaker symptom.
Common questions
FAQ
Why is my GE refrigerator LED light flickering?
First identify whether one light or an entire LED panel/column flickers and whether the door or dispenser changes the symptom. GE says LED assemblies vary by model and require authorized service when replacement is needed; do not assume a bulb or board from another model fits.
Can I replace a flickering GE refrigerator light bulb myself?
Only if the exact model confirms an owner-replaceable bulb. Unplug first, use the specified type, size, and wattage, and reinstall the cover. Many newer GE refrigerators use LED boards or assemblies that GE says require service.
Could a GE refrigerator door cause the light to flicker or stay on?
Yes. GE says that on most models the light should go out when the door is nearly closed and that a misaligned door can leave it on, adding heat. Check for visible obstructions and normal closure; do not bypass the door switch or adjust internal wiring.
Read the exact guide
Official sources
- Side-by-Side Refrigerator - Replacing Fresh Food and Freezer LightsGE Appliances · Side-by-side GE refrigerators; LED models follow the separate LED-service guidance
- Refrigerator - No Power to the DispenserGE Appliances · GE refrigerators with electronic dispenser panels, especially after installation or door removal
- Refrigerator - Selecting Appropriate Light BulbsGE Appliances · GE refrigerator lamps; exact bulb and LED architecture vary by model
- Refrigerator - Dispenser Lamp ReplacementGE Appliances · GE refrigerator dispenser lamps; incandescent and LED provisions vary by model and age
- Refrigerator - Interior LED LightingGE Appliances · GE refrigerators with LED interior panels or assemblies; exact layout varies by model
- Refrigerator - Electronic Temperature Controlled Drawer with Colored/White LED LightsGE Appliances · French-door or bottom-freezer GE models equipped with the documented temperature-controlled drawer light
- Refrigerator - Not Cooling EnoughGE Appliances · GE refrigerators; door and light behavior varies by model
- Refrigerator - Control Display Sleep ModeGE Appliances · GE refrigerators with external or internal electronic controls; exact display behavior varies by model
Community feedback
Share a repair observation
Share a plain-text repair observation. Accepted observations are published automatically; this page may take a moment to update.