
On this page
Start here
Quick answer
First confirm that “not draining” means defrost water is pooling or freezing, rather than a supply-line, water-valve, icemaker fill-line, or dispenser leak. GE says a full-size self-defrost refrigerator sends melted frost through a drain tube to a fixed drip pan; ice on the freezer floor, water under fresh-food drawers, or a recurring puddle can indicate a clogged defrost drain. The repair path is model-dependent: most top-freezer and bottom-freezer models require disassembly and service, while some side-by-side models expose a drain opening that may be flushed only as the exact Owner's Manual permits. Before cleaning or moving parts, unplug the refrigerator to reduce shock risk. Never poke the drain with a sharp tool, remove an inaccessible panel, pour water near electrical parts, or assume a compact/manual-defrost unit has the same drain. If water is coming from a valve, copper supply line, or icemaker fill line, shut off the water when safe and use a qualified appliance technician or plumber; if the drain recurs after an approved flush, arrange service.
Before you begin
Safety first
- This article covers identification, power and water isolation, external inspection, and a conditional side-by-side drain flush only when the exact manual permits it. Do not remove hidden panels, access a fixed pan or defrost assembly, disconnect tubing under pressure, or work around energized water.
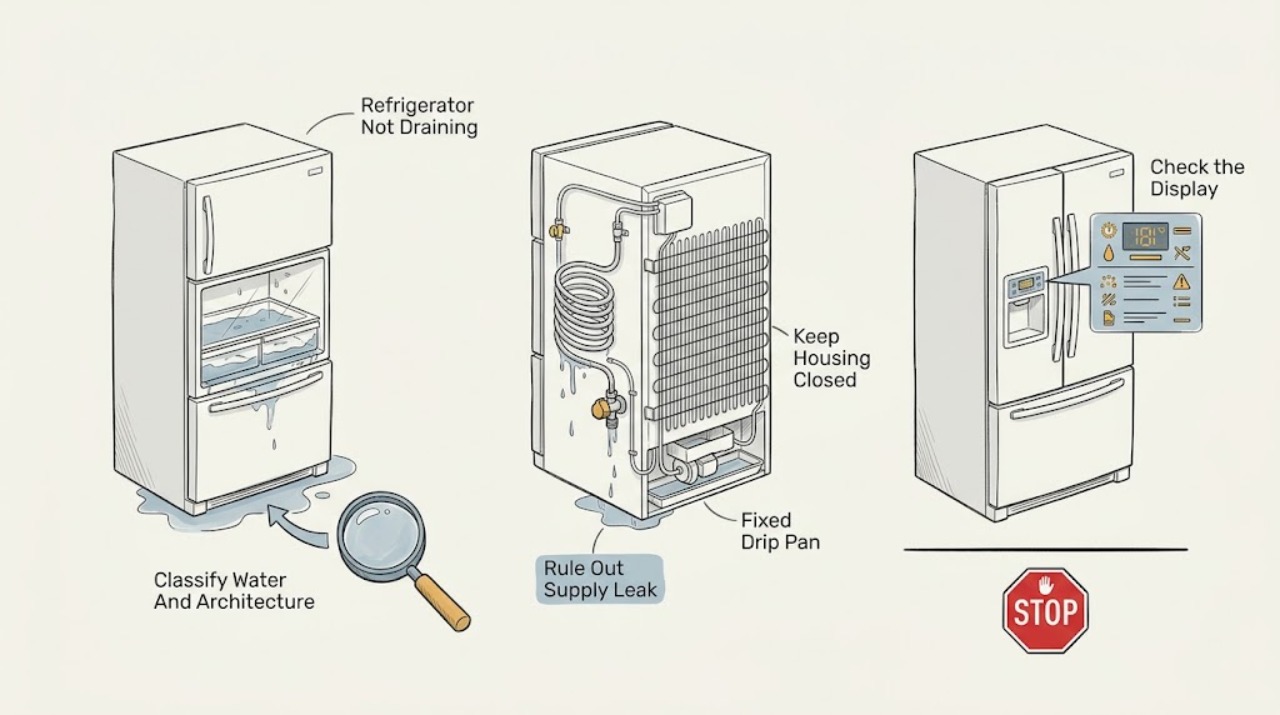
Work through in order
Diagnostic checks
Use only checks that match the exact appliance or system and its official guide.
-
Check 1
Record the complete GE model, freezer layout, and defrost type if known: top-freezer, bottom-freezer, side-by-side, compact, self-defrost, or manual-defrost. Trace where water appears without removing panels: freezer floor, below fresh-food drawers, front floor, back or bottom exterior, supply connection, or icemaker area.
Expected result: Ice or water is inside the freezer, water is under drawers, a puddle recurs after defrosting, a visible water line or valve is wet, the unit is compact or manual-defrost, or the source cannot be located.
Next step: Use only the matching branch below and the exact Owner's Manual; do not assume a drain-cleaning procedure transfers between freezer layouts.
Stop if: Stop if water is near electrical connections, the floor is slippery, the cabinet or tubing is damaged, or there is smoke, burning odor, sparking, or abnormal heat.
Why this matters
Why: The symptom location separates a defrost drain from a pressurized water leak and determines whether a drain tube exists or can be reached. GE says compact models may not have a defrost drain or drip pan.
-
Check 2
Before wiping water, cleaning, or accessing any user-serviceable area, unplug the refrigerator from a dry, reachable outlet or use the known circuit disconnect. If a water-supply leak is clearly identified, close the accessible household shutoff valve only when it can be done without moving a heavy appliance or contacting wet electrical parts.
Expected result: Power is safely disconnected, a supply leak is isolated, the connection is hard to reach, or water remains near the cord, outlet, controls, or wiring.
Next step: Dry the accessible area and continue only with an architecture-appropriate external check. Call an electrician or appliance technician if power cannot be safely isolated; call a plumber for an external supply-line leak.
Stop if: Do not reach behind a wet refrigerator, pull it across a wet floor, unplug a damaged cord, or restore power while water is contacting electrical parts.
Why this matters
Why: GE explicitly recommends unplugging before maintenance or cleaning. Water from a supply valve or line needs water isolation; a defrost drain does not justify working around energized components.
-
Check 3
With power off and from ordinary access, inspect the visible water valve area, copper household supply line, and plastic line toward the icemaker for drips, flooding, looseness, or a split. Do not disconnect tubing or remove the valve body.
Expected result: The valve is wet or flooding, the copper line is loose or split, the plastic icemaker fill line is loose or split, or all visible supply connections are dry while water remains inside the freezer or under drawers.
Next step: Shut off the water if a fill line is leaking and arrange appliance service; use a plumber for a copper household line. If visible supply paths are dry, continue to the drain-pattern branch.
Stop if: Do not tighten a pressurized fitting while wet, open a valve, bypass a shutoff, or continue using a leaking line near electricity.
Why this matters
Why: GE treats valve, copper-line, and icemaker fill-line leaks as separate causes from a clogged defrost drain. A dry exterior supply path makes the internal defrost-drain branch more likely, but does not prove it.
-
Check 4
For a bottom-freezer or top-freezer refrigerator, check the exact manual and service guidance before removing anything; for a side-by-side refrigerator, look only for a drain opening that is visibly accessible at the lower rear freezer interior and explicitly covered by the manual. Do not remove hidden panels to create access.
Expected result: The model is bottom-freezer, top-freezer, side-by-side with a visible manual-approved opening, side-by-side with a hidden opening, compact or manual-defrost, or the architecture is uncertain.
Next step: Arrange service for bottom-freezer, top-freezer, hidden-access, uncertain, or compact/manual-defrost cases unless the manual gives a clearly safe user procedure. Continue only with the side-by-side approved-flush action when all conditions match.
Stop if: Do not remove evaporator or rear panels, pull out a fixed drip pan, use heat to thaw hidden ice, or probe an unknown opening.
Why this matters
Why: GE says bottom-freezer and most top-freezer clogs require disassembly and service. Some side-by-side models can be flushed, but access and instructions are model-specific; compact or manual-defrost units may have no drain tube at all.
-
Check 5
Only for a side-by-side GE model whose exact manual permits it and whose drain opening is visible, allow accessible ice to thaw with power disconnected and use the manual-approved bulb-baster flush. GE's support procedure describes baking soda dissolved in hot tap water; use no sharp tool, pressurized hose, or electrical heat source.
Expected result: Water audibly reaches the pan below, the opening will not accept the manual-approved flush, water backs up, ice remains hidden, or the ice and puddle return after the flush.
Next step: Replace only accessible items exactly as the manual shows, dry the area, and monitor one normal defrost interval. Arrange service if flow is absent, the drain recurs, or the model's manual does not authorize the flush.
Stop if: Do not chip ice, insert wire or metal, use a heat gun or hair dryer, pour boiling water, remove a rear panel, or flush water near energized parts.
Why this matters
Why: Water reaching the pan supports a cleared drain path. No flow or recurrence suggests a deeper blockage, frozen section, drain-pan issue, or defrost fault that needs service; the procedure is not general to every GE refrigerator.
-
Check 6
After the safe external checks or a permitted side-by-side flush, document whether water drains, where it reappears, whether ice returns on the freezer floor, and whether frost is heavy or the refrigerator is defrosting unusually often.
Expected result: The leak stops, water backs up, ice returns, a bottom- or top-freezer drain needs access, a side-by-side flush fails, a fixed pan is suspected, or heavy frost and frequent defrosting continue.
Next step: Keep power and water safely isolated as indicated and arrange qualified appliance service; provide the model, layout, water location, drain access, frost pattern, and what the manual-approved check showed.
Stop if: Do not continue operation with water near electrical parts, disassemble the freezer, access a heater or fan, or replace a drain tube, heater, valve, or pan without model-specific diagnosis.
Why this matters
Why: A recurring or inaccessible drain problem can involve the hidden drain tube, trough, defrost system, drip pan, or a supply leak. GE directs most layout-specific drain repairs and unresolved water-floor concerns to service.
Use your observations
Decision map
Find the observation that best matches what you see, then follow the next safe action.
-
PATH 01Safety boundary
What you see
Ice or water is on the freezer floor, under fresh-food drawers, or on the floor in a recurring pattern, and visible supply lines and the valve are dry.
Do this next
Use the exact layout branch: service for most top- and bottom-freezer models; follow the manual-approved visible-opening procedure only for eligible side-by-side models.
Why this path and its safety boundary
Why it matters: GE identifies these patterns as evidence that a defrost drain tube may be clogged, with layout determining whether access is user-level or requires disassembly.
Safety stop: Do not probe, chip, heat, or expose a hidden drain or freezer panel.
-
PATH 02Safety boundary
What you see
The refrigerator is a side-by-side model with a drain opening visible at the lower rear freezer area and the exact manual permits clearing it.
Do this next
With power disconnected, thaw accessible ice and perform only the manual-approved bulb-baster flush; arrange service if water does not reach the pan or the problem recurs.
Why this path and its safety boundary
Why it matters: GE says some side-by-side models can be cleaned or flushed through an accessible drain opening, but the location and procedure vary by model.
Safety stop: Do not treat a hidden opening or another freezer layout as this exception, and do not use sharp tools, pressurized water, or electrical heat.
-
PATH 03Safety boundary
What you see
Water is visibly coming from the refrigerator water valve, copper household supply line, or plastic line to the icemaker rather than from the freezer drain path.
Do this next
Shut off the water supply if it can be done safely, keep water away from electricity, and arrange the appropriate appliance or plumbing service.
Why this path and its safety boundary
Why it matters: This is a pressurized water leak, not a defrost-drain blockage. GE directs valve problems to appliance service and copper-line problems to a plumber; a fill-line leak requires water shutoff when safe.
Safety stop: Do not operate a leaking valve or line, disconnect tubing under pressure, or pull the refrigerator through standing water.
-
PATH 04Safety boundary
What you see
The unit is a compact or manual-defrost refrigerator, or the model does not have a self-defrost drain tube and drip pan.
Do this next
Follow the exact Owner's Manual for manual defrosting and water collection; arrange service if the manual gives no safe procedure or if the water source is uncertain.
Why this path and its safety boundary
Why it matters: GE says compact models may lack a defrost drain tube or drip pan, and manual-defrost systems use model-specific defrost or drain instructions.
Safety stop: Do not apply full-size frost-free drain instructions, remove sealed-system parts, or scrape frost with a sharp instrument.
-
PATH 05Safety boundary
What you see
The drain is hidden, a top- or bottom-freezer model needs panel access, a side-by-side flush fails, or water and ice return after an approved correction.
Do this next
Keep the refrigerator safe and arrange qualified appliance service with the model, water location, frost pattern, and prior observations.
Why this path and its safety boundary
Why it matters: The remaining possibilities include a hidden drain blockage, trough or pan problem, defrost-system fault, or a different leak. GE treats most such access as a service repair.
Safety stop: Do not disassemble the freezer, access a defrost heater or fan, pull a fixed pan, or replace internal parts without diagnosis.
Helpful context
Understand the symptom
“Not draining” usually means defrost water is trapped
On a full-size frost-free GE refrigerator, the automatic defrost cycle melts frost and sends the water through a drain tube to a drip pan underneath, where it evaporates. Ice on the freezer floor, water below fresh-food drawers, or a puddle that returns after defrosting fits a drain-path problem more closely than a dispenser problem. Compact or manual-defrost refrigerators may not have this tube or pan, so identify the model and defrost type first.
The freezer layout changes what can be safely accessed
GE states that bottom-freezer drain tubes generally need disassembly, and most top-freezer models also require a technician. Some side-by-side models have a visible drain opening near the lower rear freezer wall and may provide a manual-approved flushing procedure. That exception does not authorize removing a rear panel, thawing hidden components with heat, or applying a side-by-side procedure to a top- or bottom-freezer model.
Rule out a water-supply leak before blaming the drain
A refrigerator can have water on the floor because a water valve is leaking or flooding, a copper supply line is loose or split, or the plastic line to the icemaker is loose or split. Those are pressurized water paths, not defrost drainage. GE directs owners toward a plumber for a copper-line leak and recommends service for a leaking valve; shut off the water when safe if a fill line is leaking.
Use only the model-approved drain procedure
If—and only if—the exact side-by-side model exposes a drain opening and its Owner's Manual permits owner cleaning, GE describes allowing ice to thaw and using a bulb baster with a baking-soda and hot-tap-water solution. A clear path should carry water to the pan below. If the opening is hidden, the water does not pass, or the ice returns, stop rather than reaching behind panels or into the defrost assembly.
A fixed drip pan is not a routine removable tray on newer models
GE says the drip pan catches defrost water and that refrigerators from 1987 onward generally use a fixed pan that is not easily accessible or removable. Do not pull a grille or tilt the refrigerator just to reach a pan unless the exact manual identifies that access. A blocked drain, recurring overflow, heavy frost, or unusually frequent defrost calls for qualified service rather than a guessed pan replacement.
Safety boundary
Stop conditions
- Unplug the refrigerator before cleaning or maintenance, and stop if water is near the cord, outlet, controls, wiring, or other electrical parts.
- Do not apply a side-by-side drain-flush procedure to a top-freezer, bottom-freezer, compact, manual-defrost, or uncertain model.
- Do not chip ice, probe a drain with wire or sharp tools, use a heat gun or hair dryer, pour boiling water, or remove hidden freezer panels.
- Do not pull a fixed drip pan, access a defrost heater or fan, disconnect pressurized tubing, or move a heavy refrigerator across standing water.
- Shut off water and seek service for a leaking valve or icemaker line; use a plumber for a loose or split household copper supply line.
- Do not replace a drain tube, pan, valve, heater, thermostat, or control without the exact model and qualified diagnosis.
When checks do not resolve it
Need a professional?
Arrange qualified appliance service when a GE bottom-freezer or top-freezer drain needs access, a side-by-side drain cannot be cleared through the exact manual-approved visible opening, water or ice returns, the drip pan or defrost system needs access, or heavy frost and unusual defrosting continue. Use an appliance technician for a leaking refrigerator valve or icemaker fill line and a plumber for a loose or split household supply line. Unplug the refrigerator and stop immediately if water reaches electrical parts, the cord or outlet is damaged, or there is smoke, burning odor, sparking, or abnormal heat.
Safety scope: This article covers identification, power and water isolation, external inspection, and a conditional side-by-side drain flush only when the exact manual permits it. Do not remove hidden panels, access a fixed pan or defrost assembly, disconnect tubing under pressure, or work around energized water.
Read the exact guide
Official sources
- Refrigerator & Freezer - Drain TubesGE Appliances · GE Appliances refrigerator and freezer architecture reference; compact, manual-defrost, upright, chest, and full-size designs differ.
- Refrigerator - Locating Your Drip PanGE Appliances · GE Appliances drip-pan reference; pan construction and access vary by model and production era.
- Side-by-Side Refrigerator - Drain TubeGE Appliances · GE Appliances side-by-side refrigerator guidance; only some models expose the drain opening and the Owner's Manual controls whether an owner may flush it.
- Refrigerator - Water on FloorGE Appliances · GE Appliances general refrigerator water-on-floor guidance; exact drain access, valve, line, and icemaker architecture vary by model.
- Refrigerator and Freezer - Types of Defrost SystemsGE Appliances · GE Appliances defrost-system reference; compact and older models can use different defrost and drainage paths.
- Refrigerator - Automatic Defrost SystemGE Appliances · GE Appliances full-size frost-free refrigerator guidance; exact defrost timing and controls vary by model.
- Top Freezer Refrigerator - Water on Floor, Repairing a Clogged Defrost DrainGE Appliances · GE Appliances top-freezer refrigerator guidance; most model drain access requires disassembly.
- Bottom Freezer Refrigerator - Clogged Drain Tube, Ice on Freezer FloorGE Appliances · GE Appliances bottom-freezer refrigerator guidance; the drain location and service access are model-dependent.
Community feedback
Share a repair observation
Share a plain-text repair observation. Accepted observations are published automatically; this page may take a moment to update.