
On this page
Start here
Quick answer
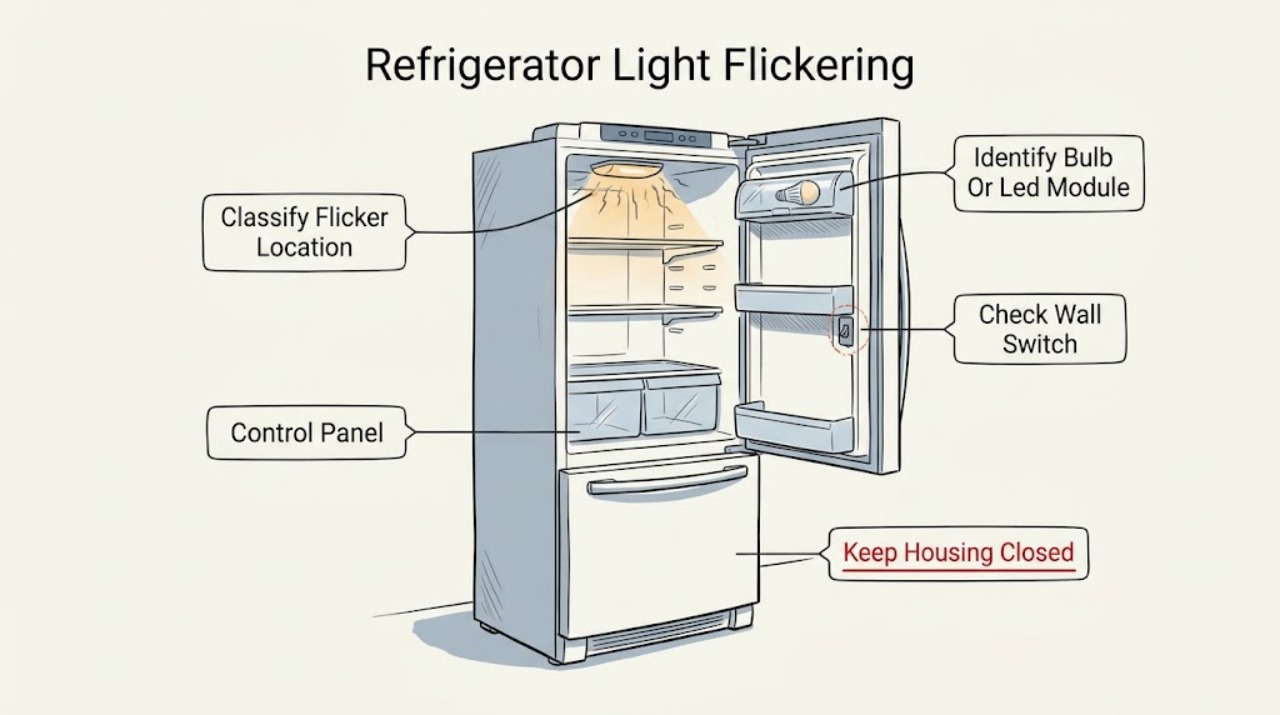
First determine whether only the interior lamp flickers or the control panel and other lights flicker too. On the Gladiator GARF30FDGB/GAFZ30FDGB family, the official guide says the lighting system may use a sealed LED module, an LED bulb, or an incandescent bulb; it requires disconnecting power before light work, and a sealed LED module that does not illuminate calls for assistance or service. Whirlpool's official refrigerator-light guidance says the door switch controls interior lights and recommends checking door contact, level, alignment, and nearby magnets or electronic devices, then cycling power for one minute. With power disconnected, confirm the door closes and the light shield and bulb are not visibly loose or damaged; use only the exact manual's bulb type and rating if it permits replacement. Do not bypass the door switch, probe wiring, or keep using the refrigerator if flickering is accompanied by a burning smell, heat, sparking, a damaged cord, water near electrical parts, or repeated power loss. Persistent flicker, a sealed LED fault, or flicker across the panel and interior lights belongs with qualified service.
Before you begin
Safety first
- This article covers identifying the affected light, checking door contact and nearby obstructions, disconnecting power, inspecting model-approved accessible bulb/shield parts, and one limited power cycle. It does not authorize switch bypass, socket or wiring work, sealed LED repair, live testing, or internal panel removal.
Work through in order
Diagnostic checks
Use only checks that match the exact appliance or system and its official guide.
-
Check 1
Record whether the flicker is in the refrigerator lamp, freezer lamp, control panel, or multiple lights, and whether it occurs when a door moves, during cooling, or after a power event. Do not repeatedly open and close the door to reproduce it.
Expected result: Only a door-operated lamp flickers, the panel and interior lights flicker together, the flicker follows door movement, or the symptom is accompanied by heat, smell, sparks, water, or power loss.
Next step: Use the door-contact and light-type checks only for an isolated, non-hazardous lamp symptom. Leave the appliance disconnected and call service for panel-wide flicker or any hazard sign.
Stop if: Do not energize a refrigerator with a damaged cord, wet electrical area, smoke, burning odor, or sparking.
Why this matters
Why: The light location and timing distinguish a door-switch/light assembly path from a broader power or control problem; hazard signs override diagnosis.
-
Check 2
Check that the refrigerator is stable, the door is level and aligned, the gasket seals, and no food package, bin, magnet, or electronic device is interfering with the door-switch area. Do not press or bypass the switch electrically.
Expected result: The door is misaligned or blocked, the gasket does not close, a nearby object is present, the switch response changes with door position, or all external conditions are correct.
Next step: Correct only the clearly visible alignment, obstruction, or nearby-device condition and monitor normally. Arrange service for an inconsistent switch, persistent flicker, or any wiring concern.
Stop if: Do not tape the switch closed, wedge the door, remove switch wiring, or use a meter on a live circuit.
Why this matters
Why: A door that does not engage its switch consistently can make the interior lamp appear to flicker; a correct door path makes a lamp, switch, or control fault more plausible.
-
Check 3
With cooling turned off and power disconnected, identify whether the exact Gladiator manual calls the light a sealed LED module, a replaceable LED bulb, or an incandescent appliance bulb. Do not remove a shield or bulb until the manual confirms that the part is user-replaceable.
Expected result: The light is a sealed LED module, a replaceable bulb is clearly identified, the bulb/shield is visibly damaged, or the lighting type cannot be confirmed.
Next step: Call for assistance for a sealed module or uncertain model. For a documented replaceable bulb, continue only with the exact bulb type, size, shape, wattage, and wet/damp rating.
Stop if: Do not pry open a sealed module, install a household bulb by appearance, or handle a socket with power connected.
Why this matters
Why: The Gladiator guide provides different actions for sealed modules and replaceable bulbs; an unconfirmed light type prevents safe part selection.
-
Check 4
For a confirmed replaceable-bulb design, unplug the refrigerator, remove only the model-approved light shield, and inspect the bulb, shield, and accessible socket for looseness, burn marks, moisture, corrosion, or damage. Refit the shield and bulb without forcing anything.
Expected result: The bulb is loose or burned out, the shield or socket is damaged or wet, or the accessible parts are intact but the lamp still flickers.
Next step: Replace only with the exact model-approved bulb and restore the shield before reconnecting power. Call service for socket damage, moisture, scorching, or recurrence.
Stop if: Do not energize with exposed wiring, a damaged shield, moisture, scorching, or a loose socket.
Why this matters
Why: A documented bulb or shield issue may be user-level, while moisture, socket damage, or persistent flicker points to a serviceable electrical or control fault.
-
Check 5
After recording the model and symptom, and only when the appliance is dry and undamaged, disconnect power for one minute and reconnect it once. Monitor whether the same light or multiple lights flicker again.
Expected result: The flicker stops, returns in the same lamp, appears across the panel and interior, or is accompanied by a breaker trip, smell, heat, sparks, or cooling loss.
Next step: Arrange qualified Gladiator/Whirlpool appliance service for recurrence, panel-wide flicker, or any electrical symptom. Protect food if cooling is interrupted.
Stop if: Do not repeat power cycling, open the control area, or continue using the appliance with a hazard sign.
Why this matters
Why: A one-time reset can clear a transient control state but cannot establish that a lamp module, switch, socket, control, or wiring is healthy.
Use your observations
Decision map
Find the observation that best matches what you see, then follow the next safe action.
-
PATH 01Safety boundary
What you see
Only the interior lamp flickers when the door opens or closes, and the door is misaligned, blocked, or not consistently engaging the switch with no heat, smell, water, or power interruption.
Do this next
Correct a visible obstruction or alignment issue and monitor. Call service if flicker remains or the switch response is inconsistent.
Why this path and its safety boundary
Why it matters: A door-switch contact or alignment issue is more plausible than a panel-wide power fault, but the switch itself remains a service part.
Safety stop: Do not bypass, tape, wedge, or electrically alter the door switch.
-
PATH 02Safety boundary
What you see
The exact Gladiator manual identifies a replaceable bulb and the bulb is visibly loose, burned out, or damaged while the shield and socket remain dry and intact.
Do this next
Disconnect power, replace only with the exact manual-approved type/rating and wet/damp suitability, reinstall the shield, and monitor once.
Why this path and its safety boundary
Why it matters: A model-approved bulb or shield issue is plausible; the manual does not support substituting a bulb by appearance or using a non-rated lamp.
Safety stop: Stop for moisture, scorching, socket damage, exposed wiring, or flicker after the correct bulb is installed.
-
PATH 03Safety boundary
What you see
The lamp is a sealed LED module, the light type is uncertain, or the same lamp flickers after door and approved bulb checks.
Do this next
Leave the refrigerator safe and arrange qualified service with the model and symptom record.
Why this path and its safety boundary
Why it matters: The Gladiator guide directs non-illuminating sealed LED modules to assistance or service, and recurrence is not evidence for a safe DIY module, socket, or control repair.
Safety stop: Do not open a sealed module, probe the socket, or order a generic LED assembly.
-
PATH 04Safety boundary
What you see
The interior and control lights flicker together, flicker follows cord movement, or there is heat, odor, sparking, water near electrical parts, a damaged cord, repeated breaker action, or cooling loss.
Do this next
Disconnect power when safe, keep the refrigerator out of use, protect perishable food, and arrange qualified appliance service.
Why this path and its safety boundary
Why it matters: A broader power, control, wiring, or moisture problem is more likely and overrides bulb or door-switch troubleshooting.
Safety stop: Do not touch wet electrical parts, run an extension cord, bypass protection, or perform live tests.
Helpful context
Understand the symptom
Identify which light is flickering
Open the door only long enough to observe the symptom, then note whether the flicker is in the main refrigerator compartment, freezer compartment, control panel, or all of them. Also note whether it changes when the door moves, when cooling starts, or after a power interruption. A door-operated interior lamp is a different circuit and control path from a panel that is losing power, so do not use a bulb replacement to explain every kind of flicker.
Check door contact without bypassing the switch
Whirlpool's official light guidance says the interior light is controlled by a door switch. With the refrigerator stable and power off when handling anything, check that the door closes fully, the gasket is clean, the door is aligned, and no package or bin prevents the switch from being engaged. The guidance also calls out magnets or electronic devices near the switch as a possible interference check. Do not tape, wedge, hold, or electrically bypass the switch to force the light on.
Match the light system to the model
The Gladiator GARF30FDGB/GAFZ30FDGB manual describes more than one lighting arrangement: sealed LED modules, replaceable LED bulbs, and incandescent bulbs. A flicker from a sealed module is not a license to remove a cover or install a random bulb. Read the exact model's guide and identify whether the lamp is a sealed module or a replaceable bulb before selecting any part.
Inspect only accessible bulb and shield parts
If the exact manual identifies a replaceable bulb, disconnect power before removing the light shield. Look for a loose or burned-out bulb, a damaged shield, moisture, scorching, or corrosion, and refit only parts the model guide identifies. The Gladiator guide warns that refrigerator and freezer compartments are wet/damp environments, so an LED replacement must be rated accordingly. Do not touch exposed sockets or wiring with power connected.
Cycle power only as a limited reset
After documenting the symptom and ensuring there is no water, heat, smoke, or cord damage, Whirlpool's official light guidance permits unplugging or disconnecting power for one minute and then monitoring the appliance. This can separate a temporary control state from a recurring fault, but it does not repair a failing LED module, switch, socket, control, or wiring. If flicker returns, stop replacing parts by guesswork and use service.
Escalate panel-wide or hazardous flicker
If the interior and control lights flicker together, the light changes with cord movement, a breaker trips, or there is heat, smell, sparking, water near electrical parts, or a damaged cord, leave the refrigerator disconnected when safe and arrange qualified service. The exact Gladiator manual requires power disconnection before service and routes unresolved appliance problems through the manufacturer's support path. Protect perishable food if the refrigerator must remain off.
Safety boundary
Stop conditions
- Disconnect power and stop for burning smell, heat, sparking, water near electrical parts, a damaged cord or plug, repeated breaker action, or cooling loss.
- Do not bypass, tape, wedge, or rewire the door switch, light socket, control, or any safety device, and do not perform live electrical tests.
- Do not open a sealed LED module or remove internal panels; persistent or panel-wide flicker requires qualified service.
- Use the exact Gladiator model guide for bulb type, size, shape, wattage, shield, and wet/damp suitability; do not choose a part by appearance alone.
- Arrange service when flicker returns after one documented power cycle or an approved bulb/door check, or when the light type cannot be confirmed.
When checks do not resolve it
Need a professional?
Contact qualified Gladiator/Whirlpool appliance service when a sealed LED module flickers, the exact light type is uncertain, flicker persists after the model-approved external checks, multiple lights or the control panel flicker, or there is socket, switch, wiring, power, moisture, or cooling trouble. Disconnect power when safe for heat, odor, sparking, water near electricity, cord damage, or repeated breaker action.
Safety scope: This article covers identifying the affected light, checking door contact and nearby obstructions, disconnecting power, inspecting model-approved accessible bulb/shield parts, and one limited power cycle. It does not authorize switch bypass, socket or wiring work, sealed LED repair, live testing, or internal panel removal.
Read the exact guide
Official sources
- Interior Lights Flickering — Refrigerator Product HelpWhirlpool · Official Whirlpool product-help guidance for the referenced refrigerator category; it is a general diagnostic aid and does not replace the exact Gladiator model manual or establish universal part compatibility.
- Gladiator All Refrigerator and Upright Freezer GARF30FDGB / GAFZ30FDGB — Use and Care GuideGladiator GarageWorks / Whirlpool · Official Gladiator GarageWorks manual hosted on Whirlpool's document domain for the listed models; lighting parts, ratings, and procedures must not be generalized to every Gladiator refrigerator.
- Gladiator 17.8 Cu. Ft. Garage-Ready All RefrigeratorGladiator GarageWorks · Official Gladiator product page; it establishes brand/product-line context but is not a substitute for the model-specific lighting instructions in the manual.
Community feedback
Share a repair observation
Share a plain-text repair observation. Accepted observations are published automatically; this page may take a moment to update.