
On this page
Start here
Quick answer
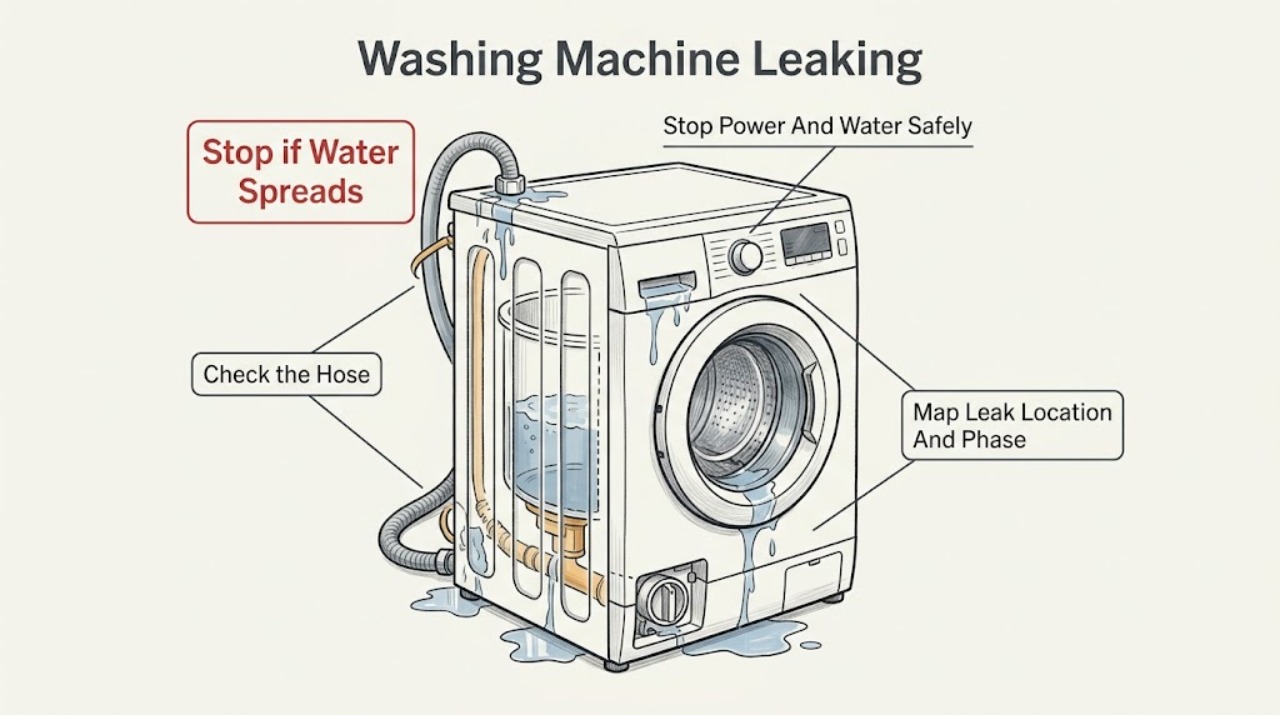
A leaking Gorenje washing machine should be stopped before you search for the source. From a dry position, switch off the appliance, disconnect power only when the plug and area are dry and safely reachable, and close the water tap if water continues entering or the machine fills while off. Do not touch a plug, outlet, or appliance standing in water. Then note whether water appears at the rear inlet connection, during filling at the detergent drawer or door, during draining at the drain hose or filter area, or underneath the cabinet. Gorenje's manuals direct owners to inspect the exterior for a detected leak, close the water valve for overflow, and call a service technician when the condition returns. Check only visible hose connections, door seal, drawer, and floor; do not open panels or dismantle the pump, tub, valve, or door lock.
Before you begin
Safety first
- This article covers dry external observation and model-approved user controls only. Do not touch wet electrical equipment, remove panels, tilt or move the washer, disconnect pressurized hoses, open a water-filled filter, access the base, bypass leak or door safety, or restore water/power after continuous leakage, overflow, or water near electricity.
Work through in order
Diagnostic checks
Use only checks that match the exact appliance or system and its official guide.
-
Check 1
Stop the programme through normal controls if it is safe, stay out of standing water, and from a dry position isolate the washer's power; close the water tap if the machine keeps filling, fills while off, or water is actively escaping.
Expected result: The floor and outlet are dry, water is near electrical equipment, the washer continues adding water, the leak stops when the tap is closed, or water continues despite the tap being closed.
Next step: Only continue with dry external observation after power and water are safely isolated; otherwise keep clear and arrange qualified appliance, electrical, or plumbing help.
Stop if: Do not touch a wet plug, outlet, cord, or appliance, stand in water to close a valve, pull the washer forward, or restore power or water to test the leak.
Why this matters
Why: Water near electricity is a shock and fire hazard. A continuing fill can require water isolation even when the washer is switched off; water that continues after the tap is closed indicates stored water or another leak path that needs service.
-
Check 2
With the washer stopped and isolated, use a dry visual inspection to record where water first appears—rear inlet, front door or dispenser, drain/filter area, side, or underneath—and whether it occurred during fill, wash, drain, or spin.
Expected result: Water is local to an external fitting, runs down from the drawer or door, appears only while draining, or emerges from the centre/bottom without a visible starting point.
Next step: Follow the matching branch and photograph the safe external location; do not run another cycle solely to reproduce an active leak.
Stop if: Stop if the source cannot be seen without moving the machine, water reaches electrical equipment, the leak is continuous, or the cabinet is wet underneath.
Why this matters
Why: The first wet location is more useful than the size of the puddle: fill-phase rear water suggests inlet connections, front water suggests drawer/foam/seal, drain-phase water suggests drain path, and bottom water without a source suggests an internal leak.
-
Check 3
From a stable dry position, inspect the visible water tap, inlet-hose ends, gaskets, and rear washer connection for a loose-looking joint, kink, crack, or water track; do not unscrew the hose or reach behind a wet or tightly installed machine.
Expected result: The leak begins at the tap or inlet connection during filling, the hose is deformed or damaged, the joint remains dry, or the leak appears from inside the cabinet.
Next step: If the cause is an obvious accessible connection and the area is dry, follow the exact manual's external connection guidance; for damage, corrosion, inaccessible fittings, or an internal source, request qualified service.
Stop if: Do not tighten or disconnect a wet, corroded, pressurized, or damaged hose, move the washer, or restore water to see whether the leak returns.
Why this matters
Why: Gorenje requires a properly sealed inlet connection and says the hose connection should be checked for leaks after installation. A damaged or leaking hose needs water isolation and replacement or service; a dry external connection shifts suspicion inward.
-
Check 4
For water or foam at the front, inspect the visible door glass, gasket folds, door edge, detergent drawer, and surrounding panel with power and water isolated; remove only loose visible debris and do not force the door or drawer.
Expected result: The gasket is folded, torn, or obstructed; water tracks from the drawer; foam is escaping from the dispenser; the door closes unevenly; or the front surfaces look dry.
Next step: Clean only accessible surfaces according to the exact manual and use the correct detergent amount on the next permitted load; if the seal, drawer housing, or front leak persists, keep the washer out of service and call service.
Stop if: Do not run with a torn gasket, force the door, remove the drawer housing, add chemicals to suppress foam, or continue when water reaches the base or electrical area.
Why this matters
Why: A door seal or drawer obstruction can direct water to the front, while Gorenje identifies excessive detergent and foam escaping through the tray as a separate condition. A torn seal, damaged door, or leak from behind the drawer needs model-specific service.
-
Check 5
For a leak during draining, inspect the visible drain hose route, wall or sink connection, filter-cover area, and household drain without moving the machine or opening a water-filled filter compartment.
Expected result: The drain hose is bent, displaced, cracked, or wet at a connection; the filter cover or manual drain hose is wet; the household drain backs up; or no external drain source is visible.
Next step: Keep the water and power isolated; arrange plumbing help for a household drain problem and qualified appliance service for the washer, filter, pump, hose, or inaccessible leak.
Stop if: Do not remove the pump filter with standing water, pour drain chemicals into the washer or household drain, disconnect a pressurized hose, or reach under a wet machine.
Why this matters
Why: Gorenje says the drain hose must be attached correctly, not bent, and routed within the model's permitted arrangement. A filter or drain leak may be serviceable only through the exact model's safe draining procedure; an unseen bottom leak is not an external adjustment.
-
Check 6
Record any exact Gorenje display code or overflow behavior and compare it with the exact model manual; if the drum continues filling, close the water tap and do not restart the programme.
Expected result: The display indicates a leak, overflow, water-level or drain issue; the machine pumps out and stops; it continues adding water; or the same code returns after the manual's permitted restart.
Next step: Provide the technician with the code, phase, water location, tap state, and safe photographs; keep the washer isolated until the cause is resolved.
Stop if: Do not repeatedly restart, bypass a leak or door safety, open panels, drain by dismantling a hose, or continue if water is near electrical equipment.
Why this matters
Why: Gorenje manuals describe leak detection, overflow, drain, and water-level errors with model-dependent actions. A code that returns, an ongoing fill, or water that remains under the machine is evidence for service rather than repeated resets.
-
Check 7
Classify the result as an obvious external connection, front seal/dispenser or foam issue, drain-path issue, or persistent/inaccessible bottom leak before any return to service.
Expected result: The leak stopped after a permitted external correction, the same leak returns during the next fill or drain, water appears from the base, or the source remains uncertain.
Next step: Keep the water tap closed and appliance disconnected, then arrange an authorized service visit; use a plumber for a confirmed household supply or drain fault.
Stop if: Do not run a diagnostic load, move the machine, dismantle the stack or cabinet, access wiring, or replace a valve, seal, pump, or hose from the puddle location alone.
Why this matters
Why: A returning or hidden leak may involve the inlet valve, internal hose, pump, tub, door lock/seal, pressure or overflow system, or leak sensor. Gorenje specifies trained experts for safety and performance repairs.
Use your observations
Decision map
Find the observation that best matches what you see, then follow the next safe action.
-
PATH 01Safety boundary
What you see
Water is on or near the outlet, plug, power cord, control area, or appliance base, or the user would need to stand in water to isolate it.
Do this next
From a dry safe position, disconnect the appliance circuit if possible, keep away, and arrange qualified electrical and appliance help; close the water tap only if reachable without entering water.
Why this path and its safety boundary
Why it matters: The immediate risk is electrical shock or fire, so leak localization must stop.
Safety stop: Do not touch the washer, plug, outlet, cord, or water, and do not pull or tilt the machine.
-
PATH 02Safety boundary
What you see
Water first appears at the tap, inlet hose, gasket, or rear washer connection while the washer is filling.
Do this next
Keep the water tap closed and follow only the exact manual's dry external connection guidance; replace a damaged hose or arrange qualified service.
Why this path and its safety boundary
Why it matters: The external inlet connection, hose, gasket, or valve area is the first fault domain; a wet or damaged joint can worsen under pressure.
Safety stop: Do not disconnect a pressurized or corroded hose, pull the washer forward, or restart to test the connection.
-
PATH 03Safety boundary
What you see
Water or foam comes from the front door, rubber gasket, detergent drawer, or dispenser during filling or washing.
Do this next
With power and water isolated, clean only visible accessible areas according to the exact manual and correct detergent use; request service for a torn seal, damaged housing, or recurring front leak.
Why this path and its safety boundary
Why it matters: A visible seal obstruction/damage, drawer residue or misrouting, overloading, or excessive detergent foam may be directing water forward.
Safety stop: Do not force the door or drawer, add chemicals to suppress foam, or run another load with a damaged seal or water reaching the base.
-
PATH 04Safety boundary
What you see
Water first appears during draining at the drain hose, filter cover, pump area, sink/wall connection, or household drain.
Do this next
Keep the washer isolated; correct only an obvious dry external hose position if permitted by the manual, and arrange appliance or plumbing service for a wet filter, pump, blocked drain, or inaccessible connection.
Why this path and its safety boundary
Why it matters: The drain path or household plumbing is implicated, but filter and pump access can release trapped water and are model-specific.
Safety stop: Do not open a filter with standing water, use drain chemicals, disconnect a hose, or reach under the washer.
-
PATH 05Safety boundary
What you see
A Gorenje display reports a leak, water-level error, overflow, or drain fault, or the machine continues adding water.
Do this next
Close the water tap if filling continues, keep power isolated, record the code, and call a service technician if the condition returns or water remains.
Why this path and its safety boundary
Why it matters: The washer has detected or may be experiencing an abnormal water condition; exact code actions vary by model.
Safety stop: Do not repeatedly restart, bypass the sensor, dismantle hoses, or continue operating with water under the appliance.
-
PATH 06Safety boundary
What you see
Water appears underneath or inside the base without a visible external source, or the leak continues after obvious external checks.
Do this next
Keep the tap closed and washer disconnected; arrange authorized appliance service and provide the first-leak phase and location.
Why this path and its safety boundary
Why it matters: An internal hose, pump, tub, valve, seal, overflow system, or leak sensor may be involved and is outside ordinary user inspection.
Safety stop: Do not tilt, move, open panels, access the base, or resume operation to locate the source.
Helpful context
Understand the symptom
Make the leak safe before locating it
Stop the programme and keep away from water near the power cord or outlet. If the floor is wet, do not reach for a plug or touch the washer; isolate the appliance circuit from a dry, safe position. Close the water tap when the machine continues filling, fills while off, or the leak is active. Gorenje says the machine's water-leak sensor can stop the water supply when water reaches the bottom, but a sensor response is not a reason to keep operating a visibly leaking appliance.
The phase and location narrow the cause
A leak at the rear during fill points first to the inlet hose, tap connection, or valve area. A leak at the front while filling can be an overloaded or obstructed dispenser, excessive foam, or a door-gasket problem. Water appearing during drain points to the drain hose, filter cover, pump area, or household drain. Water under the centre or bottom of the cabinet without a visible external source needs service because internal hoses, the tub, valve, pump, and leak sensor are not ordinary user repair points.
Use the exact Gorenje manual for any cleaning or filter access
Gorenje manuals vary by model and may show different filter covers, error codes, hose routing, and door arrangements. Only clean an accessible dispenser or wipe a visible gasket when the washer is disconnected and no standing water or electrical hazard is present. Do not remove a pump filter or hose with water trapped inside unless the exact manual gives a safe draining procedure and the area is fully isolated. A recurring leak, overflow, or leak code belongs with an authorized service technician.
Only after diagnosis
Potential parts
- washing-machine inlet hose or gasket
Consider this only when a qualified diagnosis or safe external inspection identifies a damaged or leaking inlet hose or connection seal.
Hose ends, seals, and water-safety features vary by model; confirm the complete Gorenje model before ordering. - washing-machine door gasket
Consider this only when a front leak is traced to a torn, deformed, or persistently contaminated door gasket and qualified diagnosis confirms replacement.
Gasket shape, ports, and clamps vary by model; do not infer fit from the puddle location alone. - washing-machine drain pump or filter assembly
Consider this only when qualified diagnosis links a drain-phase leak or persistent drain fault to the pump/filter assembly after safe water isolation.
Pump access and filter design are model-specific and may retain water; use a trained service procedure.
When checks do not resolve it
Need a professional?
Safety scope: This article covers dry external observation and model-approved user controls only. Do not touch wet electrical equipment, remove panels, tilt or move the washer, disconnect pressurized hoses, open a water-filled filter, access the base, bypass leak or door safety, or restore water/power after continuous leakage, overflow, or water near electricity.
Common questions
FAQ
What should I do first if my Gorenje washer is leaking?
Stop the programme, stay out of standing water, isolate power from a dry safe position, and close the water tap if water continues entering or the machine fills while off. Do not touch a wet plug, outlet, or appliance.
How can I tell whether the Gorenje inlet hose is leaking?
With power and water isolated, look for the first wet point at the tap, hose ends, gaskets, or rear washer connection. Do not disconnect a wet, pressurized, corroded, or damaged hose; arrange service if the connection cannot be inspected safely.
Why is foam leaking from the Gorenje detergent drawer?
Gorenje identifies excessive foaming as a possible cause and recommends rinsing without detergent and reducing the detergent amount. A recurring clear-water leak, damaged drawer, or water at the base needs service rather than more detergent experiments.
Can a Gorenje door seal cause a front leak?
Yes. A folded, obstructed, torn, or damaged gasket can direct water to the front. Inspect and wipe only accessible surfaces with power and water isolated; do not force the door or replace a seal based only on the puddle location.
When should I stop troubleshooting a leaking Gorenje washer?
Stop for water near electricity, continuous leakage, overflow, a recurring leak code, water under the cabinet, a damaged hose or seal, standing water in a filter area, or any need to move or open the machine. Keep water and power isolated and call qualified service.
Read the exact guide
Official sources
- USER MANUALGorenje · Official Gorenje washing-machine manual; foam and display behavior is model-dependent.
- USER MANUALGorenje · Official Gorenje operating and installation instructions; use the exact model manual for dimensions and access.
- Operating InstructionsGorenje · Official Gorenje operating instructions; exact hose routing, controls, and code meanings vary by model.
- User ManualGorenje · Official Gorenje user manual for a current washing-machine family; exact model documentation controls.
- USER MANUALGorenje · Official Gorenje washing-machine manual; exact model maintenance instructions control.
Community feedback
Share a repair observation
Share a plain-text repair observation. Accepted observations are published automatically; this page may take a moment to update.