
On this page
Start here
Quick answer
Treat a Hisense dishwasher that is not level as an installation and stability issue first. Stop the appliance if it rocks, leaks, the door rubs, or the cabinet is under stress. With the exact model manual in hand, check that all accessible feet contact the floor, adjust only the feet and rear adjuster that the manual identifies, preserve the specified countertop clearance, and confirm that the door opens and latches freely. Hisense's opened HUI66360XCUS and HUI6220XCUS manuals describe model-specific foot adjustment and securing steps, but the task has no model, so their dimensions and adjustment details must not be transferred to every Hisense dishwasher. Do not pull a plumbed-in unit out alone, loosen anchors blindly, use shims or blocks without model and installation guidance, or open electrical or water connections. Arrange qualified installation or appliance service if the floor/cabinet is uneven, a foot is damaged, the unit still rocks after the matched-manual adjustment, or the door, hoses, wiring, or leak protection cannot be checked safely.
Before you begin
Safety first
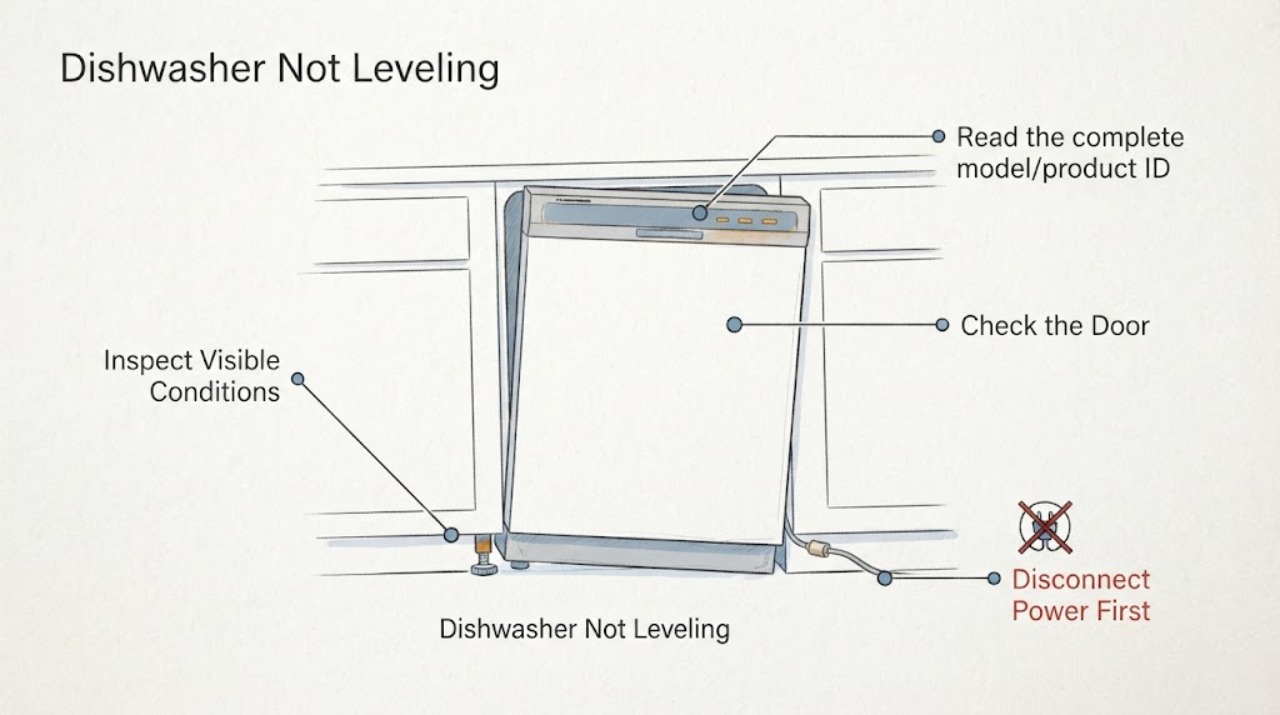
- Do not lift by the door, pull out a connected dishwasher alone, loosen unknown anchors, disconnect plumbing or wiring, use random shims/blocks, or perform live electrical work. Turn off water and disconnect power before installation or repair as directed by the matched manual; use qualified service when that cannot be done safely.
Work through in order
Diagnostic checks
Use only checks that match the exact appliance or system and its official guide.
-
Check 1
Stop the dishwasher and inspect it from the outside. Look for rocking, a cabinet that shifts when the door is opened, water at the toe-kick or side, a damaged foot, a crushed hose, or a cord/connection that would be strained if the unit moved. If the unit is connected, do not pull it out alone.
Expected result: The dishwasher is stable and dry, or it rocks, leaks, shifts, or shows a connection/installation hazard.
Next step: For rocking, leaking, or damaged connections, stop the cycle, shut off the water and accessible power safely, keep the unit in place, and arrange qualified installation or service. If it is stable and dry, continue only with the matched manual.
Why this matters
Why: Rocking or a leak means the installation is not safe to keep testing; the symptom does not identify an internal appliance part.
-
Check 2
Read the complete model/product ID from the rating label or the documentation without moving the connected dishwasher. Retrieve the matching Hisense dishwasher manual for the same region, then compare its installation-foot layout and fastening instructions with what is visible.
Expected result: The full model and matching manual are available, or only a family name/partial number is available.
Next step: If the exact manual is available, follow only its installation section. If identity remains partial, limit the work to external stability and door checks and use a qualified installer rather than borrowing dimensions from HUI66360XCUS or HUI6220XCUS.
Why this matters
Why: Hisense's support workflow is model based; a family name or partial number cannot verify a rear-foot mechanism, clearance, anchor location, or tolerance.
-
Check 3
With the unit empty and safely accessible, place a small level on a stable, non-door surface or use the exact manual's permitted reference points. Check whether the appliance rocks and whether all visible feet contact the floor. Do not stand on the door or use the door as a lifting handle.
Expected result: The cabinet is out of level or rocks, one foot does not contact the floor, or the cabinet is level and stable.
Next step: If the manual identifies the accessible foot adjustment and the unit can be adjusted without moving connections, make only the small manual-directed adjustment and recheck stability. If a foot is seized, missing, or the unit must be pulled out, stop and call an installer.
Why this matters
Why: A gap at a foot or cabinet movement supports an installation adjustment issue; a level, stable cabinet means the reported problem may be a visual reference or a cabinet/floor issue rather than a dishwasher fault.
-
Check 4
Open and close the door slowly while the dishwasher is supported in its installed position. Check for rubbing, binding, a door that will not latch, contact with the countertop or adjacent cabinet, and hoses that could kink if the unit were shifted. Use the exact manual for the required top/side clearance; do not force the door.
Expected result: The door opens and latches freely with clearance, or it rubs, binds, will not latch, or the clearance cannot be verified.
Next step: If the door binds or will not latch, stop using the dishwasher and have the installation corrected. If it moves freely, continue to the post-adjustment stability check without changing unverified dimensions.
Why this matters
Why: Hisense's opened installation manuals link correct positioning with free door movement and door-lock operation; binding can indicate an installation geometry problem, not a proven failed lock.
-
Check 5
After any adjustment permitted by the exact manual, recheck that the cabinet is stable, the feet remain on the floor, the door moves freely, and no hose or electrical connection was pulled or pinched. If the manual requires fastening the dishwasher, use only its specified attachment method.
Expected result: The dishwasher stays stable and dry with free door movement, or it still rocks, leaks, rubs, or shifts after the manual-directed adjustment.
Next step: If stable and dry, monitor for leaks during a normal cycle only when the manual and installation are complete. If not, leave the dishwasher out of service and arrange qualified installation/service; do not compensate with random blocks or repeated testing.
Why this matters
Why: The opened Hisense manuals require a final stability/foot check after fastening; persistence means the floor, cabinet, foot, anchor, or installation condition remains unresolved.
Use your observations
Decision map
Find the observation that best matches what you see, then follow the next safe action.
-
PATH 01Next step
What you see
If the dishwasher rocks, shifts when the door opens, or a foot does not contact the floor
Do this next
Stop moving the connected unit, use the exact manual or a qualified installer to correct the feet/floor/fastening, and do not keep running cycles while it rocks.
Why this path and its safety boundary
Why it matters: The installation is unstable; the observation does not diagnose a failed dishwasher component.
-
PATH 02Next step
What you see
If the exact model manual confirms the visible adjustment and the unit is dry, supported, and safely accessible
Do this next
Make only the documented adjustment, then recheck floor contact, clearance, stability, door movement, hoses, and fastening before use.
Why this path and its safety boundary
Why it matters: A small manual-directed foot adjustment may be an appropriate installation correction for that model.
-
PATH 03Next step
What you see
If the door rubs, will not latch, or the countertop/cabinet clearance cannot be verified
Do this next
Do not force or shim the door; keep the dishwasher out of service and obtain model-matched installation help.
Why this path and its safety boundary
Why it matters: The installation geometry is not confirmed, and Hisense states that incorrect positioning can disrupt door-lock function.
-
PATH 04Next step
What you see
If the unit remains level and stable but a leak, electrical damage, unusual operation, or internal fault is also present
Do this next
Stop the appliance, isolate water/power safely as applicable, record the exact model and symptom, and arrange qualified Hisense service.
Why this path and its safety boundary
Why it matters: Leveling alone does not explain the additional symptom, and the task evidence does not support an internal diagnosis.
Helpful context
Understand the symptom
First decide whether the problem is level, loose, or unsafe to move
A dishwasher can look tilted because the floor, cabinet opening, feet, or fastening point is uneven. A model was not supplied, so do not assume that a visible tilt means a failed pump, tub, door sensor, or other internal part. Do not move a connected built-in unit just to inspect the rear: water, drain, and electrical connections can be strained. If there is active leaking, a damaged cord, a crushed hose, or cabinet movement, shut off the water and power using safe accessible controls and arrange qualified help.
Use the exact model manual before turning an adjustment
Hisense's dishwasher support page tells owners to find the product ID and use it to retrieve the product page and downloads. The opened US manuals are for HUI66360XCUS and HUI6220XCUS, not an unspecified universal series. Match the full rating-label model and region first. Only then use the manual's foot location, direction, clearance, fastening, and torque instructions if they match your unit.
What the opened Hisense manuals actually support
The HUI66360XCUS installation section says to adjust the rear foot with the front screw, adjust the front feet, check the countertop air gap, slide the machine into place, verify free door movement, make final foot adjustments, and check that the front feet still touch the floor after fastening. The HUI6220XCUS manual gives a similar sequence. Those are useful examples of the adjustment pattern, not permission to apply their measurements or fastening points to a different Hisense model.
Keep the correction within a safe installation boundary
Do not force a foot that is seized, missing, or inaccessible. Do not use a random shim, lift the unit by the open door, defeat an anchor, disconnect plumbing, or alter wiring to make the cabinet appear level. Hisense's installation guidance requires the unit to remain stable, the door to operate freely, and the water and electrical connections to be protected. A floor or cabinet that cannot provide those conditions is an installation/service problem rather than a user adjustment problem.
When checks do not resolve it
Need a professional?
Call a qualified installer or Hisense service if the dishwasher rocks after the exact-manual adjustment, a foot or anchor is damaged or seized, the floor/cabinet is uneven, the door rubs or will not latch, the unit leaks, a connected dishwasher must be pulled out, or water/electrical connections would need to be altered. Keep the appliance out of service for active leaking, exposed electrical damage, or unsafe movement.
Safety scope: Do not lift by the door, pull out a connected dishwasher alone, loosen unknown anchors, disconnect plumbing or wiring, use random shims/blocks, or perform live electrical work. Turn off water and disconnect power before installation or repair as directed by the matched manual; use qualified service when that cannot be done safely.
Have this ready
- Provide the full rating-label model/product ID, region, whether the unit is newly installed or was moved, where it rocks or rubs, door-latch behavior, measured or visible clearance, leak observations, and whether the feet/anchors are accessible without moving plumbing or power.
Common questions
FAQ
Can I use the HUI66360XCUS leveling measurements on any Hisense dishwasher?
No. They are evidence from the opened HUI66360XCUS manual. Hisense's support workflow is product-ID based, so confirm the full model and use its matching manual before applying a clearance, foot direction, rear-adjuster, or fastening instruction.
Will leveling fix a dishwasher that will not start?
Not necessarily. The opened Hisense manual links incorrect positioning to possible door-lock disruption, but a no-start symptom can have other causes. Check only the exact manual's door and installation guidance; do not infer a failed lock or control from level alone.
Should I pull the dishwasher out to adjust the rear foot?
Only when the exact installation manual and a safe installation setup permit it. A built-in unit can have water, drain, and electrical connections under strain; the HUI6220XCUS manual calls for water/power precautions and two people during installation. A connected unit that needs to be pulled out should be handled by a qualified installer.
Read the exact guide
Official sources
- Operating Instructions Dishwasher HUI6220XCUSHisense USA · This opened official Hisense USA PDF identifies HUI6220XCUS and contains installation, safety, door, and service guidance. It is used to corroborate the installation pattern and safety boundary for that model, not to assert universal Hisense dimensions.
- User manual Dishwasher HUI66360XCUSHisense USA · This opened 40-page official Hisense USA PDF identifies HUI66360XCUS on its contents page and contains its installation section. It supports the adjustment sequence and safety boundary for that exact model only; the task has no model, so the article uses it as an explicitly scoped example.
- Support DishwasherHisense UK · The opened official Hisense dishwasher support page directs owners to find the product ID and retrieve the matching product page and downloads. It supports the model-scope boundary, not an unseen leveling procedure.
- Hisense 24" Top control Built-in DishwasherHisense USA · The opened official product page identifies HUI66360XCUS as a Hisense 24-inch top-control built-in dishwasher and links its user manual and dimension guide. It is used only to establish the exact example model and manual relationship.
Community feedback
Share a repair observation
Share a plain-text repair observation. Accepted observations are published automatically; this page may take a moment to update.