
On this page
Start here
Quick answer
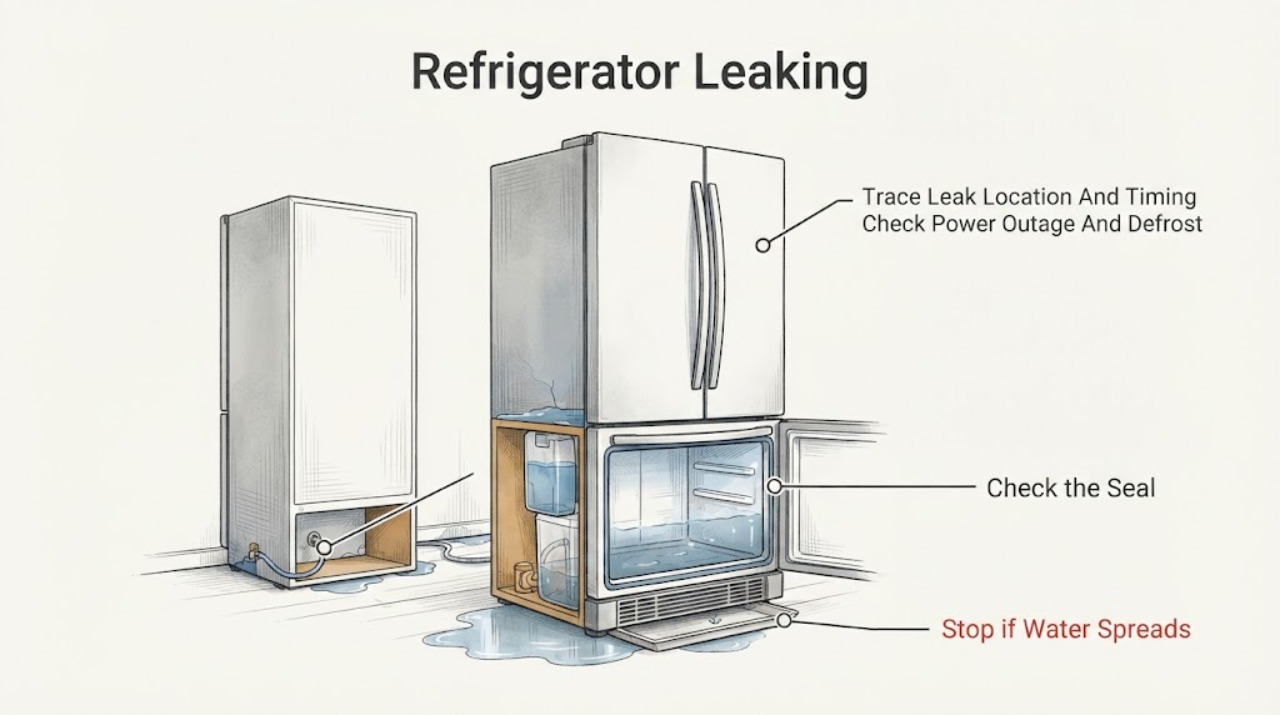
First dry the area and trace where water appears: floor or rear, under the internal water tank, from the ice-making compartment, inside the vegetable drawer, or at a dispenser or external line. Hitachi says a power interruption can melt stored frost or ice into the rear drain pan, and a small amount of water in that pan during defrost can be normal. For a water-tank model, confirm the tank is pushed fully past its set line and inspect it for a crack; stop using the refrigerator if the tank is damaged. For an ice-maker model, a documented ice-maker cleaning cycle can send water through the tray and temporarily fill the ice case, so wait for that cycle to finish. Check only visible door closure, gasket condition, food obstructions, and any model-documented external water connection. Do not pull panels, probe a hidden drain, loosen pressurized tubing, or work near water and electricity. Persistent pooling, a cracked tank, a recurring leak, poor cooling, exposed wiring, smoke, or a refrigerant-tubing concern requires qualified Hitachi service.
Before you begin
Safety first
- The owner may dry and locate visible water, observe ordinary power and defrost timing, remove a clear door obstruction, reseat an intact documented water tank, inspect visible external connections without loosening them, and wait for a documented ice-maker cleaning cycle. Qualified personnel must handle panels, hidden drains, pumps, valves, pressurized tubing, electrical testing, ice-maker mechanisms, wiring, and refrigerant systems.
Work through in order
Diagnostic checks
Use only checks that match the exact appliance or system and its official guide.
-
Check 1
Dry the visible water and record whether it returns at the floor or rear, below an internal water tank, at the ice-making compartment, inside the vegetable drawer, at a dispenser, or along an external water line. Note whether it began after a power outage, defrost, tank refill, ice-maker cleaning cycle, door opening, or installation change.
Expected result: Water returns from one defined location, appears only after defrost or a power interruption, appears during an ice-maker cleaning cycle, or cannot be traced without moving the cabinet or removing a panel.
Next step: Use the matching branch below and the exact model manual. Keep the appliance stationary if moving it would strain a water line or expose wet electrical areas.
Stop if: Stop for water near electrical parts, smoke, sparks, burning odor, exposed wiring or tubing, a damaged cord, or any need to remove a panel.
Why this matters
Why: Hitachi's official guidance uses location and timing to separate defrost-pan water, tank leaks, ice-maker water, condensation, and door-seal paths. An inaccessible or rapidly spreading source is not a safe home diagnosis.
-
Check 2
If the leak followed an outage or defrost, check only the visible floor and rear area from a dry, safe position. Confirm the refrigerator has ordinary power and note whether water is merely present in the rear drain pan or is overflowing onto the floor; do not reach behind the cabinet or tip the appliance.
Expected result: Water is limited to the rear pan and evaporation resumes, the pan overflows or the floor becomes wet, the refrigerator lost power, or power and the pan appear normal but water returns.
Next step: Dry the floor, keep doors closed if cooling was interrupted, and monitor only a normal defrost period. Escalate recurring overflow or a source that cannot be seen without accessing the rear or drain system.
Stop if: Do not pull the refrigerator across wet flooring, empty a hidden pan, probe a drain, or touch the plug or rear components with wet hands.
Why this matters
Why: Hitachi says melted frost or ice after a power interruption can reach the rear pan, and water in the pan during defrost can be normal. Overflow or recurrent floor water is not established as normal and needs service assessment.
-
Check 3
Inspect visible door edges, the gasket contact area, shelves, drawers, and packages for an obstruction or a door left ajar. Look for a torn, distorted, dirty, or visibly nonsealing gasket without removing it or applying heat.
Expected result: A package prevents closure, the gasket is visibly damaged or separated, frost or droplets cluster at the door edge, or the door and gasket appear to seal evenly.
Next step: Remove only an obvious obstruction and close the door normally. If the gasket is damaged or water persists with a good closure, document the model and arrange qualified service.
Stop if: Do not heat, stretch, cut, glue, or remove the gasket, adjust loaded hinges, or continue if the cabinet or door is damaged.
Why this matters
Why: A closure gap can admit humid air and create condensation or floor water; Hitachi identifies gasket deterioration as a possible cause. An even visible seal shifts concern toward drainage, tank, ice-maker, or internal service.
-
Check 4
For a Hitachi model with an internal water tank, inspect the tank and its seating from inside the compartment without spilling water. Confirm it is pushed fully behind the model's set line. For a model with an external supply, inspect only visible tubing, valve, filter housing, and connections for a leak; do not loosen them.
Expected result: The tank is not fully seated, the tank is cracked, a visible line or connection is wet, a filter is not seated as documented, or the model has no water feature matching this check.
Next step: Reseat only an intact tank according to the manual. Stop using a cracked tank and isolate water only when safe; call qualified appliance service or a plumber for an external leak, pressure issue, or internal water path.
Stop if: Do not use a cracked tank, disconnect pressurized tubing, bypass a filter or valve, open the rear cover, or operate with water reaching electrical parts.
Why this matters
Why: Hitachi says an incompletely seated tank can leak and a cracked tank should be taken out of use. External line or filter leaks are architecture-specific and cannot be repaired safely by tightening an unknown fitting.
-
Check 5
If the model has an automatic ice maker, check the exact manual or panel for a cleaning or ice-making cycle. If a documented cleaning cycle is currently running, keep the ice case and door closed and wait for it to finish. Afterward, inspect only the accessible case for an ice slab or obvious overflow; do not touch rotating trays or hidden mechanisms.
Expected result: An ice-maker cleaning cycle is active, water is only in the case during that cycle, an ice slab is visible, water continues after the cycle, or the source is behind the ice-maker housing.
Next step: Allow a documented cleaning cycle to complete. For a visible slab, follow only the model's care instructions; otherwise keep the ice maker and refrigerator out of service and arrange qualified diagnosis.
Stop if: Do not force a tray, insert hands near rotating parts, chip ice with a sharp tool, open the housing, or run a cycle to recreate a leak.
Why this matters
Why: Hitachi says its cleaning cycle can repeatedly move tank water for several minutes and temporarily fill the ice case. A continuing leak or hidden source may involve the tray, fill path, valve, or sensor and is not an owner repair.
-
Check 6
After documenting the location and completing only the visible outage/defrost, closure, intact-tank, external-line, and model-documented ice-cycle checks, note whether water returns, pools, affects cooling, or reaches electrical components.
Expected result: The water stops, only normal condensation or defrost-pan water is observed, a leak returns, a compartment pools water, cooling changes, or a leak accompanies noise, odor, sparks, or exposed parts.
Next step: Use the refrigerator only when it is dry and operating normally without recurring water. Otherwise disconnect power when safe, protect the floor and food, and arrange qualified Hitachi service with the model and observations.
Stop if: Do not remove panels, probe hidden drains, test live wiring, repair refrigerant tubing, or keep operating with water near electricity, smoke, sparks, burning odor, or a cracked tank.
Why this matters
Why: Resolution after a visible condition supports a temporary defrost, humidity, closure, tank seating, or documented cleaning-cycle explanation. Recurrence or compound symptoms can involve an internal drain, pump, valve, tray, defrost path, control, or refrigerant issue.
Use your observations
Decision map
Find the observation that best matches what you see, then follow the next safe action.
-
PATH 01Safety boundary
What you see
Water appears after a power interruption or defrost and is limited to the rear pan, or droplets occur during high humidity without floor pooling.
Do this next
Dry visible water and monitor one normal cycle without opening the rear cabinet. Escalate overflow, substantial pooling, cooling changes, or recurrent floor water.
Why this path and its safety boundary
Why it matters: Melted frost, defrost water, or condensation is more likely than an immediate tank or valve failure, provided the water does not overflow or recur on the floor.
Safety stop: Do not pull the unit across wet flooring or touch rear electrical components with wet hands.
-
PATH 02Safety boundary
What you see
Water or frost clusters at the door edge and an obstruction, incomplete closure, or damaged gasket is visible.
Do this next
Remove an obvious package obstruction and close the door. Arrange model-specific service for a damaged gasket or persistent water; do not reshape the seal yourself.
Why this path and its safety boundary
Why it matters: Humid air entering through a closure or gasket gap is more likely to create condensation and floor water.
Safety stop: No heat, cutting, gluing, stretching, door-panel removal, or loaded-hinge adjustment.
-
PATH 03Safety boundary
What you see
Water is under an internal tank, the tank is not beyond its set line, a crack is visible, or a documented external line, filter, or valve connection is wet.
Do this next
Reseat an intact internal tank only as documented; stop using a cracked tank and isolate water only when safe. Call qualified appliance service or a plumber for external or internal supply leaks.
Why this path and its safety boundary
Why it matters: The water-supply path is more likely than defrost condensation. A cracked tank or pressurized/internal connection is a stop-and-service condition.
Safety stop: Do not operate with a cracked tank, loosen tubing, bypass a filter or valve, or open the rear cabinet.
-
PATH 04Safety boundary
What you see
Water appears in the ice case while a documented ice-maker cleaning cycle is active, or an ice slab or overflow is visible in an automatic ice-making compartment.
Do this next
Wait for the documented cycle to finish with the case and door closed. Follow only model-specific care for an accessible slab; escalate continuing or hidden leakage.
Why this path and its safety boundary
Why it matters: A cleaning cycle can temporarily move water into the case, while continuing water or a hidden tray/fill fault requires service.
Safety stop: Do not touch rotating trays, force the ice case, chip ice with sharp tools, or open the ice-maker housing.
-
PATH 05Safety boundary
What you see
Water returns after visible checks, pools inside or on the floor, the source is behind a panel, cooling changes, or water reaches electrical components.
Do this next
Keep the refrigerator out of service and arrange qualified Hitachi diagnosis. Provide the model, leak location and timing, tank/ice features, cooling state, and safe observations.
Why this path and its safety boundary
Why it matters: An internal drain, pump, valve, tray, defrost, control, or refrigerant-related issue is possible and cannot be selected safely from puddle location alone.
Safety stop: Stop immediately for smoke, sparks, burning odor, exposed wiring or tubing, a damaged cord, a cracked tank, or any need to disassemble the appliance.
Helpful context
Understand the symptom
Location matters more than the size of the puddle
Dry the visible water, then watch where it returns without moving the appliance into an unsafe position. Water at the rear or floor can follow a power interruption, defrost pan, condensation, or door-seal path. Water under an internal tank, at an ice-making compartment, or inside a vegetable drawer points to a different model feature. Hitachi's support material explicitly organizes its guidance by leak location.
Some water is part of defrost or humidity behavior
Hitachi's English support FAQ says water from defrosting is collected in the drain pan and evaporates, and that condensation can be normal in high humidity. A brief wet pan or a few droplets is not the same as water reaching the floor repeatedly. Do not assume normal defrost if the pan overflows, a compartment pools water, cooling changes, or the leak keeps returning.
Water-tank and ice-maker models need their own branch
Hitachi models with water or ice features do not all use the same arrangement. Official guidance for a tank model says the tank must be fully seated behind its set line; a crack is a reason to stop use. In an automatic ice-maker model, a cleaning cycle can circulate tank water for several minutes and leave water in the ice case. Use the exact manual for the model's tank, tray, filter, and cleaning controls rather than treating every leak as a drain blockage.
Door gaps can turn humid air into floor water
Hitachi identifies a deteriorated door gasket as a possible route for cold air to escape and moisture to become water that reaches the floor. Check for an obvious package obstruction, incomplete closure, or visibly damaged gasket from outside the seal. A gasket replacement is model-specific; do not heat, cut, stretch, glue, or remove the door assembly to correct it.
Internal water, refrigerant, and electrical work is not a leak test
If the visible tank, closure, condensation, and documented external connections do not explain the water, the source may be an internal drain, pump, valve, tray, defrost path, or another component. Hitachi's safety manual says not to disassemble, repair, or modify the refrigerator and warns against damage to the refrigerant circuit. Keep the unit out of service when water reaches electrical parts or a panel would need to be removed.
Safety boundary
Stop conditions
- Stop use for water near electrical parts, smoke, sparks, burning odor, a damaged cord, exposed wiring or tubing, a cracked water tank, or a leak that spreads rapidly.
- Do not pull or tip the refrigerator across wet flooring, touch a wet plug or rear component, or operate while water reaches an outlet or wiring.
- Do not probe hidden drains, remove panels, disconnect pressurized tubing, bypass pumps or valves, perform live electrical tests, or work on the refrigerant circuit.
- Do not force ice trays, touch rotating automatic ice-maker machinery, use sharp tools to break ice, or run a cleaning cycle to recreate a leak.
- Do not heat, cut, stretch, glue, or remove a door gasket or choose a replacement tank, valve, drain, or pump from the leak location alone.
Only after diagnosis
Potential parts
- Hitachi refrigerator water tank
Consider this category only if the exact model has an internal water tank and a model-specific inspection confirms a crack or failed seal; water under the tank alone is not enough to select a part.
Tank shape, seals, filter arrangement, and availability vary by complete Hitachi model and region; confirm exact fit before ordering. - refrigerator door gasket
Consider this category only if a qualified or model-specific inspection confirms that a torn, distorted, or nonsealing gasket remains after visible door-obstruction checks.
Gasket profile and installation vary by exact Hitachi model; do not order from a puddle location alone.
When checks do not resolve it
Need a professional?
Arrange qualified Hitachi refrigerator service when water returns after the visible door, intact-tank, external-line, defrost, and model-documented ice-cycle checks; when the source is behind a panel; or when pooling affects cooling or compartments. Use qualified plumbing help for an external water-supply problem. Stop immediately for water near electricity, smoke, sparks, burning odor, exposed wiring or tubing, a damaged cord, a cracked tank, or any refrigerant concern.
Safety scope: The owner may dry and locate visible water, observe ordinary power and defrost timing, remove a clear door obstruction, reseat an intact documented water tank, inspect visible external connections without loosening them, and wait for a documented ice-maker cleaning cycle. Qualified personnel must handle panels, hidden drains, pumps, valves, pressurized tubing, electrical testing, ice-maker mechanisms, wiring, and refrigerant systems.
Common questions
FAQ
Why is my Hitachi refrigerator leaking onto the floor?
Trace the source first. Hitachi identifies power-outage or defrost water, a door-gasket gap, an internal water-tank leak, ice-maker water, and condensation as different possibilities. Recurrent pooling, a cracked tank, poor cooling, or water near electricity needs service.
Is water in the Hitachi refrigerator drain pan normal?
Hitachi says defrost water is collected in the rear drain pan and evaporates, so some water there can be normal. Overflow, repeated floor water, compartment pooling, or cooling changes are not a reason to assume normal defrost; arrange diagnosis.
What should I check on a Hitachi refrigerator with a water tank?
Confirm the intact tank is pushed fully beyond the model's set line and look for a visible crack. Hitachi says a cracked tank is a reason to stop using the refrigerator. Do not loosen internal tubing or substitute a tank without exact model confirmation.
Can an Hitachi ice-maker cleaning cycle cause water in the ice case?
Yes, for models with that documented function. Hitachi says the cleaning cycle can repeatedly move tank water for several minutes and temporarily fill the ice case. Keep the case and door closed until the cycle finishes; continuing leakage or a hidden source needs service.
Can I remove a Hitachi refrigerator panel to find the leak?
No. Hitachi's safety manual says not to disassemble, repair, or modify the refrigerator and warns against damaging the refrigerant circuit. Limit checks to visible, model-documented areas and arrange qualified service for hidden water, electrical, or refrigeration faults.
Read the exact guide
Official sources
- RX730G, RS620G, RS670G User ManualHitachi Global · Opened Hitachi Australia manual for the listed model families; safety warnings are relevant to the covered refrigerators, while controls and components remain model-specific.
- RefrigeratorsArçelik Hitachi Home Appliances Sales Vietnam · Official Hitachi regional refrigerator support FAQ; regional architectures and exact model procedures vary.
- refrigeratorsArçelik Hitachi Home Appliances Sales Middle East · Official Hitachi Home Appliances regional refrigerator FAQ; water-tank, dispenser, drain-pan, and temperature details vary by model and market.
- 冷蔵庫から水漏れしています。Hitachi Home Appliances Japan · Official Hitachi Japan refrigerator support article; examples and controls are regional and model-dependent, so the matching manual controls the exact procedure.
Community feedback
Share a repair observation
Share a plain-text repair observation. Accepted observations are published automatically; this page may take a moment to update.