
On this page
Start here
Quick answer
Stop the Hoover dryer and disconnect it before inspecting or moving it. First identify whether the sound is a brief rumble at startup, a squeak, a deep rumble, metal-on-metal grinding, a creak, or a new rattle. Check pockets and the drum for loose objects, confirm the dryer is level and stable, and clean the accessible filter, condenser, and vent areas according to the model manual. Hoover says a brief rumble can occur during the running-in period on a new or long-unused dryer, while persistent rumbling, squeaking, grinding, or creaking can indicate a fan, bearing, drum-support, or tension-pulley issue. Do not remove panels, reach into the drum drive, or keep operating the dryer if the sound is accompanied by a burning smell, smoke, scraping metal, a loose drum, a hot cord, or repeated shutdowns.
Work through in order
Diagnostic checks
Use only checks that match the exact appliance or system and its official guide.
-
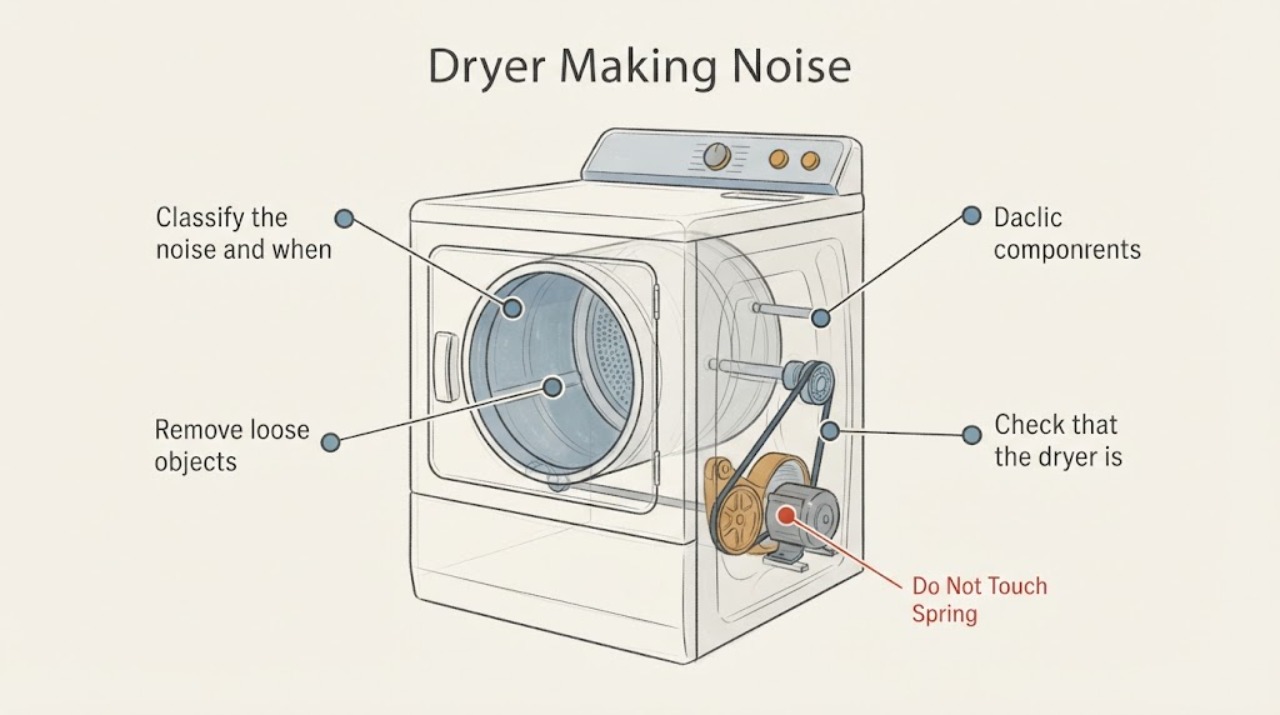
Classify the noise and when it occurs
From a safe position, note the sound type, its location, and its timing: startup only, drum rotation, high-speed rotation, airflow, or shutdown. Record whether the dryer heats and tumbles normally, whether the noise changes with an empty drum, and whether the drum appears to wobble. Do not run repeated cycles just to reproduce a severe noise.
Expected result: A brief rumble on a new or long-unused Hoover dryer may be a running-in condition. A squeak that follows drum movement, a deep aircraft-like rumble, grinding, or a creak that coincides with reduced performance points toward different mechanical branches.
Next step: Continue with the safe external and load checks for a mild, intermittent noise. Stop using the dryer and arrange service if the sound is severe, persistent, accompanied by a loose drum or reduced operation, or accompanied by smoke, burning smell, or electrical symptoms.
Why this matters
Why: Sound timing separates a temporary startup condition from a component or installation problem and tells the technician which evidence to inspect first.
-
Remove loose objects from the load and drum
With the dryer disconnected and cool, remove the load and inspect pockets, zippers, hooks, coins, buttons, and the door seal for trapped objects. Turn the drum gently by hand only if the model instructions permit and stop if it binds, scrapes, or feels loose. Do not insert tools through drum perforations.
Expected result: A coin or other hard object can create a rattle or intermittent knock that changes with drum position. If the empty drum still makes a rhythmic scrape, squeak, or knock, the noise is less likely to be the load itself.
Next step: Remove only a clearly accessible object and perform no more than one supervised confirmation. If the noise remains with an empty drum, keep the dryer disconnected and proceed to the level and accessible-cleaning checks or service.
Why this matters
Why: Eliminating a loose object is a low-risk way to separate an external load problem from a drive, support, or drum problem.
-
Check that the dryer is level and stable
With the appliance empty and disconnected, check that all feet contact a solid floor and that the cabinet is not rocking or touching a wall, pipe, shelf, or another appliance. Use the installation instructions for any permitted foot adjustment; do not pull a stacked or heavy dryer alone.
Expected result: Hoover explains that a dryer on uneven footing can let the drum lean against other components and produce metal-on-metal grinding. A noise that changes when the cabinet is stabilized supports an installation or balance branch, while unchanged grinding suggests an internal mechanical issue.
Next step: Correct only an obvious, manual-approved leveling issue and confirm that surrounding objects are clear. If grinding remains, the cabinet cannot be moved safely, or the dryer is stacked, stop and arrange qualified service.
Why this matters
Why: A stable cabinet keeps the drum aligned; correcting a safe external imbalance can remove noise without implying that a bearing or motor is defective.
-
Check the filter, condenser, vent, and ventilation path
With power disconnected, clean the lint filter and inspect the accessible condenser, vent hose, and ventilation openings according to the exact model manual. Look for trapped fluff, a crushed hose, debris, or an object caught near the filter or drum. Let any washed filter or condenser dry fully before refitting it, and do not reach into the blower area.
Expected result: Hoover says unusual noise can be caused by items caught in the filter or drum, while blocked filters or condensers can impair operation. A blocked or poorly ventilated path may also make the dryer hotter and louder, but a clear accessible path does not rule out a worn fan or internal bearing.
Next step: Restore only the parts that the manual allows the user to clean and run one supervised confirmation if no safety symptom exists. If the noise persists, becomes louder, or returns with a burning smell or poor drying, stop and book qualified service.
Why this matters
Why: Cleaning removes common accessible causes and reduces airflow load, but it cannot validate an internal repair or justify opening the cabinet.
-
Use the sound to narrow the mechanical branch
Do not remove panels. Instead, compare the recorded sound with these observable patterns: a squeak that follows drum rotation, a deep rumble that resembles an aircraft, metal-on-metal grinding, or a creak with reduced drying or drum movement. Record whether the drum jumps, the fan airflow sounds uneven, or the dryer stops unexpectedly.
Expected result: Hoover associates squeaking with possible worn or loose bearings, a deep rumble with a fan problem, grinding with drum alignment or footing, and creaking with tension pulleys. A creak plus reduced performance can precede a dryer that stops working.
Next step: Give the sound description and timing to a qualified repairer. Do not tighten, lubricate, or replace a bearing, fan, belt, or pulley unless the exact model procedure and safe access are confirmed by a qualified technician.
Why this matters
Why: These are diagnostic possibilities from Hoover's guidance, not confirmed part failures; internal access and electrical testing are outside a safe user check.
-
Check the model-specific support path
Find the dryer product code from the appliance information plate and use Hoover's Advice Centre to open the matching dryer guidance and manual. Keep the exact model, sound recording, cycle, load, date the noise began, and any recent move or cleaning available for support.
Expected result: Hoover's Advice Centre is organized by dryer type and model-specific questions, manuals, and maintenance advice. If a guide for the exact model gives a different access or cleaning boundary, that model instruction controls.
Next step: Follow only the exact model's user-accessible checks. If the model guide does not resolve persistent noise, use Hoover support or a qualified appliance technician rather than continuing to run the dryer.
Why this matters
Why: Hoover dryers differ in condenser, vent, drive, and control arrangements; model identity prevents applying a procedure from another appliance.
-
Run one supervised confirmation only after a safe correction
Only after a clearly accessible object, leveling issue, or manual-approved filter or condenser issue has been corrected, run one short supervised test with the dryer empty or with a suitable small load as the manual permits. Stay nearby and stop immediately for renewed grinding, a sharp squeak, rising heat, burning smell, smoke, scraping, drum wobble, or electrical symptoms.
Expected result: A quiet test with normal drum movement and no odor supports an external load, balance, or maintenance cause. A persistent or returning noise, especially with changed drum movement or reduced drying, indicates an unresolved internal problem.
Next step: Disconnect the dryer and arrange qualified service if the noise returns or any stop-use sign appears. Do not bypass the door switch or keep testing a machine with a mechanical or electrical warning.
Why this matters
Why: One controlled test confirms whether the safe external correction changed the symptom; repeated cycles can worsen a failing bearing, fan, pulley, belt, or drum support.
Use your observations
Decision map
Find the observation that best matches what you see, then follow the next safe action.
-
PATH 01Next step
What you see
A brief rumble occurs only for the first few minutes on a new or long-unused Hoover dryer, with normal operation and no odor or wobble.
Do this next
Follow the exact model guidance and monitor one supervised cycle. If the rumble continues beyond the running-in period or returns as a worsening noise, arrange service.
-
PATH 02Next step
What you see
The noise is a rattle or knock that disappears when the drum is empty.
Do this next
Remove pockets or accessible objects and reload within the manual's limits. Stop if the drum is damaged, the noise persists empty, or the object cannot be removed safely.
-
PATH 03Next step
What you see
Grinding or metal-on-metal noise occurs, the cabinet rocks, or the drum appears to lean or wobble.
Do this next
Stop the dryer, correct only a safe external leveling issue, and arrange qualified service if the noise remains. Do not run it to see whether the drum self-aligns.
-
PATH 04Next step
What you see
A squeak, deep rumble, or creak persists after accessible load and maintenance checks, or drying performance drops.
Do this next
Keep the dryer disconnected and provide the sound pattern to a technician for bearing, fan, pulley, belt, drum-support, or related diagnosis. Do not open the cabinet.
-
PATH 05Next step
What you see
Smoke, burning smell, sparks, a hot or damaged cord or outlet, exposed wiring, severe scraping, or repeated shutdown is present.
Do this next
Stop immediately, disconnect only if it is safe to do so, keep clear, and seek qualified help from a safe location. Do not restart or disassemble the dryer.
Helpful context
Understand the symptom
The sound pattern changes the diagnosis
A short, low rumble when a new or long-unused dryer starts can be different from a squeak that follows drum rotation, a deep fan-like roar, metal-on-metal grinding, or a creak that gets worse as the drum turns. Note whether the noise starts with the motor, occurs only when the drum tumbles, changes with load weight, or continues after the cycle stops. The sound is evidence for a branch, not proof that a particular part has failed.
Stop before investigating a moving or hot dryer
Use the normal control to stop the cycle, disconnect the appliance as the model instructions require, and wait for hot surfaces to cool. Do not put a hand into a moving drum, remove the rear or top panel, bypass a door switch, spray lubricant into the cabinet, or test energized wiring. Smoke, a burning smell, sparks, a hot or damaged cord or outlet, exposed wiring, scraping that may damage the drum, or a drum that is loose or not turning is an immediate stop-use condition.
Only after diagnosis
Potential parts
- drum bearing, roller, or support
Consider this only when a qualified diagnosis confirms a squeak, wobble, or drum-support fault after external objects and leveling are excluded.
Bearing, roller, and support designs vary by model; verify the exact product code and safe repair procedure. - fan or fan mounting
Consider this only when a technician confirms a deep rumble or airflow-related mechanical fan fault.
Fan assemblies and mounts are model-specific; do not reach into or operate an exposed fan. - tension pulley, belt, or idler
Consider this only when qualified inspection links a creak, slipping, or reduced drum performance to the drive system.
Drive parts differ by model and require safe panel access; do not lubricate or tension them by guesswork. - door seal or cabinet leveling hardware
Consider this only when an inspection confirms contact, vibration, or alignment caused by a worn seal or unstable installation.
Seals and leveling hardware must match the exact model and should not be used to mask internal grinding.
When checks do not resolve it
Need a professional?
Arrange qualified Hoover dryer service when unusual noise persists after removing accessible objects, confirming stable footing, and following the model-approved cleaning guidance; when the drum wobbles, grinding or squeaking continues, a deep rumble suggests a fan issue, a creak is paired with reduced performance, or the dryer repeatedly shuts down. Stop immediately for smoke, burning smell, sparks, a hot or damaged cord or outlet, exposed wiring, severe scraping, or a loose drum. Do not remove panels, bypass a door switch, or lubricate internal parts without qualified diagnosis.
Common questions
FAQ
Why does my Hoover dryer rumble when it starts?
Hoover says a new or long-unused tumble dryer can rumble briefly while its wheels run in. If the rumble continues beyond the short startup period, gets louder, or is paired with poor performance or an odor, stop using it and arrange qualified service.
What does a deep rumble or aircraft-like noise mean?
Hoover identifies a fan as one possible cause of a deep rumble. This is not a confirmation that the fan has failed. Disconnect the dryer, note the timing and airflow, and have a technician inspect it if the sound persists.
Can an uneven floor make a Hoover dryer grind?
Yes. Hoover explains that an unbalanced dryer can let the drum lean into other components and create metal-on-metal grinding. Correct only a safe, manual-approved leveling issue; persistent grinding needs service.
Can a coin or clothing item cause a Hoover dryer to rattle?
Yes. Hoover's cleaning guidance notes that items can become caught in the filter or drum. Disconnect the dryer, remove only clearly accessible objects, and stop if the empty drum still rattles, scrapes, or feels loose.
When should I stop using a noisy Hoover dryer?
Stop for persistent or worsening noise, severe scraping, drum wobble, reduced performance, burning smell, smoke, sparks, a hot or damaged cord or outlet, exposed wiring, or repeated shutdown. Do not remove panels or bypass safety switches; arrange qualified help.
Read the exact guide
Official sources
- Contact Hoover Customer Support, Warranty & OrdersHoover UK · Technical support, repair appointment, and model-specific manual routing
- How To Clean Your Tumble DryerHoover UK · Filter, condenser, drum, door-seal, vent, ventilation, trapped-object, unusual-noise, and professional-maintenance guidance
- Tumble Dryer Appliance Advice CentreHoover Advice Centre · Model-specific troubleshooting, manuals, product-code lookup, and dryer maintenance routing
- Rumbling noiseHoover Advice Centre · Short running-in rumble on a new or long-unused machine and disconnect-before-examining safety guidance
- Why is my tumble dryer making noises?Hoover UK · Noise-pattern guidance for squeaking, rumbling, grinding, and creaking, plus safe unplugging before examination
Community feedback
Share a repair observation
Share a plain-text repair observation. Accepted observations are published automatically; this page may take a moment to update.