
On this page
Start here
Quick answer
When a dryer noise speeds up, slows down, or repeats with the rotating drum, first treat it as a rotation-related symptom rather than guessing at a single part. Stop the cycle, remove the load, and check for loose objects at the drum edges, a tangled or heavy load, contact with the cabinet or vent, and an unlevel dryer. Run only a brief empty-drum observation with the door closed and nobody reaching inside. If the noise remains with the empty drum, is scraping, grinding, or getting worse, the likely area may include drum supports, glides, bearings, belt or idler, or the blower path; those components vary by model and need qualified appliance service rather than cabinet disassembly.
Before you begin
Safety first
- Do not run the dryer with panels removed, perform live electrical tests, bypass safety devices, or disturb gas or vent connections.
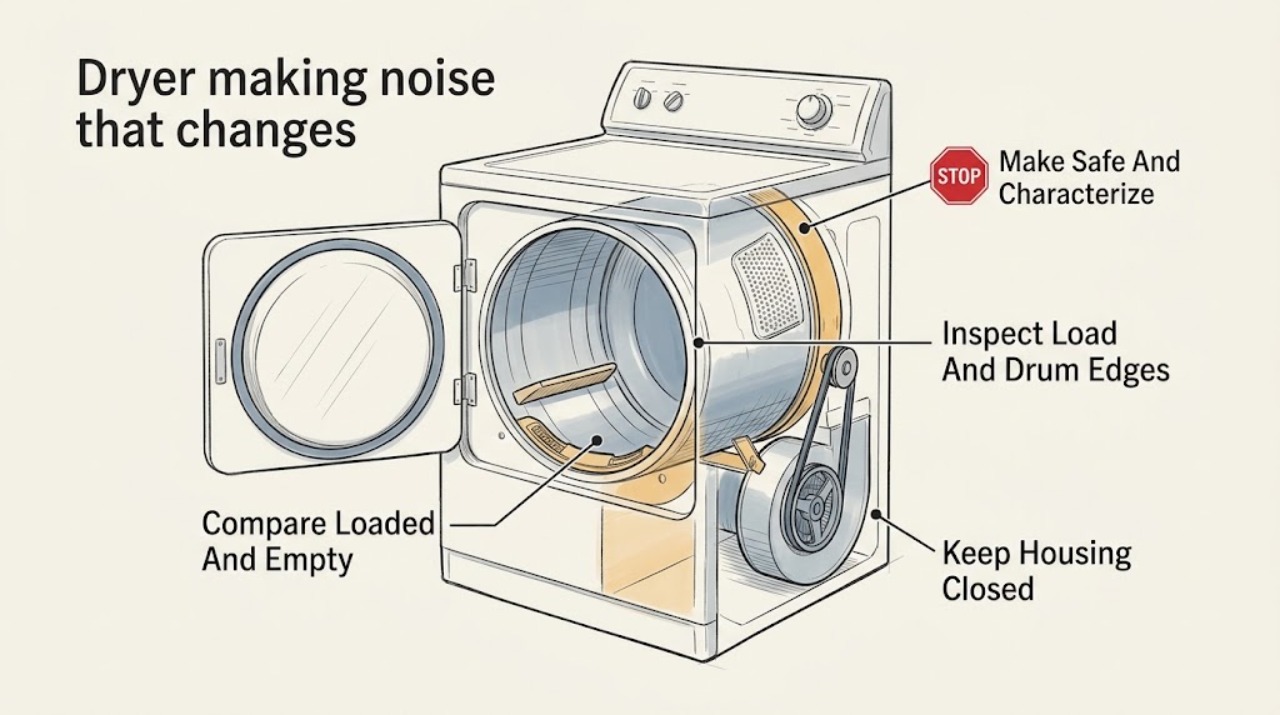
Work through in order
Diagnostic checks
Use only checks that match the exact appliance or system and its official guide.
-
Check 1
Stop the cycle, turn the dryer off, and let the drum come to a complete stop. From outside the appliance, record whether the sound is a rattle, thump, scrape, squeal, grinding, rumble, hum, or a click, and whether it changes with drum speed or only during heating.
Expected result: There is no smoke, burning smell, sparking, gas odor, damaged cord, or drum that has stopped turning unexpectedly; the sound can be described without opening the dryer.
Next step: If any hazard is present, keep the dryer off and arrange appropriate emergency or qualified service help. Otherwise continue with the dryer unplugged or otherwise isolated from operation while making the visual checks below.
Stop if: Do not restart a dryer that smokes, smells of gas or burning insulation, sparks, has a damaged power cord, or has a drum that binds or will not turn normally.
Why this matters
Why: A speed-linked mechanical sound can be investigated with safe external checks. A combustion, electrical, or severe mechanical warning is a stop-use condition, not a normal noise diagnosis.
-
Check 2
Remove all laundry and loose items, close the door, and make one brief empty-drum observation from outside the dryer using the same cycle conditions; do not reach through the door or run the dryer with a panel removed.
Expected result: The noise disappears when empty, becomes quieter, or remains at the same speed-linked pattern with no load inside.
Next step: Use the loaded-versus-empty result to choose the matching branch; stop repeated testing if the sound is scraping, grinding, or worsening.
Stop if: Do not keep operating the dryer to reproduce a severe noise, and never place hands or tools inside while the drum can move.
Why this matters
Why: A noise that disappears with an empty drum makes load contact, overload, a balled-up item, or a garment fastener more likely. A noise that remains with an empty drum shifts concern toward the dryer mechanism or blower path and is less likely to be laundry alone.
-
Check 3
With the dryer off and stopped, inspect the empty drum, the front and rear drum edges, and the door seal area for coins, paper clips, pens, buttons, zippers, screws, or other objects; check the last load for tangled sheets, oversized fasteners, shoes, or unusually heavy wet items.
Expected result: An object is lodged at a drum edge or seal, the load was knotted or overloaded, the sound matches a hard item tumbling, or no load-related cause is visible.
Next step: Remove only a loose, reachable item without force, clear pockets, separate the load, and retest once with a balanced lighter load. If an object is trapped or the noise persists with a clear drum, arrange service.
Stop if: Do not pry an object from the seal, scrape the drum, reach into a narrow opening, or remove any panel to retrieve it.
Why this matters
Why: Small hardware at the drum seam can scrape as the drum rotates, while fasteners and a balled-up or heavy load can rattle or thump. If the drum and load are clear, do not assume the next step is to remove a support or belt.
-
Check 4
From a stable position, check that the dryer is on a solid floor with all intended feet in contact, and clear objects leaning against it, items on top, pedestal contents, and contact with the washer, wall, cord, or exposed vent connection.
Expected result: The cabinet rocks, a foot is missing or loose, the dryer touches another object, the vent or cord can rattle against a surface, or the installation is stable and clear.
Next step: Remove only loose external items and correct an obvious safe contact or leveling issue according to the installation instructions; then make one short observation. Request service if the cabinet cannot be stabilized without moving connections or if the noise remains.
Stop if: Do not pull out a gas dryer, disconnect gas or vent connections, lift the appliance, or work behind it without qualified help.
Why this matters
Why: Leveling and external contact can add pounding, vibration, or rattling that changes as the cabinet and drum move. A stable installation makes an internal rotating symptom more likely when the noise continues.
-
Check 5
With the dryer off, remove the lint screen and look only into the accessible lint-screen opening for a visible foreign object; also observe from outside whether the vent connection is secure and free from rattling contact. Keep the lint screen installed whenever the dryer operates.
Expected result: A coin, sock, button, or other object is visible in the lint path, the vent is loose or touching something, or the accessible path is clear.
Next step: Remove only an object that is plainly reachable with the dryer-specific lint brush or ordinary safe access; otherwise record the finding and ask a qualified servicer to inspect the internal path.
Stop if: Do not insert tools or hands past a sharp or narrow opening, remove the blower housing, disconnect the vent for an internal inspection, or operate without the lint screen.
Why this matters
Why: A foreign object in the lint path can strike the blower wheel and create a rotating rattle. A loose vent can make a separate vibration that is mistaken for an internal dryer fault; a clear accessible path does not rule out an internal blower or belt issue.
-
Check 6
Combine the empty-drum result, sound type, location, installation checks, and trend to choose whether to stop use and request appliance service; provide a short recording or written description only from a safe position.
Expected result: The noise is gone after a loose item, load, or external-contact correction; or it remains empty, is a scrape or grind, comes from the front or rear, becomes louder, or is accompanied by drum drag, burning odor, smoke, or another fault.
Next step: Stop using the dryer and arrange qualified appliance service for a persistent empty-drum noise, grinding, scraping, worsening squeal or rumble, or any hazard. Tell the technician whether the noise follows drum speed, whether the drum was empty, and where it was loudest.
Stop if: Do not remove cabinet panels, test energized wiring, bypass a door or safety switch, lubricate an unknown part, or replace a belt, roller, pulley, bearing, glide, or blower component based only on sound.
Why this matters
Why: A resolved load or contact symptom supports normal use with the preventive correction. A persistent empty-drum or harsh rotating noise is consistent with a worn or obstructed mechanical path, but the exact part and repair method are model-dependent.
Use your observations
Decision map
Find the observation that best matches what you see, then follow the next safe action.
-
PATH 01Safety boundary
What you see
The noise occurs with laundry but disappears when the drum is empty, and the load contains tangled fabric, hard fasteners, shoes, or excess weight.
Do this next
Separate the load, turn fasteners inward, clear pockets, reduce the load, or use a rack for items that should not tumble; retest once.
Why this path and its safety boundary
Why it matters: The load is more likely than an internal dryer part to be creating the speed-linked thump, rattle, or scrape.
Safety stop: Stop if the noise remains with a balanced lighter load or changes to grinding, scraping, or a worsening mechanical sound.
-
PATH 02Safety boundary
What you see
The noise reduces after leveling the dryer or separating it from the washer, wall, cord, vent, pedestal contents, or another object.
Do this next
Keep the dryer stable and clear, then monitor a normal load. Arrange service if the drum-speed noise returns without external contact or if the appliance cannot remain stable.
Why this path and its safety boundary
Why it matters: Cabinet vibration or external contact was contributing; this does not prove that every internal rotating part is healthy.
Safety stop: Do not move a connected gas dryer or disturb connections to chase a vibration.
-
PATH 03Safety boundary
What you see
A loose object is visible at a drum seam, door seal, or accessible lint path, and the sound follows the drum or blower movement.
Do this next
Remove only a plainly loose object from ordinary safe access; otherwise stop use and have a qualified servicer retrieve it and inspect for damage.
Why this path and its safety boundary
Why it matters: The object can explain the rotating rattle or scrape, but an object that is trapped or unreachable can damage the seal or moving parts if the dryer continues to run.
Safety stop: Do not pry, probe, dismantle the lint path, or run the dryer to shake the object loose.
-
PATH 04Safety boundary
What you see
The same noise remains with the drum empty, especially if it is a scrape, grind, persistent squeal, or rumble that changes with drum speed.
Do this next
Stop operating the dryer and request qualified appliance service. Share the empty-drum result, recording, model information, sound location, and whether the dryer had been unused or recently moved.
Why this path and its safety boundary
Why it matters: An internal drum-support, belt-drive, glide, bearing, idler, or blower-path problem becomes more likely than laundry; the exact component cannot be selected from symptom words alone.
Safety stop: Do not open the cabinet, run with panels removed, or attempt a belt, pulley, roller, bearing, glide, or blower repair without model-specific training and safe isolation.
-
PATH 05Safety boundary
What you see
The sound occurs only during heating, or it is accompanied by gas odor, smoke, burning smell, sparking, a damaged cord, or another abnormal heat symptom rather than simply following drum speed.
Do this next
Stop use. For gas odor or fire concern, leave the area and seek appropriate emergency guidance; otherwise arrange qualified appliance service from a safe location.
Why this path and its safety boundary
Why it matters: A gas-valve click or low burner roar can be normal on some gas dryers, but odor, smoke, burning, sparks, and electrical damage require a safety response and are outside ordinary noise troubleshooting.
Safety stop: Do not relight, bypass a safety device, inspect combustion parts, or perform live electrical tests.
Helpful context
Understand the symptom
Why drum-speed changes matter
A sound that repeats faster as the drum turns faster is tied to something in the rotating or air-moving system, but the sound alone cannot identify the failed component. A zipper, coin, balled-up load, or a drum-edge object can produce a changing rattle or scrape. If the sound remains with no laundry, model-specific drum supports, glides, bearings, belt-drive parts, or a blower wheel become service possibilities rather than do-it-yourself diagnoses. The useful split is whether the noise disappears when the load and external contact are removed, not whether a part name sounds familiar.
Start with checks that do not open the cabinet
Turn the dryer off before inspecting the drum, and keep hands out of a moving drum or lint opening. Check pockets, the front and rear drum edges, the lint-screen opening from ordinary safe access, the leveling feet, nearby objects, and the exposed vent connection. Manufacturers also note that a dryer can thump after a period of non-use because support rollers temporarily flatten, and that an unlevel cabinet can add vibration. A brief empty-drum observation is useful only with the door closed and from outside the appliance.
When a rotating noise needs service
An empty-drum scraping, grinding, persistent squeal, or worsening rumble is not a reason to remove a panel and test the belt or pulley. GE advises discontinuing use when unusual noise remains unresolved, and Maytag identifies worn bearings, roller shafts, belts, glides, idler pulleys, and blower-wheel problems as possible repair conditions. Give the technician the sound type, whether it changes with speed, whether the drum was empty, where the sound seemed loudest, and whether the dryer was recently moved or unused.
Gas-dryer and heat-cycle boundary
Some gas-dryer clicks, valve sounds, or a low burner roar can occur during normal heating, but that is different from a mechanical sound that follows drum speed. If the symptom includes gas odor, smoke, a burning smell, sparking, or a hot electrical smell, stop using the dryer and leave the area for a gas odor or fire concern; seek appropriate emergency or qualified service help from a safe location. Do not use the noise checks to investigate combustion or live electrical parts.
Safety boundary
Stop conditions
- Stop using the dryer for smoke, gas odor, burning insulation smell, sparking, a damaged power cord, or a drum that binds or will not turn normally.
- Stop repeated testing when an empty-drum noise is scraping, grinding, persistently squealing, rumbling, or getting louder.
- Do not open the cabinet, remove a blower or belt-drive cover, test live wiring, bypass a safety switch, or reach into a moving drum.
- Do not move a connected gas dryer or disconnect gas, power, or vent connections to investigate an internal noise.
Only after diagnosis
Potential parts
- drum support rollers or roller shafts
Consider only if a qualified diagnosis finds a persistent empty-drum thump, rumble, or rotation-linked noise consistent with a worn support, rather than a load or leveling issue.
Confirm the exact dryer model and manufacturer fit information; designs and roller assemblies vary. - drum glide, bearing, or seal support
Consider only when service confirms a front or rear drum-support wear pattern or scraping with the drum empty.
Do not infer fit from appearance or brand family; use the exact model documentation and service diagnosis. - drive belt or idler pulley
Consider only after a technician identifies belt-drive wear or pulley noise as the source of a speed-linked squeal, thump, or rumble.
Belt length, pulley geometry, and mounting differ by model; verify the exact model before ordering. - blower wheel
Consider only if service confirms a loose, obstructed, or damaged blower path after the accessible lint area and external vent checks are clear.
Blower designs and shaft interfaces vary; do not remove the housing or assume cross-model compatibility.
When checks do not resolve it
Need a professional?
Arrange qualified appliance service when the noise remains with an empty drum, returns after a safe load and installation correction, is a persistent scrape, grind, squeal, or rumble, or is accompanied by drum drag, smoke, burning odor, sparks, a damaged cord, or gas odor. Stop and seek appropriate emergency help for an immediate gas or fire hazard.
Safety scope: Do not run the dryer with panels removed, perform live electrical tests, bypass safety devices, or disturb gas or vent connections.
Common questions
FAQ
Why does my dryer noise change when the drum speeds up?
That pattern makes a rotating or air-moving source more relevant, but it does not identify one failed part. First compare a normal load with an empty drum and rule out loose objects, tangled laundry, leveling, and external contact. A persistent empty-drum scrape, grind, squeal, or rumble needs qualified service.
Is a thumping dryer always broken?
No. A balled-up or heavy load, shoes, loose fasteners, an unlevel cabinet, or temporary support-roller flat spots after non-use can cause thumping. If the thump continues with an empty drum or worsens, stop use and arrange service.
Can I run the dryer empty to test the noise?
A brief empty-drum observation can help separate load noise from a mechanical symptom when the door is closed and you remain outside the dryer. Do not run it with a panel removed, reach inside, or repeatedly operate it to reproduce grinding, scraping, or a worsening sound.
Should I replace the belt or drum rollers when the noise follows drum speed?
Not from that symptom alone. Belts, rollers, glides, bearings, idlers, and blower wheels differ by model and can have overlapping sounds. Have a qualified technician confirm the source and exact compatible part before replacement.
When should I stop using a noisy dryer immediately?
Stop for smoke, gas odor, burning insulation smell, sparks, a damaged cord, drum binding, a persistent empty-drum grind or scrape, or a noise that is rapidly getting worse. For gas odor or fire concern, leave the area and seek appropriate emergency guidance from a safe location.
Read the exact guide
Official sources
- Sounds or Noises in a DryerWhirlpool · Whirlpool dryer noise troubleshooting
- Samsung dryer is too noisySamsung · Samsung dryer noise troubleshooting
- Scraping Sound - DryerWhirlpool · Whirlpool dryer scraping-sound troubleshooting
- Squealing or Squeaking Sound - DryerWhirlpool · Whirlpool dryer squealing and squeaking troubleshooting
- POSSIBLE FIXES FOR A DRYER THAT’S MAKING LOUD NOISESMaytag · Maytag dryer loud-noise causes and professional repair boundary
- Dryer - NoisesGE Appliances · GE dryer noise guidance applicable to common dryer noise diagnosis and service boundary
- Sounds or Noises in a DryerMaytag · Maytag dryer noise troubleshooting
Community feedback
Share a repair observation
Share a plain-text repair observation. Accepted observations are published automatically; this page may take a moment to update.