
On this page
Start here
Quick answer
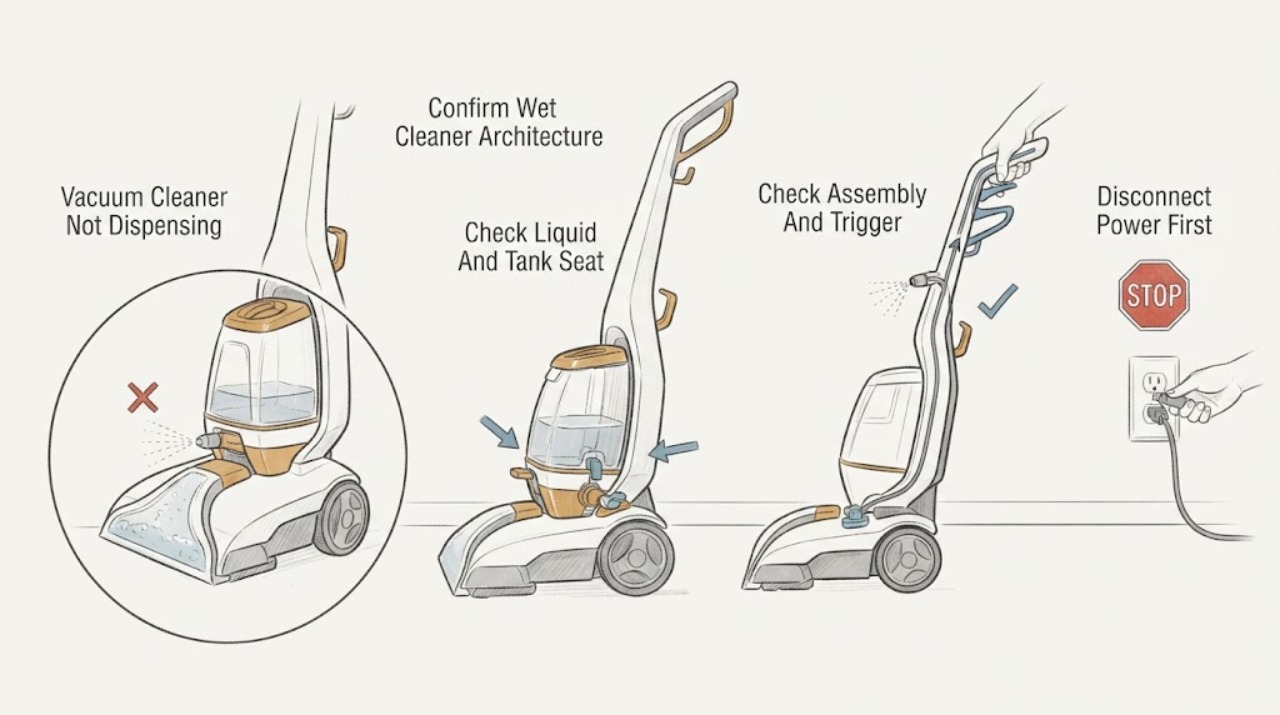
First confirm that the Hoover product is a wet carpet cleaner, spot washer, or floor washer with a clean-water or solution tank and spray trigger; a dry vacuum has no liquid-dispensing path. Record the exact model because Hoover uses different wet-cleaning architectures. On the Hoover PowerDash guidance, a new or recently assembled unit should be fully assembled, the clean-water tank pressed into place, and the pump primed by holding the trigger for the documented brief period. If a unit sprayed before and then stopped, an accessible nozzle or distributor path may be clogged. For a Hoover HS5 Spot Wash&Dry, the official product page says to add water and Hoover solution to the clear tank and press the trigger to spray; do not add unapproved liquids. Turn the cleaner off and unplug it before removing tanks or cleaning an accessible nozzle. Do not open the pump, pierce a hose, use a live test, or force a valve. If the tank is seated and filled with the model-approved liquid but no spray returns after the model's normal priming and accessible cleaning steps, or if there is leaking, burning odor, a hot plug, smoke, or repeated breaker activity, stop and arrange qualified service.
Before you begin
Safety first
- This article covers product-scope identification, model-approved liquid and tank checks, normal assembly and priming, and cleaning only accessible spray-path parts with the appliance unplugged. Do not open the pump or motor housing, use live electrical tests, inject liquid into hoses, drill nozzles, bypass valves, or operate with a leak.
Work through in order
Diagnostic checks
Use only checks that match the exact appliance or system and its official guide.
-
Check 1
Record the complete Hoover model and confirm that the appliance has a clean-water or solution tank, a spray trigger, and a wet-cleaning mode. Note whether it is a carpet cleaner, spot washer, or hard-floor washer, and whether it ever dispensed liquid.
Expected result: The appliance is a dry vacuum with no liquid system, a wet cleaner that has never sprayed, or a wet cleaner that sprayed previously and has now stopped.
Next step: Use the matching branch below and the exact model manual. Stop if the product identity or wet-cleaning architecture cannot be confirmed.
Stop if: Do not add liquid to a dry vacuum or use another model's tank, nozzle, solution, or spray procedure.
Why this matters
Why: A dry vacuum has no dispensing path. A newly assembled wet cleaner points first to tank, assembly, and priming; a formerly working unit points more toward an accessible obstruction or a component fault.
-
Check 2
With the cleaner switched off, check the model-approved liquid level and inspect the clean-water or solution tank, cap, visible valve, and seat for a missing seal, debris, crack, or incomplete latch. Reinstall the tank only as the manual shows.
Expected result: The tank is empty, the wrong liquid was used, the tank is not fully seated, a seal or valve is visibly damaged, or the tank is full, correct, and dry around its seat.
Next step: Use only the exact manual's fluid and tank procedure, correct an obvious seating issue, and retest once. Arrange service for a crack, damaged seal, persistent leak, or an internal valve.
Stop if: Do not substitute chemicals, overfill, pry a valve, seal a crack with adhesive, or operate with a leak.
Why this matters
Why: No liquid, wrong fluid, a tank-seat issue, or a damaged valve can stop dispensing before a pump is considered. A correctly filled and seated tank moves the diagnosis toward assembly, priming, nozzle, or internal service.
-
Check 3
For a unit that is new or was recently reassembled, verify that the handle, tube, hose, tool, and tank are latched as the model instructions show. Select the documented wash or spray mode and squeeze the normal trigger without forcing it.
Expected result: A latch is incomplete, the wrong mode is selected, the trigger moves normally but no liquid appears, or the cleaner sprays after a connection is reseated.
Next step: Keep the restored assembly in the exact documented position and continue only if it sprays normally without leaking. If the trigger is stuck or the unit remains dry, proceed to priming or service.
Stop if: Do not force a trigger, bypass a latch, operate with a hose detached, or expose electrical connections to water.
Why this matters
Why: Hoover's PowerDash support identifies complete assembly and the clean-water tank seat as first checks. Restored spray after reseating indicates a connection or assembly issue rather than a confirmed pump failure.
-
Check 4
If the model is a PowerDash-type cleaner and has never sprayed or has been emptied, follow the official support's normal priming instruction with the tank installed and the cleaner in the documented position. Use the model manual instead if it specifies a different prime; do not hold a trigger indefinitely.
Expected result: Liquid begins spraying during the documented prime, the pump makes a sound but no liquid appears, or there is no response and the tank remains dry.
Next step: Stop the prime when the model instruction says, clean up any spill, and make one normal spray test. If it remains dry, continue to an accessible nozzle check or arrange service.
Stop if: Do not use a live electrical probe, run the cleaner without its tank, inject liquid into the hose, or exceed the documented prime.
Why this matters
Why: Spray after priming suggests air in the pump path after filling or assembly. A dry tank despite a correct prime points toward a blocked path, valve, trigger, or pump problem, but sound alone cannot identify the part.
-
Check 5
If the wet cleaner sprayed before and then stopped, switch it off, unplug it, empty or secure the tanks as the manual directs, and inspect only the removable nozzle, brush cover, tool screen, or distributor opening that the exact model identifies. Rinse or wipe accessible parts and let them dry before reinstalling.
Expected result: Debris or dried solution is visible in an accessible spray path, the path is clear, the cover will not seat, or liquid leaks when the tank is installed.
Next step: Reassemble the cleaned parts exactly as the manual shows and make one test. Arrange service for a damaged cover, leak, persistent no-spray condition, or any part requiring housing access.
Stop if: Do not insert wire or sharp tools, drill the nozzle, remove an internal pump, open the motor housing, or clean while energized.
Why this matters
Why: A visible obstruction can explain a formerly working unit that stopped spraying. A clear path with leakage or no output makes a valve, hose, pump, trigger, or control issue more likely.
-
Check 6
After the model-specific tank, assembly, priming, and accessible spray-path checks, document whether the unit has no output, weak output, intermittent output, or a leak. Note any pump or trigger sound, and whether the vacuum or brush functions normally, without opening the appliance.
Expected result: No spray persists with a full seated tank, one mode or tool fails repeatedly, the pump runs dry, a hose or valve leaks, or smoke, burning odor, hot plug, sparking, or breaker activity appears.
Next step: Arrange qualified Hoover wet-cleaner service and provide the exact model, liquid used, last successful spray, mode or tool affected, and observations. Use qualified electrical service for a hot or damaged connection.
Stop if: Stop immediately for smoke, burning odor, sparking, water near electrical parts, a hot or damaged plug or cord, or repeated breaker trips. Do not continue operating to force a pump to prime.
Why this matters
Why: An internal pump, valve, seal, trigger, hose, control, or wiring fault is possible. An electrical or water hazard overrides ordinary cleaning-path checks.
Use your observations
Decision map
Find the observation that best matches what you see, then follow the next safe action.
-
PATH 01Safety boundary
What you see
The Hoover appliance has only a dust container or bag and no clean-water or solution tank, trigger, pump, or spray nozzle.
Do this next
Use the exact dry-vacuum manual for suction, dust, or attachment symptoms; do not fill the dust system with liquid.
Why this path and its safety boundary
Why it matters: This is not a liquid-dispensing failure. A dry vacuum cannot dispense cleaning solution through its normal architecture.
Safety stop: Do not pour water or solution into a dry vacuum, hose, motor, or dust container.
-
PATH 02Safety boundary
What you see
The product is a wet cleaner that has never sprayed, was just assembled, or was emptied and stored before the failure.
Do this next
Follow the exact model's assembly and normal priming steps with the model-approved liquid and tank installed. Arrange service if no output remains.
Why this path and its safety boundary
Why it matters: Tank seating, tube or handle latches, correct wash mode, and air in the pump path are more likely than a sudden clog.
Safety stop: Do not run without tanks, inject liquid into the hose, or exceed the documented prime.
-
PATH 03Safety boundary
What you see
The wet cleaner dispensed normally before, then stopped, and an accessible nozzle, tool screen, or distributor opening contains dried solution or debris.
Do this next
Unplug the cleaner, clean only the removable path permitted by the exact manual, let it dry, reinstall it, and make one test.
Why this path and its safety boundary
Why it matters: A visible obstruction is more likely than an unconfirmed pump failure.
Safety stop: Do not drill, poke with wire, open the pump, or clean while energized.
-
PATH 04Safety boundary
What you see
The correct liquid is in a correctly seated tank, the unit is fully assembled, the documented mode and trigger are used, and no accessible obstruction is present, but no liquid dispenses.
Do this next
Keep the cleaner unplugged when not testing its normal controls and arrange qualified Hoover service with the model and failed mode.
Why this path and its safety boundary
Why it matters: An internal pump, valve, trigger, hose, seal, or control issue is more likely than a simple refill or setup issue.
Safety stop: Do not open the housing, perform live testing, bypass a valve, or order a generic pump.
-
PATH 05Safety boundary
What you see
The tank or hose leaks toward electrical parts, the plug or cord is hot or damaged, smoke or burning odor appears, sparking occurs, or the breaker trips.
Do this next
Stop the cleaner and isolate power only from a safe accessible point; arrange qualified appliance or electrical service.
Why this path and its safety boundary
Why it matters: This is a safety event that overrides liquid-path troubleshooting.
Safety stop: Do not touch wet electrical parts, repeatedly reset a breaker, operate with a damaged cord, or continue priming a leaking unit.
Helpful context
Understand the symptom
Confirm this is a wet-cleaning product
“Not dispensing” applies to a Hoover carpet cleaner, spot washer, or hard-floor washer that sprays water or cleaning solution. A dry stick, canister, or handheld vacuum normally has suction and a dust container but no liquid tank, pump, or spray nozzle. Look for the product model and a clean-water or solution tank before trying any spray check.
Tank seating and assembly come before pump diagnosis
Hoover's PowerDash support sequence starts with complete assembly and a clean-water tank that is firmly in place. The HS5 product instructions likewise use a clear tank and trigger to spray. A tank that is not seated, a missing cap or valve seal, or a handle, tube, or hose that has not latched can stop flow without proving that the pump has failed.
Use only the liquid and mode documented for the model
The fluid path is model-specific. Hoover's HS5 instructions describe water plus Hoover solution in the clear tank, while its product page warns that other liquids can damage the product. Use the exact manual's liquid, tank, and operating mode; do not add bleach, oils, fragrance, hand cleaner, or an unverified concentrate to make the spray stronger.
A new unit and a formerly working unit point to different checks
If the cleaner has never sprayed or was just assembled, the tank, tube, trigger, and pump may need the model's normal prime. Hoover says PowerDash may need a short trigger hold to prime the pump. If spraying worked and then stopped, Hoover instead points to a possible clog and an accessible distributor or nozzle path. Do not convert either observation into permission to open the pump or perform a live test.
Persistent no-spray needs model-specific service
When the correct tank is filled and seated, the product is fully assembled, the documented mode is selected, and an allowed prime or accessible nozzle clean does not restore spray, an internal pump, valve, trigger, seal, hose, or control fault is more likely. Keep the cleaner unplugged during inspection and arrange service instead of ordering a generic pump or opening the housing.
When checks do not resolve it
Need a professional?
Arrange qualified Hoover wet-cleaner service when the model-approved liquid and correctly seated tank do not produce spray after the exact assembly, normal prime, and accessible nozzle or distributor checks; when a trigger, valve, hose, pump, seal, or control needs housing access; or when a leak persists. Stop immediately for smoke, burning odor, sparking, water near electrical parts, a hot or damaged plug or cord, or repeated breaker trips. Do not add unapproved liquids, run without tanks, open the pump, perform live tests, or force a valve.
Safety scope: This article covers product-scope identification, model-approved liquid and tank checks, normal assembly and priming, and cleaning only accessible spray-path parts with the appliance unplugged. Do not open the pump or motor housing, use live electrical tests, inject liquid into hoses, drill nozzles, bypass valves, or operate with a leak.
Common questions
FAQ
Why is my Hoover carpet cleaner not spraying?
Confirm the model is a wet cleaner, fully assemble it, seat the clean-water tank, use the model-approved liquid, and follow its normal prime. If it sprayed before and stopped, inspect only the accessible nozzle or distributor path allowed by the manual. Persistent no-spray needs service.
Can a regular Hoover vacuum dispense water or solution?
No. A dry vacuum without a clean-water or solution tank, pump, trigger, and spray path is outside this problem. Do not pour liquid into its dust container, hose, or motor.
What liquid should I put in a Hoover wet cleaner?
Use only the liquid and dilution specified by the exact model. Hoover's HS5 page describes water and Hoover solution and warns that other liquids can damage the product; do not substitute bleach, oils, fragrance, or household cleaner.
What if my Hoover cleaner worked and then stopped spraying?
Turn it off and unplug it, then inspect only the removable nozzle, tool screen, or distributor opening that the exact manual identifies. Dried solution or debris can block an accessible path. If the path is clear and the tank is seated, arrange service rather than opening the pump.
Read the exact guide
Official sources
- Hoover Official Frequently Asked Questions - PowerDash and Wet CleanersHoover · Hoover US support guidance for the named PowerDash and related wet-cleaner families; exact assembly and accessible maintenance vary by model.
- Hoover HS5 Spot Wash&Dry Carpet CleanerHoover UK · HS5/HS500 001 model in the Hoover UK range; used to establish a Hoover wet-cleaning product and not universal compatibility.
Community feedback
Share a repair observation
Share a plain-text repair observation. Accepted observations are published automatically; this page may take a moment to update.