
On this page
Start here
Quick answer
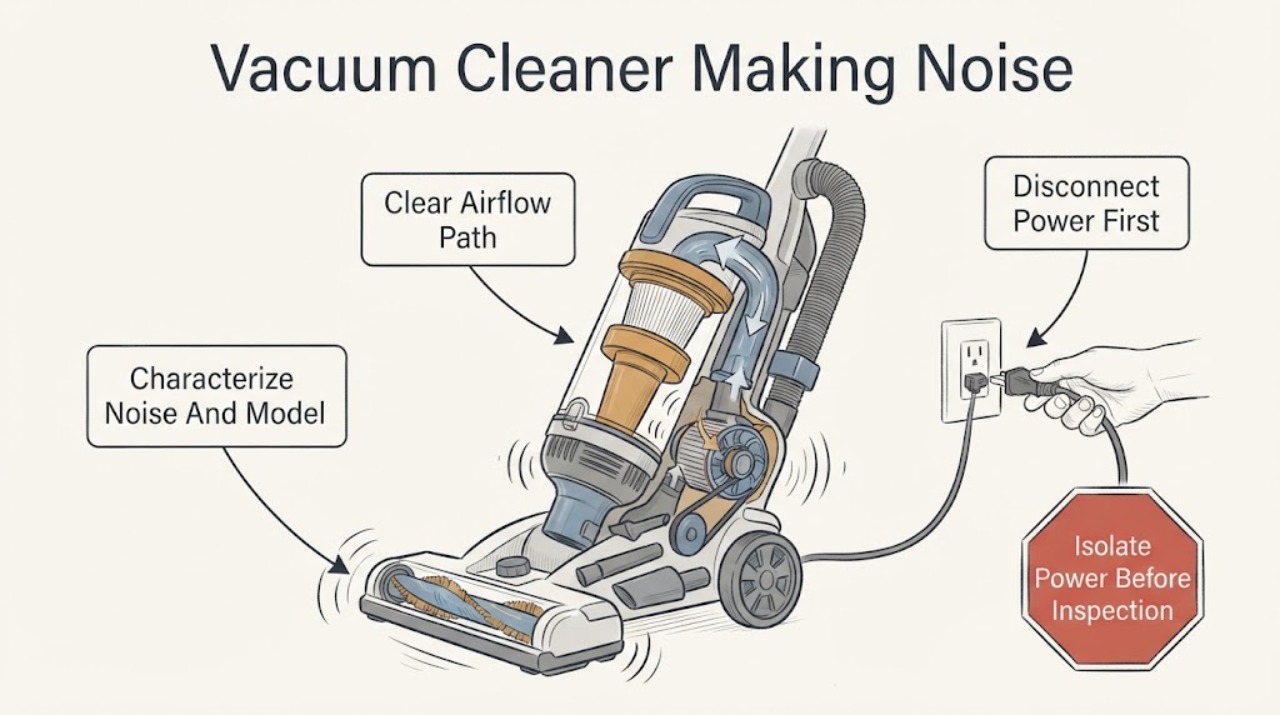
First describe the new sound and where it begins: a whistle or splutter with weak suction points toward a restricted air path, while a rattle, vibration, grinding, or squeal from the floor head points toward debris, a damaged brush roll, or a drive problem. Hoover's official Advice Centre says a vacuum can become noisy or vibrate when debris is tangled around the brush roll or agitator, and it requires the appliance to be disconnected from the mains before examination. The same centre says blocked filters, hoses, pipes, or tools can make the product noisier and may produce spluttering when a safety valve responds to restricted airflow. With power isolated, empty the dust container or replace the bag if fitted, clean the model-permitted filters, check accessible hoses and tools, and inspect the brush roll for hair, thread, a hard object, cracks, or a seized end. Hoover also explains that some sound comes normally from the motor, fan, airflow, and canister, so a steady familiar sound is different from a sudden change. If the noise remains after accessible cleaning, the motor or fan is hot, there is a burning smell, smoke, sparking, a damaged cord, repeated shutdown, or an internal bearing, belt, drive, or electrical part would need access, stop using the vacuum and arrange qualified service. Do not operate with covers removed or perform live testing.
Before you begin
Safety first
- The user may identify the model, switch off and unplug the vacuum, empty or replace a model-permitted bag, clean and dry accessible filters, inspect visible hoses and tools, and remove loose debris from an accessible brush roll as the exact guide permits. Qualified service must handle cabinet panels, motor, fan, bearings, belts or drives, controls, wiring, hidden blockages, and live electrical tests.
Work through in order
Diagnostic checks
Use only checks that match the exact appliance or system and its official guide.
-
Check 1
Record the complete Hoover model or product code and describe the sound by location and timing: steady airflow hiss, whistle, splutter, rattle, vibration, grinding, squeal, or electrical buzz. Note whether it occurs at the canister, hose, floor head, brush roll, wheels, or cord area, and whether suction changes.
Expected result: The sound is familiar and steady, a new airflow whistle or splutter comes with weak suction, a rattle or vibration comes from the floor head, or a grinding, burning, sparking, or electrical sound comes from the body.
Next step: Use the exact model guide and follow the matching air-path or brush-roll check. For a burning, electrical, or hazardous sound, switch off, unplug when safe, and use the service branch immediately.
Stop if: Do not keep running the cleaner to reproduce smoke, sparks, burning odor, a hot cord, or a rapidly worsening mechanical noise.
Why this matters
Why: Hoover says motor, fan, airflow, and canister noise can be normal, while blocked air paths can create spluttering and a brush obstruction can create noise or vibration. A new mechanical or electrical sound is not safely identified by sound alone.
-
Check 2
Switch the vacuum off, unplug it from the mains, wait for the brush and fan to stop, and place it on a stable surface before inspecting the floor head, dust container, bag, filter, hose, or tools.
Expected result: The plug and cord are cool and intact, the cleaner is still warm or moving, the cord or plug is damaged, or the noise came with smoke, odor, or a trip.
Next step: Continue only when the unit is cool, unplugged, and dry with no damage. For cord, plug, smoke, odor, or protective-trip symptoms, leave it unplugged and arrange qualified service or electrical help.
Stop if: Do not examine a running brush, reach into a fan opening, use water on an energized unit, or reconnect a damaged cord.
Why this matters
Why: Hoover's noise guidance requires disconnection before examination. A damaged or hot electrical path changes this from routine cleaning to an immediate safety and service issue.
-
Check 3
With power isolated, empty the model's dust container or replace its paper bag if fitted. Inspect the accessible hose, wand, nozzle, and tool openings for a blockage, and clean the filters only by the exact Hoover model instructions; let washable filters dry fully before refitting.
Expected result: The container or bag is full, a filter is visibly clogged or wet, a hose or tool is blocked, or the air path is clean and correctly assembled.
Next step: Correct only the accessible dust, bag, filter, hose, or tool issue permitted by the model guide, refit everything, and make one brief test. Escalate if suction or noise does not improve.
Stop if: Do not run without the required filter or bag, reinstall a wet filter, pour liquid into the air path, or push a sharp tool through a hose.
Why this matters
Why: Hoover says blocked filters, hoses, pipes, or tools can increase noise and cause a spluttering safety-valve sound when airflow is restricted. A clear path makes a brush or internal fault more likely if the sound remains.
-
Check 4
With the vacuum unplugged, turn or position the floor head only as the exact model guide permits. Inspect the accessible brush roll or agitator for hair, thread, string, a hard object, cracks, missing bristles, or an end that does not turn freely; remove only loose visible debris without forcing the assembly.
Expected result: Debris is wrapped around the brush, the brush roll is fractured or visibly damaged, the brush is jammed, or the accessible brush appears clear and intact.
Next step: Clean and refit the brush only as the exact model guide directs, then perform one brief test. If the brush is damaged, seized, or requires a cover or belt to reach, stop and arrange service.
Stop if: Do not remove a brush guard unless the model guide explicitly permits it, power the head while exposed, cut near wiring, or force a seized roll.
Why this matters
Why: Hoover's official vibration guidance identifies tangled debris and a broken or fractured brush roll as causes of noise or vibration. A clear brush with persistent grinding or side-to-side play points to a drive, bearing, belt, or head fault that needs model-specific diagnosis.
-
Check 5
After all accessible parts are correctly refitted, use only the exact model's normal attachment or floor-head selection to compare one brief run with the brush function disengaged or the approved tool configuration. Keep covers closed and stop immediately if the sound becomes hazardous.
Expected result: The noise occurs only with the floor head or brush engaged, follows a particular hose or tool, remains from the main body with no brush function, or cannot be compared safely on this model.
Next step: Use the localized result to tell qualified service which assembly to inspect. If the exact model has no approved comparison mode, skip it rather than improvising a disassembly test.
Stop if: Do not run with the bottom plate or body cover removed, defeat a brush safety switch, or hold a loose belt or brush while powered.
Why this matters
Why: A sound that follows the floor head, brush, hose, or tool is more consistent with that removable path; a sound that remains from the body points toward the fan, motor, or internal airflow path. This comparison localizes the symptom but does not prove a replaceable part.
-
Check 6
With power isolated, inspect accessible wheels, the floor-head housing, attachment collars, dust-container lid, and other model-permitted covers for hair, a trapped hard object, a loose fitting, or a cracked housing. Do not remove hidden panels or force a clipped assembly.
Expected result: Debris is caught at a wheel or attachment, a fitting is loose or cracked, the housing is intact, or the noise remains with no visible external cause.
Next step: Remove only loose accessible debris and reseat a model-permitted attachment, then make one brief test. For a cracked housing, loose internal-looking part, or persistent noise, keep the vacuum unplugged and arrange service.
Stop if: Do not glue a rotating part, lubricate an unknown motor or bearing, or operate a cracked or partially disassembled cleaner.
Why this matters
Why: A loose or obstructed external assembly can rattle or rub independently of the motor. No visible cause after the air and brush checks makes internal wear, bearing, fan, drive, or electrical trouble more likely.
-
Check 7
Stop owner troubleshooting after the accessible dust, filter, hose, tool, brush, and external-fitting checks are complete if the Hoover still makes a new or worsening noise, vibrates, loses suction, overheats, or shuts down.
Expected result: The sound persists from the body, the motor or fan is hot, the brush drive grinds despite a clear brush, a protective shutdown recurs, or internal access would be needed.
Next step: Leave the vacuum unplugged and arrange qualified Hoover appliance or vacuum service. Provide the model, sound location, suction change, filter and brush observations, and whether the sound changed with an approved attachment test.
Stop if: No cabinet opening, live test, motor disassembly, belt manipulation while powered, or continued operation with smoke, odor, sparks, heat, or a damaged cord.
Why this matters
Why: A motor, fan, bearing, belt or drive, control, wiring, or other internal component may be involved. The noise pattern cannot safely select a part or justify live electrical testing.
Use your observations
Decision map
Find the observation that best matches what you see, then follow the next safe action.
-
PATH 01Safety boundary
What you see
The sound is steady and familiar, suction is normal, there is no vibration, heat, odor, or change in pitch, and the model's air path is correctly assembled.
Do this next
Continue normal model-specific filter and brush maintenance and monitor for a change in sound or performance.
Why this path and its safety boundary
Why it matters: Normal motor, fan, airflow, and canister sound is more likely than a new mechanical fault. Hoover explains that these are ordinary sources of vacuum sound.
Safety stop: Stop if the sound changes, the cleaner overheats, smells burned, sparks, or begins to lose suction.
-
PATH 02Safety boundary
What you see
A whistle or splutter occurs with weak suction and a full container or bag, dirty filter, blocked hose, pipe, or tool is found.
Do this next
With power isolated, clear the model-permitted container, filter, hose, pipe, or tool path, dry washable filters fully, refit everything, and make one brief test.
Why this path and its safety boundary
Why it matters: Restricted airflow is more likely than a brush-drive fault; Hoover says blockages can make a product noisier and can trigger a spluttering safety valve.
Safety stop: Do not run without the required filter or bag or push sharp objects into a blockage.
-
PATH 03Safety boundary
What you see
Rattle or vibration starts at the floor head, especially after string, hair, or a hard object was picked up, and the brush has visible debris or damage.
Do this next
Remove only loose visible debris and refit or replace the model-specific brush according to its guide. Use qualified service for a seized roll, cracked housing, belt, bearing, or hidden drive.
Why this path and its safety boundary
Why it matters: A tangled or broken brush roll is more likely than a main-body motor fault. Hoover's Advice Centre specifically directs a disconnected inspection of the brush roll or agitator.
Safety stop: Do not power the exposed brush head, force the roll, or infer fit from another Hoover model.
-
PATH 04Safety boundary
What you see
The sound follows one hose, tool, wheel, or floor-head configuration in an approved brief comparison, while the main body is otherwise quiet.
Do this next
Inspect only visible debris, seating, and damage on that assembly; give the localized result to qualified service if the noise persists.
Why this path and its safety boundary
Why it matters: The removable assembly or its connection is more likely involved than the main motor, but a localized sound can still reflect a hidden drive or bearing.
Safety stop: Do not dismantle a head, bypass a brush switch, or operate with guards removed.
-
PATH 05Safety boundary
What you see
The body continues to grind, squeal, or rattle after accessible checks, or the noise comes with burning odor, smoke, sparks, abnormal heat, damaged cord, or repeated shutdown.
Do this next
Switch off, unplug from a dry safe position, keep the cleaner out of use, and arrange qualified appliance or electrical service.
Why this path and its safety boundary
Why it matters: An internal motor, fan, bearing, drive, control, wiring, or electrical fault is more likely, and the hazard makes continued operation unsafe.
Safety stop: No repeated restart, cabinet opening, live test, lubrication experiment, or internal part replacement by the user.
Helpful context
Understand the symptom
Classify the sound before touching the cleaner
A Hoover vacuum normally makes sound because air moves through the hose, fan, and canister and because the motor runs. A new rattle, vibration, grinding sound, or change in pitch deserves a different check from a steady airflow hiss. Note whether the sound starts only when the floor head is engaged, changes when an attachment is fitted, appears with weak suction, or continues when the brush roll is not being used. The exact model guide matters because Hoover's manual portal uses the model number or product code to select instructions.
Air restriction and brush debris are separate paths
Hoover's Advice Centre identifies blocked filters, hoses, pipes, and tools as causes of extra noise and describes a spluttering safety-valve sound when airflow is restricted. A floor-head rattle or vibration can instead be caused by hair, thread, a hard object, or a damaged brush roll. Disconnect the vacuum before clearing either path, and do not infer a motor fault until these accessible checks are complete.
A persistent or hazardous sound needs service
A clean filter, clear visible hose, and unobstructed brush roll do not prove that a bearing, belt, fan, motor, control, or wiring is healthy. A burning smell, smoke, sparking, hot housing or cord, or repeated protective shutdown is a stop condition. Keep the vacuum unplugged and use qualified service for internal access, live diagnosis, or replacement selection.
Safety boundary
Stop conditions
- Disconnect the Hoover from the mains before examining a brush roll, filter, hose, dust container, bag, tool, or floor head; wait for all moving parts to stop.
- Stop immediately for smoke, sparks, burning smell, abnormal heat, a hot or damaged cord or plug, repeated protective shutdown, or water near electrical parts, and leave the cleaner unplugged.
- Do not operate without required filters or bags, run with covers or brush guards removed, reach into a moving fan or auger-like brush, or perform live electrical testing.
- Use the exact Hoover model or product code for brush-release, filter, bag, and attachment instructions. Internal motor, fan, bearing, belt, drive, control, wiring, and cabinet work requires qualified service.
Only after diagnosis
Potential parts
- brush roll or agitator
Consider this category only when the exact model has a damaged, fractured, seized, or worn brush roll after power isolation and visible debris removal, and the noise is localized to the floor head.
Brush-release designs and fit vary by model. Confirm the complete model and the manufacturer's fit information; do not choose a brush from the sound alone. - vacuum filter or dust bag
Consider this category only when the exact model documents a replaceable filter or bag and the current one is damaged, missing, blocked, or cannot be restored after the accessible cleaning check.
Bagless and bagged systems and filter layouts differ. A filter or bag replacement does not prove that a motor or fan is healthy. - hose, nozzle, or floor-head assembly
Consider this category only when a visible hose, tool, nozzle, wheel, or floor-head housing is cracked, loose, or damaged and the sound follows that assembly in an approved check.
Connections and brush-drive arrangements are model-specific. Verify exact model fit and use qualified service for hidden wiring or drive access. - motor, fan, bearing, belt, drive, or electrical service
Consider these service categories only after the exact model's accessible air-path, filter, hose, brush, and attachment checks are clear but the body or drive still makes abnormal noise.
These are internal mechanical or electrical diagnoses, not user live-test parts. Qualified service must identify the fault and verify model compatibility.
When checks do not resolve it
Need a professional?
Arrange qualified Hoover appliance or vacuum service when the exact model's accessible dust, filter, hose, tool, brush, and external-fitting checks do not stop a new or worsening noise, when the body or floor-head drive grinds, or when the cleaner overheats or repeatedly shuts down. Stop immediately for smoke, sparks, burning odor, abnormal heat, a damaged cord or plug, or any need to open the cabinet or perform a live test.
Safety scope: The user may identify the model, switch off and unplug the vacuum, empty or replace a model-permitted bag, clean and dry accessible filters, inspect visible hoses and tools, and remove loose debris from an accessible brush roll as the exact guide permits. Qualified service must handle cabinet panels, motor, fan, bearings, belts or drives, controls, wiring, hidden blockages, and live electrical tests.
Common questions
FAQ
Why is my Hoover vacuum cleaner making a loud noise?
Describe whether it is a whistle or splutter with weak suction, or a rattle or vibration at the floor head. With power isolated, check the model-permitted dust container or bag, filters, hose and tools, then inspect the brush roll for hair, thread, a hard object, or damage. Hoover identifies blocked air paths and tangled or fractured brush rolls as causes to check. Persistent body noise or any burning smell needs service.
Can a blocked Hoover filter or hose make the vacuum splutter?
Yes. Hoover says blocked filters, hoses, pipes, or tools can make the cleaner noisier and may produce a spluttering safety-valve sound when airflow is restricted. Unplug the vacuum, clear only accessible model-permitted blockages, clean and fully dry washable filters, and stop if the sound remains.
Is some Hoover vacuum noise normal?
Some noise is expected: Hoover explains that the motor, fan, airflow, and canister vortex contribute to normal vacuum sound. A sudden change in volume or type, a rattle, vibration, loss of suction, overheating, or odor is not something to dismiss as normal.
How do I check a noisy Hoover brush roll?
Turn the vacuum off and disconnect it from the mains before examining the floor head. Follow the exact model guide to access the brush, remove only loose hair or thread, and look for a hard object, fracture, missing bristles, or a seized roll. Do not power an exposed brush or force a damaged one; use qualified service for the drive or bearings.
When should I stop using a noisy Hoover vacuum?
Stop and unplug it when the noise is accompanied by smoke, sparks, burning odor, abnormal heat, a hot or damaged cord, repeated shutdown, or a worsening grinding sound. Also stop when accessible filters, hoses, tools, and brush checks do not restore normal operation; motor, fan, bearing, belt, drive, control, and wiring diagnosis requires qualified service.
Read the exact guide
Official sources
- Vibrations and noisyHoover Advice Centre · Official Hoover UK Advice Centre page with an explicit list of applicable vacuum models; brush access and parts vary by model.
- What is the quietest Hoover?Hoover Home · Official Hoover UK product-information article; its sound explanation is general, while the featured H-ENERGY 500 performance figure is model-specific and is not used here.
- Product ManualsHoover · Official Hoover US manual portal listing multiple vacuum families and model identifiers; it is used to establish the need for exact-model instructions, not a universal repair procedure.
- NoisyHoover Advice Centre · Official Hoover Advice Centre page containing a vacuum-cleaner section and separate appliance sections; use only its vacuum airflow guidance here and match all access steps to the exact model.
Community feedback
Share a repair observation
Share a plain-text repair observation. Accepted observations are published automatically; this page may take a moment to update.