
On this page
Start here
Quick answer
Stop the cycle, close the water tap, and disconnect the machine from the mains only from a dry position if water is near the appliance. Do not touch a plug, socket, or controls while standing in water. Find when the leak appears and where the first wet point is: during filling at the rear hose, during washing at the door or detergent drawer, during draining at the waste hose or pump filter, or only when the household drain backs up. Hoover's user guidance covers inlet-hose connections, door glass, the detergent drawer, and the pump-filter seal, but model-specific manuals determine what can be opened. Dry the area, make one low-risk confirmation only after the leak is controlled, and call qualified service for a continuing leak, an internal leak, water near electrical parts, or a damaged hose, seal, pump, or cabinet.
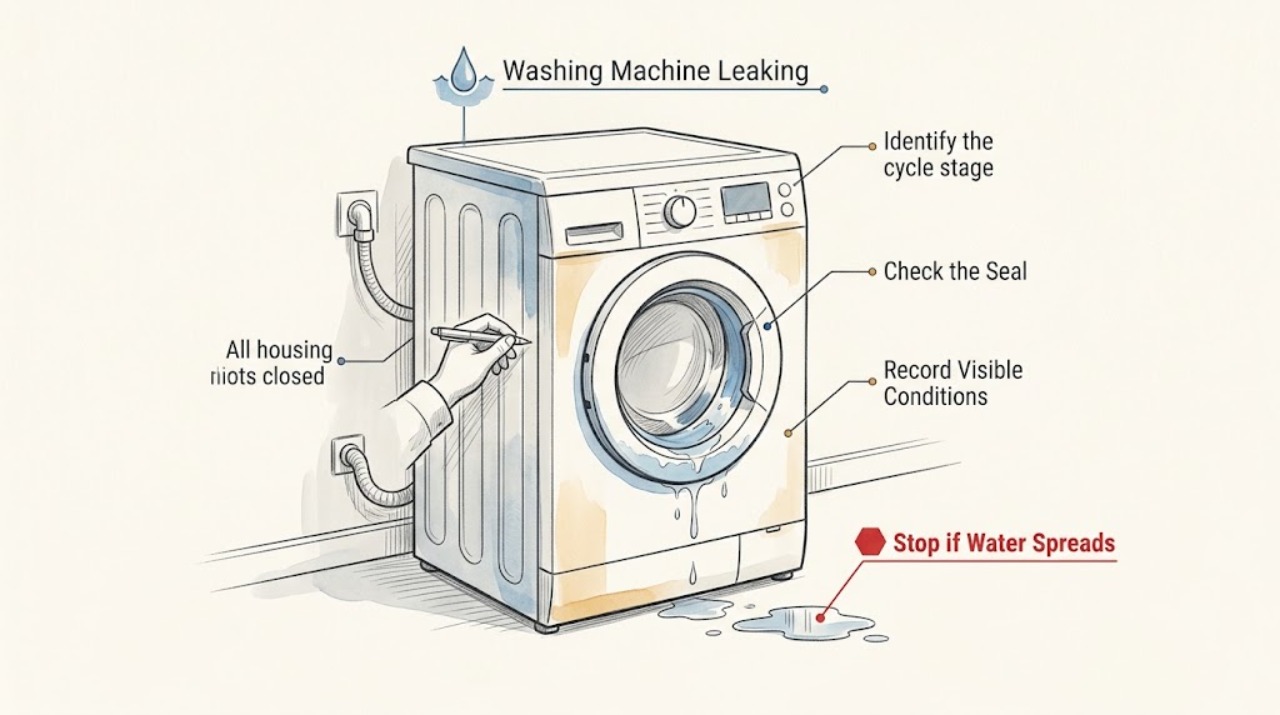
Work through in order
Diagnostic checks
Use only checks that match the exact appliance or system and its official guide.
-
Check 1
Stop the cycle, close the accessible water-supply tap, and move to a dry position before isolating mains power. Without pulling the machine forward or opening a cover, mop the floor and mark the first wet point. Record the full Hoover model or product code and whether water is still entering when the machine is off.
Expected result: Water continues to enter with the programme off, the leak stops when the tap is closed, the floor is wet only after a cycle, or the source cannot be reached safely.
Next step: Keep the tap closed and the machine isolated if water continues, the source is internal, or the area cannot be made dry. If it is safe to continue, use the cycle-stage checks below without moving the machine or touching wet electrical parts.
Why this matters
Why: Water entering while the machine is idle can indicate an inlet-valve or supply problem. A leak that stops when the tap is closed is still a plumbing or appliance fault, not a reason to run another test. The first wet point is more useful than the largest puddle.
-
Check 2
Identify the cycle stage at which the leak begins: filling, tumbling or washing, draining, spinning, or while the machine is idle. Watch from a dry position only and do not run a new cycle just to reproduce an active leak.
Expected result: The leak begins as water enters, appears at the front while the drum turns, starts when the pump drains, occurs at spin, or appears without a programme running.
Next step: Follow the matching branch: rear hose for fill, door or drawer for wash, pump filter and drain hose for drain, and household waste for a sink-connected installation. Stop if the leak is fast, hidden, or near electrical parts.
Why this matters
Why: The timing separates the inlet path from the door and detergent paths, and from the drain pump, waste connection, or internal hose. An idle leak is a reason to keep the tap closed and request service rather than test more cycles.
-
Check 3
For a leak during filling, inspect the visible cold-water hose at the rear and its tap connection without moving the machine. From a dry position, check for a loose connection, a kink, a damaged hose, or a missing or displaced sealing washer. Do not use tools to force a fitting and do not remove the hose while it is pressurized.
Expected result: Water beads at the tap or rear connection, the hose is kinked or visibly damaged, a washer is missing, or the connections are dry while water appears elsewhere.
Next step: Keep the tap closed and have a qualified person replace a damaged hose or seal. If the leak is only a safely accessible loose connection and the area is dry, hand-tighten only as the Hoover guidance permits; recheck without running a full cycle. Persistent leakage requires service.
Why this matters
Why: Hoover identifies both ends of the inlet hose and their sealing washers as likely places to find a fill leak. A dry inlet path shifts attention to the door, drawer, drain, or an internal leak rather than more tightening.
-
Check 4
For a front leak during washing, with power isolated and the door unlocked, inspect the visible door glass and door seal for lint, coins, detergent residue, a trapped garment, cuts, or a fold. Check that the load is not caught between the glass and seal, and wipe accessible glass residue with a soft cloth; do not pry or pull the seal from the cabinet.
Expected result: Debris or residue is present on the glass, a garment was trapped, the seal is torn or deformed, the door does not close evenly, or the front is dry while water comes from above.
Next step: Remove only loose visible debris and clean the accessible glass with a non-abrasive cloth. Keep the machine off if the seal is torn, the door will not close evenly, or the leak returns; arrange model-specific service.
Why this matters
Why: Hoover states that limescale, fibres, or debris on the glass can prevent a tight door seal and cause leakage during washing. A damaged seal or misaligned door is beyond a cleaning check and can worsen with another cycle.
-
Check 5
For water at the top front or around the detergent drawer, isolate power and inspect the drawer opening and visible outlet for hardened detergent, an overfilled compartment, or residue. Use only the drawer-removal and cleaning method in the exact Hoover manual; do not pour chemicals into the machine or force a stuck drawer.
Expected result: Residue blocks the drawer or outlet, foam is excessive, the leak rises over the drawer during fill, or the drawer and opening are clean while water comes from inside the cabinet.
Next step: Clean only the removable user-accessible drawer parts as the manual directs, dry the area, and use the correct detergent amount on the next approved test. If water still escapes, stop and arrange service; never open the cabinet to trace the internal path.
Why this matters
Why: Hoover lists a blocked soap drawer as a cause of water on the floor. Excess detergent can also create foam that escapes through the drawer or door, but a clean drawer with an internal leak needs service rather than more detergent experiments.
-
Check 6
For a leak during draining or spinning, keep the machine disconnected and inspect only the visible drain hose, its connection to the household waste pipe or sink, and the pump-filter flap area. Check for a kink, a hose that has pulled loose, a blocked household drain, or water emerging after the filter was recently cleaned. Do not open the filter with a full drum unless the model manual gives an emergency-drain procedure.
Expected result: The household waste backs up, the drain hose is kinked or loose, water is concentrated at the filter cap, the drum remains full, or the visible connections are dry.
Next step: Keep power and water isolated. Clear only an accessible household waste obstruction if it is safe and dry. If the model guide permits emergency draining, use a low container and towel; otherwise use service. Never loosen a filter or hose while water can reach electrical parts.
Why this matters
Why: Hoover links floor water to a blocked house drain and links a leak after filter refitting to a dirty or incorrectly seated filter seal. Water left in the drum can make opening the filter release a large volume, so the model procedure matters.
-
Check 7
If the pump filter was recently removed, follow the exact model instructions with mains power disconnected: drain residual water into a suitable container, clean the visible filter and seal surfaces, and refit the filter fully as specified. Do not use this step when the filter is inaccessible, the cabinet is wet, the seal is damaged, or the drum contains more water than the manual procedure can safely handle.
Expected result: The seal has lint or residue, the filter is not seated as the manual shows, the handle or cap cannot reach its specified position, the seal is damaged, or the area remains dry but leakage returns.
Next step: Refit only as the model guide directs and dry the area completely. Make at most one short, supervised confirmation if the machine is safe and the manual permits it; stop immediately if water reappears and arrange service for the filter, pump, or internal hose.
Why this matters
Why: A filter that is not clean or fully seated can leak after maintenance. A cut seal, damaged housing, or recurring leak after correct refitting points to a pump or internal drain fault rather than a user adjustment.
-
Check 8
After the water source is controlled and all visible areas are dry, make one short confirmation only if the model manual permits it and no safety warning is present. Observe from a dry position and stop at the first drip, unusual noise, electrical smell, smoke, or water near the plug, socket, or controls. Do not repeatedly run cycles to find an intermittent leak.
Expected result: The machine remains dry, the same leak returns at a specific stage, the leak is hidden inside the cabinet, the breaker trips, or any electrical or heat warning appears.
Next step: Close the tap, isolate power from a dry position, and arrange qualified Hoover appliance service for any returning or hidden leak. Use an electrician as well when a breaker, socket, cord, or house circuit is involved.
Why this matters
Why: A repeatable stage-specific leak gives a technician useful evidence, but an internal leak or electrical symptom is not a safe user repair. Repeated testing increases water and electrical risk and can spread damage.
Use your observations
Decision map
Find the observation that best matches what you see, then follow the next safe action.
-
PATH 01Next step
What you see
Water appears at the rear while the machine fills.
Do this next
Close the tap, keep the area dry, and check only the accessible connection as Hoover directs. Replace a damaged hose or seal through qualified service and do not run the machine with a continuing drip.
Why this path and its safety boundary
Why it matters: The visible inlet hose, tap connection, or sealing washer is the first place to inspect.
-
PATH 02Next step
What you see
Water comes from the door during tumbling or washing.
Do this next
Isolate power, remove only loose visible debris, and clean accessible glass with a soft cloth. A torn seal, uneven door, or returning leak needs service; do not pull the seal out.
Why this path and its safety boundary
Why it matters: Door glass residue, a trapped garment, an obstructed seal, an overloaded load, or a damaged gasket is possible.
-
PATH 03Next step
What you see
Water appears around the detergent drawer or upper front.
Do this next
Clean only the removable drawer parts according to the exact model manual and use the correct detergent amount. Stop and request service if the drawer is clean or the leak persists.
Why this path and its safety boundary
Why it matters: A blocked drawer outlet, excess foam, or an internal fill path may be involved.
-
PATH 04Next step
What you see
Water appears at the bottom during drain or spin, especially after filter cleaning.
Do this next
Keep the machine disconnected. Use the model's safe drain procedure, inspect only dry accessible connections, and refit a filter only as specified. Use service for a damaged seal, full drum, internal leak, or recurring water.
Why this path and its safety boundary
Why it matters: A pump-filter seal, drain hose, pump path, or household waste connection may be leaking or blocked.
-
PATH 05Next step
What you see
The sink or household waste backs up when the washer drains.
Do this next
Keep the washer off and address the accessible household drain only if it can be done without wet electrical contact. Have a plumber or appliance technician check the connection if the backup returns.
Why this path and its safety boundary
Why it matters: The appliance may be discharging into a restricted household drain rather than leaking from its own hose.
-
PATH 06Next step
What you see
Water appears while the machine is idle or continues after the programme is stopped.
Do this next
Keep the water tap closed and power isolated. Do not run another cycle or open the cabinet; arrange qualified service and provide the model, time, and wet location.
Why this path and its safety boundary
Why it matters: An inlet valve, supply hose, or internal water path may be allowing water through.
-
PATH 07Next step
What you see
Water reaches a plug, socket, control, motor area, or other electrical part; the breaker trips; or there is smoke, burning odor, sparking, or abnormal heat.
Do this next
Do not touch wet electrical parts. Isolate power only from a dry, safe position, close the water tap, leave the machine off, and obtain qualified appliance or electrical help. Use emergency assistance for active smoke or fire.
Why this path and its safety boundary
Why it matters: This is an electrical, fire, or shock hazard and not a normal leak diagnosis.
Helpful context
Understand the symptom
Make the leak safe before diagnosing it
Turn the programme off and close the water supply tap. If the floor or appliance is wet, do not reach for the plug or controls while standing in water; isolate power only from a dry, safe position. Mop up enough water to identify the first wet point, keep children and pets away, and do not restart a machine that is actively leaking. Record the full product code because Hoover procedures and access points vary by model.
The stage of the cycle is the main clue
A leak at fill usually points to the tap or inlet hose. A front leak during washing points toward the door glass, seal, load, or detergent drawer. A leak during drain or spin points toward the drain hose, pump filter, household waste connection, or an internal pump path. If water appears while the machine is idle, leave the tap closed and arrange service rather than running another cycle.
Safety boundary
Stop conditions
- Close the water tap and stop the programme for an active leak; do not keep running cycles to reproduce or locate it.
- Do not touch a plug, socket, control, or appliance surface while standing in water. Isolate power only from a dry, safe position.
- Do not move the machine, open panels, probe live wiring, or remove an internal hose, pump, valve, or door seal as a user check.
- Do not loosen a pressurized inlet hose or open a pump filter with a full drum unless the exact model manual provides a safe emergency-drain procedure.
- Stop for smoke, burning or electrical odor, sparking, abnormal heat, visible damage, water near electrical parts, or a breaker that trips again; leave the machine off and obtain qualified help.
Only after diagnosis
Potential parts
- inlet hose or sealing washer
Consider this only after a dry inspection confirms that the leak begins at the tap or rear inlet connection and a qualified person identifies a damaged hose or missing or failed washer.
Confirm the complete Hoover model or product code and the manufacturer's fit information before ordering; do not infer fit from a generic leak. - door gasket
Consider this only when the door glass is clean but a qualified diagnosis confirms a torn, deformed, or non-sealing gasket.
Verify the exact model and have replacement performed according to the model service instructions; similar-looking seals may not fit. - pump filter seal or drain pump
Consider this only after a qualified diagnosis finds a correctly refitted filter still leaking or an internal drain pump fault after the hose and household waste path are clear.
Confirm model and product-code compatibility before ordering; water removal and electrical work require safe isolation and qualified service.
When checks do not resolve it
Need a professional?
Arrange qualified Hoover appliance service when the leak returns after a safe hose, door-glass, drawer, drain, or filter-seal check; when water comes from inside the cabinet; when the door seal, hose, filter housing, pump, or cabinet is damaged; when the machine leaks while idle; or when the source cannot be made safe. Contact a plumber for a household waste backup and an electrician when a breaker, socket, cord, or circuit is involved. Stop immediately for water near electrical parts, smoke, burning odor, sparking, abnormal heat, or a repeated breaker trip.
Have this ready
- Provide the complete Hoover model or product code, the cycle stage, first wet location, whether the leak stops when the water tap is closed, whether the filter or hose was recently handled, the amount and appearance of water, and any breaker trip, odor, smoke, heat, or visible damage.
Common questions
FAQ
What should I do first when my Hoover washing machine is leaking?
Stop the cycle, close the water tap, and get to a dry position before isolating power. Mop up enough water to find the first wet point, then identify whether the leak occurs during fill, wash, drain, spin, or while idle.
Why is my Hoover washer leaking from the back?
Check the accessible cold-water hose connection at the machine and at the tap, including the sealing washers, with the water tap closed and mains power disconnected from a dry position. A damaged hose or continuing drip needs service.
Why is water coming from the Hoover washing-machine door?
Lint, limescale, fibres, a trapped item, or a damaged seal can prevent the door from sealing. With power isolated, remove only loose debris and clean accessible glass with a soft cloth. Do not use the machine if the seal is torn or the leak returns.
What if the pump filter leaks after I cleaned it?
Hoover says a filter seal can leak after refitting if its sealing surfaces are dirty or the filter is not seated as specified. Follow the exact model emergency-drain and refitting procedure with mains power disconnected; stop if the drum is full, the seal is damaged, or water reaches electrical parts.
Can a blocked household drain make a Hoover washer look like it is leaking?
Yes. If water appears when the machine drains and the sink or waste pipe backs up, the household waste arrangement may be restricted. Keep the washer off and address the drain safely or call a plumber; do not keep running cycles.
When is a Hoover washing-machine leak unsafe to troubleshoot?
Stop for water near a plug, socket, controls, or other electrical parts, as well as smoke, burning odor, sparking, abnormal heat, visible damage, or a breaker that trips again. Isolate power only from a dry, safe position, close the water tap, and obtain qualified help.
Read the exact guide
Official sources
- Check the Water Hose Is Not LeakingHoover Advice Centre · Hoover models covered by the page when water leaks at the rear inlet hose or tap connection
- Washing Machine Appliance Advice CentreHoover Advice Centre · Hoover washing-machine guide index for leak, drain, detergent, water-supply, and product-code checks
- Clean the Filter SealHoover Advice Centre · Hoover models covered by the page when a leak starts after pump-filter refitting
- What to Check if Your Washer Stops Full of Water - Check the Pump Filter or Drain ConnectionHoover Advice Centre · Hoover washers that retain water or leak during drain and spin
- Leaking - Hoover Advice CentreHoover Advice Centre · Hoover washing machines and washer dryers with water on the floor or a visible leak
- Make Sure the Door Glass Is CleanHoover Advice Centre · Hoover front-loading models covered by the page when water leaks at the door during washing
Community feedback
Share a repair observation
Share a plain-text repair observation. Accepted observations are published automatically; this page may take a moment to update.