
On this page
Start here
Quick answer
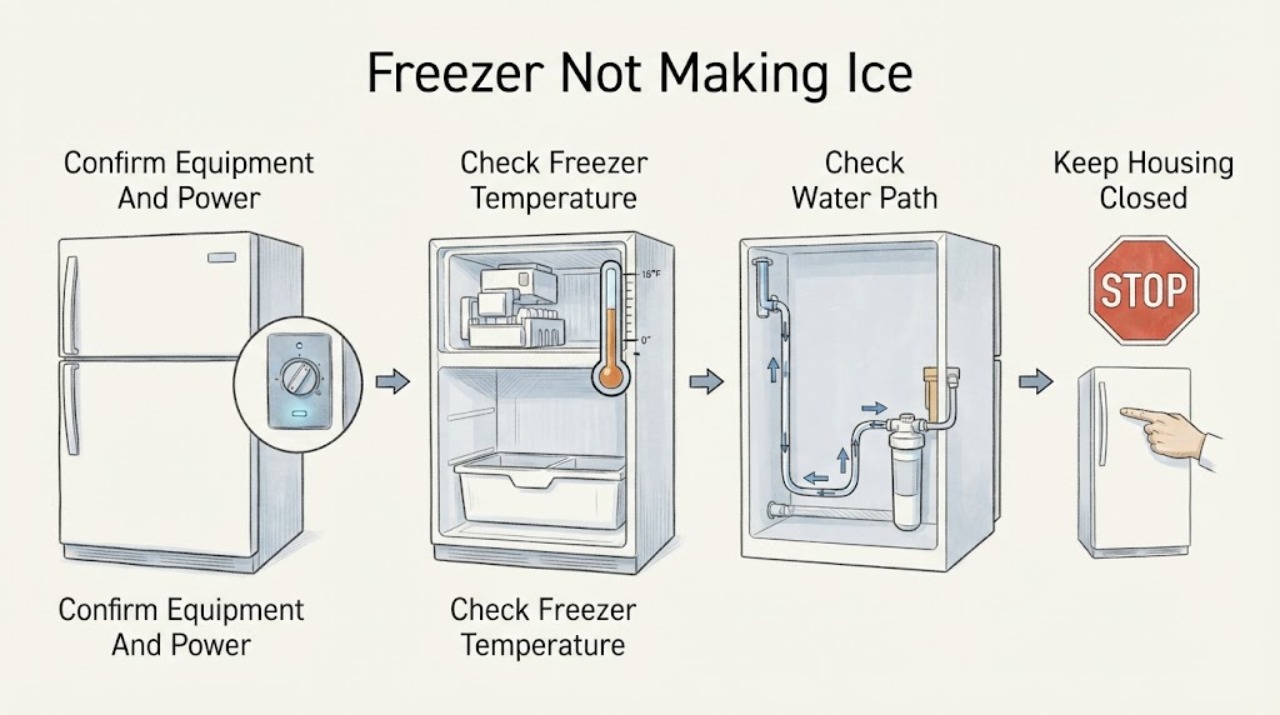
First confirm that the Hotpoint freezer model actually has an installed icemaker and that its control is On; some models require a separately installed kit. Then check that the freezer is cold enough, the water supply and any filter are flowing, and the ice bin or feeler arm is not blocked by clumped ice. GE Appliances guidance for this appliance family uses about 0°F for the freezer and says an icemaker mold needs to reach about 16°F before a cycle can start, but the exact model manual controls. A newly installed icemaker may need time to cool and purge air from its water line. Do not force the ejector, handle a warm mold, remove panels, or work on live wiring. If the freezer is warm, water leaks, the supply is not safe to inspect, or the icemaker still does not cycle after these non-invasive checks, keep food and appliance safety in mind and arrange qualified service.
Before you begin
Safety first
- A homeowner may check controls, temperature display, accessible bin ice, and visible external water conditions only when safe. Internal water valves, icemaker modules, sensors, controls, wiring, and sealed-system work require qualified service.
Work through in order
Diagnostic checks
Use only checks that match the exact appliance or system and its official guide.
-
Check 1
Use the exact Hotpoint model manual to confirm that an automatic icemaker is installed or that the correct kit is present, then check its visible On/Off control without removing covers.
Expected result: Record whether an icemaker assembly is present, whether its control shows On, whether the feeler arm is in the operating position described by the manual, and whether the freezer has interior power.
Next step: Enable the control only as the manual directs. If the appliance has no installed icemaker, use the manual or qualified service to confirm the correct model-specific installation rather than improvising.
Stop if: Stop if the control, wiring, or assembly is damaged, wet, burnt, or inaccessible without removing a panel.
Why this matters
Why: An absent optional assembly or an Off control explains zero production without a failed part. A powered, enabled icemaker requires temperature, water, and blockage checks next.
-
Check 2
Check the freezer temperature using the appliance display or a suitable thermometer positioned according to the model instructions; do not block vents while checking.
Expected result: Note whether the freezer is near the model's recommended setting, whether food is soft or frost is abnormal, and whether the icemaker mold is cold rather than warm.
Next step: Follow the model guide for a small temperature adjustment and allow the compartment to stabilize. If the freezer cannot hold temperature, has heavy frost, or is warm enough to threaten food, stop relying on the icemaker and arrange appliance service.
Stop if: Stop if the cabinet is warming rapidly, there is a refrigerant-like odor, water is pooling, or the temperature problem requires sealed-system or electrical access.
Why this matters
Why: A freezer that is too warm can delay or prevent ice formation even when the icemaker is On. GE Appliances cites about 0°F as a recommended freezer setting and about 16°F as the approximate mold threshold for starting a cycle.
-
Check 3
If the model has a water dispenser or filter, check for normal dispenser flow, a correctly seated filter, and a visibly kinked external supply line without disconnecting plumbing.
Expected result: Record whether dispenser flow is weak or absent, the filter is newly installed or clogged, the supply line is kinked, or the icemaker has no water while the rest of the appliance is normal.
Next step: Replace or reseat the filter only as the model manual directs, and restore a safe water connection without opening a pressurized fitting. Arrange service for a leak, valve, hidden blockage, or water path that cannot be checked safely.
Stop if: Stop for leaking tubing, a wet electrical area, a shutoff or connection that will not move normally, or any need to pull the refrigerator out or open a panel.
Why this matters
Why: Restricted water flow can prevent the mold from filling. GE Appliances specifically identifies clogged filters as a flow restriction; no water at multiple outlets points beyond the icemaker alone.
-
Check 4
With the icemaker Off if the manual requires it, inspect the ice bin, feeler arm, and ejector area from normal access for clumped cubes or a visible obstruction; keep hands away from a warm mold.
Expected result: Note whether the bin is overfilled or frozen together, the feeler arm is held up, or a cube is stopping the ejector rake; also note whether the mold is warm or damaged.
Next step: Clear only loose, accessible ice using the manual's method and return the bin and feeler arm to their normal positions. Seek service if the obstruction is frozen in place, the mold is warm, or the mechanism does not move as designed.
Stop if: Do not pry, chip with a sharp object, pour hot water into the assembly, or reach into moving or energized parts.
Why this matters
Why: A stuck cube or bin can stop production even when temperature and water are correct. A warm mold, broken rake, or recurring jam points to a component or temperature problem rather than a simple blockage.
-
Check 5
If the icemaker or refrigerator was newly installed, leave it powered and undisturbed for the model-specified startup period while monitoring for a safe first fill.
Expected result: Record the installation timing, whether the freezer reaches its target, whether the first fill is small, and whether subsequent cycles add water and release cubes.
Next step: Follow the owner's manual for the startup sequence and wait only within that documented period. If there is still no water or cycle afterward, use the water-path and service branches.
Stop if: Stop for water leakage, a warm freezer, burning smell, repeated breaker operation, or any unsafe installation condition.
Why this matters
Why: GE Appliances says a new icemaker may need up to 24 hours to cool and may purge air through several cycles, so no immediate ice does not prove a failed part.
-
Check 6
After the non-invasive checks, keep the icemaker Off if necessary and prepare a service handoff instead of removing covers or testing live components.
Expected result: Document the exact model and serial information, installed-versus-optional icemaker status, freezer temperature, water-flow result, filter history, bin condition, installation date, and any leak or noise.
Next step: Arrange qualified appliance service and provide the notes and safe photographs. Keep the freezer operating only if it maintains a safe temperature and has no leak or electrical warning.
Stop if: Do not bypass the feeler arm, jumper the icemaker, remove panels, test live wiring, or replace a valve or control from the symptom alone.
Why this matters
Why: The pattern distinguishes a setup or supply issue from a temperature-control, water-valve, icemaker-module, ejector, or wiring fault that needs a technician.
Use your observations
Decision map
Find the observation that best matches what you see, then follow the next safe action.
-
PATH 01Safety boundary
What you see
The Hotpoint freezer has no automatic icemaker installed or the model requires an optional kit that is not present.
Do this next
Use the exact model documentation to confirm the intended ice-making setup; do not treat the freezer as failed.
Why this path and its safety boundary
Safety stop: Do not install an unverified kit or modify wiring without model-specific installation instructions and qualified help.
-
PATH 02Safety boundary
What you see
The icemaker is Off or was just installed and has not completed its documented startup period.
Do this next
Enable it according to the manual or allow the specified cooling and air-purge time, then check for a first fill.
Why this path and its safety boundary
Safety stop: Stop for leaks, warming, electrical symptoms, or any unsafe installation condition.
-
PATH 03Safety boundary
What you see
The freezer is above its model target, the mold is warm, or food is soft.
Do this next
Treat temperature control or airflow as the primary branch, follow the manual's safe setting checks, and arrange service if temperature does not recover.
Why this path and its safety boundary
Safety stop: Do not keep resetting the icemaker or rely on new ice while the freezer cannot hold temperature.
-
PATH 04Safety boundary
What you see
The icemaker is On and cold, but dispenser flow is weak or the filter or supply path is visibly restricted.
Do this next
Reseat or replace the filter and correct only an accessible external kink as the model guide allows; seek service for leaks or hidden restrictions.
Why this path and its safety boundary
Safety stop: Do not disconnect water fittings, open the valve area, or operate a wet appliance.
-
PATH 05Safety boundary
What you see
Clumped cubes or a visible obstruction holds the feeler arm or ejector.
Do this next
Clear only accessible loose ice using the manual's method and restore the bin and arm to their normal positions.
Why this path and its safety boundary
Safety stop: Do not force the rake, chip the mold, or handle a warm assembly.
-
PATH 06Safety boundary
What you see
The freezer is cold, the icemaker is On, water is available, and the bin is clear but no cycle or fill occurs.
Do this next
Keep the appliance safe and arrange qualified service for diagnosis of the icemaker, valve, sensor, control, or wiring.
Why this path and its safety boundary
Safety stop: Do not jumper controls, bypass safety features, or remove panels to force a cycle.
Helpful context
Understand the symptom
Confirm that the freezer is equipped for automatic ice
Hotpoint freezer compartments are not all configured the same way: some models use an installed icemaker while others are only ready for an optional kit or use manual ice trays. Use the model and serial information to open the matching owner's manual. Find the icemaker's On/Off control, switch, or feeler arm and confirm that it is enabled; do not assume a freezer compartment will produce ice without the proper assembly.
Temperature and water must both support a cycle
An icemaker cannot fill and freeze normally if the freezer is too warm or water cannot reach the fill path. GE Appliances recommends about 0°F for the freezer and says the mold must reach about 16°F before a cycle starts. A filter that is clogged, incorrectly seated, or overdue can restrict flow. Use the model instructions for temperature adjustment and filter handling; do not disconnect a pressurized water line to test it.
Look for a blocked bin or ejector without forcing it
Clumped cubes in the ice bin can hold the feeler arm in the stop position, and a cube caught in the ejector can keep the cycle from completing. Inspect from ordinary access only after checking the manual and keeping hands clear of the mold and moving parts. Never pry the rake, chip ice with a sharp tool, or handle the mold if it may be hot. A repeated jam after the bin is cleared is a service symptom.
Allow a new installation time to start
After a new icemaker or refrigerator installation, the freezer and mold may need time to become cold enough, and air in the water line may be purged over several cycles. GE Appliances says a newly installed icemaker can take up to 24 hours to get cold enough and that the first fill can be small while air is cleared. If that period has passed without a fill or cycle, return to the power, temperature, and water checks rather than repeatedly resetting an unknown fault.
Only after diagnosis
Potential parts
- water filter or filter bypass component
Consider only when the model uses a filter and flow is weak or stops after the filter is installed, while temperature and power are normal.
Confirm the exact Hotpoint model and the owner's manual before selecting a filter or bypass component. - water inlet valve
Consider only after a qualified diagnosis confirms that the icemaker is cold and enabled but the valve does not provide water with a safe supply path.
Water and electrical connections require model-specific fit and qualified service; do not replace the valve from no-ice symptoms alone. - icemaker assembly or ejector module
Consider only when temperature, power, water availability, and bin clearance are verified but the assembly does not cycle or repeatedly jams.
Verify whether the model uses an installed or optional icemaker and confirm the exact model before any replacement decision. - temperature sensor or control
Consider only when the freezer cannot hold its target temperature or the icemaker remains warm despite normal airflow and settings.
A technician must identify the failed control or sensor and confirm model compatibility; sealed-system work is outside ordinary checks.
When checks do not resolve it
Need a professional?
Arrange qualified appliance service if the freezer is warm, a water line leaks, the icemaker remains cold and enabled but never fills or cycles after the documented startup period, the ejector is jammed or damaged, the appliance has electrical symptoms, or diagnosis would require panel removal or live testing.
Safety scope: A homeowner may check controls, temperature display, accessible bin ice, and visible external water conditions only when safe. Internal water valves, icemaker modules, sensors, controls, wiring, and sealed-system work require qualified service.
Have this ready
- Provide the exact Hotpoint model and serial information, whether the icemaker is installed or optional, freezer temperature, water-flow and filter result, bin and feeler-arm condition, installation date, and any leak, noise, or warning.
Common questions
FAQ
Why is my Hotpoint freezer not making ice even though it is cold?
Confirm that the model has an installed automatic icemaker and that its control is On. Then check water flow, filter seating, clumped ice in the bin, and the feeler arm. If it remains cold and enabled but never fills or cycles, arrange service rather than bypassing the control.
What temperature should a Hotpoint freezer be for ice making?
GE Appliances uses about 0°F as a recommended freezer setting and says the icemaker mold must reach about 16°F before a cycle can begin. Use the exact Hotpoint model manual and an actual temperature reading because controls and construction vary.
Could the water filter stop the freezer from making ice?
Yes. GE Appliances says a clogged water filter can restrict flow. Check the model's filter instructions and dispenser flow if fitted; do not disconnect a water line or open the valve area as a test.
How long should a new Hotpoint icemaker take to make ice?
GE Appliances says a newly installed icemaker may take up to 24 hours to get cold enough, and the water line may purge air over several cycles. Follow the model manual and stop for leaks or a warm freezer.
Can stuck ice in the bin stop production?
Yes. Clumped cubes can hold the feeler arm in the stop position, and a cube in the ejector can prevent a cycle from completing. Clear only loose, accessible ice as the manual allows; do not pry the mechanism or handle a warm mold.
Read the exact guide
Official sources
- Refrigerator - Icemaker Not Producing IceGE Appliances · Use for Hotpoint models supported through the GE Appliances service family; confirm the exact Hotpoint manual for controls and fit.
- Hotpoint® 17.5 Cu. Ft. Recessed Handle Top-Freezer RefrigeratorGE Appliances · This is one Hotpoint top-freezer model page, not a claim about every Hotpoint freezer; use it only to illustrate that configuration is model-specific.
- Hotpoint SupportHotpoint · Hotpoint support page for appliance registration, documentation, and service; regional coverage and model support vary.
- Refrigerator - New Icemaker Not Producing IceGE Appliances · Use for a newly installed Hotpoint icemaker only when the model is supported by the GE Appliances family; follow the exact owner's manual.
Community feedback
Share a repair observation
Share a plain-text repair observation. Accepted observations are published automatically; this page may take a moment to update.