
On this page
Start here
Quick answer
If a Hotpoint oven will not start, first decide whether the control panel has power. A blank display or dead oven light points to the supply, while a powered display usually calls for a clock, control-lock, delay, function, temperature, Start-button, door-latch or self-clean check. Use the exact model manual for button sequences. Do not continue testing if you smell unburned gas, hear delayed ignition or a bang, see smoke or arcing, feel abnormal heat, or the circuit trips again; leave the appliance off and arrange qualified service.
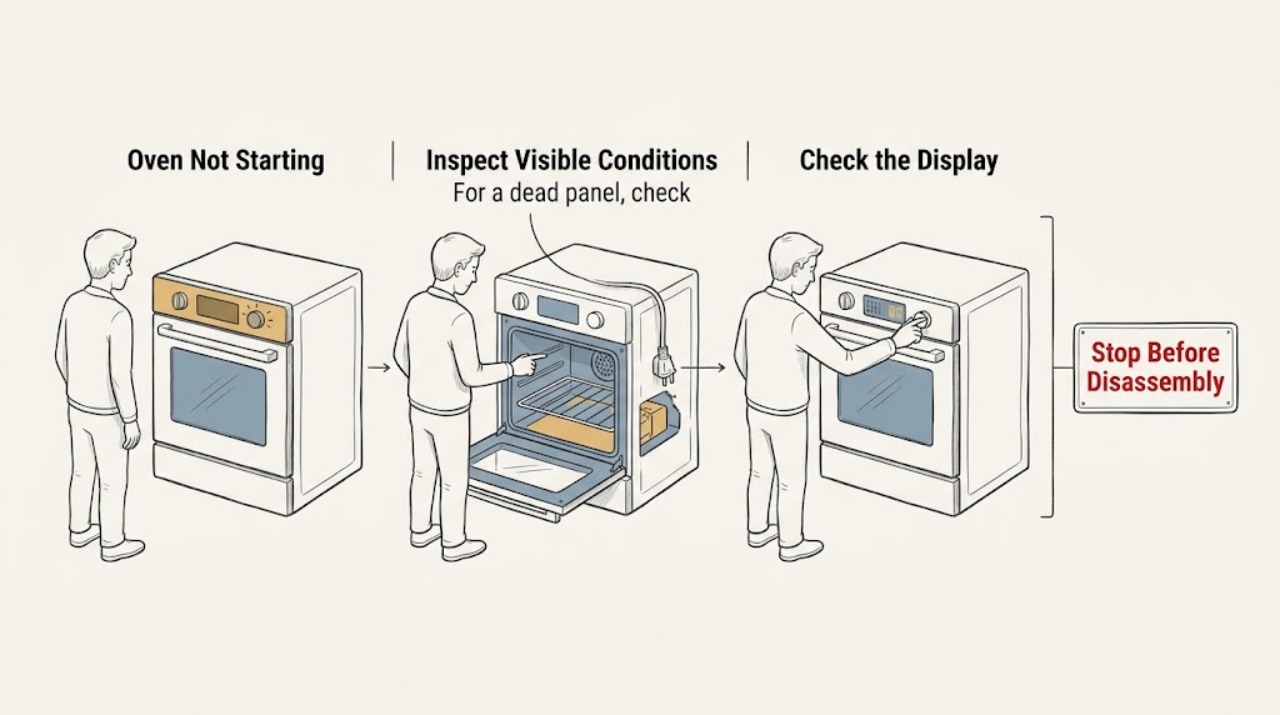
Work through in order
Diagnostic checks
Use only checks that match the exact appliance or system and its official guide.
-
Check 1
With the oven off, look at the control display and open the door only if it is safe to do so; check whether the interior light responds without touching any wiring.
Expected result: The display and light are either both dead, or at least one responds.
Next step: If both are dead, continue with the supply check. If the display responds, continue with the control-state check.
Why this matters
Why: No display and no light suggest the oven is not receiving usable power; a responsive display shifts the diagnosis to controls, latch, ignition or heating.
-
Check 2
For a dead panel, check the appliance plug and the household fuse or breaker from a dry, safe position; do not remove an oven cover or reach into the appliance.
Expected result: The plug is loose, a breaker or fuse is off, or the supply appears normal.
Next step: Restore a clearly tripped device once only if there is no smell, smoke, moisture or visible damage. If it trips again or the supply is normal, stop and arrange service.
Why this matters
Why: A loose connection or tripped protective device can explain a blank oven. A breaker that trips again indicates a fault rather than a successful reset.
-
Check 3
If the display has power, set the clock using the exact Hotpoint model instructions, check that the control lock is off, and confirm the display has not been intentionally turned off.
Expected result: The clock was blank or incorrect, a lock indicator was present, or the display and controls respond after the lock is cleared by the model-approved sequence.
Next step: After the clock and lock are corrected, make one normal start attempt. Do not guess a button combination if the model manual does not specify it.
Why this matters
Why: Some electronic ovens inhibit cooking until the clock is set, and a control lock can make a healthy panel appear unresponsive.
-
Check 4
Select Bake or Broil and a temperature, then press Start when the model uses electronic controls; for knobs, confirm the function and temperature knobs are in the intended positions and were replaced correctly after cleaning.
Expected result: The oven accepts the function and temperature and begins its normal start sequence, or the controls still do nothing.
Next step: If the sequence starts, allow the normal preheat period. If it does not, continue to the delay and special-mode check rather than repeating random key presses.
Why this matters
Why: A missing Start command, an unset function, or a misplaced knob can mimic a failed oven. No response after a correct sequence points beyond a simple setting.
-
Check 5
Check the display and the model manual for Delay Start, Sabbath mode, a timer-only state, or another special mode that can inhibit an immediate start; cancel it only through the documented controls.
Expected result: A delayed or special-mode indicator is present, or no such mode is shown.
Next step: Cancel the mode using the exact manual sequence and make one test start. If the indicator will not clear, record it and call for service.
Why this matters
Why: The oven may be waiting for a programmed time or following special control behavior instead of responding like a standard Bake cycle.
-
Check 6
With the oven cool and controls off, look at the door and self-clean latch from the outside; confirm the door is fully closed and the latch is in its normal unlocked position when no self-clean cycle is active.
Expected result: The latch is visibly locked or obstructed, the door is damaged or misaligned, or the door closes normally.
Next step: Allow a hot oven to cool and follow the manual's release instructions. Never force the door, bypass the interlock, or dismantle the latch; obtain service for a jammed or damaged door.
Why this matters
Why: A self-clean latch that remains locked can inhibit ordinary oven operation. Damage or misalignment can prevent the safety interlock from proving closed.
-
Check 7
For a gas Hotpoint oven only, after confirming the correct model setting and with the door closed, observe the normal ignition attempt from the approved viewing position; do not manually light the burner or adjust gas components.
Expected result: There is a normal ignition sequence without odor, or there is no ignition, a delayed pop, an unstable or unusual flame, or an unburned-gas smell.
Next step: For any gas odor, delayed ignition, bang or abnormal flame, stop, avoid switches and flames, leave the area, and contact the gas supplier or emergency service from outside. Otherwise, use qualified appliance service rather than opening the gas path.
Why this matters
Why: No ignition can require qualified diagnosis of the ignition or gas-control system. Odor, delayed ignition or abnormal flame creates an immediate safety boundary and is not a retry condition.
-
Check 8
For an electric Hotpoint oven only, after a correct safe start attempt, observe from outside whether the bake or broil element shows normal heating; never touch it, remove panels, or inspect inside while energized.
Expected result: The element heats normally, remains cold, or shows a crack, break, arcing or smoke.
Next step: Switch the oven off and isolate power only if it can be done without approaching a hazard. Arrange qualified service for a cold, damaged or arcing element or any repeated fault.
Why this matters
Why: A cold element after valid controls can indicate a heating, sensor or control fault. A crack, arc or smoke is a stop condition, not a part-identification exercise.
Use your observations
Decision map
Find the observation that best matches what you see, then follow the next safe action.
-
PATH 01Safety boundary
What you see
The display and interior light are both dead.
Do this next
Check the safe external supply path and one-time breaker or fuse reset; stop if it trips again or any hazard is present.
Why this path and its safety boundary
Safety stop: Treat the powered-panel path as a controls, latch, ignition or heating diagnosis.
-
PATH 02Safety boundary
What you see
The house breaker or fuse is off.
Do this next
Restore it once only when there is no moisture, smell, smoke or visible damage, then test normally.
Why this path and its safety boundary
Safety stop: Do not keep resetting; a normal supply with a dead panel needs service diagnosis.
-
PATH 03Safety boundary
What you see
The powered display shows an unset clock or a control-lock indicator.
Do this next
Set the clock and clear the lock using the exact model manual sequence, then make one start attempt.
Why this path and its safety boundary
Safety stop: Continue to the normal function, temperature and Start sequence.
-
PATH 04Safety boundary
What you see
Bake or Broil and a temperature were selected but Start was not pressed, or a control knob is misplaced.
Do this next
Correct the controls and make one normal start attempt.
Why this path and its safety boundary
Safety stop: Continue to delay, Sabbath and other special-mode checks.
-
PATH 05Safety boundary
What you see
Delay Start, Sabbath mode or another special mode is active.
Do this next
Cancel it only with the documented model controls; arrange service if the mode will not clear.
Why this path and its safety boundary
Safety stop: Continue to inspect the external door and self-clean latch state.
-
PATH 06Safety boundary
What you see
The self-clean latch is locked while no self-clean cycle is intended, or the door is damaged or misaligned.
Do this next
Let the oven cool and follow the manual release guidance; never force or bypass the latch.
Why this path and its safety boundary
Safety stop: Continue to the appliance-type-specific ignition or heating observation.
-
PATH 07Safety boundary
What you see
A gas oven produces unburned-gas odor, delayed ignition, a bang or abnormal flame.
Do this next
Stop immediately, avoid switches and flames, leave the area, and contact the gas supplier or emergency service from outside.
Why this path and its safety boundary
Safety stop: Do not open the gas path; arrange qualified service if ignition still fails.
-
PATH 08Safety boundary
What you see
An electric oven element is cold after a valid start or shows damage, arcing or smoke.
Do this next
Turn it off and arrange qualified service; repeated resets or energized inspection are unsafe.
Why this path and its safety boundary
Safety stop: If the oven still will not start, record the model, symptoms and any code for Hotpoint service.
Helpful context
Understand the symptom
Start with the safety decision
A no-start symptom can be a simple control state, a lost supply, or a fault in the latch, ignition or heating circuit. Keep the oven switched off while you identify the symptom. A cooling fan that runs or cycles after shutdown can be normal on some models; it is not, by itself, evidence that the oven is ready to start again. Never defeat a door lock, light a gas burner by hand, remove a cover, or work on energized wiring.
What the result tells you
A dead display and no interior light should be treated as a supply problem. A display that responds but will not heat points toward an unset clock, lock, delayed or special mode, incomplete start sequence, locked self-clean door, or a heating and ignition fault. Record the exact model and any alternating code before contacting Hotpoint, because control sequences and fault meanings vary by model.
When to stop
Stop immediately for gas odor, delayed ignition, a bang, yellow or unstable flame, smoke, burning insulation, visible arcing, a damaged cord or door, abnormal heat at the controls, or a breaker that trips again. Do not repeatedly reset a fault. Follow the model manual and Hotpoint safety notices, then use qualified service when the low-risk checks do not restore operation.
Only after diagnosis
Potential parts
- door latch or door-lock assembly
Only consider this class if the door remains locked or the safety interlock does not prove a properly closed door after the oven is cool and the manual release steps fail.
Confirm the complete Hotpoint model identifier and manufacturer fit information before ordering; do not bypass the interlock. - electric bake or broil element
Only consider this class if a qualified diagnosis confirms the correct electric heating circuit is not heating and the element is damaged or open.
Confirm model-specific fitment and electrical specifications; replacement requires safe isolation and may need qualified service. - oven igniter or ignition control
Only consider this class after a qualified technician confirms a gas oven has a genuine ignition fault without an active gas-safety hazard.
Confirm the exact model and gas configuration; never substitute a part or open the gas path based only on a no-start symptom.
When checks do not resolve it
Need a professional?
Call qualified appliance service when the external power and documented control checks do not restore operation, when a door latch remains locked, when an element or ignition system fails, when a fault code returns, or when a breaker trips again. Stop immediately for unburned-gas odor, delayed ignition, a bang, abnormal flame, smoke, arcing, burning insulation, abnormal heat, water near electrical parts, a damaged cord or door, or any repeated protective-device trip. For gas odor, avoid electrical switches and open flames, leave the area, and contact the gas supplier or emergency service from outside. Check Hotpoint safety notices and the exact model manual before any further use.
Common questions
FAQ
Why is my Hotpoint oven display on but the oven will not start?
Check the clock, control lock, delay or special mode, then select the cooking function and temperature and press Start as the model requires. If the correct sequence still produces no response, arrange service.
What should I check if the Hotpoint oven display is blank?
From a dry, safe position, check the external plug and the household breaker or fuse. Restore a clearly tripped device only once when there is no hazard; a repeat trip or normal supply with a blank panel needs service.
Can an unset clock stop a Hotpoint oven from starting?
Some electronic oven models inhibit cooking until the clock is set. Use the exact Hotpoint model manual rather than guessing the button sequence.
Why will the oven not start after self-cleaning?
The oven may still be hot or the self-clean latch may not have returned to its normal unlocked position. Let it cool and follow the model manual; never force or bypass the latch.
What if my Hotpoint gas oven smells like gas when I try to start it?
Stop immediately. Do not touch electrical switches or use flames, leave the area, and contact the gas supplier or emergency service from outside. Do not retry ignition or open the gas path.
What if the electric element does not heat?
After confirming the documented controls, switch the oven off and arrange qualified service for a cold, damaged or arcing element. Do not inspect energized wiring or remove panels.
Is a cooling fan after shutdown proof that the oven is broken?
Not necessarily. Hotpoint notes that a cooling fan can continue or cycle after shutdown to protect the controls. If the oven will not start once cool and correctly set, use the model-specific troubleshooting and service path.
Read the exact guide
Official sources
- FAQs | Ranges & OvensGE Appliances · Model-specific range and oven controls, locked-door behavior, cooling fan and service boundaries
- Hotpoint Oven Troubleshooting & RepairHotpoint UK Appliances Limited · Hotpoint oven troubleshooting and normal cooling-fan behavior after shutdown
- Range & Wall Oven - Oven Error, Fault or Function CodesGE Appliances · Examples of model-dependent oven fault and function codes and reset/service limits
- Gas Range - Gas OdorsGE Appliances · Gas odor safety response around gas cooking appliances
- Electric Range & Wall Oven - Oven Has Power But Does Not WorkGE Appliances · Powered electronic ovens: clock, child lockout and display-state checks
- Hotpoint Service Gas & Electric Cooker RepairHotpoint UK Appliances Limited · Hotpoint gas and electric cooker repair, model manual use and safe isolation before repair work
- Hotpoint Appliances Safety NoticesHotpoint UK Appliances Limited · Hotpoint model and serial safety-notice checks and stopping use when a notice applies
- Range & Wall Oven - No PowerGE Appliances · External range and wall-oven power checks, plug, breakers and fuses
- Range & Wall Oven - Oven Will Not Come OnGE Appliances · Range and wall-oven control sequence, power reset, self-clean latch and electric element observation
- Hotpoint Service Oven RepairHotpoint UK Appliances Limited · Hotpoint oven model manuals, gas and electric oven repair support, and model-specific service guidance
Community feedback
Share a repair observation
Share a plain-text repair observation. Accepted observations are published automatically; this page may take a moment to update.