
On this page
Start here
Quick answer
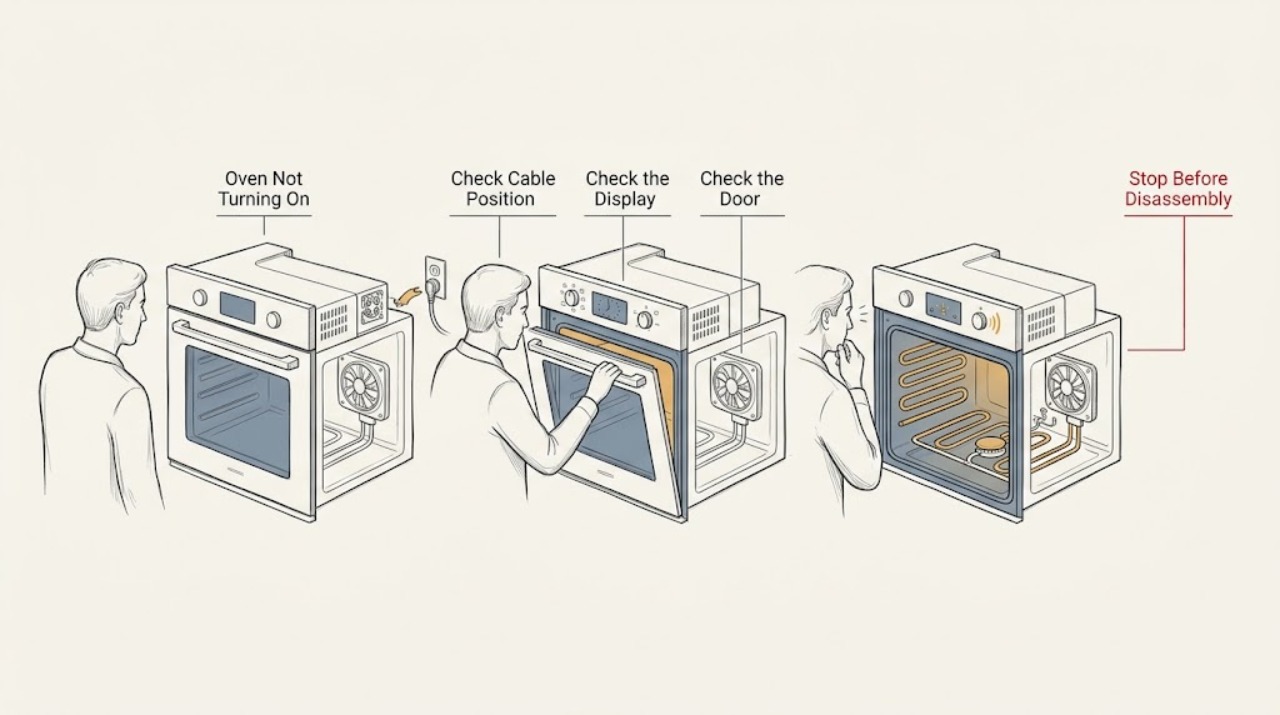
If a Hotpoint oven is not turning on, first identify whether the display is dark, the controls respond but no cycle starts, the door or timer blocks operation, an electric oven has no heat, or a gas oven has no safe ignition. Check only the accessible plug, isolator, labeled breaker, clock or timer, selected function, temperature, and door closure using the exact model manual. For a gas model, observe ignition only from the normal viewing position and do not adjust gas connections or relight repeatedly. Gas odor, delayed ignition, popping, an abnormal flame, smoke, arcing, scorching, dangerous heat, a hot cable, or a repeat breaker trip is an immediate stop condition: turn the appliance off, move away as appropriate, and follow local emergency or gas-service guidance. Hotpoint says its ovens include both gas and electric models and directs users to model manuals and qualified service for unresolved repairs. A cooling fan that continues after switch-off can be normal and does not prove that the oven has failed to turn on.
Work through in order
Diagnostic checks
Use only checks that match the exact appliance or system and its official guide.
-
Check 1
Stop the oven and check from a safe position for gas odor, delayed ignition, popping, flame outside the normal burner area, abnormal flame, smoke, arcing, scorching, dangerous heat, a hot or damaged cable, or a breaker that trips again.
Expected result: A gas, fire, heat, or electrical hazard is present, or the oven is cool, intact, and free of an immediate hazard.
Next step: For gas odor or suspected fire, move away as appropriate and follow local emergency or gas-service guidance. For smoke, arcing, dangerous heat, or a repeat trip, keep the oven off and isolate power only when safe before arranging qualified help. If safe, continue to classify the display and fuel type.
Stop if: Do not relight gas, open the door into a flame event, touch a hot element, or reproduce smoke, odor, arcing, or overheating.
Why this matters
Why: A hazard overrides all control and ignition checks. Repeated starts cannot safely diagnose a gas or electrical event.
-
Check 2
Without moving a built-in oven or opening a cover, check the accessible plug or isolator, labeled breaker, household power, display, interior light, and any clock or timer indication. Make only one permitted breaker reset when there is no hazard and the manual allows it.
Expected result: The display and light are dark, the accessible supply is interrupted, the breaker has operated, the display responds but shows a timer or lock state, or power and controls appear normal.
Next step: Correct only an obvious accessible supply state or documented clock setting and make one supervised start attempt. If the breaker trips again, the outlet or cable is damaged, or the display stays dark, stop and arrange service.
Stop if: Stop for a hot outlet, damaged cable, exposed wiring, repeat breaker operation, or any need to test energized circuits or alter the installation.
Why this matters
Why: An external supply or control state can prevent an oven from starting. Normal accessible power with an unresponsive display shifts the problem toward internal controls or wiring.
-
Check 3
With the oven off and cool, use the exact Hotpoint manual to confirm the clock is set if required, no delayed start or timer mode is preventing immediate operation, the intended cooking function and temperature are selected, and the door closes normally without a rack or tray obstruction.
Expected result: The clock is unset, a timer or special mode is active, the wrong function or temperature was selected, the door does not close, or all settings and door conditions appear normal.
Next step: Correct only an obvious setting or cool obstruction and make one documented start attempt. If the door remains damaged, the controls do not accept the sequence, or the oven remains inactive, arrange service.
Stop if: Stop for a damaged door, a lock that needs bypassing, a returning control error, or any need to remove a panel or switch.
Why this matters
Why: A control sequence, timer state, or door interlock can make a powered oven appear not to turn on. Correct settings do not resolve an internal selector, lock, sensor, or heating fault.
-
Check 4
If the model is electric, make one supervised start in the documented mode and observe whether the display indicates operation, the cavity warms, and the selected heating path responds from a safe distance. Do not touch an element or remove a cover.
Expected result: The oven starts and warms, the display starts but the cavity stays cold, only one mode fails, the fan runs without useful heat, or the breaker operates during the start.
Next step: If the cavity stays cold, a mode repeatedly fails, or the breaker operates, turn the oven off and arrange qualified appliance or electrical service. If heating is normal, continue only with the cooking-result check.
Stop if: Stop for smoke, arcing, scorching, dangerous heat, a damaged element, a hot cable, or any need to touch energized or hot components.
Why this matters
Why: A mode-specific cold cavity can point to that mode's heating path or control, while no heat across modes can involve supply, selector, thermostat, sensor, or internal wiring. A fan may run for cooling and does not prove heat is present.
-
Check 5
If the model is gas or dual-fuel, use the exact manual for one normal start and observe only from the intended viewing position whether ignition occurs promptly and the flame remains normal. Check only an accessible supply control if the manual permits it; do not adjust gas fittings, regulator settings, or internal burner parts.
Expected result: There is no ignition, clicking occurs without a safe flame, ignition is delayed, the flame goes out or looks abnormal, gas odor appears, or a stable normal flame appears but the oven stays cold.
Next step: For no ignition, delayed ignition, an abnormal flame, flame loss, or gas odor, turn the oven off and follow local gas-safety guidance before arranging qualified gas-appliance service. For a stable flame with a cold cavity, stop ordinary use and request service.
Stop if: Never relight repeatedly, inspect the burner while running, alter a regulator, loosen a gas connection, or touch hot or energized gas parts.
Why this matters
Why: No ignition, delayed ignition, unstable flame, and stable flame with no heat point to different gas-appliance service paths. None justifies repeated relighting or user adjustment of the gas system.
-
Check 6
If the oven warms but the complaint is poor cooking or a fan that continues after switch-off, compare the fan sound with the selected cycle and check, after the oven is cool, that food is centered on the shelf rather than the oven base and that airflow is not blocked by a high-sided pan.
Expected result: The fan runs after switch-off, cooking is uneven but the cavity is warm, the fan runs during a cold cavity, or the oven has no heat at all.
Next step: Treat post-cycle fan operation as normal when it matches the manual and no hazard exists. Correct only cool food placement or pan airflow; if the cavity remains cold or the fan behavior is accompanied by heat, odor, or noise, arrange service.
Stop if: Stop for smoke, scorching, dangerous heat, abnormal mechanical noise, a damaged fan area, or any need to reach behind a cover.
Why this matters
Why: Hotpoint says a cooling fan can run after switch-off, while food position and airflow affect cooking results. A fan with a cold cavity or no heat is not explained by normal cooling behavior.
-
Check 7
Prepare the exact Hotpoint model, gas or electric configuration, display and clock state, selected mode and temperature, power and breaker observations, door condition, ignition or heating response, fan behavior, and every odor, smoke, spark, heat, or trip event.
Expected result: The oven recovers after a safe external correction, or it remains dark, inactive, cold, mode-specific, ignition-affected, error-affected, or unsafe.
Next step: For persistent or unsafe failure, leave the oven off as appropriate and arrange qualified appliance, electrical, or gas service. Do not order an igniter, burner, thermostat, element, control, or fuse from the broad symptom alone.
Stop if: Do not open the housing, test energized circuits, bypass a door or thermal safety, touch gas or heating parts, or alter wiring or fuel connections.
Why this matters
Why: This record separates external supply, controls, door interlock, electric heating, gas ignition, thermostat, and normal cooling-fan behavior so the correct qualified service path can be selected.
Use your observations
Decision map
Find the observation that best matches what you see, then follow the next safe action.
-
PATH 01Next step
What you see
Gas odor, delayed ignition, popping, abnormal flame, smoke, arcing, scorching, dangerous heat, hot or damaged power parts, or a repeat breaker trip is present.
Do this next
Arrange qualified service and follow the exact model guidance.
Why this path and its safety boundary
Why it matters: Stop using the oven, move away as appropriate, isolate power only when safe, and follow local emergency, gas, electrical, or appliance-service guidance. Do not retest.
-
PATH 02Next step
What you see
The display and light are dark, the accessible supply is interrupted, or the breaker has operated.
Do this next
Arrange qualified service and follow the exact model guidance.
Why this path and its safety boundary
Why it matters: Correct only an obvious accessible supply state and make one permitted reset when safe. A repeat trip, damaged outlet or cable, or continued dark display needs qualified service.
-
PATH 03Next step
What you see
The display responds but a clock, timer, mode, temperature, or door condition prevents the cycle from starting.
Do this next
Arrange qualified service and follow the exact model guidance.
Why this path and its safety boundary
Why it matters: Use the exact Hotpoint manual to correct the setting or cool obstruction and make one supervised start attempt. Persistent inactivity or a damaged door needs service.
-
PATH 04Next step
What you see
An electric oven starts but remains cold, only one mode fails, the fan runs without useful heat, or the supply trips during heating.
Do this next
Arrange qualified service and follow the exact model guidance.
Why this path and its safety boundary
Why it matters: Turn the oven off and arrange qualified appliance or electrical service. Do not touch elements, wiring, or controls.
-
PATH 05Next step
What you see
A gas or dual-fuel oven does not ignite, ignites late, loses its flame, shows an abnormal flame, or produces gas odor.
Do this next
Arrange qualified service and follow the exact model guidance.
Why this path and its safety boundary
Why it matters: Turn the oven off, follow local gas-safety guidance, and arrange qualified gas-appliance service. Do not relight repeatedly or alter the gas path.
-
PATH 06Next step
What you see
The cavity warms but cooking is uneven, or a cooling fan continues or cycles after switch-off without a hazard.
Do this next
Arrange qualified service and follow the exact model guidance.
Why this path and its safety boundary
Why it matters: Use the model guidance for food placement and allow the normal cooling fan to finish. If the cavity is cold or a safety symptom returns, request service.
-
PATH 07Next step
What you see
The oven starts and heats normally after a documented setting, accessible supply, door, or cool placement correction and no hazard returns.
Do this next
Arrange qualified service and follow the exact model guidance.
Why this path and its safety boundary
Why it matters: Monitor one supervised cycle and retain the model, fuel, and setting record. Request service if the fault or any safety symptom returns.
Helpful context
Understand the symptom
Separate a dead oven from a no-heat oven
A dark display, a display that responds but will not start, an oven that starts but stays cold, a door that does not close, and a gas burner that never safely ignites are different reports. Record the display, clock or timer state, selected function, door position, and whether the symptom affects every function. Do not repeat a start to reproduce smoke, odor, popping, or a flame problem.
Use the exact Hotpoint model and fuel branch
Hotpoint supports gas and electric ovens, and control sequences differ by model. Find the model label and matching manual before assuming that a knob, clock, lock, ignition, or selector behaves like another oven. A gas oven needs a fuel and ignition path; an electric oven needs its electrical supply and heating path. Never transfer gas-hob instructions to an oven burner.
Check accessible power and settings only
With the oven off and cool, check the accessible plug or isolator, labeled breaker, clock, timer, cooking function, temperature, and door closure. Correct only an obvious setting or obstruction described by the model manual. Do not remove covers, reach behind the controls, bypass a door switch, or test energized wiring.
Do not mistake a cooling fan for a working heat cycle
Hotpoint explains that a cooling fan may run after switch-off and may cycle on and off while controls cool. Fan noise is therefore not proof that the selected cooking cycle has started or that an electric element or gas burner is heating. Use the display, ignition, and cavity result to classify the fault.
Gas and electrical safety change the next step
Gas odor, delayed ignition, popping, flame outside the normal burner area, an abnormal flame, smoke, arcing, scorching, or dangerous heat requires an immediate stop. Turn the oven off, move away as appropriate, and use local emergency or gas-service guidance. For a power fault, a hot cable, exposed wiring, or a repeat trip, isolate power only when safe and arrange qualified electrical or appliance service.
Know when to stop user checks
If the oven remains dark or cold after safe external checks, if only one mode fails, if ignition is absent or unstable, or if the next action involves a part, gas component, control panel, or live circuit, arrange qualified service. Hotpoint's official pages direct users to manuals and professional service for unresolved oven repairs.
Only after diagnosis
Potential parts
- electric heating element or thermal-protection component
Consider only after qualified service confirms an element or thermal-protection fault for the exact electric model after settings and supply checks.
Do not touch or replace an element based on a cold-cavity symptom; confirm the exact model and safe repair procedure. - gas igniter, burner, or flame-sensing component
Consider only after qualified gas-appliance service confirms an ignition or burner fault for the exact model.
Gas work requires qualified service; never relight repeatedly, adjust a regulator, or alter a gas connection. - selector, thermostat, temperature sensor, or control component
Consider only when qualified service links persistent no-start or mode-specific behavior to a named model component.
Control and sensor fit is model-specific and cannot be inferred from a general no-start symptom.
When checks do not resolve it
Need a professional?
Gas odor, delayed ignition, popping, abnormal flame, smoke, arcing, scorching, dangerous heat, a hot cable, or a repeat breaker trip appears., The display is dark after safe accessible power checks, the outlet or door is damaged, or the supply trips again., The clock, timer, mode, temperature, and door checks are correct but the oven will not start or an error returns., An electric oven remains cold, only one mode fails, the fan runs without useful heat, or heating causes a breaker trip., A gas or dual-fuel oven does not ignite safely, the flame goes out or looks abnormal, or a stable flame leaves the cavity cold., The next step would require opening panels, testing energized circuits, touching heating or gas parts, bypassing a safety, or changing wiring or fuel connections.
Common questions
FAQ
Why is my Hotpoint oven completely dead?
Check the accessible plug or isolator and labeled breaker, then see whether the display and light respond. If accessible power is normal but the display remains dark, stop and arrange qualified electrical or appliance service.
Can a Hotpoint oven timer stop it from turning on?
A clock, timer, or model-specific control state can prevent an expected start. Use the exact Hotpoint manual to confirm the clock, function, temperature, and timer state. If correct settings do not start the oven, request service.
Why does my Hotpoint oven fan run when the oven is off?
Hotpoint says a cooling fan can continue or cycle after switch-off to protect the controls. Fan operation alone does not prove that the cooking cycle has started or that the oven is heating. A fan with a cold cavity or an odor or smoke symptom needs service.
What should I do if my Hotpoint gas oven will not ignite?
Use the exact manual for one normal start and observe from a safe position. Turn it off for no ignition, delayed ignition, popping, flame loss, an abnormal flame, or gas odor. Do not relight repeatedly or adjust the gas path; follow local gas-safety guidance and arrange qualified service.
When should I stop troubleshooting a Hotpoint oven?
Stop for gas odor, delayed ignition, popping, abnormal flame, smoke, arcing, scorching, dangerous heat, a damaged power part, or a repeat breaker trip. Also stop when the next step would involve panels, energized circuits, heating or gas parts, a safety bypass, or wiring changes.
Read the exact guide
Official sources
- Hotpoint Service Gas & Electric Cooker Repair - HotpointHotpoint · Opened official Hotpoint support page; exact controls and installation details vary by model and the matching manual takes precedence.
- Hotpoint Oven Troubleshooting & Repair - HotpointHotpoint · Opened official Hotpoint troubleshooting page; use the exact model manual for any control sequence.
- Hotpoint Service Oven Repair - HotpointHotpoint · Opened official Hotpoint oven service page; gas ignition and control behavior depend on the exact model.
Community feedback
Share a repair observation
Share a plain-text repair observation. Accepted observations are published automatically; this page may take a moment to update.