
On this page
Start here
Quick answer
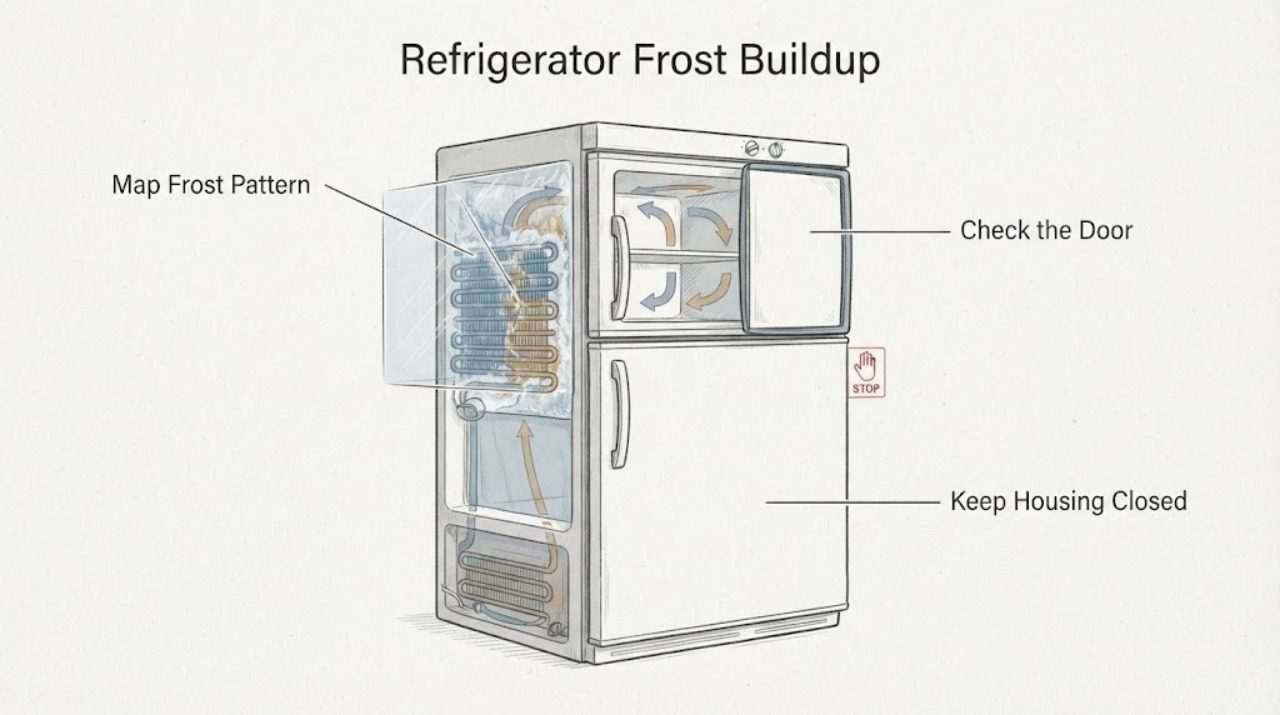
Do not assume an IKEA refrigerator has one universal defrost procedure: IKEA sells appliances made by IKEA and external vendors, and its range includes manual-defrost, low-frost, and no-frost designs. First find the exact model, article number, serial number, and manufacturer from the rating plate or paperwork without moving or dismantling the unit. Photograph where the frost is—freezer wall, door edge, drawer front, rear refrigerator wall, drain opening, vent, or behind a liner—and note whether the door was left ajar, food or liquids were hot or uncovered, or packages are blocking air. Check the visible door seal, closure, loading, ventilation, temperature setting, and accessible condensation drain only while the appliance remains safe and dry. Defrost only if the exact manual permits it; for a manual-defrost product, disconnect power, let ice melt naturally, collect water, and dry the cabinet fully before restart. Do not chip ice with a knife or other sharp tool, use a hair dryer, flame, boiling water, or remove an interior panel. If a no-frost unit develops a solid recurring ice bank, frost returns soon after the approved defrost, cooling becomes uneven, water reaches electrical parts, or the door cannot seal, leave it out of service and route the repair through the correct manufacturer or IKEA support channel. A frost patch alone does not identify a gasket, fan, heater, sensor, or control-board part.
Before you begin
Safety first
- The owner may make dry visible checks of identity, door closure, loading, vents, accessible drain, settings, and a manual-approved natural defrost. Qualified personnel must handle concealed drains, panels, fans, heaters, sensors, controls, wiring, refrigerant circuits, live diagnosis, and integrated-appliance movement.
Work through in order
Diagnostic checks
Use only checks that match the exact appliance or system and its official guide.
-
Check 1
Without moving, tilting, or dismantling the refrigerator, record the IKEA article number, manufacturer, model, and serial number from an accessible rating plate, receipt, manual, or existing photograph. Confirm whether the documentation calls the unit manual-defrost, low-frost, no-frost, refrigerator-only, or fridge-freezer.
Expected result: The manufacturer and model are clear; only an IKEA product name is known; the rating plate is hidden; or the documentation identifies manual, low-frost, or no-frost operation.
Next step: Use the exact manual and support route for that manufacturer. If identity remains uncertain, continue only with visible dry checks and do not defrost or remove panels based on a similar-looking product.
Stop if: Stop if finding the label requires pulling out an integrated unit, removing trim, touching a cord, or entering a wet or damaged area.
Why this matters
Why: IKEA appliances can have different manufacturers and defrost architectures. Product identity is needed before a defrost interval, control behavior, or replacement part can be discussed.
-
Check 2
Photograph and describe the frost before clearing it: freezer wall, drawer or basket front, door perimeter, refrigerator rear wall, drain opening, vent, or ice behind an interior cover. Note whether it is a light coating, localized patch, or solid bank and whether cooling is even.
Expected result: Frost is localized at a door edge; follows a freezer wall in a manual-defrost model; sits on the refrigerator rear wall or drain area; blocks a visible vent; or forms a solid bank behind a liner in a no-frost unit.
Next step: Take the matching branch after checking the exact manual. Leave concealed frost, liners, and internal covers for qualified service.
Stop if: Do not pry, scrape, or puncture a liner, fan shroud, drain, or ice-covered internal component.
Why this matters
Why: The pattern separates moisture/closure, storage/drainage, and manual-defrost maintenance from a concealed no-frost airflow or defrost fault. Frost location alone does not name a part.
-
Check 3
With hands dry, check that shelves, drawers, packages, bottles, or an ice tray are not preventing the door from closing. Inspect the accessible gasket for dirt, tears, flattening, or a visible gap; note any recent door-left-open event, uncovered liquid, or hot food placed inside. Do not bend or glue the seal.
Expected result: The door closes evenly with continuous gasket contact; a corner remains open; the seal is damaged or dirty; or frost is concentrated where warm air could enter.
Next step: Remove only visible obstructions, cool food before loading, cover liquids, and clean the gasket as the manual directs. Monitor for new frost; use model-specific service if the gap or damage remains.
Stop if: Do not remove a door, adjust hinges, pull out an integrated appliance, or perform a seal replacement without the exact manual and safe support procedure.
Why this matters
Why: An obstruction, damaged seal, or moisture load can explain localized frost. A good visible seal with a compartment-wide ice bank makes airflow or defrost service more likely.
-
Check 4
Reposition food away from visible vents and the refrigerator rear wall. Inspect the accessible condensation drain opening for a blockage only as the manual permits, and confirm adequate exterior ventilation. Compare the thermostat and any fast-cool, fast-freeze, vacation, or no-frost setting with the model instructions; use an appliance thermometer if available.
Expected result: A vent or drain is obstructed; food touches the rear wall; ventilation is restricted; a special mode is active; the measured temperature is normal; or the compartment remains warm beside heavy frost.
Next step: Correct only visible conditions and return settings according to the manual, then allow the documented stabilization period. Escalate persistent frost, warm temperatures, or concealed ice to the correct manufacturer or IKEA support route.
Stop if: Do not insert wire or sharp tools into a drain, enter service mode, remove a fan cover, or test a sensor, heater, compressor, or control board.
Why this matters
Why: Loading, drainage, ventilation, or a setting may be contributing to frost and uneven cooling. Warmth alongside a solid bank raises the possibility of an internal airflow or defrost issue but does not select a component.
-
Check 5
Only if the exact manual identifies the product as manual-defrost or permits the procedure, move food safely, switch off and disconnect the appliance from a dry position, let frost melt naturally, collect water, and dry all accessible surfaces before restarting. Record whether the frost returns and how quickly temperatures recover.
Expected result: The approved defrost clears the ice and it does not return; the same frost returns quickly; the appliance stays warm; or ice remains behind an interior cover.
Next step: Monitor only when the manual's conditions and temperatures return to normal. For recurrence or any no-frost ice bank, keep the appliance out of service as appropriate and arrange qualified model-specific repair.
Stop if: Do not chip ice, apply heat or flame, pour boiling water, wet electrical parts, remove panels, or repeatedly defrost a no-frost model as a substitute for service.
Why this matters
Why: A maintenance-related ice layer may be resolved on a manual-defrost model. Rapid recurrence, persistent warmth, or hidden ice suggests a closure, airflow, defrost, fan, sensor, or control fault that cannot be diagnosed by frost alone.
Use your observations
Decision map
Find the observation that best matches what you see, then follow the next safe action.
-
PATH 01Safety boundary
What you see
The exact manual identifies a manual-defrost product and the ice is a visible accessible layer, with the door closing and no water or electrical hazard.
Do this next
Follow the exact natural-defrost procedure, disconnect power as directed, collect meltwater, dry completely, and allow the manual's stabilization period before judging the result.
Why this path and its safety boundary
Why it matters: Accumulated frost may be a maintenance condition rather than proof of a failed part; IKEA includes manual-defrost products in its appliance range.
Safety stop: Do not use a knife, pick, flame, hair dryer, boiling water, or force. Escalate if the manual is unavailable, the ice is inaccessible, or the frost quickly returns.
-
PATH 02Safety boundary
What you see
Frost is concentrated at a door edge, drawer front, or corner and the appliance had an ajar door, obstructed closure, damaged/dirty seal, uncovered liquid, or hot-food load.
Do this next
Restore visible closure, clean the accessible seal, cover liquids, allow hot food to cool, and monitor under normal loading. Use the exact model support path if a gap or damage persists.
Why this path and its safety boundary
Why it matters: Warm humid air or excess condensation is more likely than a confirmed internal defrost failure.
Safety stop: Do not bend, glue, heat, or replace the gasket without model fitment guidance, and do not keep operating if water reaches electrical parts.
-
PATH 03Safety boundary
What you see
Ice or water is concentrated on the refrigerator rear wall or visible drain, or packages cover a vent or touch the wall, without a concealed ice bank.
Do this next
Move food away from the wall and vents, cool food before loading, and clear only an accessible drain obstruction as the manual permits. Dry the area and monitor.
Why this path and its safety boundary
Why it matters: Storage, airflow, or condensation drainage is more likely. IKEA advises keeping the condensation drainage hole clear and links hot food with ice buildup.
Safety stop: Do not probe behind a liner, use a sharp tool in the drain, or continue if water approaches lamps, controls, wiring, or other electrical parts.
-
PATH 04Safety boundary
What you see
The exact documentation identifies no-frost operation, but a thick ice bank blocks internal air movement, cooling is uneven, or the same ice returns soon after an approved defrost.
Do this next
Stop repeating defrost cycles, leave covers and liners in place, protect perishable food, and contact the actual manufacturer or IKEA support with the model, manufacturer, photos, and temperature history.
Why this path and its safety boundary
Why it matters: This is not a routine manual-defrost condition; an internal sealing, airflow, defrost, fan, sensor, or control issue is more likely, but model diagnosis is required before naming a part.
Safety stop: Do not remove the liner, run a forced defrost, enter service mode, test live circuits, or replace a heater, fan, sensor, or board yourself.
-
PATH 05Safety boundary
What you see
The manufacturer/model is unknown, the frost is behind a panel, the liner is damaged or bulging, the appliance remains warm, or there is water near electrical parts, smoke, sparks, burning odor, heat, or repeated protective-device tripping.
Do this next
Stop using the refrigerator and isolate power only from a dry safe position when possible. Keep the unit out of service and contact the correct manufacturer, IKEA support, qualified appliance technician, or emergency help for active fire/smoke.
Why this path and its safety boundary
Why it matters: The fault exceeds safe generic checks and may involve an internal component or an immediate electrical/refrigeration hazard.
Safety stop: Do not move an integrated unit, touch wet or hot electrical parts, reconnect to reproduce the problem, open panels, or bypass a safety device.
Helpful context
Understand the symptom
IKEA is the seller, not always the appliance manufacturer
An IKEA refrigerator can have an IKEA product identity while its appliance was made by an external vendor. IKEA's support page names external manufacturers such as Whirlpool, Faber, and Electrolux and says to use the rating plate for manufacturer, model, and serial information. That matters here: a TILLREDA refrigerator is explicitly listed as manual defrost, while IKEA's buying guide also describes low-frost and no-frost products. Do not transfer a TILLREDA defrost instruction to another IKEA appliance or assume that a no-frost cabinet should be routinely hand-defrosted.
The location and shape of ice select the first branch
A thin coating on a freezer wall in a manual-defrost model is a maintenance question. Frost around the door perimeter, a drawer front, or a corner suggests warm humid air entering through closure, loading, or the seal. Ice on the refrigerator rear wall or around a drain opening points toward condensation management and storage position. A thick bank behind a cover in a no-frost appliance is a service signal rather than an invitation to pry off the liner. Record the pattern before it melts.
Correct moisture, seal, and airflow conditions first
Make sure the door closes fully and remains airtight, wipe the accessible seal clean as the product care instructions allow, and move packages away from the door path and vents. Let hot food cool before placing it inside, keep liquids covered, and avoid overloading the compartment. Check the visible condensation drain for a blockage only if the manual describes it as user-accessible. IKEA also warns that a freestanding refrigerator needs ventilation and should not be enclosed in cabinetry that obstructs airflow. These checks can explain frost without proving that an internal fan or defrost part has failed.
Use settings and temperature as evidence, not as a cure
Check the temperature setting and any fast-cool, fast-freeze, vacation, or no-frost control against the exact manual. IKEA's buying guide gives broad guidance of 37–41°F for the refrigerator and 0–5°F for the freezer, but control behavior and acceptable ranges are product-specific. Frost with normal measured temperatures and a clear gasket points toward moisture or local airflow. A warm compartment alongside a growing ice bank suggests that air circulation or defrost service may be impaired; it does not identify a safe replacement part.
Follow only the model-approved defrost method
If the exact manual permits manual defrosting, move perishable food to a safe alternative, switch the appliance off and disconnect power as directed, let the ice melt naturally, collect the water, and wipe the interior dry before restart. The TILLREDA product page says its defrost system is manual and directs the owner to the manual; that fact must not be generalized to other IKEA models. Do not use a knife, pick, flame, hair dryer, boiling water, or force on a frozen drain. If ice returns rapidly after a complete approved defrost, stop repeating the procedure and obtain model-specific service.
Safety boundary
Stop conditions
- Do not use knives, picks, screwdrivers, flame, hair dryers, boiling water, or other high-heat/sharp methods to remove frost; IKEA warns that sharp tools can damage the internal plastic lining.
- Do not remove liners or panels, probe a concealed drain, enter service mode, test live circuits, bypass a thermostat or safety device, or replace a fan, heater, sensor, board, or sealed-system component.
- Only defrost when the exact product manual permits it; disconnect power from a dry safe position, collect meltwater, and dry the cabinet before restoring power.
- Stop for water near electrical parts, smoke, sparks, burning odor, heat, a damaged cord or socket, or repeated protective-device trips; keep clear and isolate only when safe.
- Do not repeatedly hand-defrost a no-frost appliance or transfer a TILLREDA/manual-defrost instruction to another IKEA model; confirm the manufacturer and model first.
Only after diagnosis
Potential parts
- door gasket
Consider this category only if the exact manufacturer/model documentation or a technician confirms a torn, deformed, or failed gasket after visible closure obstructions are removed.
IKEA appliances may use different manufacturers; verify the complete article/model number and the correct manufacturer's fit information before ordering. - defrost system component
Consider only after qualified diagnosis confirms an internal defrost heater, sensor, or related component fault in a model that has that system; frost alone does not select a part.
Confirm the OEM, exact model, service diagnosis, and fitment; do not substitute parts across IKEA refrigerator families. - evaporator or circulation fan
Consider only when the correct manufacturer or technician confirms an internal fan fault after visible loading and airflow checks have been ruled out.
Verify manufacturer-specific fitment and electrical specifications before purchase or repair; no universal IKEA fan is implied.
When checks do not resolve it
Need a professional?
Arrange model-specific repair through IKEA or the actual appliance manufacturer when the manufacturer/model cannot be identified, a no-frost unit has a solid or recurring ice bank, frost returns rapidly after an approved natural defrost, the door or gasket cannot be restored with visible checks, cooling remains uneven or unsafe, ice is behind a panel, or a fan, heater, sensor, control, or sealed-system fault is suspected. Stop immediately for water near electrical parts, smoke, sparks, burning odor, heat, a damaged cord or socket, or repeated protective-device trips; isolate power only from a dry safe position and obtain emergency or qualified help as appropriate. The owner may document the frost, identify the product, correct visible loading/closure/drain conditions, and follow the exact manual for a permitted natural defrost. Cabinet access, live testing, component replacement, refrigerant work, and movement of an integrated appliance require qualified service.
Safety scope: The owner may make dry visible checks of identity, door closure, loading, vents, accessible drain, settings, and a manual-approved natural defrost. Qualified personnel must handle concealed drains, panels, fans, heaters, sensors, controls, wiring, refrigerant circuits, live diagnosis, and integrated-appliance movement.
Common questions
FAQ
Why is frost building up in my IKEA refrigerator?
The cause depends on the model and frost pattern. A door-edge patch can follow warm humid air entering through an ajar door, obstruction, or weak seal. Rear-wall or drain ice can relate to storage or condensation. A solid bank in a no-frost model or rapid recurrence after an approved defrost needs service; frost alone does not identify a failed part.
Are all IKEA refrigerators frost-free?
No. IKEA's guide describes no-frost and low-frost functionality, and the TILLREDA product page identifies that model as manual defrost. Find the exact manufacturer and model, then follow its manual rather than applying a TILLREDA or another product's defrost instructions.
Can a door or food placement cause frost in an IKEA refrigerator?
Yes. Keep the door airtight, remove packages that prevent full closure, keep vents and the rear wall clear, cover liquids, and let hot food cool before loading. If the gasket remains damaged or frost returns after correct loading and closure, use the exact model support route.
How should I defrost an IKEA refrigerator?
Only follow the exact product manual. If it permits manual defrosting, disconnect power from a dry safe position, let ice melt naturally, collect water, and dry the cabinet fully before restarting. Do not use a knife, pick, hair dryer, flame, boiling water, or other high-heat method. A no-frost unit with recurring ice should be serviced instead of repeatedly defrosted.
What if the ice is on the back wall or around the drain?
Move food away from the rear wall and visible vents, let hot food cool before loading, and inspect the accessible condensation drain only as the manual allows. IKEA advises keeping that drain clear. Do not probe behind a liner or use a sharp tool; persistent refreezing, standing water, or water near electrical parts requires service.
When does IKEA refrigerator frost buildup need a technician?
Use IKEA or the actual manufacturer when the OEM/model is unknown, a no-frost unit has a solid or recurring ice bank, frost returns soon after an approved defrost, cooling stays uneven, the door cannot seal, or ice is behind a panel. Stop immediately for smoke, sparks, burning odor, heat, water near electrics, or repeated protective-device trips, and isolate only when safe.
Read the exact guide
Official sources
- What spare parts can I get from IKEA and how much do they cost?IKEA United States · Opened official IKEA spare-parts article; used to confirm that refrigerator/freezer parts and parts for external-brand appliances sold by IKEA depend on the rating-plate manufacturer/model and authorized service information.
- LIMITED WARRANTY – TERMS AND CONDITIONSIKEA United States · Opened official IKEA appliance warranty PDF; used for refrigerator ventilation, clear condensation drainage, cooling food before loading, and the warning against sharp defrost tools.
- What can I do if my appliance isn’t working as it should?IKEA United States · Opened official IKEA support article; used to establish that IKEA appliances may be made by IKEA or external vendors and that the manufacturer, model, and serial number should be identified before support is selected.
- TILLREDA refrigerator, freestanding/white, 2 cu.ftIKEA United States · Opened official TILLREDA product page; used only as a concrete example that this named IKEA model is manual defrost, has a product-specific manual, and recommends checking door seals. The example is not generalized to other IKEA refrigerators.
- Refrigerator buying guide: what to knowIKEA United States · Opened official IKEA refrigerator guide; used for airtight-door, temperature, frost, no-frost/low-frost, and airflow principles. It is not used to infer a particular model's internal parts.
Community feedback
Share a repair observation
Share a plain-text repair observation. Accepted observations are published automatically; this page may take a moment to update.