
On this page
Start here
Quick answer
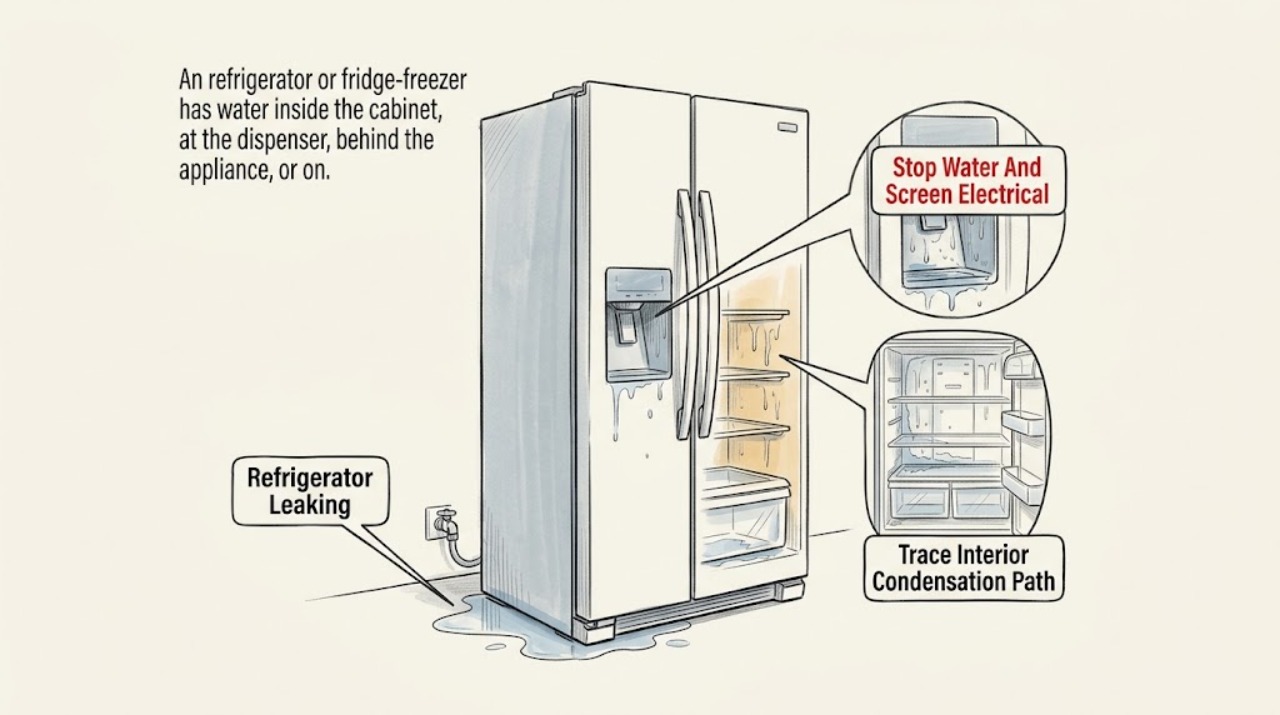
First stop dispensing and close the refrigerator's accessible water shutoff valve if water is actively flowing. If water is near an outlet, plug, cord, or other electrical part, keep the area dry, isolate power only from a safe location, and do not touch wet equipment. Then identify the IKEA article number, manufacturer, model, and serial number: IKEA says repair guidance depends on who made the appliance, and its US support names external vendors such as Whirlpool, Faber, and Electrolux. Trace the leak by location before touching anything: IKEA's refrigerator guidance describes a blocked condensation channel or drain hole causing water in the bottom drawer, a full rear condensation collector causing water at the back, and a door or food obstruction causing condensation; water-dispenser models can drip after dispensing, after a new installation or filter change, or from a loose water-line connection. Check only visible seals, door clearance, filter seating, and accessible connections using the exact manual. Do not pull out a built-in or loaded refrigerator, open panels, disconnect internal tubing, or keep running it to find a hidden leak; recurring, underneath, water-line, ice-maker, drain-pan, or electrical leaks need qualified appliance service.
Work through in order
Diagnostic checks
Use only checks that match the exact appliance or system and its official guide.
-
Check 1
Stop dispensing and close the accessible refrigerator water shutoff valve if water is actively flowing and the valve can be reached safely. From a dry position, check whether water has reached an outlet, plug, cord, or other electrical part.
Expected result: Water is still flowing, water is near electrical equipment, the valve cannot be reached safely, or the area is dry and the leak has stopped.
Next step: If safe, isolate power from a dry accessible location and leave the water supply closed; arrange qualified appliance or electrical service. Otherwise keep clear and obtain help. Continue only with dry, external observations.
Stop if: Do not touch wet electrical parts, pull the refrigerator through water, open the rear cover, or run the dispenser to reproduce the leak.
Why this matters
Why: An active or electrical-adjacent leak is a safety event, not a normal troubleshooting condition. A stopped leak still needs a source decision before the refrigerator is operated normally.
-
Check 2
Record the IKEA article number, manufacturer name, model, and serial number from the rating plate or order documents. Note whether the refrigerator is freestanding or built-in, has a water dispenser or ice maker, and has a water filter or external water line.
Expected result: The unit has no water connection, has a dispenser or ice maker, is a built-in water-connected model, or the manufacturer and model cannot be identified.
Next step: Use only the exact manual for the identified model and follow IKEA's manufacturer routing. If the identity is missing, photograph the rating plate when safe and arrange support rather than combining manuals from different families.
Stop if: Do not pull a built-in refrigerator, remove doors, or infer an internal layout from the IKEA brand name alone.
Why this matters
Why: The available leak paths and safe checks differ by architecture and OEM. A non-plumbed refrigerator should not be given a dispenser-line diagnosis, while a water-connected model requires water-line and filter history.
-
Check 3
If there is no external water connection or the water is inside the fresh-food compartment, check from outside the door and inside the cabinet for food blocking a complete door closure, a dirty or damaged visible seal, water along the back wall, or water in the bottom drawer. Clean only an accessible seal and follow the exact manual for a visible condensation channel or drain hole.
Expected result: The door is held open by food or a bin, the seal is visibly dirty or damaged, water runs down the back wall into the drawer, or no visible condensation cause is present.
Next step: Remove only the obstruction and clean a visible seal or channel as the model manual permits. Keep the refrigerator dry and arrange service for a damaged seal, recurring water, or a hidden drain path.
Stop if: Do not insert sharp tools or chemicals into an unknown drain, remove liners, defrost with direct heat, or restart while water reaches electrical areas.
Why this matters
Why: IKEA's guidance links poor closure to condensation and a blocked channel or drain hole to overflow into or under the bottom drawer. No accessible cause leaves a hidden drain, defrost, or internal leak possible.
-
Check 4
For a model with a water dispenser, note whether the leak is only one or two drops after dispensing, began after installation or filter replacement, appears at the dispenser face, or appears near the base grille or rear connection. Check only the visible filter seating and dispenser area using the exact manual.
Expected result: Only a brief post-dispense drop occurs; dripping continues after a new installation or filter change; the filter is visibly not seated; or water appears at the rear or base grille.
Next step: Follow the exact manual's filter seating and water-system flush instruction when safe. Close the water valve and arrange service for a rear, base, or recurring dispenser leak; do not remake hidden connections.
Stop if: Do not remove a pressurized line, over-tighten a fitting, pull the refrigerator out, or continue dispensing with a visible leak.
Why this matters
Why: The manuals treat a few post-dispense drops as normal but associate continued dripping with air or filter history and rear leaks with water-line connections. A rear or base leak may involve a hidden door tube, valve, or line.
-
Check 5
Only if the refrigerator is freestanding, the floor is dry, and the exact manual permits access, inspect the visible rear or base area for a full condensation collector, a kinked or damaged water line, or water at a connector. Do not move a loaded unit alone or reach behind live equipment.
Expected result: Water collects at the rear pan or base, a visible line is kinked or damaged, a connector is wet, or the accessible rear area is dry.
Next step: Close the water supply and arrange qualified service or an approved installer for a wet connector, damaged line, full collector, or hidden rear leak. Do not disconnect or repair the line yourself unless the exact manual defines a safe owner procedure.
Stop if: Do not tilt or drag the refrigerator, work near an energized cord, remove the compressor cover, or open a water valve to test a leak.
Why this matters
Why: IKEA's condensation guidance identifies an overfull rear collector, while water-connected manuals identify line and connection issues. A dry accessible rear area does not clear hidden tubing, valve, drain, or sealed internal paths.
-
Check 6
Document the leak location, timing, water-connection and filter history, door or condensation findings, model and OEM identity, and any water-stop, ice-maker, cooling, cabinet, floor, or electrical damage. Keep the water supply closed until qualified service has assessed a hidden or recurring leak.
Expected result: The leak is underneath or behind the cabinet, returns after an accessible correction, involves the ice maker or internal water path, or has reached electrical or structural areas.
Next step: Arrange qualified appliance service, the identified external manufacturer's support, or an approved installer with the exact model and observations. Assess cabinet, flooring, and electrical damage when water has spread.
Stop if: Do not continue operating to locate the leak, pull out a built-in appliance, remove panels, disconnect internal tubing, or work on energized or wet equipment.
Why this matters
Why: An internal line, valve, drain pan, defrost path, dispenser tube, ice-maker assembly, seal, or installation fault is more likely; location alone cannot identify a safe replacement part.
Use your observations
Decision map
Find the observation that best matches what you see, then follow the next safe action.
-
PATH 01Safety boundary
What you see
Water is actively flowing, has reached an outlet or cord, or the water valve cannot be reached safely.
Do this next
Keep clear, isolate power only from a safe dry location if possible, close the water supply when safe, and arrange qualified appliance or electrical help.
Why this path and its safety boundary
Why it matters: The immediate concern is water damage, electric shock, or fire; source tracing is secondary.
Safety stop: Do not touch wet electrical equipment, run the refrigerator's dispenser, or move the appliance through water.
-
PATH 02Safety boundary
What you see
Water is in the bottom drawer or along the back wall, while a door obstruction, poor seal, or blocked visible condensation channel is present and there is no water connection.
Do this next
Correct only an accessible door obstruction and clean the visible seal or channel as the exact manual permits. Arrange service if the water returns or the drain is hidden.
Why this path and its safety boundary
Why it matters: Condensation drainage or door closure is more likely than a pressurized water-line leak; IKEA describes this location pattern in its refrigerator guidance.
Safety stop: Do not puncture a drain, remove cabinet liners, or use direct heat to defrost.
-
PATH 03Safety boundary
What you see
A water-connected model drips at the dispenser after use or after a new installation or filter change, or water appears near the base grille after door or filter work.
Do this next
Follow only the exact manual's filter seating or water-system flush guidance. Close the water valve and arrange service for a recurring, rear, or base leak.
Why this path and its safety boundary
Why it matters: Brief post-dispense drops can be normal, while continued dripping is more consistent with air, filter seating, or a water-tube connection issue in the covered model families.
Safety stop: Do not disconnect tubing, over-tighten fittings, remove doors, or keep dispensing while water escapes.
-
PATH 04Safety boundary
What you see
Water is behind or under a freestanding water-connected refrigerator, with a full collector, wet visible connector, kinked line, or recent installation or movement.
Do this next
Keep water closed and have the installer or qualified appliance technician correct the condition. Do not drag or tilt a loaded refrigerator to reach the back.
Why this path and its safety boundary
Why it matters: A condensation collector or water-supply routing issue is more likely than an interior condensation drain, but hidden valves and tubing remain possible.
Safety stop: Do not open the water valve for a test, disconnect a line, or work behind a live appliance.
-
PATH 05Safety boundary
What you see
Location, detergent, door, filter, and accessible connection checks do not explain the leak, or the leak is under a built-in unit, recurring, connected to the ice maker, or accompanied by cooling or electrical symptoms.
Do this next
Use the exact model and manufacturer routing identified by IKEA, keep water closed, and arrange qualified appliance service or an approved installer.
Why this path and its safety boundary
Why it matters: An internal drain, valve, hose, dispenser tube, ice-maker path, seal, or installation fault is more likely and cannot be identified safely from outside.
Safety stop: Do not pull out the built-in refrigerator, remove panels, bypass a sensor, or continue operating with a hidden leak.
Helpful context
Understand the symptom
Make the leak safe before tracing it
Close the refrigerator's water shutoff valve if it can be reached without stepping through water or touching electrical equipment. If water has reached an outlet, plug, cord, or wiring, do not handle the wet connection; isolate power from a safe dry location and arrange qualified help. Keep doors closed enough to protect food, place a container or towels only where they can be used without reaching behind the appliance, and do not run another cycle or dispenser test to reproduce the leak.
Location is the first useful split
Water in the bottom drawer or along the back wall points toward condensation drainage; water at the rear or base grille points toward a collector, supply line, filter, or dispenser connection; water under a built-in cabinet can come from a hidden internal path. IKEA's published condensation guidance and water-dispenser manuals use different mechanisms, so do not apply a dispenser fix to a non-plumbed refrigerator or a defrost-drain assumption to an ice-and-water model.
Door closure and condensation can imitate a plumbing leak
IKEA's refrigerator guidance says a door that is not closed properly, or food blocking the door, can let humid air in and create condensation. It also says a clogged condensation channel or drain hole can overflow into or under the bottom drawer. Inspect the seal, door edge, and visible channel only as the exact manual allows; do not poke deep into an unknown drain or remove liners.
Dispenser leaks need filter and connection history
On IKEA refrigerator models with a water dispenser, the manuals identify brief post-dispense drops as normal, but continued dripping can follow a new installation, filter replacement, or air in the water line. A leak at the back may follow a water-line connection that was not fully tightened or a door water tube that was not reconnected after door removal. These are model-specific water systems; do not disconnect a line or tighten a hidden fitting while the supply is open.
IKEA support routes through the actual manufacturer
IKEA explains that appliances may be made by an external vendor and that the manufacturer, model, and serial number determine the support path. A manual for one IKEA refrigerator family cannot establish the drain, filter, ice-maker, water-stop, or defrost layout of another. Use the exact manual and escalate hidden leaks, recurring leaks, damaged tubing, or leaks near electrical parts to the appropriate qualified service provider.
When checks do not resolve it
Need a professional?
Arrange qualified service when an IKEA refrigerator leak is underneath or behind the cabinet, recurs after an accessible seal, drain, filter, or connection check, involves an ice maker or internal water path, occurs in a built-in unit, or reaches electrical equipment, cabinetry, or flooring. IKEA-sold refrigerators can have different external manufacturers and architectures, so provide the IKEA article number, manufacturer, model, and serial number. Keep the water supply closed and do not pull out the appliance, open panels, disconnect internal tubing, or operate with water near electrical parts.
Have this ready
- IKEA article number, manufacturer, model and serial number, freestanding or built-in installation, dispenser or ice-maker presence, leak location and timing, filter or door-removal history, water-valve status, condensation findings, and any cooling, cabinet, floor, or electrical damage.
Common questions
FAQ
What should I do first if my IKEA refrigerator is leaking?
Close the accessible water shutoff valve and stop dispensing. Keep away from wet electrical equipment and isolate power only from a safe dry location if needed. Do not run the refrigerator to reproduce the leak; record the model and trace the water by location using its exact manual.
Why is water collecting in the bottom drawer of my IKEA refrigerator?
IKEA's refrigerator guidance identifies a blocked condensation channel or drain hole and explains that condensation can overflow into or under the bottom drawer. It also recommends checking that the door closes and that food is not blocking it. Use only the exact manual for cleaning a visible drain; a recurring or hidden blockage needs service.
Why does my IKEA refrigerator drip from the water dispenser?
One or two drops after dispensing can be normal on covered models. Continued dripping can follow air after a new installation or filter change, an incorrectly seated filter, or a water-line connection issue. Follow the exact model manual and close the water supply for a persistent or rear leak.
How do I know which IKEA refrigerator leak instructions apply?
Find the IKEA article number and the manufacturer, model, and serial number on the rating plate or documents. IKEA says external-vendor appliances require that manufacturer's support. Do not mix procedures from different IKEA refrigerator manuals or OEM families.
Read the exact guide
Official sources
- NUTID S25 Side-by-Side Refrigerator User ManualIKEA United States · Official IKEA NUTID S25 side-by-side refrigerator manual for the model family identified in the document.
- STJÄRNSTATUS French-Door Refrigerator User ManualIKEA United States · Official IKEA STJÄRNSTATUS French-door refrigerator installation and water-supply manual for the model family identified in the document.
- My refrigerator is leaking water, what should I do?IKEA Sweden · Official IKEA refrigerator leak guidance for the models and regional support context covered by the page.
- NUTID French-Door Refrigerator User ManualIKEA United States · Official IKEA NUTID French-door refrigerator manual for the model family identified in the document.
- BETRODD Bottom-Mounted Refrigerator User ManualIKEA United States · Official IKEA BETRODD bottom-mounted refrigerator manual for the model family identified in the document.
- What can I do if my appliance isn’t working as it should?IKEA United States · Official IKEA US guidance on appliance manufacturer identity and support routing.
Community feedback
Share a repair observation
Share a plain-text repair observation. Accepted observations are published automatically; this page may take a moment to update.