
On this page
Start here
Quick answer
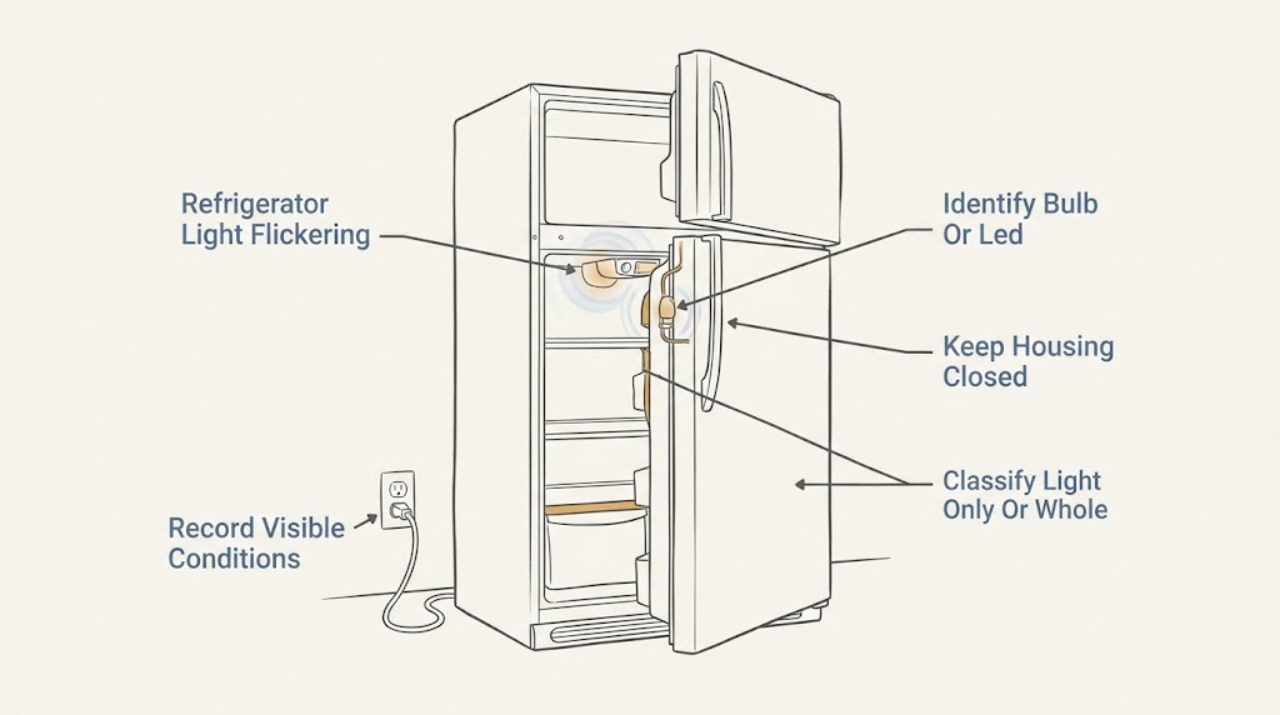
First determine whether the flicker is limited to the interior light or whether the display, controls, compressor, or other loads also lose power. Inglis's refrigerator troubleshooting identifies an unplugged refrigerator and a loose or burned-out bulb as first checks, while its model guidance points to the Use & Care Guide. On supported Whirlpool-family refrigerator platforms, the door switch controls the interior lights; a door that is out of alignment or a nearby magnet/electronic device can prevent consistent switch operation, and Whirlpool recommends a single power cycle by disconnecting power for one minute. If the light is a replaceable bulb, use only the exact model manual's lamp type and rating with power disconnected; an integrated LED assembly, a light that flickers when the switch is not moving, or flicker accompanied by display/cooling loss needs qualified service. Stop immediately for a hot or damaged cord, burning odor, smoke, arcing, water near electrical parts, or repeated protective-device trips. Do not bypass the door switch, open the LED or control housing, or perform a live electrical test.
Before you begin
Safety first
- The user may record the model, classify the light symptom, inspect the cord and door closure from a dry position, remove visible interference near a confirmed door-switch area, and follow an exact model manual for a permitted bulb check with power disconnected. Qualified service must handle integrated LEDs, sockets, switches, connectors, controls, wiring, cabinet disassembly, and energized testing.
Work through in order
Diagnostic checks
Use only checks that match the exact appliance or system and its official guide.
-
Check 1
Record the complete Inglis model and serial information from the interior label, and inspect the outlet, plug, and cord from a dry position before touching the light or moving the door. If there is smoke, arcing, a hot or damaged cord, water at the outlet, or a repeated breaker trip, stop.
Expected result: The model is available and the electrical area is dry and intact, or a hazard prevents safe inspection.
Next step: If safe, continue with symptom classification and the model manual. If not safe, keep clear and arrange qualified appliance or electrical service.
Stop if: Do not step into water, handle a hot or damaged cord, repeatedly reset a breaker, or move the refrigerator to reach the outlet.
Why this matters
Why: The model determines the light architecture and permitted lamp procedure; a visible electrical hazard takes priority over troubleshooting.
-
Check 2
Observe one brief, normal door opening and record whether one interior light, all interior lights, or the display and cooling functions flicker together. Do not repeatedly cycle the door or leave it open while the light is unstable.
Expected result: Only one lamp flickers; all interior lamps flicker together; or the display, controls, compressor, or other loads also reset.
Next step: Follow the matching bulb/LED, door-switch, or whole-power branch and stop if any hazard appears.
Stop if: Do not test with panels removed or use a meter on energized refrigerator wiring.
Why this matters
Why: A single-lamp pattern makes that lamp, socket, or local connector more likely; all lamps together makes the door-switch, common supply, LED driver, or control path more likely; whole-appliance interruptions make household power or an internal electrical fault more likely.
-
Check 3
Use the exact Inglis model manual to determine whether the affected light is a replaceable appliance bulb or an integrated LED assembly. If the manual permits bulb access, disconnect power from a dry position and inspect only the visible bulb and cover for looseness, darkening, cracking, or moisture.
Expected result: The manual specifies a replaceable bulb and the bulb is loose or damaged; the light is an integrated LED; or the manual and light type cannot be matched confidently.
Next step: For an explicitly user-replaceable bulb, follow the manual's exact type and rating after power is disconnected. For an LED, uncertain design, damaged socket, or persistent flicker, arrange qualified service.
Stop if: Do not use a generic bulb, exceed the manual's rating, open an LED module, touch wiring, or work with power connected.
Why this matters
Why: A single loose or failed bulb can cause a local flicker, while integrated LEDs and uncertain architectures require model-specific diagnosis rather than a guessed replacement.
-
Check 4
Inspect the door's closing, gasket contact, and visible alignment. Identify the door-switch location only from the model guidance and remove any magnet or electronic device within the stated nearby area if applicable; do not tape, wedge, or bypass the switch.
Expected result: The flicker changes with door movement, the door is misaligned or not closing evenly, a nearby magnet/electronic device is present, or the door and switch area appear stable.
Next step: Correct only a clearly visible obstruction or alignment issue permitted by the manual. If the door is aligned and the flicker continues, stop owner checks and use the service branch.
Stop if: Do not remove door panels, adjust hinges under load, defeat the switch, or perform a continuity or live test.
Why this matters
Why: A change with door movement or poor alignment makes inconsistent switch activation more likely; a stable door with a persistent flicker shifts suspicion toward the lamp, LED assembly, common supply, or control.
-
Check 5
Only when the floor, outlet, cord, and cabinet are dry and undamaged, disconnect the refrigerator from power, wait one minute, reconnect it, and observe the light without opening the door repeatedly.
Expected result: The flicker disappears and stays gone; it returns after reconnecting; or other appliance functions also reset or fail.
Next step: If the symptom returns or other functions are affected, leave the appliance off when appropriate and arrange qualified service.
Stop if: Do not repeat the reset, use an extension cord as a diagnostic, or reset a tripped protective device repeatedly.
Why this matters
Why: A lasting recovery is consistent with a transient control state but does not certify the light circuit. A return or broader reset pattern points toward a persistent lamp, switch, LED/control, or supply fault.
-
Check 6
Stop owner troubleshooting when the flicker persists after the model-directed checks, involves an integrated LED or hidden socket, follows a door-switch check without improvement, or is accompanied by display/cooling loss or an electrical hazard. Give the technician the model, light architecture, timing, and observations.
Expected result: The fault is persistent, internal, model-uncertain, affects several functions, or has heat, odor, smoke, arcing, water, or repeated trip symptoms.
Next step: Keep the refrigerator off when a hazard is present and arrange qualified Inglis/Whirlpool appliance service; use qualified electrical service for a supply-side concern.
Stop if: No cabinet opening, internal light-module or control repair, live testing, switch bypass, or operation after smoke, arcing, overheating, or water exposure.
Why this matters
Why: An LED driver, door switch, socket, connector, control, wiring, or household supply fault may be involved; the symptom alone cannot identify a safe part.
Use your observations
Decision map
Find the observation that best matches what you see, then follow the next safe action.
-
PATH 01Safety boundary
What you see
Only one interior lamp flickers, the exact model manual identifies a replaceable bulb, and the visible bulb is loose, darkened, or damaged while the rest of the refrigerator operates normally.
Do this next
Disconnect power safely and follow the exact manual's bulb type and rating. If the correct bulb still flickers, arrange service for the socket or wiring.
Why this path and its safety boundary
Why it matters: The bulb or its model-specific socket is more likely than a whole-appliance power fault.
Safety stop: Do not guess a bulb rating, touch the socket energized, or open a hidden socket assembly.
-
PATH 02Safety boundary
What you see
The light changes as the door moves, the door does not align or close evenly, or a magnet/electronic device is close to the model's door-switch location.
Do this next
Remove only a clearly identified nearby interference and correct visible loading or alignment issues allowed by the manual. Arrange service if the switch pattern remains.
Why this path and its safety boundary
Why it matters: Inconsistent door-switch activation is more likely; Whirlpool identifies the switch as the interior-light control and links operation to door alignment.
Safety stop: Do not wedge, tape, bypass, or electrically test the switch.
-
PATH 03Safety boundary
What you see
Several interior lights pulse together, the manual identifies an integrated LED, or no replaceable bulb procedure matches the exact Inglis model.
Do this next
Stop at external observation and arrange model-specific qualified service; provide the manual/model and whether door movement changes the symptom.
Why this path and its safety boundary
Why it matters: A common LED module, driver, connector, switch signal, or control path is more likely than a single bulb.
Safety stop: Do not remove an LED cover or control panel or substitute a bulb for an integrated assembly.
-
PATH 04Safety boundary
What you see
The light flicker occurs with display reset, control loss, compressor stoppage, or another appliance load, rather than as an isolated light symptom.
Do this next
Stop repeated resets. If safe, note other affected appliances and arrange qualified electrical or appliance service; keep the refrigerator off if heat, odor, smoke, arcing, water, or repeated trips occur.
Why this path and its safety boundary
Why it matters: A household outlet/circuit, cord, internal power connection, or control fault is more likely than a lamp alone.
Safety stop: Do not fit a larger protective device, use an extension cord to continue operation, or open the refrigerator electrical compartment.
-
PATH 05Safety boundary
What you see
The flicker persists after the exact model's safe checks or appears with heat, burning odor, smoke, arcing, water near electrical parts, a hot/damaged cord, or repeated protective-device trips.
Do this next
Keep clear, disconnect only from a dry safe position if possible, and arrange qualified appliance or electrical service with the recorded model and hazard details.
Why this path and its safety boundary
Why it matters: The remaining fault may be internal or supply-side and is not suitable for user disassembly or energized testing.
Safety stop: Do not operate the appliance to gather more evidence or attempt internal repair.
Helpful context
Understand the symptom
Confirm that the symptom is only the refrigerator light
Open the door only long enough to observe the symptom safely. Note whether one lamp pulses, all interior lights pulse together, the flicker changes as the door moves, or the display, controls, compressor, or other appliance functions also reset. A light-only symptom narrows the problem toward the lamp, LED assembly, socket, connector, or door switch; simultaneous appliance power loss points first to the supply or control path.
Use the exact Inglis model before choosing a lamp or LED part
Record the model and serial information from the refrigerator's interior wall or rating label without moving the appliance. Inglis directs owners to the Use & Care Guide for changing the light bulb, and Whirlpool's manual portal uses the model number to locate the applicable literature and parts information. Do not infer a bulb size, wattage, LED module, or fit from another Inglis or Whirlpool refrigerator.
Separate a replaceable bulb from an integrated LED assembly
With power disconnected from a dry, safe position and only if the exact manual permits owner access, inspect the visible lamp cover for a loose or damaged replaceable bulb. If the light is an integrated LED module, several lamps flicker together, or the manual gives no owner replacement procedure, stop at visual inspection and arrange service. Never remove a control or LED cover to reach wiring and never substitute an unverified lamp.
Check door contact without bypassing the switch
Look at the door closing, gasket contact, and visible alignment from the outside. Whirlpool explains that the door switch turns the interior light on and off and that leveling or door misalignment can keep the switch from being operated consistently. Remove any magnet or electronic device close to the switch only when its location is identified from the model guidance. Do not wedge, tape, or electrically bypass the switch.
Try one safe power cycle only when there is no hazard
If the refrigerator is dry and there is no damaged cord, heat, odor, smoke, arcing, or recent protective-device trip, disconnect power, wait one minute, reconnect, and monitor the light and other appliance functions. This can clear a transient control state but cannot prove that a bulb, switch, LED driver, or wiring fault is cured. If the flicker returns, stop testing.
Hand off internal, persistent, or electrical symptoms
Arrange qualified Inglis/Whirlpool appliance service when the exact model uses an integrated LED, the door-switch check does not explain the flicker, more than one lamp pulses, the display or cooling also interrupts, or the symptom returns after safe checks. Provide the model, region, light type, which lamps flicker, whether door position changes it, and whether a power cycle changed the symptom.
Safety boundary
Stop conditions
- Stop immediately for smoke, arcing, a burning odor, a hot or damaged cord or plug, water near the outlet or electrical parts, or repeated protective-device trips; keep clear and arrange qualified service.
- Disconnect power only from a dry, safe position. Do not move the refrigerator, use an extension cord as a test, repeatedly reset a breaker, or open an electrical, LED, or control housing.
- Do not bypass, tape, wedge, or live-test the door switch. Use the exact Inglis model manual for any permitted bulb access, type, and rating.
- An integrated LED, persistent flicker, multiple-light flicker, display/cooling interruption, hidden socket, or uncertain model architecture requires qualified Inglis/Whirlpool appliance service.
Only after diagnosis
Potential parts
- model-specific refrigerator appliance bulb
Consider this category only when the exact Inglis manual identifies a replaceable bulb and the bulb is visibly loose, darkened, or damaged.
Bulb base, shape, rating, temperature suitability, and access vary by model. Confirm the complete model and manual before selection; disconnect power before permitted replacement. - integrated refrigerator LED light module or driver service
Consider this service category when several lights flicker together, the exact manual identifies an integrated LED, or a correct bulb is not an owner-replaceable option.
LED modules, drivers, connectors, and control interfaces are model-specific. Do not open the module or control housing; qualified service must verify the part. - refrigerator door switch or door-status sensor
Consider this category only when the light changes with door movement, the door is properly aligned after visible checks, or the model-specific switch does not operate consistently.
Switch position and electrical interface vary by refrigerator architecture. Do not bypass or test it while energized; confirm fitment by complete model. - light socket, connector, or refrigerator control service
Consider this service category when a correct model-directed bulb does not cure a single-light flicker, several lights flicker, or the display/cooling also resets.
Socket, harness, LED driver, and control parts require model-specific diagnosis and safe isolation. Internal access and electrical testing belong to qualified service.
When checks do not resolve it
Need a professional?
Arrange qualified Inglis/Whirlpool appliance service when a model-directed bulb and visible door/alignment check do not stop the flicker, when the refrigerator uses an integrated LED, when several lights pulse, or when the display, controls, or cooling also interrupt. Use qualified electrical service for a supply-side concern. Stop immediately for smoke, arcing, burning odor, a hot or damaged cord, water near electrical parts, or repeated protective-device trips.
Safety scope: The user may record the model, classify the light symptom, inspect the cord and door closure from a dry position, remove visible interference near a confirmed door-switch area, and follow an exact model manual for a permitted bulb check with power disconnected. Qualified service must handle integrated LEDs, sockets, switches, connectors, controls, wiring, cabinet disassembly, and energized testing.
Common questions
FAQ
Why is my Inglis refrigerator light flickering when I open the door?
If only the interior light flickers, first identify whether the exact model uses a replaceable bulb or an integrated LED. A loose or damaged bulb can cause a local flicker; a flicker that changes with door movement can also indicate inconsistent door-switch activation or alignment. Use the exact model manual and do not bypass the switch or open an LED assembly.
Can a refrigerator door switch make the light flicker?
Yes, on supported Whirlpool-family refrigerator platforms the door switch controls the interior light, and Whirlpool says alignment affects switch operation. A change with door movement makes that path more likely, but it is not proof of a failed switch. Check only visible alignment and nearby interference from a safe position; do not tape, wedge, bypass, or live-test the switch.
How do I know whether my Inglis refrigerator has a bulb or LED light?
Use the complete model number in the exact Inglis or Whirlpool-hosted manual search and follow the light section. Inglis's general troubleshooting mentions a loose or burned-out bulb, but that does not establish the architecture of every model. If the manual does not give a permitted bulb procedure or several lights flicker together, arrange service instead of guessing a part.
Should I reset an Inglis refrigerator when the light flickers?
Only once, and only when the floor, outlet, cord, and cabinet are dry and undamaged. Whirlpool's official light-flicker guidance says to disconnect power, wait one minute, reconnect, and monitor. A returning flicker or a display/cooling interruption needs service; do not keep resetting the appliance or its protective device.
Is a flickering refrigerator light dangerous?
A light-only flicker is not enough to identify a hazard, but smoke, arcing, burning odor, a hot or damaged cord, water near electrical parts, or repeated protective-device trips requires immediate stop and qualified service. Keep clear and disconnect only from a dry, safe position. Do not open the refrigerator or perform a live electrical test.
Read the exact guide
Official sources
- Contact Us - Inglis Home AppliancesInglis Home Appliances · Official Inglis Canada customer-care page; service availability and coverage depend on purchase region and model.
- Canada | Whirlpool CorporationWhirlpool Corporation · Official Whirlpool corporate history for Canada; it supports brand context but does not establish a universal light design or part fit.
- Whirlpool Manuals & LiteratureWhirlpool · Official Whirlpool manual portal; use only if the complete Inglis model and region resolve to matching literature or support.
- Troubleshooting - Inglis Home AppliancesInglis Home Appliances · Official Inglis Canada troubleshooting page with separate side-by-side and top-mount refrigerator sections; exact light and access instructions vary by model.
- Interior Lights Flickering - RefrigeratorWhirlpool Product Help · Official Whirlpool guidance tagged to French-door/bottom-freezer refrigerators; apply to an Inglis unit only when the exact model architecture and region support the same mechanism.
- How to Test if the Door Switch is ActivatedWhirlpool Product Help · Official Whirlpool multi-model refrigerator guidance; switch placement and exact test procedure are model-dependent and the Inglis manual takes precedence.
Community feedback
Share a repair observation
Share a plain-text repair observation. Accepted observations are published automatically; this page may take a moment to update.