
On this page
Start here
Quick answer
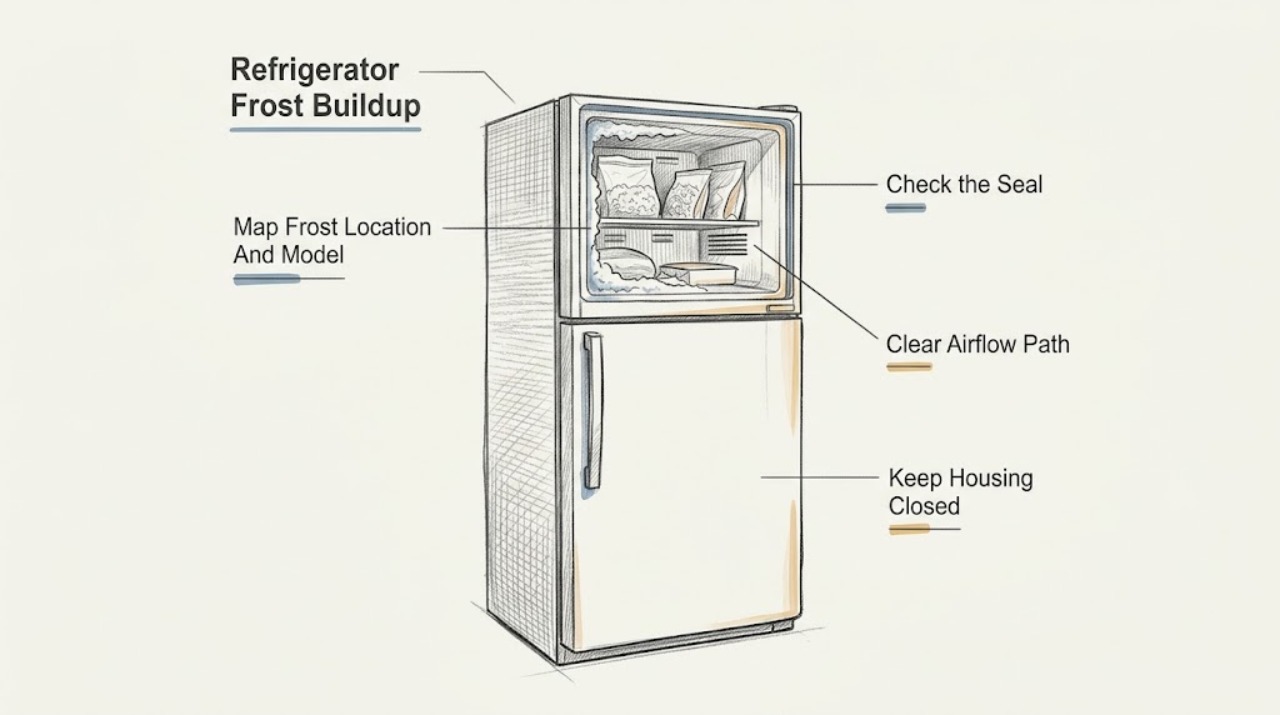
Do not treat every white layer as the same fault. Kelvinator's official troubleshooter distinguishes frost on an evaporator cover as normal operation until it becomes ice, ice at the front of the freezer as a door that is not completely closed, frost across the rear wall as a possible failed defrost system, and frost on the liner as possible wet insulation requiring workshop repair. First record the exact Kelvinator model and frost location, then check that the door closes firmly, the gasket is clean and intact, packaging or food is not holding the door open, and accessible vents are not blocked. Kelvinator's official refrigerator materials also say frost-free models do not need routine manual defrosting, while model specifications vary between frost-free and other designs. Use only the model manual for an approved defrost procedure; disconnect power and never chip ice with a sharp object or apply direct heat. If thick rear-wall ice returns after a safe, model-approved defrost, the door will not seal, the liner or insulation is wet, temperatures are unstable, or a timer, heater, thermostat, fan, or wiring would need access, stop and arrange qualified service.
Before you begin
Safety first
- This article covers frost mapping, ordinary-access door/airflow checks, and only a model-approved user defrost. Do not open panels, access the evaporator or defrost system, perform live tests, use direct heat, or work on refrigerant or wiring.
Work through in order
Diagnostic checks
Use only checks that match the exact appliance or system and its official guide.
-
Check 1
With the refrigerator operating normally and the freezer door opened only briefly, record the complete Kelvinator model number and photograph the frost pattern. Identify whether it is in a bag or on food, at the front/door edge, around a visible vent, on the evaporator cover, across the rear wall, or on the liner.
Expected result: Frost is isolated to a package or vent, concentrated at the door edge, a light layer is visible on the evaporator cover, the rear wall is covered, or the liner/insulation appears wet.
Next step: Use the matching branch and the exact model manual. Do not assume a manual-defrost procedure applies to a frost-free model.
Stop if: Stop if the liner is cracked or wet, food is warming, ice is blocking the door, wiring is exposed, or the frost cannot be inspected without removing a panel.
Why this matters
Why: Kelvinator assigns different meanings to these locations: air in packaging, door closure/seal, normal evaporator-cover frost until it becomes ice, a possible defrost failure on the rear wall, or wet insulation requiring workshop repair.
-
Check 2
Inspect the freezer and refrigerator door edges, gasket, shelves, bins, drawers, and visible packaging with the appliance closed normally. Remove only an item that is visibly holding the door open; wipe the accessible gasket and contact surface with the model-approved method, then close the door firmly without slamming.
Expected result: A package, bin, drawer, ice, debris, or shipping material blocks closure; the gasket is dirty, torn, warped, or detached; the door closes and seals evenly; or a gap remains.
Next step: Correct only the visible obstruction or clean condition and monitor the exact model. For a damaged gasket, persistent gap, or door that cannot close firmly, arrange service rather than stretching or gluing the seal.
Stop if: Do not force the door, pry ice from the gasket, heat or cut the seal, adjust hinges without the manual, or operate with a damaged door or gasket.
Why this matters
Why: Kelvinator identifies an incompletely closed door and poor door seal as causes of frost and ice near the front or liner. A clear, even seal makes a door-air-leak explanation less likely and keeps the defrost/airflow branch open.
-
Check 3
Check only accessible freezer and refrigerator vents and the space around stored food. Move food away from a cold-air outlet, remove an obvious vent blockage, and remove air from freezer bags before resealing them; do not dismantle a duct or fan.
Expected result: A bag contains trapped air, food touches or blocks an outlet, the vent is visibly obstructed, or airflow paths are clear but frost continues.
Next step: Correct the accessible storage or vent condition and allow the model's normal stabilization time. If a frost-free model continues to accumulate thick ice, continue to the defrost-pattern/service branch.
Stop if: Do not insert tools into vents, force a fan, scrape the evaporator, or use a hair dryer, heat gun, boiling water, or open flame to clear ice.
Why this matters
Why: Kelvinator says air in freezer bags and food stored near the cooling outlet can create local frost, while blocked vents reduce airflow. A clear path with a growing blanket of ice is less likely to be a simple storage issue.
-
Check 4
Use the model number to confirm whether the refrigerator is frost-free or manual-defrost and compare the observed layer with the manual. On a frost-free model, inspect only the visible evaporator-cover area without removing it; on a manual-defrost model, follow only the manual's user defrost instructions.
Expected result: The model is frost-free, the manual explicitly requires periodic defrosting, the evaporator cover has a light removable frost layer, the frost has become solid ice, or the architecture cannot be confirmed.
Next step: For a confirmed manual-defrost model, use its documented defrost process with power disconnected. For a frost-free model with solid ice or uncertain architecture, stop before removing panels and arrange model-specific advice/service.
Stop if: Never chip, pierce, pry, or heat hidden ice; do not remove an evaporator cover or expose the heater, fan, thermostat, timer, or wiring.
Why this matters
Why: Kelvinator says frost-free units do not require manual defrosting, while its troubleshooter calls frost on an evaporator cover normal only until it becomes ice. Unknown architecture is not a safe basis for a defrost or disassembly step.
-
Check 5
If and only if the exact model manual permits owner defrosting, disconnect power, remove food, place towels or a suitable container, and let accessible ice melt naturally. Restore power only after the interior is dry and the manual says it is safe; record whether the same frost pattern returns.
Expected result: Ice clears and does not return, ice returns on the rear wall, the door cannot close because of ice, the liner remains wet, or the model manual does not permit a user defrost procedure.
Next step: Monitor a cleared manual-defrost unit according to its manual. For recurring rear-wall ice, wet liner, or an unavailable/unclear procedure, keep the unit off as appropriate and arrange qualified Kelvinator service.
Stop if: Do not restore power while water is present, use direct heat, puncture ice, scrape liners, or repeat defrosting as a substitute for diagnosing recurring ice.
Why this matters
Why: A one-time manual-defrost condition can be maintenance on a confirmed manual-defrost design. Returning rear-wall ice on a frost-free or self-defrosting design points toward a defrost, airflow, or seal fault; wet insulation and uncertain procedures require service.
-
Check 6
Document the model, frost location, door/gasket result, airflow result, frost-free/manual architecture, defrost history, temperature trend, and any water or liner damage. If thick frost returns or covers the rear wall, stop before accessing the internal defrost system.
Expected result: Rear-wall ice returns, the evaporator-cover frost becomes a solid block, the refrigerator has unstable temperatures, the liner/insulation is wet, or a timer, heater, termination thermostat, fan, or wiring would need access.
Next step: Leave the appliance in a safe state, protect food if temperatures are rising, and arrange qualified refrigeration service with the exact model and photographs.
Stop if: Do not remove covers, test or bypass a heater/thermostat/timer, force a fan, access refrigerant, or perform live electrical work.
Why this matters
Why: Kelvinator's own fault tree associates rear-wall ice with failure to defrost and names the timer, heater, and termination thermostat as possible internal causes. These are not safe user-level checks and cannot be confirmed by bypassing a component.
Use your observations
Decision map
Find the observation that best matches what you see, then follow the next safe action.
-
PATH 01Next step
What you see
Is frost limited to a freezer bag, food near an air outlet, or an accessible vent blockage?
Do this next
If frost spreads beyond the local area or returns with clear airflow, use the door/seal and defrost-pattern branches.
Why this path and its safety boundary
Why it matters: Kelvinator associates air in bags, food at the cooling outlet, and blocked airflow with local frost. Correct the accessible storage or vent condition and keep food away from the outlet.
-
PATH 02Next step
What you see
Is ice concentrated at the front of the freezer or along the door edge?
Do this next
Correct only visible obstructions or clean the gasket. A damaged gasket, persistent gap, or misalignment needs service.
Why this path and its safety boundary
Why it matters: Check whether the door is fully closed, a package or drawer is in the way, and the gasket contacts evenly. Kelvinator links front ice with incomplete closure.
-
PATH 03Next step
What you see
Is there a light layer on the evaporator cover, or has it become a solid ice block?
Do this next
If it has become ice, confirm frost-free architecture and arrange qualified service for a recurring condition rather than repeatedly heating or scraping it.
Why this path and its safety boundary
Why it matters: Kelvinator describes frost on the evaporator cover as normal operation until it becomes ice. Do not remove the cover or chip the layer.
-
PATH 04Next step
What you see
Is the freezer's rear wall covered by thick frost or ice?
Do this next
Stop before opening the freezer panel, protect food if temperatures rise, and arrange qualified service; use a full defrost only when the exact manual explicitly permits it.
Why this path and its safety boundary
Why it matters: Kelvinator identifies this pattern as possible failure to defrost and names the timer, heater, or termination thermostat as internal possibilities.
-
PATH 05Next step
What you see
Is the liner or insulation wet, or does thick frost return after a safe model-approved defrost?
Do this next
Keep the appliance safe and arrange qualified service with the model number and frost photographs.
Why this path and its safety boundary
Why it matters: Kelvinator associates frost on the liner with possible wet insulation and workshop repair. Returning ice after a permitted defrost is not proof that another defrost will fix it.
Helpful context
Understand the symptom
Frost location is the useful diagnosis
A little frost in a bag or on a cold surface is not the same as ice at the freezer door edge, an evaporator-cover layer that has become a solid block, or a rear wall covered across its width. The location indicates whether to inspect air entry at the door, product placement and vents, or an internal defrost path. Do not remove a panel simply to see which component is frozen.
Confirm frost-free versus manual-defrost architecture
Kelvinator's FAQ describes frost-free models as using a fan to move moisture-free sub-zero air and says they do not need manual defrosting. Kelvinator product materials also list frost-free systems and separate control arrangements on particular models. Use the exact model's manual before deciding that a full defrost is normal maintenance; a frost-free refrigerator that repeatedly builds a rear-wall ice blanket needs a service diagnosis.
Defrost safely and stop before the internal system
If the exact manual permits user defrosting, disconnect power, protect the floor, remove food, and let the ice melt without sharp tools or direct heat. Do not remove an evaporator cover, test a heater or thermostat, alter a timer, or access wiring. Kelvinator's official fault pattern for a rear wall covered in ice is already a reason to arrange service when it returns.
Safety boundary
Stop conditions
- Stop for thick rear-wall ice, wet liner or insulation, a damaged gasket or liner, food warming, water near electricity, exposed wiring, smoke, burning odor, or an unstable appliance.
- Do not chip, pierce, pry, scrape, or drill ice; do not use a hair dryer, heat gun, boiling water, open flame, or other direct heat to defrost.
- Do not remove evaporator or rear panels, force a fan, access refrigerant, or test, bypass, or replace a defrost timer, heater, termination thermostat, control, or wiring as a user step.
- Do not repeatedly power-cycle or repeatedly defrost a frost-free unit to suppress a returning rear-wall ice pattern.
- Do not order a gasket, heater, timer, thermostat, fan, or other part without the exact model and qualified diagnosis.
When checks do not resolve it
Need a professional?
Arrange qualified Kelvinator refrigeration service when thick ice returns after a model-approved defrost, the freezer rear wall is covered, evaporator-cover frost has become solid ice, a gasket or liner is damaged, insulation appears wet, temperatures are unstable, or a defrost timer, heater, termination thermostat, fan, control, wiring, or sealed-system component would need access. Stop immediately for electrical or water hazards.
Safety scope: This article covers frost mapping, ordinary-access door/airflow checks, and only a model-approved user defrost. Do not open panels, access the evaporator or defrost system, perform live tests, use direct heat, or work on refrigerant or wiring.
Common questions
FAQ
Is some frost normal in a Kelvinator refrigerator?
Kelvinator says frost on an evaporator cover can be normal operation until it becomes ice. Local frost in a freezer bag or near an outlet has different causes, while a thick rear-wall ice blanket on a frost-free model needs a defrost-system diagnosis.
Why is ice building up at the front of my Kelvinator freezer?
Check that the freezer door closes firmly and that food, drawers, bins, packaging, or ice are not holding it open. Kelvinator links front ice with incomplete door closure; a damaged gasket or persistent gap needs service.
What does thick ice on the rear wall of a Kelvinator freezer mean?
Kelvinator identifies rear-wall ice as a possible failure to defrost and names the timer, heater, or termination thermostat as internal possibilities. Do not remove the panel or test those components; arrange qualified service.
Can I defrost my Kelvinator refrigerator with a hair dryer or knife?
No. Use only the exact manual's approved defrost method, with power disconnected and the interior protected from water. Never chip, pierce, scrape, or apply direct heat to ice, and do not use repeated defrosting to hide a returning frost-free fault.
Why does frost return after I defrost my Kelvinator freezer?
If the door seal, visible loading, and airflow are normal, returning thick frost—especially across the rear wall—makes an internal defrost, fan, insulation, or control problem more likely. Stop before removing panels and provide the technician with the model and frost pattern.
Read the exact guide
Official sources
- Troubleshooter | Support | KelvinatorKelvinator · Kelvinator Australia support guidance. Exact model, market, and manual control whether a defrost or adjustment procedure applies.
- Frequently Asked QuestionsKelvinator · Kelvinator Australia FAQ covering refrigerator and freezer families; exact model manuals remain controlling.
- 430L White Bottom Mount Refrigerator - KBM4300WB-LKelvinator · Applies directly to the named KBM4300WB-L model and is used to demonstrate model variation; it is not a universal specification for all Kelvinator refrigerators.
- REFRIGERATION RANGEKelvinator · Official Kelvinator Australia range brochure; it supports architecture variation but does not replace the exact model manual.
Community feedback
Share a repair observation
Share a plain-text repair observation. Accepted observations are published automatically; this page may take a moment to update.