
On this page
Start here
Quick answer
Do not start by buying a valve or drain part: first locate the highest wet point and note when the water appears. Kelvinator Australia’s official troubleshooter says moisture on the refrigerator floor or under crispers can occur in very humid conditions, water on a crisper cover or at the front can be a spill, and water running down the back of the food compartment can indicate a blocked drain trough. It also links excessive frost to a poor door seal and says water under the refrigerator may be condensation in humid conditions. If the leak is active, reaches a plug or other electrical part, comes from a pressurized or hidden water line, or is accompanied by burning odor, smoke, sparking, or a tripped breaker, stop using the refrigerator and isolate power or water only from a dry, safe, accessible position. Empty or contain water without moving a built-in appliance. On models equipped with an ice maker, dispenser, or filter, use the exact model manual for those connections; not every Kelvinator refrigerator has those features. Do not use sharp tools or heat to clear ice, open panels, pull the appliance out, or perform a live test. Recurring leaks, a damaged seal, a hidden drain or defrost tray, and any electrical or plumbing repair need qualified service.
Before you begin
Safety first
- The owner may stop water/ice use, isolate power or water only from a dry accessible position, contain water, record the model and wet-point pattern, and inspect visible spills, seal surfaces, or accessible connections allowed by the exact guide. Qualified personnel must handle hidden tubing, rear or evaporator covers, defrost hardware, moving built-in units, electrical hazards, and sealed refrigeration work.
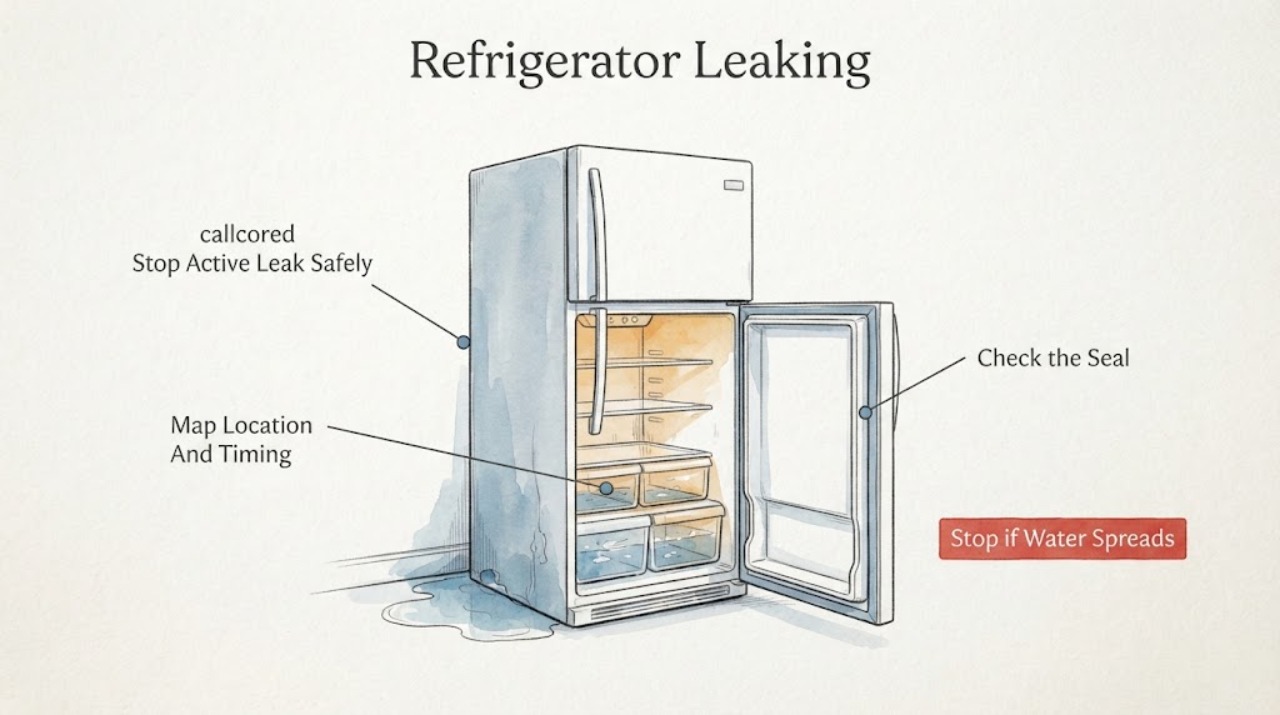
Work through in order
Diagnostic checks
Use only checks that match the exact appliance or system and its official guide.
-
Check 1
Stop dispensing water and making ice if the model has those features. From a dry, safe position, unplug or switch off the refrigerator only when the plug or isolator can be reached without touching water; close an accessible water shutoff only if it is clearly identified and safe. Contain water with towels or a shallow container without reaching behind or underneath the appliance.
Expected result: Water is still flowing, water is near the outlet or cord, a hose is spraying, the breaker has tripped, or there is smoke, burning odor, sparking, heat, or visible electrical damage; alternatively, the leak has stopped and all electrical parts are dry.
Next step: For any hazard or inaccessible isolation point, keep the refrigerator off and arrange qualified appliance, plumbing, or electrical service. Continue only with dry, visible observations when no hazard is present.
Stop if: Do not touch wet plugs or wiring, stand in water, repeatedly reset a breaker, restart an active leak, or move the refrigerator to reach a hidden source.
Why this matters
Why: An active, pressurized, or electrical leak is a stop-use condition. A stopped, dry spill can be documented; it does not prove that the refrigerator is repaired.
-
Check 2
With the area dry and the appliance safely off if needed, trace the highest visible wet point and write down the timing: inside or under a crisper, front/door edge, rear food-compartment liner, behind the cabinet, or floor/base; during ordinary cooling, after a defrost or humid period, after water/ice dispensing, or after the door opens.
Expected result: The first wet point is inside/front, on the rear liner, at a filter/dispenser/ice area, behind the cabinet, under the base, or cannot be seen without moving or opening the appliance.
Next step: Follow the matching branch and give the location and timing to service. If the source is hidden, stop at documentation rather than creating a leak test.
Stop if: Do not remove a toe grille or rear cover, pull out a built-in refrigerator, or run a cycle with guards or panels removed.
Why this matters
Why: A front or crisper pattern favors a spill, condensation, seal, or drain-path check; a rear or base pattern raises a drain, defrost-tray, condensation, or hidden plumbing question. An unseen source cannot be safely identified from the puddle alone.
-
Check 3
If water is inside, under a crisper, at the front, or along the rear liner, remove only obvious spilled food or liquid and inspect the visible drain trough, door gasket, and nearby stored items. If the exact Kelvinator guide permits it, carefully clean a visible drain trough with warm soapy water; keep the cabinet dry afterward. Do not probe the drain or force the gasket.
Expected result: The water matches a spilled container; the visible trough is dirty or blocked; the gasket is torn, loose, flattened, or not contacting; frost is excessive; or the visible interior looks normal.
Next step: Clean only the safe visible area and correct a storage item or door obstruction. If the trough blocks again, the seal is damaged, frost returns, or water persists, use model-specific service.
Stop if: Do not use knives, wire, compressed air, boiling water, or a heat gun; do not remove an evaporator cover, heater, fan, or drain assembly.
Why this matters
Why: Kelvinator’s official troubleshooting separates spills from water down the rear liner, where a blocked drain is possible, and links excessive frost to a poor door seal. A normal-looking interior does not exclude a concealed drain or defrost fault.
-
Check 4
Only if the exact model has a water dispenser, ice maker, or water filter, inspect from a dry, user-accessible position for water around the filter housing, dispenser area, door hinge area, or visible supply connection. Confirm the filter is seated as the model manual shows and note whether the leak began after filter replacement or plumbing work; do not loosen a line or disconnect a fitting.
Expected result: Water appears only after dispensing or ice fill; the filter or visible connection is wet; the model has no water feature; or the source remains hidden.
Next step: Stop the water/ice feature, keep the water supply isolated if safe, and use the exact model manual or qualified service for the filter, tubing, valve, or door connection. For no-feature models, follow the interior/rear branch instead.
Stop if: Do not disconnect pressurized tubing, bypass a filter, enter a service mode, open the door hinge or rear panel, or retest a line that is actively leaking.
Why this matters
Why: A feature-linked or recently serviced wet point makes the model’s water path more relevant, but it does not identify an O-ring, valve, tube, or connector without model-specific evidence. A refrigerator without that feature cannot be diagnosed with a dispenser path.
-
Check 5
If water is behind or under the refrigerator, inspect only what is already visible without moving the appliance: a drip/defrost tray position, a visible drain outlet, floor condensation, or a water-line connection that can be seen from a dry position. Compare the model manual before treating a tray or hose as user-removable.
Expected result: The floor is merely damp during humid conditions; a tray is visibly displaced or overflowing; a visible line or fitting is wet; or the source is behind the cabinet or inaccessible.
Next step: Dry and monitor only a clearly condensation-related, nonrecurring spot with no water near electrics. Otherwise keep the refrigerator off or the water supply isolated as appropriate and arrange model-specific service.
Stop if: Do not pull out the refrigerator, remove rear covers, reach near the compressor or fan, tip the cabinet, or perform a live leak or electrical test.
Why this matters
Why: Kelvinator’s official troubleshooter identifies humidity/condensation as a possible explanation under the refrigerator and, in its freezer guidance, identifies a mispositioned defrost tray or drain tube as a possible floor-water cause. Those mechanisms and access points vary by model; a hidden leak needs service.
-
Check 6
Record the exact model and country/region, feature configuration, highest wet point, timing, frost or door-seal condition, whether water/ice was involved, and what was safely isolated. Compare any drain, tray, filter, or error guidance only with that model’s Kelvinator manual or official support page.
Expected result: The leak stops after a clearly identified spill or safe visible correction; it recurs; frost or seal damage remains; the source is hidden; or water/electrical risk remains.
Next step: For recurrence, hidden sources, damaged seals, water-system faults, or any unsafe condition, arrange Kelvinator or qualified appliance service and provide the model and wet-point history. Use qualified plumbing/electrical help when those systems are implicated.
Stop if: Do not order a universal gasket, drain, valve, tray, or filter from the symptom alone; do not open the sealed system or energized cabinet.
Why this matters
Why: A one-time spill or documented condensation pattern is different from recurring water, a concealed drain/defrost fault, a water-system leak, or a damaged seal. Without an exact model, a replacement part or internal diagnosis is not reliable.
Use your observations
Decision map
Find the observation that best matches what you see, then follow the next safe action.
-
PATH 01Safety boundary
What you see
Water is highest inside the cabinet, beneath a crisper, on a crisper cover, or at the front/door edge.
Do this next
Remove only the spill or visible obstruction, clean the permitted visible trough, and check the gasket without forcing it. If water returns or frost/seal damage remains, arrange model-specific service.
Why this path and its safety boundary
Why it matters: Kelvinator’s official guidance makes a spill, humid condensation, blocked drain, and poor door seal separate possibilities. A clean visible area does not rule out a hidden drain or defrost problem.
Safety stop: Do not pierce ice, use heat, remove interior panels, or repeatedly run the refrigerator to reproduce the leak.
-
PATH 02Safety boundary
What you see
Water is on the floor, behind the cabinet, or beneath the base, and the model has no confirmed dispenser, ice maker, or filter path.
Do this next
Monitor only a dry, nonrecurring condensation spot. For overflow, recurrence, or an inaccessible source, keep the appliance safely out of service and obtain qualified service.
Why this path and its safety boundary
Why it matters: Humidity/condensation is possible, while a tray or drain position can matter on applicable models. A hidden rear or base leak cannot be assigned to a part from location alone.
Safety stop: Do not move a built-in unit, remove covers, reach near fans/compressor, or test with power applied.
-
PATH 03Safety boundary
What you see
The leak follows water dispensing, ice filling, a filter change, or appears around a filter housing, dispenser, door, or visible water connection on a model that has those features.
Do this next
Stop ice/water use and isolate the supply only if safe; follow the exact manual or have qualified service inspect the connection. Do not substitute another Kelvinator model’s procedure.
Why this path and its safety boundary
Why it matters: The water-system branch is conditional on the model actually having the feature. A wet connection narrows the area but does not prove which seal, tube, valve, or housing is defective.
Safety stop: Do not loosen tubing, bypass a filter, open the door hinge, or operate while water is reaching electrical parts.
-
PATH 04Safety boundary
What you see
Water recurs with heavy frost, a door that does not close evenly, or a gasket that is visibly damaged or not contacting.
Do this next
Clear only a visible door obstruction and clean the accessible seal surface. If the seal is damaged, alignment is abnormal, or recurrence continues, arrange service rather than fitting an unverified gasket.
Why this path and its safety boundary
Why it matters: Kelvinator’s official troubleshooter links excessive frost to poor door sealing. Persistent frost or water with an intact-looking gasket can involve alignment, airflow, defrost, or another model-specific fault.
Safety stop: Do not pry the door, adjust hinges, use heat to melt frost, or replace a seal without exact model fitment and instructions.
-
PATH 05Safety boundary
What you see
Water is active or hidden, reaches electrical equipment, is accompanied by odor/smoke/sparking or a breaker trip, or cannot be isolated safely.
Do this next
Leave the refrigerator and any implicated water supply off, keep people away from the wet area, and arrange qualified appliance, plumbing, or electrical service. Provide the model, photos from a dry position, and timing without recreating the leak.
Why this path and its safety boundary
Why it matters: This is no longer a routine spill or condensation check. Water and electricity, pressurized tubing, and inaccessible internal components require professional control of the hazard.
Safety stop: Do not reset breakers, touch wet wiring, pull the appliance out, open panels, or perform live tests.
Helpful context
Understand the symptom
Map the wet point before interpreting it
A puddle’s edge is often farther from the source. Dry the accessible area from a safe position and record the highest wet point: inside the cabinet, beneath a crisper, at the front or door edge, along the rear liner, behind the unit, or under its base. Also record whether it appears after door opening, defrosting, dispensing water or ice, or simply during humid weather. That map determines whether a spill, condensation, drain path, door seal, or water connection is plausible.
Kelvinator configurations vary by model and region
The opened Kelvinator material is Australian support content, while this task supplies no country or model. Treat its symptom guidance as a useful official starting point, not proof that every Kelvinator refrigerator has the same drain, defrost tray, filter, ice maker, dispenser, door layout, or service procedure. Record the model and use the manual for the appliance’s actual features before touching a water connection or ordering a part.
Keep water away from power and food
Stop an active leak and keep water away from the plug, outlet, controls, and floor-level electrical equipment. Do not reach through water, tilt the refrigerator, or move a built-in unit to expose its rear. Protect food from contaminated or warm water and discard food or materials that are unsafe. The user boundary ends at dry, visible checks; hidden tubing, energized components, defrost hardware, and sealed refrigeration work belong to qualified service.
Safety boundary
Stop conditions
- Stop using the refrigerator for an active leak, water near a plug or outlet, smoke, burning odor, sparking, a hot or damaged cord, a breaker trip, a pressurized spray, or a source that cannot be isolated safely.
- Do not move a built-in refrigerator, remove rear or evaporator covers, reach near the compressor or fan, or perform a powered leak or electrical test.
- Do not use knives, wire, boiling water, or a heat gun to clear a frozen drain; do not defeat a door, ice, or water-system safety feature.
- Do not replace a gasket, drain, defrost tray, filter, valve, tubing, or other part without the exact model and a confirmed diagnostic result; use qualified service for hidden plumbing, defrost, electrical, or sealed-system work.
When checks do not resolve it
Need a professional?
Arrange Kelvinator or qualified appliance service for a recurring leak, water from behind or beneath the cabinet, a blocked or inaccessible drain, a displaced or overflowing defrost tray, a damaged or ineffective door seal, or any diagnosis requiring panels, moving the appliance, internal defrost parts, wiring, or the sealed refrigeration system. Use qualified plumbing service for a pressurized or hidden water connection and qualified electrical service for water near power hardware, smoke, sparking, a hot cord/outlet, or a breaker trip.
Safety scope: The owner may stop water/ice use, isolate power or water only from a dry accessible position, contain water, record the model and wet-point pattern, and inspect visible spills, seal surfaces, or accessible connections allowed by the exact guide. Qualified personnel must handle hidden tubing, rear or evaporator covers, defrost hardware, moving built-in units, electrical hazards, and sealed refrigeration work.
Common questions
FAQ
What should I do first if my Kelvinator refrigerator is leaking?
Stop dispensing water or making ice if fitted, keep water away from electrical parts, and isolate power or water only from a dry, safe accessible position. Locate the highest wet point without moving or opening the appliance. Smoke, sparking, a hot cord, a breaker trip, an active pressurized leak, or an inaccessible source requires immediate professional service.
Why is there water under the crispers or at the front of the Kelvinator refrigerator?
First rule out a spilled container or food. Kelvinator’s official troubleshooter also says high humidity can leave water on the refrigerator floor or under crispers, while water running down the rear food-compartment liner can point to a blocked drain trough. A torn or poorly contacting door seal, especially with heavy frost, needs model-specific service.
What if the water is behind or underneath the refrigerator?
Inspect only what is visible from a dry position. Humidity or condensation may explain an occasional damp floor, but recurring water, an overflowing or displaced tray, or a hidden drain or connection should be serviced. Do not pull out a built-in refrigerator or remove rear covers to investigate.
Could the ice maker, dispenser, or filter be causing the leak?
Yes, but only if the exact refrigerator has that feature and the leak follows dispensing, ice filling, or a filter change. Stop using the feature, isolate the water supply only when safe, and use the exact model guide for the filter and tubing. Do not loosen a pressurized line or assume another Kelvinator model uses the same connection.
How can I tell condensation from a real Kelvinator refrigerator leak?
A small, occasional damp area during humid conditions that does not recur after drying is more consistent with the official humidity/condensation explanation. Water that follows dispensing, runs down the rear liner, returns under a crisper, leaves a continuous trail, or wets an electrical area should be treated as an unresolved leak until the exact source is confirmed.
When should I call service for a leaking Kelvinator refrigerator?
Call for a recurring or hidden leak, excessive frost with a damaged or ineffective seal, an inaccessible drain or defrost tray, any water-system connection, or any work involving panels, wiring, the compressor area, or the sealed system. Provide the exact model and region because Kelvinator configurations and procedures differ.
Read the exact guide
Official sources
- Frequently Asked QuestionsKelvinator Australia · Opened official Kelvinator Australia FAQ; used only for frost-free fan/airflow, unblocked vents, and humidity-control context, not as proof of a particular model’s internal layout.
- Customer Care CenterKelvinator Australia · Opened official Kelvinator Australia customer-care page; used for model-specific service and repair escalation when safe user checks do not resolve the leak.
- SupportKelvinator Australia · Opened official Kelvinator Australia support index; used to route unresolved or model-dependent faults to the matching product support and service path.
- TroubleshooterKelvinator Australia · Opened official Kelvinator Australia troubleshooting page; used the refrigerator leaking/dripping guidance and its conditional freezer floor-water note. Country, model, and feature configuration remain conditional.
Community feedback
Share a repair observation
Share a plain-text repair observation. Accepted observations are published automatically; this page may take a moment to update.