
On this page
Start here
Quick answer
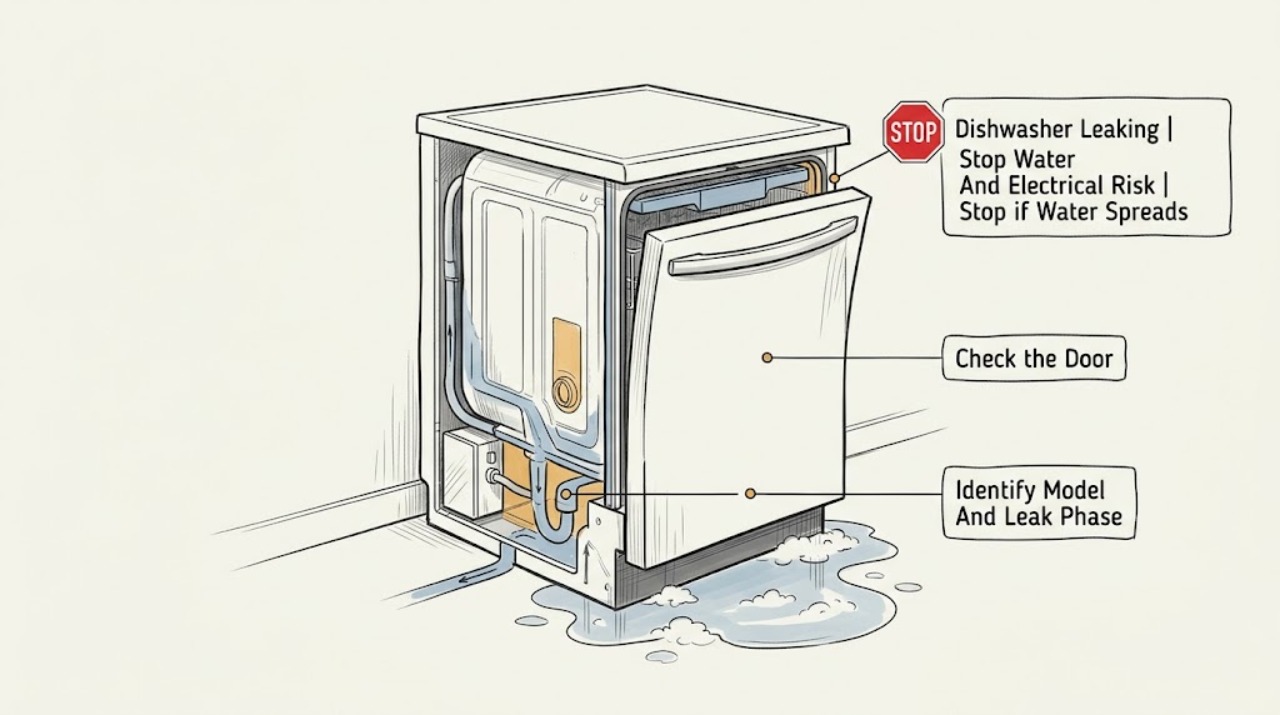
Stop the cycle and do not run another cycle just to reproduce a leak. If water is still entering, close the accessible dishwasher water shutoff. Keep hands and electrical equipment out of water; isolate power only from a dry, safe position and without removing a panel or moving a built-in unit. Blot the visible area and record when the first water appears—fill, wash, drain, or after completion—and where it first appears. Use the exact model number in Kenmore's manual finder before applying a cleaning, access, or parts instruction: Kenmore's official dishwasher catalog lists multiple built-in families and model numbers, while its warranty treats a rust-through leak in a stainless-steel tub or inner door panel as a condition that must be verified by authorized service. A visible door-edge or suds clue can be documented without opening the machine; water under the tub, a hidden connection, a cracked tub or inner door, continuing water entry, or water near electrical parts is a stop-and-service condition.
Before you begin
Safety first
- Owner scope ends at stopping the cycle, using a safely accessible water shutoff, dry-position power isolation when safe, model identification, timing/location observation, visible door/loading observation, and manual-documented accessible cleaning. Moving the built-in appliance, removing panels, or accessing hidden supply, drain, pump, tub, heater, controls, or wiring requires qualified service.
Work through in order
Diagnostic checks
Use only checks that match the exact appliance or system and its official guide.
-
Check 1
Stop the cycle if the controls respond, stay clear of hot water and steam, and close the accessible dishwasher water shutoff if water is still entering. From a dry, safe position, isolate electrical power only when this does not require touching wet equipment, removing a panel, or moving the built-in dishwasher.
Expected result: The leak stops with the cycle; water continues to enter; water reaches a plug, outlet, cord, controls, or other electrical equipment; the floor is slippery; or smoke, a burning odor, arcing, or a breaker trip is present.
Next step: Keep the dishwasher and affected electrical equipment out of use. Arrange qualified appliance service, plumbing help for a house-side connection, or electrical service for wet or damaged electrical equipment.
Stop if: Do not repeatedly reset power, reach through water, touch a wet plug or outlet, or open the dishwasher.
Why this matters
Why: Continuing water or a water-and-electricity condition takes priority over diagnosis. A reset or second cycle does not make a wet or hot appliance safe.
-
Check 2
Record the complete Kenmore model number from an accessible label or paperwork without moving the appliance. Blot the visible area and note the first wet location and cycle phase: fill, wash, drain, or after completion. Describe whether the liquid looks like clear water, wash water, or suds.
Expected result: The model number and first wet location are known; only a general puddle is visible; or the label and the likely connection cannot be reached without moving the built-in unit.
Next step: Open the exact Kenmore manual before doing any further check. If the model cannot be confirmed or the source is hidden, stop at documentation and qualified service.
Stop if: Do not pull, tilt, crawl under, or disconnect the built-in dishwasher to expose a label or leak.
Why this matters
Why: Kenmore provides model-number-specific manuals and lists multiple dishwasher families, so timing and location are triage information rather than proof of a universal failed part.
-
Check 3
After the machine has stopped and cooled, inspect only the visible door edge and door-to-tub contact area. Check that racks, dishes, or utensils are not preventing normal closure or protruding into the door path. Look for a visibly displaced or damaged seal and for suds escaping at the door; clean only what the exact manual identifies as an accessible area.
Expected result: Water first appears at a front corner or door edge; an item prevents closure; the seal is visibly damaged or displaced; suds are present; or the visible door path is clear while water appears elsewhere.
Next step: Remove only an obvious loading obstruction and leave the appliance off if the seal or door is damaged. If the edge still leaks with a clear load, follow the exact model manual or arrange service.
Stop if: Do not force the door, hold it open during a cycle, pry or glue a seal, remove the door or hinge, or run another cycle as a test.
Why this matters
Why: A door-edge pattern makes a closure, loading, seal, or suds issue more relevant, but a clear door path does not rule out an internal water or drain fault and does not identify a compatible replacement part.
-
Check 4
Without adding water or cleaner, observe the stopped tub from above. Record whether there are suds at the door, whether water remains after a completed cycle, and whether the wet area first appeared during drain. Do not reach into the sump or beneath the tub.
Expected result: Foam or a frothy film is present; clear water remains in the tub; the leak is drain-timed; or neither suds nor standing water is present.
Next step: Stop adding detergent or rinse aid until the exact manual is checked, and leave the appliance off if standing water or a drain-timed leak persists. Do not mix chemicals or use repeated cycles to clear foam.
Stop if: Do not pour chemicals or extra water into the tub as a test, force a float or protector, or reach beneath the tub.
Why this matters
Why: Suds and standing water are different observations and need different model-specific instructions. Neither observation proves that a pump, hose, filter, or internal seal can be serviced by removing a cover.
-
Check 5
If water appears beneath the tub, behind the enclosure, at an unseen supply or drain connection, or from a crack, leave the appliance off. Photograph only the accessible dry-area evidence and give the technician the model, cycle timing, first wet location, and liquid description.
Expected result: The leak is under the tub or enclosure; the tub or inner door panel is cracked or rusted through; water reaches electrical parts; water keeps entering after the shutoff; or the leak remains after an obvious loading or suds condition is removed.
Next step: Keep water and power isolated as safely accessible and arrange qualified appliance service. Use plumbing or electrical professionals when the house-side connection or wet electrical equipment is involved.
Stop if: Do not remove the toe-kick, bottom cover, terminal box, pump, heater, or wiring, and do not pull or tilt the built-in dishwasher for a live leak test.
Why this matters
Why: A hidden connection, tub, inner door, pump, drain path, heater-area seal, wiring, or control may be involved, but the exact cause and access are model- and installation-dependent. Kenmore's warranty says rust-through of a stainless-steel tub or inner door panel must be verified by authorized service.
Use your observations
Decision map
Find the observation that best matches what you see, then follow the next safe action.
-
PATH 01Safety boundary
What you see
Water continues to enter, reaches electrical equipment, or is accompanied by smoke, burning odor, arcing, hot wiring, or a breaker trip.
Do this next
Stay clear, use only a safely accessible water shutoff, and obtain qualified appliance, plumbing, or electrical service as appropriate.
Why this path and its safety boundary
Why it matters: This is a safety fault, not an invitation to repeat the cycle. Wet electrical equipment can create shock or fire risk.
Safety stop: Do not touch wet electrical equipment, reset repeatedly, or open the dishwasher.
-
PATH 02Next step
What you see
The first wet area is a front corner or door edge, especially when a load obstructs closure or suds are visible.
Do this next
With the unit stopped and cool, correct only an obvious loading obstruction and consult the exact model manual for permitted cleaning. Leave it off and arrange service if the seal or door is damaged or the edge still leaks.
Why this path and its safety boundary
Why it matters: Loading, door contact, a visibly damaged seal, or foam is more relevant than a hidden floor-side connection, but this pattern does not select a universal Kenmore part.
-
PATH 03Next step
What you see
The leak begins during drain or water remains in the tub after completion.
Do this next
Keep the dishwasher off, document the model and timing, and arrange model-specific service if the exact manual does not provide a safe accessible check.
Why this path and its safety boundary
Why it matters: The drain path or an internal water-management component becomes more relevant, but a puddle does not identify a pump, hose, filter, or seal and does not authorize bottom access.
-
PATH 04Next step
What you see
Water appears beneath the tub or enclosure, a tub or inner door panel is cracked or rusted through, or the source cannot be seen without moving the unit.
Do this next
Leave water and power isolated as safely accessible and schedule qualified appliance service; provide the model and photographs without pulling out the appliance.
Why this path and its safety boundary
Why it matters: This is a hidden or structural leak. Kenmore's published warranty identifies rust-through of a stainless tub or inner door panel as an authorized-service verification condition, not a homeowner part-selection test.
Helpful context
Understand the symptom
Make the area safe before looking for a cause
Press Cancel or Stop if the controls respond, and let hot water and steam settle. Do not reach through standing water or touch a wet plug, outlet, cord, or control. If the leak is continuing, use only an accessible water shutoff; do not pull, tilt, or open a built-in dishwasher. The U.S. Consumer Product Safety Commission advises disconnecting water-contact appliances before cleaning and treating water damage as a maintenance and safety issue. Kenmore's own support material routes owners to manuals, parts literature, and repair resources rather than a universal repair procedure.
Model and timing are part of the diagnosis
Read the complete model number from an accessible label or existing paperwork without moving the appliance. Kenmore's manual page asks for the model number and specifically includes dishwashers among the appliances covered. Its current built-in-dishwasher catalog lists several families and model numbers, so do not assume that a control sequence, leak sensor, gasket shape, filter arrangement, or access step applies to every Kenmore dishwasher. Note the first wet location and cycle phase instead of relying on the largest puddle on the floor.
What a safe external check can and cannot show
Once the dishwasher is stopped and cool enough to handle, inspect only the visible door-to-tub contact area, the door edge, and rack or utensil clearance. Look for a displaced or visibly damaged seal, an item preventing normal closure, or suds escaping at the door. Do not pry, glue, reshape, remove a door, or run a second cycle. A clear door area does not prove that an internal hose, pump, tub, inner door, or heater-area seal is sound; it only moves the next step to the exact Kenmore manual or qualified service.
Treat a hidden or structural leak as service work
Kenmore's warranty information specifically addresses stainless-steel tub and inner-door-panel leaks caused by rust-through and says that condition must be verified by an authorized service representative. That is not a general diagnosis of every puddle, and it is not permission to remove panels. If water appears beneath the tub, behind the enclosure, at an unseen supply or drain connection, or from a crack, leave the appliance off and give the technician the model, timing, first wet location, liquid appearance, and photographs taken from a dry, accessible position.
Safety boundary
Stop conditions
- Stop immediately for continuing water entry, water near electrical parts, smoke, burning odor, arcing, hot wiring or outlet, repeated breaker operation, or a floor that cannot be made safe.
- Do not run another cycle to reproduce the leak, repeatedly reset power, mix cleaning chemicals, or continue using the dishwasher with a damaged door, tub, seal, hose, cord, or plug.
- Do not remove the toe-kick, bottom cover, terminal box, pump, heater, wiring, or door, and do not perform a live leak or electrical test.
- Do not pull, tilt, or crawl beneath a built-in dishwasher. Use qualified appliance, plumbing, or electrical service for hidden, under-tub, continuing, structural, or electrical leaks.
When checks do not resolve it
Need a professional?
Arrange qualified Kenmore appliance service when the leak persists after a safe visible door/loading or suds observation, occurs beneath the tub or behind the enclosure, involves a supply or drain connection, leaves standing water, or requires moving the built-in unit, removing a panel, or touching a pump, tub, inner door, heater-area seal, control, or wiring. Use plumbing service for a house-side water or drain connection and electrical service for wet or damaged electrical equipment.
Safety scope: Owner scope ends at stopping the cycle, using a safely accessible water shutoff, dry-position power isolation when safe, model identification, timing/location observation, visible door/loading observation, and manual-documented accessible cleaning. Moving the built-in appliance, removing panels, or accessing hidden supply, drain, pump, tub, heater, controls, or wiring requires qualified service.
Common questions
FAQ
What should I do first when my Kenmore dishwasher is leaking?
Stop the cycle, let hot water and steam settle, and do not run another cycle to reproduce the leak. Close an accessible water shutoff if water continues to enter, and isolate power only from a dry, safe position without opening or moving a built-in unit. Record the first wet location and cycle phase, then use the exact model number in Kenmore's manual finder.
Why do I need the exact Kenmore dishwasher model number?
Kenmore's official manual finder requires a model number, and its current dishwasher catalog lists multiple built-in families and model numbers. Controls, access, seals, filters, and leak-related features should therefore be confirmed in the manual for the actual appliance instead of copied from another Kenmore model.
Can I pull out my built-in Kenmore dishwasher to find the leak?
Do not use moving the appliance as a homeowner leak test. Water and electrical connections may be disturbed, and the exact installation controls safe access. Photograph the accessible area, keep the appliance off, and arrange qualified service for a hidden, under-tub, or connection leak.
Does a Kenmore warranty cover a leaking dishwasher tub?
Kenmore's published warranty separately describes stainless-steel tub and inner-door-panel leaks caused by rust-through and says rust-through must be verified by an authorized service representative. That statement does not establish coverage for every leak, so retain the model and purchase information and use the applicable warranty terms.
When is a Kenmore dishwasher leak an emergency?
Stop immediately for continuing water entry, water near a plug, outlet, cord, or controls, smoke, burning odor, arcing, hot wiring, repeated breaker operation, or an unsafe wet floor. Keep clear, use only a safely accessible water shutoff, and obtain qualified appliance, plumbing, or electrical service as appropriate.
Read the exact guide
Official sources
- Warranty Information | Kenmore AppliancesKenmore / Transform SR Brands LLC · Official Kenmore warranty page; dishwasher coverage and conditions vary by purchase date and product class.
- Built-In Dishwashers | Built-In Dishwashers | KenmoreKenmore / Transform SR Brands LLC · Official Kenmore category page showing several current built-in dishwasher families and distinct model numbers; it does not establish that every model shares the same leak features.
- Biological Pollutants in Your HomeU.S. Consumer Product Safety Commission · Government household-safety guidance used only for the moisture, cleaning, and disconnect-before-cleaning boundary; it is not Kenmore model repair guidance.
- Find Your Manual | Kenmore Appliance Manuals & GuidesKenmore · Official Kenmore manual finder; it requires the complete model number and explicitly includes dishwashers among supported appliances.
- Customer Care & Support | Kenmore AppliancesKenmore / Transform SR Brands LLC · Official Kenmore support hub for selecting model documentation and repair resources.
Community feedback
Share a repair observation
Share a plain-text repair observation. Accepted observations are published automatically; this page may take a moment to update.