
On this page
Start here
Quick answer
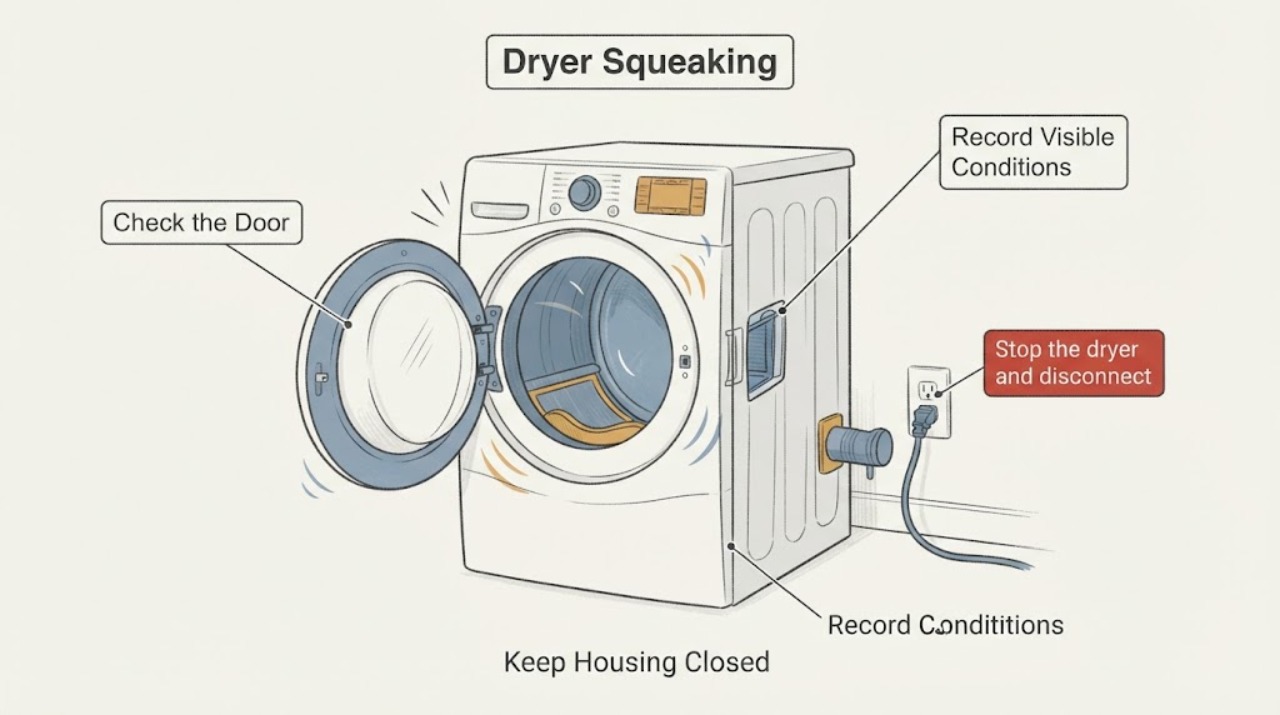
A Kenmore dryer squeak is a sound symptom, not proof that a belt, roller, pulley, bearing, or motor has failed. First stop if there is a burning smell, smoke, metal-on-metal scraping, damaged cord, or a drum that does not turn normally. With power disconnected and the drum stopped, remove the load and inspect only the accessible drum and lint-screen area for coins, fasteners, or other loose objects; make sure the dryer is stable and level. Record whether the sound occurs only at startup or shutdown, follows drum rotation, changes with the load, or continues after accessible objects are removed. Kenmore requires the exact model number to retrieve the owner manual, and its customer-care page provides repair routing. Persistent or worsening noise should go to service rather than an unverified internal parts replacement.
Before you begin
Safety first
- Do not open the cabinet, remove the drum, test live wiring, reach near a moving drum, replace rollers/belt/pulley/bearing/blower/motor from the symptom alone, or continue a hazardous cycle.
Work through in order
Diagnostic checks
Use only checks that match the exact appliance or system and its official guide.
-
Check 1
Stop the dryer and disconnect its power before reaching into the drum if there is a burning smell, smoke, sparking, exposed or damaged cord, metal-on-metal scraping, a jammed drum, or a sound that suddenly becomes severe. Do not run it to reproduce a hazardous noise.
Expected result: No hazard is present and the drum is stopped; or a burning, electrical, scraping, or jammed-drum condition is present.
Next step: For a hazard, leave the dryer out of service and arrange qualified appliance service or electrical help. If there is no hazard, continue only with the accessible inspection below.
Why this matters
Why: A hazardous or mechanically obstructed dryer should not be treated as a harmless squeak. The available Kenmore material routes unresolved repair through customer care rather than authorizing internal diagnosis without the model.
-
Check 2
Record the full Kenmore model number from the rating label and describe the noise timing: startup, shutdown, every drum rotation, a particular load size, or the full cycle. If possible, save a short recording without placing hands near a moving drum or opening any panel.
Expected result: The model and a repeatable timing pattern are available; or the model cannot be read and the sound pattern is unclear.
Next step: Use the matching Kenmore manual and give the model, timing, and recording to service. If the model remains unknown, stop before ordering a part or applying a model-specific test.
Why this matters
Why: Kenmore's official manual lookup is model-number based, and sound timing can separate an intermittent operating condition from a persistent mechanical noise without naming a part.
-
Check 3
With power disconnected and the drum fully stopped, remove the load and inspect the accessible drum surface, door opening, lint-screen area, and visible lint path for coins, zippers, buttons, paper clips, or other loose objects. Remove only an object that is plainly reachable without tools or disassembly, and keep the lint screen installed for any later normal use.
Expected result: A loose object is found and removed; the accessible areas are clear; or the object is behind a cover or requires cabinet access.
Next step: After the object is removed, make one cautious observation only if the dryer has no hazard. If the sound remains or the object requires disassembly, stop and use the exact manual or service route; do not open the cabinet to chase the noise.
Why this matters
Why: A loose object can create a noise that changes with drum movement, but a clear accessible area does not prove an internal belt, roller, pulley, bearing, blower, or motor condition.
-
Check 4
From outside the appliance, check that the dryer stands securely without rocking and that the door, exhaust connection, and surrounding installation are not contacting the cabinet. Do not move a heavy or stacked dryer alone and do not adjust internal supports.
Expected result: The dryer rocks, contacts an adjacent surface, or has a visibly strained installation; or it is stable and clear of surrounding contact.
Next step: Correct only an accessible, safe installation contact using the matching manual. If the dryer is stacked, built in, or difficult to move, arrange service rather than pulling it out alone.
Why this matters
Why: An unstable or contacting installation can add vibration or rubbing noise, while a stable installation makes that explanation less likely. Neither result identifies an internal wear part.
-
Check 5
Give Kenmore or the authorized repair service the model number, gas or electric configuration if known, noise timing, load dependence, whether accessible objects were found, installation observations, and any burning smell or scraping history.
Expected result: The squeak persists after accessible checks, is worsening, returns with each cycle, is accompanied by drum resistance or abnormal movement, or cannot be safely reproduced or inspected.
Next step: Keep the dryer out of service if the noise is severe or hazardous and schedule Kenmore repair through the official customer-care route. Do not order or replace an internal part based only on the word “squeaking.”
Why this matters
Why: A persistent noise needs a model-specific diagnosis. The symptom alone cannot select a belt, roller, idler, bearing, blower, or motor, and cabinet disassembly is outside this user-level guide.
Use your observations
Decision map
Find the observation that best matches what you see, then follow the next safe action.
-
PATH 01Next step
What you see
The dryer has a burning smell, smoke, sparking, metal-on-metal scraping, exposed cord damage, a jammed drum, or a repeat electrical problem.
Do this next
Disconnect power when safe, leave the dryer out of service, and arrange qualified appliance or electrical service.
Why this path and its safety boundary
Why it matters: The observation is a safety or mechanical-stop condition, not a routine noise to keep testing.
-
PATH 02Next step
What you see
A coin, fastener, paper clip, or other loose item is visible in the accessible drum or lint-screen area and can be removed without tools or disassembly.
Do this next
Remove the accessible object with power disconnected, then make only one cautious follow-up observation if no hazard is present. Escalate if the squeak remains.
Why this path and its safety boundary
Why it matters: The object is a plausible external source of noise, but removal does not prove that no internal issue exists.
-
PATH 03Next step
What you see
The dryer rocks, rubs an adjacent surface, or has a visibly strained or unsafe installation.
Do this next
Correct only safe, accessible installation conditions with the exact manual; use service for stacked, built-in, or heavy repositioning.
Why this path and its safety boundary
Why it matters: Installation contact or vibration may contribute to the sound, but it is not evidence of a failed drum-support or drive part.
-
PATH 04Next step
What you see
The sound occurs only at startup or shutdown, follows drum rotation, changes with load size, or continues throughout the cycle.
Do this next
Record the pattern and model for Kenmore service; do not transfer the community report’s suspected or eventual cause to this dryer.
Why this path and its safety boundary
Why it matters: Timing narrows the service description but cannot identify a belt, roller, pulley, bearing, blower, or motor without the exact model and an inspection.
-
PATH 05Next step
What you see
The dryer remains noisy after accessible object and installation checks, the noise worsens, or the model-specific manual does not resolve it.
Do this next
Stop use if the sound is severe or accompanied by heat/smell/scraping and schedule authorized Kenmore repair with the model and symptom record.
Why this path and its safety boundary
Why it matters: An internal mechanical or airflow condition remains possible, but the current evidence does not support user disassembly or part selection.
Helpful context
Understand the symptom
Treat the sound pattern as evidence, not a part diagnosis
Note whether the squeak is present only when the drum starts or stops, follows the drum's rotation, changes with a heavier load, or remains during the whole cycle. A community report for one Kenmore model shows a startup/end-of-cycle pattern that disappears during the main cycle, while the same report later found a different source than the first suspected wear parts. Keep that report as context only: the missing model and lack of a recording mean the sound cannot be mapped to a Kenmore component here.
Use the exact Kenmore manual and service route
Kenmore's manual page asks for the appliance model number and says its manuals cover dryers and their parts and accessories. Once the model is known, use that manual for the permitted external checks, operating conditions, and service boundary. Kenmore's customer-care page links product manuals and repair scheduling; do not substitute another Kenmore series or a different manufacturer’s noise procedure.
When checks do not resolve it
Need a professional?
Arrange Kenmore service when the squeak persists after accessible object and installation checks, becomes louder, follows every cycle, is accompanied by scraping, drum resistance, burning smell, smoke, or unusual heat, or the dryer is stacked/built in and cannot be safely inspected.
Safety scope: Do not open the cabinet, remove the drum, test live wiring, reach near a moving drum, replace rollers/belt/pulley/bearing/blower/motor from the symptom alone, or continue a hazardous cycle.
Have this ready
- Full model number, gas/electric configuration if known, sound recording, timing pattern, load dependence, accessible-object result, installation observations, and any hazard symptoms.
Common questions
FAQ
Does a Kenmore dryer squeak mean the belt or rollers are bad?
No. A squeak is a symptom. Sound timing, accessible foreign objects, installation contact, and the exact Kenmore model must be documented before a technician selects an internal part.
What can I safely check before calling about a squeak?
With power disconnected and the drum stopped, remove the load, inspect the accessible drum and lint-screen area for loose objects, and check from outside that the dryer is stable and not rubbing surrounding surfaces. Stop if the object requires disassembly or if there is scraping, burning smell, smoke, or electrical damage.
Why do I need the Kenmore model number?
Kenmore's official manual page requires the model number to retrieve the applicable owner manual and resources. Different Kenmore platforms can have different operating and service instructions, so do not use another model's part or cabinet procedure.
When should I stop running the dryer?
Stop when the sound is severe or worsening, changes to grinding or metal scraping, comes with a burning smell or smoke, the drum resists movement, the cord is damaged, or the dryer trips power. Arrange Kenmore repair through the official customer-care route.
Read the exact guide
Official sources
- Loud thumping and squeaking noise on my 2014 Kenmore dryer (model 417.81122310)Reddit r/appliancerepair · Opened the exact Reddit post. It supports only the reported model and sound timing; community replies changed hypotheses and cannot be generalized to an unspecified Kenmore dryer.
- Find Your Manual | Kenmore Appliance Manuals & GuidesKenmore Appliances · Opened the official Kenmore manual portal. It requires the model number to retrieve the applicable manual and confirms that dryer manuals include operating, parts, and accessory information; it does not provide a universal noise diagnosis.
- Customer Care & SupportKenmore Appliances · Opened the official Kenmore customer-care page. It links manuals, contact information, and repair scheduling; it does not authorize cabinet disassembly or identify a squeak component.
Community feedback
Share a repair observation
Share a plain-text repair observation. Accepted observations are published automatically; this page may take a moment to update.