
On this page
Start here
Quick answer
First distinguish a small amount of water in the filter cup from a tub that remains full. KitchenAid says some water halfway up the filter area can be normal, while standing water across the tub calls for checks of the filter, drain hose, air gap, sink/disposer connection, and—on a new installation—the disposer knockout plug and drain-loop routing. With power off and water contained, clean and correctly reinstall the accessible filters, look under the sink for a kinked or low hose, and inspect the air gap or disposer for an obstruction according to its instructions. Use only automatic-dishwasher detergent; suds can cause leaking and poor drainage. A 30-second control reset may help after the physical checks, but do not repeatedly reset, run a leaking unit, disconnect plumbing without a bucket and safe isolation, or reach into a pump. Arrange KitchenAid service if water remains after the documented checks, the hose or pump needs disassembly, a leak or overflow is present, or a drain error returns.
Before you begin
Safety first
- Turn off power and water before installation or connection work. Do not reach into a pump, pull out a connected dishwasher, disconnect a water-filled hose without containment, remove guarded panels, perform live electrical tests, or repeatedly run a leaking appliance.
Work through in order
Diagnostic checks
Use only checks that match the exact appliance or system and its official guide.
-
Check 1
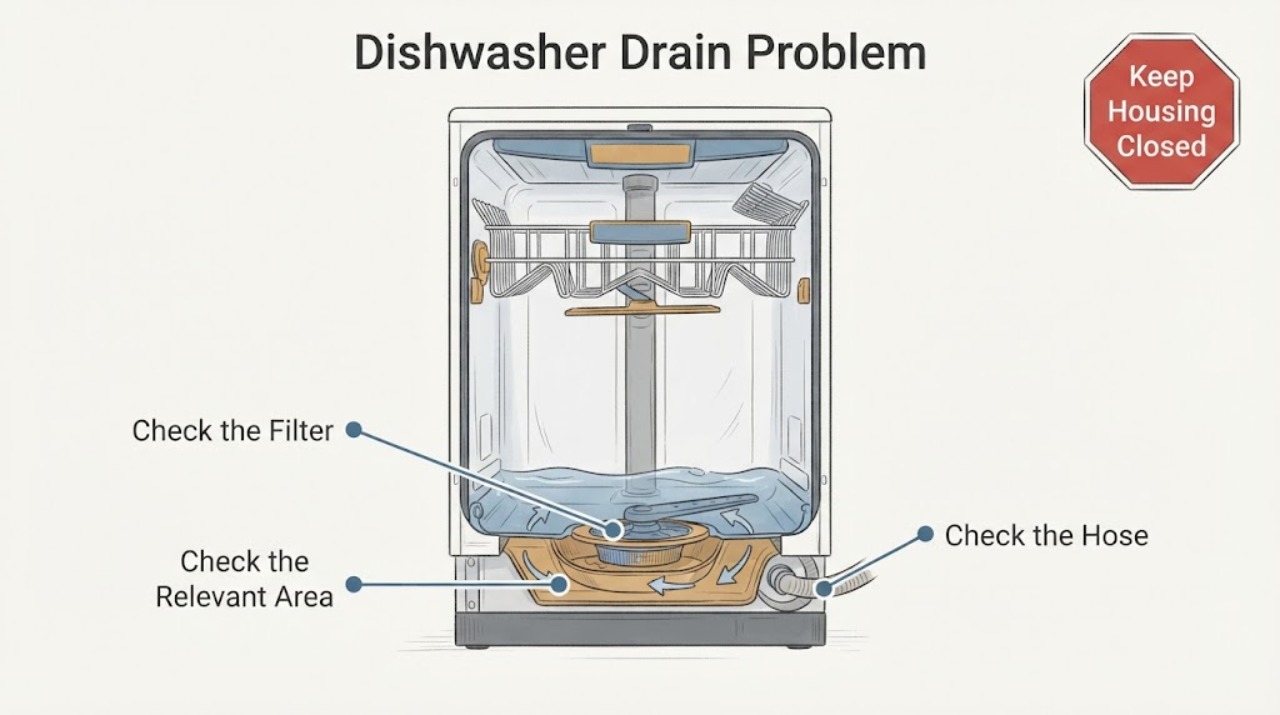
Stop the dishwasher and inspect the water level without reaching into the pump area. Note whether water is only in the filter cup or covers the tub floor, and check for leaking at the toe-kick, under-sink connections, or air gap.
Expected result: Only a small amount of water is halfway up the filter area, or water remains across the tub or is leaking.
Next step: For a small filter-cup amount, continue with filter and hose checks. For full-tub water or a leak, keep the dishwasher off, contain water safely, shut off the accessible water supply if needed, and arrange service if the cause is not visible.
Why this matters
Why: KitchenAid says the small filter-area amount can be normal; full-tub water or leakage indicates an unresolved drain or plumbing condition.
-
Check 2
With the dishwasher off, remove only the user-accessible filters according to the model manual, rinse visible soil under running water, inspect the drain area for food or foreign objects, and reinstall both filters so the lower filter is secure and the upper assembly locks.
Expected result: The filters or drain opening contain soil/objects, or they are clean and correctly locked.
Next step: Clear only accessible debris, reinstall the filters correctly, and use the model manual for any further cleaning. If the tub remains full, do not reach deeper into the pump; continue with the under-sink checks or service.
Why this matters
Why: KitchenAid identifies filter cleaning and drain obstructions as user-level checks, and warns that incorrect filter installation can damage the dishwasher.
-
Check 3
Look under the sink without pulling the dishwasher out. Check whether the drain hose is kinked, pinched, sharply bent, loose, clogged, or routed too low; if an air gap is fitted, inspect its accessible cap/vent only as its manufacturer directs. Compare the route with the exact KitchenAid installation instructions.
Expected result: The hose is restricted or low, an air-gap vent is blocked, or the drain route appears open and correctly supported.
Next step: Correct only a visible routing issue permitted by the manual, without disconnecting a water-filled hose. If a connection must be removed, isolate power/water and use a container or call service; if the route is clear and water remains, stop and arrange service.
Why this matters
Why: KitchenAid says incorrect hose routing can cause poor/no drainage or backflow, while an air gap allows proper drainage without a vacuum. An apparently clear route does not rule out a pump or internal blockage.
-
Check 4
If the dishwasher was newly installed or recently connected to a disposer, verify from the outside that the disposer dishwasher inlet knockout plug was removed and the hose is attached to the correct inlet. If suds or foam are present, turn the dishwasher off and allow them to dissipate; do not add more detergent or rinse aid.
Expected result: The installation is new and the knockout plug may remain, the disposer/air gap is obstructed, or soap foam is present; alternatively, none of these conditions is found.
Next step: Have a qualified installer correct a retained plug or unsafe connection; clear only an accessible disposer/air-gap obstruction according to its instructions; wait for suds to dissipate before any permitted rinse. If none applies, continue to service escalation.
Why this matters
Why: KitchenAid identifies a retained knockout plug, obstruction, and excessive suds as distinct causes of poor drainage or leakage. Their absence means the symptom remains unresolved and does not prove a failed pump.
-
Check 5
After the physical checks are complete and there is no leak or standing hazard, record the model, cycle, water level, filter result, hose/air-gap/disposer result, detergent used, and any displayed code. If the exact model guidance allows it, disconnect the control from power for 30 seconds and restore it once; do not repeatedly reset a hard-wired circuit.
Expected result: The dishwasher drains after the documented check/reset, or water remains, the drain error returns, the pump area needs access, or the appliance leaks.
Next step: If it drains and stays leak-free, monitor one normal cycle using the manual. If it does not, leave it off, shut off water when appropriate, and arrange qualified KitchenAid service; do not open the pump or cabinet for live testing.
Why this matters
Why: KitchenAid says a 30-second control reset can help some drain-related control issues, but persistent water or F9E1-type behavior needs model-specific service rather than a guessed pump or board diagnosis.
Use your observations
Decision map
Find the observation that best matches what you see, then follow the next safe action.
-
PATH 01Next step
What you see
If only a small amount of water remains halfway up the filter area and the next cycle drains normally
Do this next
Leave the filters correctly installed and monitor normal operation; do not disassemble the drain pump for that observation alone.
Why this path and its safety boundary
Why it matters: KitchenAid describes that amount as normal water retained to protect seals.
-
PATH 02Next step
What you see
If water covers the tub floor, rises above the filter area, or leaks at the toe-kick or under-sink connection
Do this next
Stop the dishwasher, contain water safely, shut off the accessible water supply if needed, and arrange service if the visible hose/filter checks do not resolve it.
Why this path and its safety boundary
Why it matters: The drain problem is unresolved and has a water-damage risk; the water level does not identify a failed part.
-
PATH 03Next step
What you see
If the hose is kinked/low, the air gap is blocked, or a new disposer connection still has its knockout plug
Do this next
Correct the visible issue only under the exact installation/manufacturer instructions; do not disconnect a water-filled connection without isolation and containment.
Why this path and its safety boundary
Why it matters: The installation or accessible drain path can explain poor drainage or backflow.
-
PATH 04Next step
What you see
If foam or suds are present after hand dish soap or excess detergent was used
Do this next
Turn the dishwasher off, let suds dissipate, use only automatic-dishwasher detergent thereafter, and stop if water continues to leak.
Why this path and its safety boundary
Why it matters: KitchenAid says suds can push water out and cause leaking or poor wash performance.
-
PATH 05Next step
What you see
If filters, hose, air gap, disposer and detergent checks are clear but water remains or a drain error returns
Do this next
Keep the dishwasher off and arrange qualified KitchenAid service; do not reach into guarded components, open the cabinet, or perform live tests.
Why this path and its safety boundary
Why it matters: A deeper restriction, pump, control, or installation issue remains unverified.
Helpful context
Understand the symptom
Do not mistake normal filter-cup water for a blocked tub
KitchenAid says a small amount of water halfway up the filter area can remain to keep seals from drying and should drain when the next cycle starts. Water covering the tub floor, rising above the filter area, returning after a cycle, or causing a drain error is a different symptom. The water level alone does not prove that a pump or control has failed.
Start with filters and visible drain restrictions
Turn the dishwasher off before handling the filters. Clean the accessible upper and lower filters under running water and reinstall them correctly; KitchenAid warns not to operate the dishwasher without the filters properly locked. Check only visible food or obstruction at the drain and use the sink/disposer or air-gap manufacturer's instructions for its accessible blockage check.
Check the under-sink drain route
A kinked, pinched, sharply bent, low, or clogged drain hose can leave water in the tub or allow backflow. KitchenAid says a high loop or air gap may be required depending on the model and local plumbing. Inspect the route from outside the cabinet and match height, length, and attachment to the exact installation instructions; do not pull the dishwasher out by force.
Treat new installations and suds as separate clues
If the problem began immediately after installation, confirm that a connected garbage disposer had its dishwasher inlet knockout plug removed and that the hose is clamped to the correct inlet. If there are bubbles or foam, stop the dishwasher and let the suds dissipate; KitchenAid says hand dish soap or excessive detergent can push water out and cause leaking or poor wash performance. These observations do not identify an internal component.
When checks do not resolve it
Need a professional?
Arrange KitchenAid service when water remains after the documented filter and drain-path checks, a leak or overflow is present, a hose/pump connection needs disassembly, F9E1 or another drain error returns, the dishwasher is hard-wired and power isolation is uncertain, or the internal pump/controls would need access. Keep the dishwasher off and shut off water when a leak is active or cannot be contained.
Safety scope: Turn off power and water before installation or connection work. Do not reach into a pump, pull out a connected dishwasher, disconnect a water-filled hose without containment, remove guarded panels, perform live electrical tests, or repeatedly run a leaking appliance.
Have this ready
- Provide the full model number, whether the installation is new, cycle and water level, filter condition, hose/high-loop or air-gap result, disposer connection and knockout-plug status, detergent used, leak/suds observations, and any displayed code.
Common questions
FAQ
Is a little water in the KitchenAid dishwasher filter area normal?
KitchenAid says a small amount halfway up the filter area can be normal because it helps keep seals from drying and should drain at the next cycle. Water across the tub or water that returns after a cycle is a different symptom.
Why does a newly installed KitchenAid dishwasher leave water?
KitchenAid identifies a retained disposer knockout plug, low or incorrect drain-loop routing, a kinked/pinched hose, or an air-gap or disposer obstruction as installation-related possibilities. Match routing and height to the exact installation instructions rather than assuming every model uses the same arrangement.
Can I reset a KitchenAid dishwasher drain problem?
KitchenAid's F9E1 guidance supports disconnecting power for 30 seconds and restoring it once, but a generic drain problem is not automatically F9E1. Check the physical drain path first; persistent standing water, leaks, or a returning code need service.
Read the exact guide
Official sources
- Water Remains In Filter Area - DishwasherKitchenAid Product Help · The opened official page supports distinguishing normal filter-cup water from filter maintenance needs and warns that filters must be correctly installed before operation.
- Not Draining - Newly Installed - DishwasherKitchenAid Product Help · The opened official page specifically addresses newly installed KitchenAid dishwashers. Its high-loop and knockout-plug guidance is conditional on installation/model and is not treated as a universal plumbing layout.
- Drain Line InstallationKitchenAid Product Help · The opened official installation page supports safe external inspection and installation boundaries. It does not justify changing plumbing or connections without the model instructions and safe isolation.
- F9E1 - DishwasherKitchenAid Product Help · The opened official page defines F9E1 as Long Drain for the KitchenAid dishwasher help path. It is used only for code-specific conditional guidance; the assigned generic problem is not labeled F9E1.
- Not Draining - Water Remain at End of Cycle - DishwasherKitchenAid Product Help · The opened official KitchenAid dishwasher page covers generic end-of-cycle standing-water checks. It distinguishes normal filter-cup water from a full drain problem and does not establish an internal part diagnosis.
Community feedback
Share a repair observation
Share a plain-text repair observation. Accepted observations are published automatically; this page may take a moment to update.