
On this page
Start here
Quick answer
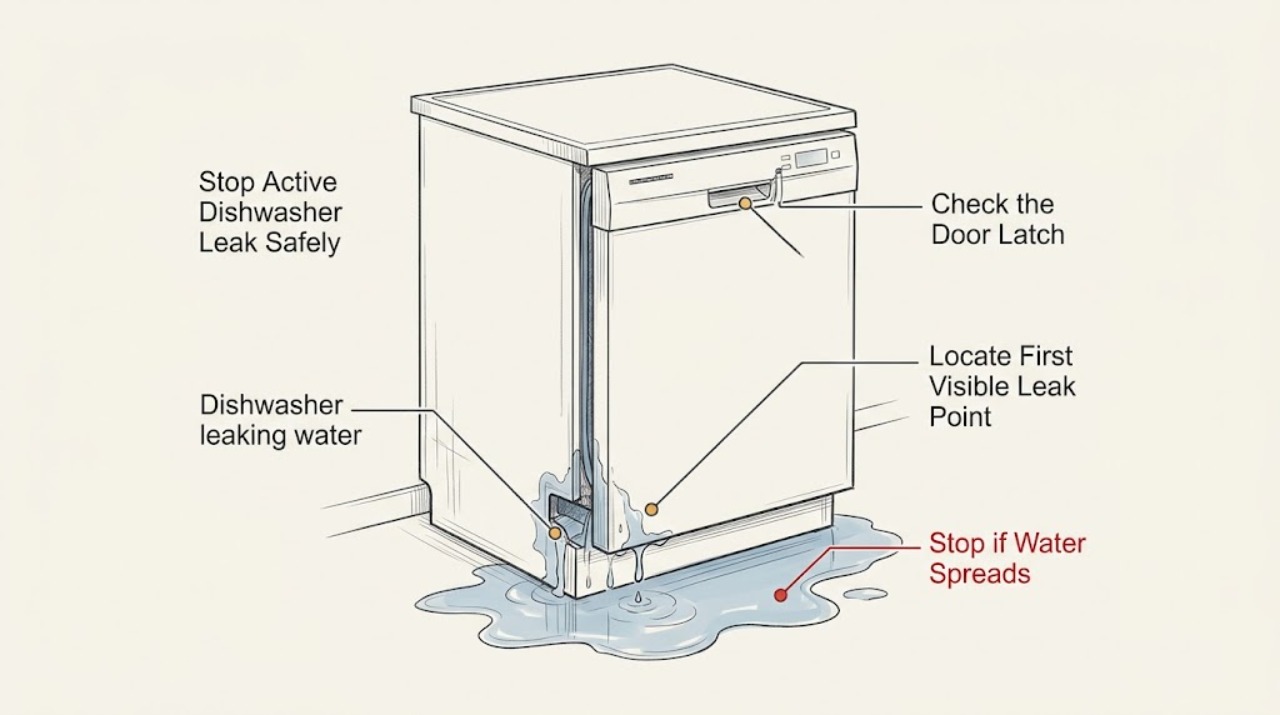
Stop a KitchenAid dishwasher leak before trying to identify the part. If water is actively escaping, cancel or stop the cycle only if the controls and floor are safe to approach; keep clear of water near electrical connections, and shut off power and the dishwasher water supply from a safe, accessible location if the leak continues. Do not run another cycle to test it. From outside the appliance, note whether water starts at the door, underneath, behind the cabinet, the vent, or after draining. A damaged or obstructed door seal, suds from the wrong detergent, an unlevel tub, a supply or drain connection, an inlet valve, overfill, or a pump/seal problem can produce different leak patterns. Check only cool, accessible areas and the exact model guidance; persistent leaks, water under the unit, a cracked tub, a failed valve or pump, mold or cabinet damage, or any electrical hazard requires qualified service.
Before you begin
Safety first
- Owner checks end at stopping the cycle, safe water/power isolation when accessible, external observation, cool door-seal and loading inspection, model-approved accessible filter or air-gap checks, and documentation. A qualified professional must handle moving the unit, panel or sump access, electrical testing, plumbing disconnection, inlet valves, pumps, seals, controls, tub, and drain repairs.
Work through in order
Diagnostic checks
Use only checks that match the exact appliance or system and its official guide.
-
Check 1
From a dry, safe position, check whether the dishwasher is still filling, spraying, draining, or leaking onto the floor. If the controls and floor can be approached safely, press Cancel or otherwise stop the cycle; if water is near electrical connections, the dishwasher is hardwired, or the leak continues, do not touch wet areas. Shut off the dishwasher water supply and power only from a safe, accessible location and keep people away.
Expected result: The cycle has stopped and the leak is no longer active; water continues to flow or pool; or water, power, heat, or access conditions are unsafe.
Next step: For an unsafe electrical, structural, or active-flow condition, keep clear and obtain urgent qualified appliance/electrical/plumbing help; for a stopped, safe appliance, place towels or a shallow tray only where they can be positioned without reaching under the unit and continue with external observations. Do not run another cycle.
Stop if: Stop for water near electrical connections, a tripped breaker, smoke, sparks, burning odor, a gas odor, uncontrolled filling, a collapsing or wet cabinet, or any need to reach beneath or move the dishwasher while wet.
Why this matters
Why: Stopping flow limits cabinet and floor damage. Ongoing flow suggests an inlet, overfill, or control problem; water near electrical parts creates shock risk, and a wet or hardwired appliance may require professional isolation.
-
Check 2
With the dishwasher stopped and safe, use a flashlight from outside the unit to note where water first appears: the door or front corners, bottom/front center, vent area, beneath the cabinet, behind the unit, or only after a drain event. Photograph the dry and wet pattern without removing the toe-kick, pulling the machine out, or touching a wet underside.
Expected result: Water starts at the door/front; beneath the center or rear; at the vent; under or behind the cabinet; or the origin cannot be seen.
Next step: Use the matching branch below and the exact model manual. If the origin is hidden or the dishwasher must be moved or opened, stop owner troubleshooting and arrange service.
Stop if: Stop if locating the source requires running a cycle, moving the dishwasher, removing panels, reaching under wet cabinetry, or touching hot, sharp, or energized parts.
Why this matters
Why: KitchenAid associates front/door patterns with the gasket, suds, or spray direction; center/bottom patterns with sump, pump seal, or overfill; and behind/under-cabinet patterns with supply, inlet-valve, or drain-line conditions. A vent spot can be condensation or a drain/steam issue, so the first point matters.
-
Check 3
If the first visible point is the front, let the door and tub become safe to approach, then inspect the gasket and tub lip without stretching or removing the seal. Look for tears, flattened sections, food debris, an item caught between the seal and tub, a rack item protruding into the door, or a latch that does not hold the door closed. Do not tighten or replace a latch unless the exact model instructions and safe isolation permit it.
Expected result: The gasket is clean and seated; debris or a protruding item is present; the gasket is torn, missing, flattened, or displaced; the latch is loose/damaged; or no door fault is visible.
Next step: Remove only safe room-temperature obstructions, wipe the accessible gasket as the model guide allows, and leave the dishwasher unused until the leak is resolved. A damaged gasket/latch or a leak with no visible door cause should be handled with model-specific parts or qualified service; do not test with another cycle.
Stop if: Stop for hot water, a sharp or loose seal, a door that falls or cannot latch, a cracked tub, water inside electrical areas, or any need to disassemble the door or tub.
Why this matters
Why: A clean obstruction can prevent sealing, while a torn or missing gasket and a bent or defective latch are hardware issues. If no front-door defect is visible, suds, spray-arm direction, leveling, or an internal leak becomes more likely.
-
Check 4
If the leak appeared at the door or vent and foam, bubbles, or soap film are present, record whether hand dish soap, a pre-wash spray, or excess detergent was used. Stop the dishwasher and allow suds to dissipate; clean accessible overflow without pouring more water into the unit. Use only automatic-dishwasher detergent in future, and follow the exact model's suds-removal instructions rather than improvising a rinse cycle while a leak remains.
Expected result: There are obvious suds; dishes carried residual hand soap; the detergent was correct with no foam; or the leak has no detergent relationship.
Next step: For a clear suds event, let foam subside and clean the overflow safely; do not resume washing until the leak is gone and the model guide permits it. If suds were absent, persistent, or the leak returns with correct detergent, arrange service rather than adding chemicals or repeating cycles.
Stop if: Stop for water on electrical parts, a continuing active leak, strong chemical fumes, a cracked tub, or any instruction that would require running the dishwasher while it still leaks.
Why this matters
Why: KitchenAid says hand dish soap and residue from pre-washed or soaked dishes can create excess suds that push water out. No suds makes a gasket, leveling, spray direction, plumbing, overfill, or pump/seal issue more likely.
-
Check 5
With power isolated as the exact model manual requires and the dishwasher cool, note whether water remains in the tub after the stopped cycle. If the model has an owner-accessible filter, inspect and rinse it as directed; from the sink, check an accessible air gap for buildup and look for a visibly kinked drain hose. Do not reach into the sump, remove a pump, or open a wet access area.
Expected result: There is only the small amount of water expected by the model; substantial water remains; the filter or air gap is blocked; the drain hose is kinked or disconnected; or the drain path appears clear.
Next step: Clear only the model-approved accessible filter or air-gap buildup, and do not run a cycle while a leak persists. For substantial standing water, a hidden blockage, failed drain motor, or leak under the unit, request qualified service.
Stop if: Stop for standing water near electrical parts, sharp debris, a wet or inaccessible sump, a blocked hose that needs disconnection, or any need to remove an access panel or perform live testing.
Why this matters
Why: KitchenAid notes that excessive standing water can indicate a clog that raises the tub level and contributes to leaks, while an improperly installed drain line can leave residual water. A clear accessible path does not rule out a pump, valve, sump, or hidden hose fault.
-
Check 6
Only from a dry, accessible area and with the water supply and power safely isolated, inspect visible connections under the sink for moisture, a kinked drain line, a loose clamp, or a supply hose/valve connection that is cracked or wet. Check whether the dishwasher door appears square and closes evenly; do not pull out the machine, loosen compression fittings, adjust leveling legs, or remove panels as a first check.
Expected result: A visible supply/drain connection is wet or damaged; the door is out of square or the appliance appears unlevel; or all visible connections look dry and aligned.
Next step: Keep the water supply off if a connection is visibly leaking and arrange qualified plumbing or appliance service. If leveling or installation correction is suspected, use the exact installation instructions or a professional; do not retest a leaking dishwasher yourself.
Stop if: Stop for water near wiring, a damaged hose or valve, a hardwired or inaccessible appliance, a wet cabinet floor, a gas or burning odor, or any need to move the dishwasher or open the base.
Why this matters
Why: KitchenAid links under-cabinet leaks to supply, inlet valve, and drain-line issues, and says an unlevel or out-of-square dishwasher can keep the door from sealing. Dry visible connections do not rule out a hidden pump, sump, valve, or tub leak.
-
Check 7
Prepare a service record with the complete KitchenAid model and serial information, first visible leak location, cycle stage, amount and pattern of water, suds or detergent history, door/gasket/latch observations, standing-water and drain findings, visible hose or valve condition, leveling clues, and any cabinet or floor damage. Do not run a cycle solely to obtain a better video.
Expected result: The leak stopped after an obvious safe obstruction or detergent issue; it recurs; its source is hidden; water is under the unit; or a component, tub, cabinet, or floor may be damaged.
Next step: Keep the dishwasher out of service for a recurring, hidden, underneath, or component-related leak and arrange qualified KitchenAid appliance service. Include photos only when taken from a dry, safe location and provide the model information for correct parts and instructions.
Stop if: End owner troubleshooting when diagnosis requires moving the dishwasher, removing panels, disconnecting plumbing or wiring, entering the sump, replacing a pump/valve/seal, or testing an energized appliance.
Why this matters
Why: A one-time external cause can differ from a recurring or hidden leak. The record helps a technician distinguish door sealing, suds, plumbing, drain, overfill, pump/seal, inlet-valve, tub, and installation conditions without hazardous reproduction.
Use your observations
Decision map
Find the observation that best matches what you see, then follow the next safe action.
-
PATH 01Next step
What you see
Water first appears at the door, front corners, or sides, and the cool inspection finds a torn, flattened, displaced, dirty, or obstructed gasket, a protruding rack item, or a door/latch that does not close squarely.
Do this next
Remove only safe room-temperature obstructions and follow the exact model's gasket/latch guidance; leave the dishwasher unused for damaged seals, a defective latch, a recurring leak, or any need for disassembly and arrange service.
Why this path and its safety boundary
Why it matters: A sealing or loading problem is more likely than a hidden supply leak. If the gasket and latch look sound, suds, spray direction, leveling, or an internal leak remains possible.
-
PATH 02Next step
What you see
The front or vent area is wet and foam, bubbles, hand-dish-soap residue, pre-wash residue, or condensation after opening is present, without an obvious torn seal.
Do this next
Stop the cycle, allow suds to dissipate, clean the accessible overflow safely, and use only automatic-dishwasher detergent. Do not run another cycle until the leak is resolved; call service if foam or vent water recurs or the source is unclear.
Why this path and its safety boundary
Why it matters: KitchenAid says wrong or excess detergent can create suds that push water out, while vapor from the door vent can condense and leave a spot. Persistent water or a leak without suds needs a different diagnosis.
-
PATH 03Next step
What you see
Water first appears under the center, rear, or cabinet, the visible door seal is intact, and there is moisture at a supply/drain connection, a kinked line, substantial standing water, or evidence of overfill.
Do this next
Keep water and power safely isolated, leave the dishwasher unused, and arrange qualified appliance or plumbing service. Do not loosen fittings, move the appliance, open the base, or replace a valve or pump without model-specific diagnosis.
Why this path and its safety boundary
Why it matters: A supply hose, inlet valve, drain installation, clog, float/overfill condition, or pump/sump seal is more likely than a simple door obstruction. The hidden source cannot be safely confirmed from the puddle alone.
-
PATH 04Next step
What you see
A leak coincides with substantial water remaining in the tub, a blocked accessible filter or air gap, a kinked or incorrectly routed drain hose, or water backing into the dishwasher after draining.
Do this next
Clear only owner-accessible parts specified by the exact manual and keep the dishwasher off while it leaks. If standing water persists or the drain motor/hose is hidden or defective, request qualified service.
Why this path and its safety boundary
Why it matters: A drain restriction or installation problem can raise water levels and contribute to leakage, but a clear accessible path does not rule out a drain motor, valve, sump, or check-valve fault.
-
PATH 05Next step
What you see
The leak returns after safe external checks, starts from an unseen area, involves a cracked tub or damaged cabinet/floor, or occurs with water near electrical connections, smoke, odor, or uncontrolled filling.
Do this next
Stop using the dishwasher, keep clear of wet electrical areas, and obtain urgent qualified KitchenAid appliance, plumbing, or electrical service. For smoke, fire, active arcing, or a gas emergency, leave and contact emergency help from a safe location.
Why this path and its safety boundary
Why it matters: A recurring or hidden leak is more likely to involve an internal seal, pump, inlet valve, tub, control, installation, or structural condition. Water and electricity together create an immediate shock and property-damage risk.
Helpful context
Understand the symptom
Where the water starts is more useful than where it ends
A puddle at the front does not always mean the door gasket is the original source. KitchenAid groups leak patterns by the first visible location: door or front, bottom or center, behind or under the cabinet, and vent. Observe from outside while the machine is stopped; do not pull out a built-in dishwasher or remove panels just to see underneath.
Door leaks often involve sealing, suds, or loading
Look for a torn, flattened, dirty, or displaced gasket, an item protruding from a rack, an object between the seal and tub, a latch that does not hold the door squarely, or foam from hand dish soap or pre-washed dishes. These clues change the next step, but they do not justify another wash cycle while water is escaping.
Leaks underneath need a plumbing and appliance boundary
Water under the machine can come from a supply connection, drain hose, inlet valve, sump, pump or motor seal, overfill, or a drain problem. Only inspect visible connections that are safely accessible with water and power isolated as the model instructions require. Do not loosen a fitting, remove an access panel, reach beneath a wet appliance, or replace a pump or valve from the puddle location alone.
Safety boundary
Stop conditions
- Stop the dishwasher and keep clear for water near electrical connections, a tripped breaker, smoke, sparks, burning odor, uncontrolled filling, a damaged cabinet or floor, or any need to reach beneath a wet appliance.
- Do not run another cycle to reproduce a leak, move a built-in dishwasher, remove access panels, reach into the sump, or perform live electrical or plumbing tests.
- Do not loosen supply fittings, disconnect a drain hose, remove a pump or valve, adjust leveling hardware, or replace a gasket/latch unless the exact model instructions and safe isolation explicitly support that owner task.
- Do not add chemicals, hand dish soap, extra detergent, oil, or water as an improvised leak remedy. Use only automatic-dishwasher detergent and the exact model's suds-removal guidance.
- Call qualified KitchenAid appliance service for recurring, hidden, underneath, cracked-tub, inlet-valve, overfill, pump/seal, drain-motor, control, or installation leaks, or whenever diagnosis requires moving, opening, isolating, or replacing internal components.
Only after diagnosis
Potential parts
- KitchenAid dishwasher door gasket or tub/cabinet seal
Consider this only when inspection confirms a torn, flattened, missing, displaced, or model-specific seal is the source of a front or side leak after safe loading and cleaning checks.
Verify exact model, seal location, profile, channel, and installation instructions; do not substitute a generic gasket or use adhesive as a seal repair. - KitchenAid dishwasher water supply hose or inlet valve
Consider this only when qualified inspection finds a wet, cracked, loose, or failed supply connection or inlet valve causing an underneath or overfill leak.
Confirm exact model, fitting, hose routing, valve configuration, electrical connection, and manufacturer requirements; water and power must be safely isolated for this work. - KitchenAid dishwasher drain hose, pump, sump, or motor seal
Consider this only when diagnosis links the leak or standing water to a hidden drain restriction, drain hose, pump, sump, diverter, or motor-shaft seal after accessible path checks.
Verify exact model, hose routing, pump/sump design, seal position, connectors, and service instructions; a puddle location alone does not identify the correct part. - KitchenAid dishwasher door latch or leveling/installation hardware
Consider this only when a technician confirms that a defective latch or out-of-square installation prevents the door from sealing and is not an obstruction or gasket condition.
Confirm exact model, latch geometry, adjustment range, mounting, and installation requirements; do not move or re-level a wet built-in dishwasher without safe isolation and support.
When checks do not resolve it
Need a professional?
Arrange qualified KitchenAid appliance service for a leak that recurs, begins underneath or behind the dishwasher, leaves substantial standing water, involves a damaged tub, inlet valve, pump or seal, or continues after safe external checks of loading, gasket, detergent, accessible filter, drain path, and visible connections. Keep the dishwasher off until the source is fixed. Treat water near electrical parts, smoke, sparks, burning odor, uncontrolled filling, and cabinet or floor damage as urgent safety conditions and seek emergency help from a safe location when appropriate.
Safety scope: Owner checks end at stopping the cycle, safe water/power isolation when accessible, external observation, cool door-seal and loading inspection, model-approved accessible filter or air-gap checks, and documentation. A qualified professional must handle moving the unit, panel or sump access, electrical testing, plumbing disconnection, inlet valves, pumps, seals, controls, tub, and drain repairs.
Common questions
FAQ
What should I do first if my KitchenAid dishwasher is leaking water?
Stop the cycle if it is safe to approach, keep clear of wet electrical areas, and stop the dishwasher's water supply and power from a safe accessible location if the leak continues. Do not run another cycle. Note where water first appears and arrange service for recurring or hidden leaks.
Why is my KitchenAid dishwasher leaking from the bottom of the door?
KitchenAid lists a damaged or obstructed gasket, protruding dishes, a defective latch, excess suds, spray direction, and an unlevel or out-of-square dishwasher as possibilities. Inspect only a cool, accessible seal and loading; do not retest while the machine leaks.
Can the wrong soap make a KitchenAid dishwasher leak?
Yes. KitchenAid says hand dish soap or residue from pre-washed or soaked dishes can create suds that push water out. Stop the cycle, let suds dissipate, clean overflow safely, and use only detergent made for automatic dishwashers. Call service if foam or leaking returns.
Is a little water at the dishwasher vent always a leak?
Not always. KitchenAid notes that vapor released through the door vent can condense and leave a spot after the door is opened. If water is excessive, appears during the cycle, reaches the cabinet, or occurs with a blocked drain or other leak pattern, stop using the dishwasher and have it assessed.
Why is water leaking from underneath my KitchenAid dishwasher?
Possible areas include the water supply connection, inlet valve, drain line, overfill system, pump, sump, or motor seal. Inspect only safely accessible dry connections with power and water isolated as the model requires. Do not pull out the dishwasher or remove the base yourself.
Can a clogged KitchenAid dishwasher filter cause a leak?
It can contribute to standing water and a rising tub level. Check only an owner-accessible filter or air gap as the exact manual permits. If water remains, the drain path is hidden, or the dishwasher leaks underneath, keep it off and call a professional.
Should I adjust the leveling legs if my KitchenAid dishwasher leaks?
An unlevel or out-of-square dishwasher can prevent the door from sealing, but leveling a built-in appliance can involve moving it and accessing electrical or plumbing connections. Use the exact installation instructions or a qualified technician; do not adjust it while wet or leaking.
Can I run a short cycle to find where my KitchenAid dishwasher leaks?
Do not run a cycle solely to reproduce an active leak. Observe the first visible location from outside after stopping the machine, photograph it safely, and give the cycle stage and pattern to a technician. A hidden leak may involve energized parts or cause cabinet damage.
Can I replace a KitchenAid dishwasher gasket or hose myself?
Some models have owner-accessible seals or connections, but fit and isolation are model-specific. Do not begin if water or power cannot be safely isolated, the appliance must be moved, or the source is uncertain. Use the exact manual; otherwise arrange qualified service.
When is a KitchenAid dishwasher leak an emergency?
Keep clear and seek urgent help for water near electrical connections, a tripped breaker, smoke, sparks, burning odor, uncontrolled filling, a damaged cabinet or floor, or a leak that cannot be isolated safely. Leave for fire or active arcing and contact emergency help from a safe location when appropriate.
Read the exact guide
Official sources
- Drain Line InstallationKitchenAid Product Help · Official KitchenAid drain-line installation guidance; exact model installation instructions control.
- Dishwasher Leaking Troubleshooting GuideKitchenAid Product Help · Official KitchenAid Product Help guide for dishwasher leaks; exact model instructions control parts and owner tasks.
- How to Find & Fix Dishwasher LeaksKitchenAid · Official KitchenAid consumer guidance; model construction and repair access vary.
- Leaking - Underneath - DishwasherKitchenAid Product Help · Official KitchenAid under-unit leak guidance; do not access wet or hardwired areas without qualified isolation.
- How To Unclog a Dishwasher & Help Prevent ClogsKitchenAid · Official KitchenAid consumer guidance; filter access and drain design vary by model.
- Dishwasher Water Supply ConnectionKitchenAid Product Help · Official KitchenAid installation/support guidance; fitting and access vary by model and installation.
- Leaking from DoorKitchenAid Product Help · Official KitchenAid door-leak troubleshooting; use only the exact model's manual for repairs.
Community feedback
Share a repair observation
Share a plain-text repair observation. Accepted observations are published automatically; this page may take a moment to update.