
On this page
Start here
Quick answer
A dishwasher that leaks during fill or wash can be leaking at the door seal, an inlet or drain connection, the tub or pump area, or from excess suds and spray being directed past the door. First stop the cycle, keep water away from electrical parts, and note whether water appears at the front edge, underneath, behind the unit, or only when the spray and wash motor run. With power and water safely controlled, inspect the visible door seal, protruding dishes, filter area, drain path, and accessible supply and drain connections; use only automatic-dishwasher detergent. Do not pull the appliance out, open electrical panels, reach under a wet cabinet, or tighten a pressurized connection without the model instructions and a dry, safe work area. Shut off the dishwasher's water supply and power at the appropriate disconnect and arrange qualified appliance or plumbing service for an active leak, water near electrical equipment, a failed inlet valve, persistent overfill, a cracked tub, a pump seal, or a leak that remains after safe checks.
Before you begin
Safety first
- A homeowner may stop and contain water, inspect a visible gasket and load, confirm the detergent type, clean an accessible filter as the manual permits, and observe visible dry-access connections. A qualified technician should handle appliance removal, electrical parts, inlet valves, pumps, sumps, tub seals, concealed hoses, overfill faults, and any pressurized or wet connection.
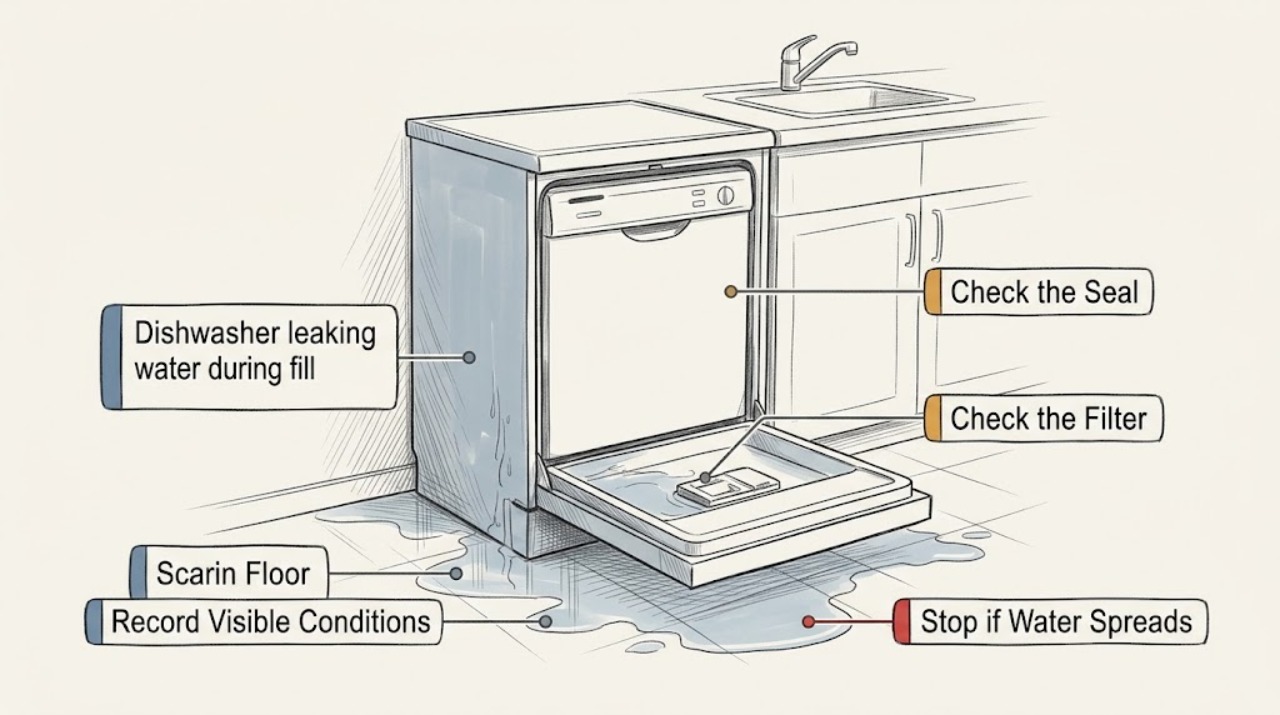
Work through in order
Diagnostic checks
Use only checks that match the exact appliance or system and its official guide.
-
Check 1
Stop the cycle and contain the water from a dry, safe position; record whether the first water appears during fill, while the spray or wash motor is running, during drain, or only after the door is opened.
Expected result: Note the first wet location, the cycle phase, the amount and direction of flow, whether suds are present, and whether water is near an outlet, cord, junction, or other electrical equipment.
Next step: Cancel the cycle, wipe up accessible water, and keep the dishwasher off while making only the safe checks below. If the source is active or cannot be reached without moving the appliance, arrange service and provide the timing and location record.
Stop if: Stop immediately for water near electrical equipment, an active spray, water entering cabinets or flooring, a burning smell, a damaged cord, or any need to reach behind or beneath a wet appliance.
Why this matters
Why: Fill timing makes the water inlet, supply connection, float, or overfill path more likely; wash timing makes the door seal, loading, suds, spray path, pump, sump, or motor seal more likely. Drain timing shifts attention toward the drain hose or drain connection. The first wet point is more useful than the final puddle.
-
Check 2
With the dishwasher stopped, inspect the visible door gasket, tub edge, rack ends, and spray-arm path; remove only an item or food residue that is plainly caught at the seal, and do not pry or disassemble the door.
Expected result: Classify the seal as clean and seated, dirty, cracked, torn, flattened, displaced, or impossible to judge; note a utensil or dish protruding through the door, blocked spray-arm movement, or water emerging from a door vent.
Next step: Remove a plainly trapped item or residue, reload so nothing contacts the seal, and follow the model manual for a compatible gasket inspection or replacement. Do not run another cycle if the seal is damaged, the door is not square, or water leaks again.
Stop if: Do not force the door, stretch or glue the gasket, remove door panels, or continue operating with a damaged seal or water escaping at the door.
Why this matters
Why: A front-edge or corner leak with an obstruction, damaged gasket, poor door closure, or misdirected spray supports a door-side cause. Condensation or a spot after opening can have a different explanation from a leak during wash. A clean, correctly seated seal with a fill-only leak makes the supply or inlet path more likely.
-
Check 3
Look inside the tub for persistent bubbles or foam, confirm that only automatic-dishwasher detergent was used, and inspect the user-accessible filter and drain area according to the model instructions without reaching into a running pump.
Expected result: Record whether suds remain after the cycle is stopped, whether hand dish soap or pre-wash residue may have entered, whether the filter or sump area is visibly blocked, and whether the leak occurs during wash or drain.
Next step: Stop using the machine until suds have dissipated, clean only the accessible filter as the manual permits, and use the correct detergent on the next service-approved test. Arrange service if foam persists, the tub overfills, water remains, or the leak returns.
Stop if: Do not add random cleaners, mix chemicals, reach into a moving pump, remove the sump, or run repeated cycles to flush an unknown product. Keep the appliance off for standing water or an active leak.
Why this matters
Why: Excess suds can push water past the door and create a leak or poor washing. A blocked filter or drain path can leave water at the wrong level or expose a drain-side problem, but a clear filter does not rule out a pump, sump, or hose fault.
-
Check 4
Only from a dry, normally accessible position, inspect the visible shutoff, supply connection, drain connection, and nearby cabinet floor for fresh moisture, a kink, a cracked hose, a displaced washer, or a connection that leaks when the machine fills or drains.
Expected result: Record whether the moisture is at the supply side during fill, at the drain side during drain, under the center or rear, or absent until the wash spray starts; note whether the shutoff is accessible and whether the appliance is newly installed or recently moved.
Next step: If a visible connection is wet, leave the water supply off and provide photographs and the cycle timing to a qualified appliance or plumbing technician. Do not pull the dishwasher out or tighten a connection while it is pressurized or the area is wet.
Stop if: Do not disconnect a hose, move the appliance, reach behind it, remove the toe panel, or open an inlet-valve or pump compartment as a general homeowner check.
Why this matters
Why: A supply-side fill leak supports an inlet hose, fitting, inlet valve, or washer issue; a drain-timed leak supports a drain hose or connection. A center or rear leak can involve a pump, sump, diverter, or motor seal. Recent installation raises a routing, seating, or leveling question, but the exact model instructions govern.
-
Check 5
From the front and without moving the dishwasher, check whether the door closes squarely and the appliance appears supported by its leveling feet; gather the model information and photographs of the first wet point for service if the leak persists.
Expected result: Note a visibly tilted or loose appliance, a door that binds or leaves a gap, repeat leakage after a correct load and detergent, a cracked tub, a persistent overfill, or a leak that cannot be seen without removing panels.
Next step: Keep the dishwasher out of service and arrange qualified appliance repair or plumbing service. Give the technician the model, phase of the cycle, first wet location, detergent history, filter observation, and whether the machine was recently installed or moved.
Stop if: Do not pull out, tilt, lift, shim, open panels, or attempt electrical, pump, inlet-valve, float, tub, or seal repairs without model-specific instructions and qualified support.
Why this matters
Why: An appliance that is not level or square can prevent the door from sealing, but leveling does not explain every leak. Persistent leakage after safe loading and detergent checks makes an inlet valve, float, pump, sump, motor seal, hose, drain path, tub, or control fault more likely and needs diagnosis.
Use your observations
Decision map
Find the observation that best matches what you see, then follow the next safe action.
-
PATH 01Safety boundary
What you see
Water first appears at the front edge or corners while spray or wash is running, especially with a displaced or damaged gasket, a protruding item, poor closure, or suds.
Do this next
Stop the cycle, remove only plainly trapped residue or items, correct the load and detergent, and follow the model instructions for a seal check. Keep the machine off if the gasket is damaged or the leak returns.
Why this path and its safety boundary
Why it matters: A door-side seal, loading, leveling, spray-direction, or excess-suds cause is more likely than a hidden supply connection.
Safety stop: Do not force the door, stretch the gasket, remove door panels, or keep testing an active front leak.
-
PATH 02Safety boundary
What you see
Water appears as the dishwasher fills, before the wash spray begins, and moisture is visible near the supply connection, inlet area, or rear of the cabinet.
Do this next
Leave the water supply off, do not pull the appliance out, and arrange appliance or plumbing service with the location and timing documented.
Why this path and its safety boundary
Why it matters: A supply hose, fitting, washer, inlet valve, float or overfill path is more likely than a door-only leak.
Safety stop: Do not disconnect a pressurized hose, open the inlet valve compartment, or continue filling tests.
-
PATH 03Safety boundary
What you see
Water appears beneath or behind the dishwasher during drain, or the leak becomes visible after a drain event rather than during initial fill.
Do this next
Keep the unit off and inspect only the visible dry-access area. Photograph the wet path and arrange qualified service rather than removing the appliance or pump cover.
Why this path and its safety boundary
Why it matters: A drain hose connection, routing problem, pump, sump, or motor seal is more likely; water may travel before pooling.
Safety stop: Do not reach under a wet appliance, disconnect the drain hose, or run another cycle to reproduce the leak.
-
PATH 04Safety boundary
What you see
Bubbles or foam are present and water is pushed out at the door or underneath after hand dish soap, pre-wash residue, or too much unsuitable detergent was used.
Do this next
Stop the cycle, let the suds dissipate, remove accessible overflow, and do not run another cycle until the correct detergent and the model's cleanup instructions are confirmed. Call service if foam or leaking persists.
Why this path and its safety boundary
Why it matters: Excess suds can overflow through a normally sealed door and mimic a gasket failure.
Safety stop: Do not mix cleaners, add unapproved chemicals, or keep operating while foam is forcing water into cabinets or onto electrical equipment.
-
PATH 05Safety boundary
What you see
The dishwasher was newly installed or moved, the door does not close squarely, or the unit appears unsupported or tilted, and the leak is concentrated at the door edge.
Do this next
Do not operate it until installation and leveling are reviewed by the installer or qualified technician; provide the model and the first wet location.
Why this path and its safety boundary
Why it matters: Installation, hose routing, leveling, or a door-seal alignment issue is plausible, but the exact installation instructions and visible connections still need to be checked.
Safety stop: Do not pull the unit from the cabinet, shim it, or alter water or electrical connections while wet or energized.
-
PATH 06Safety boundary
What you see
The filter and loading are reasonable, the correct detergent is used, the visible gasket and connections are not the source, but water still appears during fill or wash, or a crack, overfill, pump, sump, or concealed hose is suspected.
Do this next
Leave water and power isolated as appropriate and arrange qualified appliance repair or plumbing service. Share timing, first wet point, photographs, model information, detergent and filter observations, and any recent installation history.
Why this path and its safety boundary
Why it matters: A component or concealed installation fault is more likely than a simple user-setting issue, and the leak cannot be identified safely from external checks.
Safety stop: Do not open panels, test electrical parts, remove the pump or inlet valve, tilt the appliance, or add water to reproduce the leak.
Helpful context
Understand the symptom
Stop the cycle and map when the water appears
Press the model's cancel or stop control, close the dishwasher door, and clean up water that has reached the floor or cabinets. If water is still entering, use the accessible shutoff only if it can be reached without reaching through water; isolate power at the appropriate disconnect when the area is wet or water is near electrical equipment. The timing matters: water during fill points toward the supply, inlet, float, or an overfill path, while water during spray or wash points more toward the door seal, suds, loading, spray direction, tub, sump, pump, or motor seal. A puddle found after the cycle may have traveled from a higher connection.
Use the leak location as the first decision
Water at the front corners or door edge makes the door seal, an item trapped in the seal, a protruding rack item, suds, spray misdirection, or leveling worth checking. Water under the center or rear can come from a pump, sump, motor seal, inlet valve, supply hose, or drain connection. A leak that occurs only while the tub is filling should not be diagnosed as a door gasket solely because water eventually reaches the front. Photograph the first wet point from a dry, safe position rather than guessing from the final puddle.
Check detergent, loading, and visible seals without opening the cabinet
Use only detergent made for automatic dishwashers; hand dish soap or residue from pre-washing can create suds that push water out. Check for dishes, silverware, or food caught between the door and tub, and make sure the racks or spray arms are not directing water at the seal. Inspect the visible gasket for food residue, flattening, cracks, or a section out of its track. If the appliance is visibly out of square or the door will not close evenly, do not compensate by forcing the latch.
Safety boundary
Stop conditions
- Stop the cycle and keep the dishwasher off for an active leak, standing water, water entering cabinets or flooring, or a leak that returns after a safe check.
- Keep water away from outlets, cords, junctions, and electrical equipment; isolate power at the appropriate disconnect when the area is wet or electrically unsafe.
- Do not pull out, tilt, lift, or shim the appliance, and do not reach behind or beneath it as a general troubleshooting step.
- Do not open panels, handle wiring, test a pump or inlet valve, disconnect pressurized hoses, or attempt a concealed tub, sump, or motor-seal repair.
- Do not mix cleaners or run repeated cycles with foam, a damaged seal, a cracked tub, persistent overfill, or water near electrical equipment.
When checks do not resolve it
Need a professional?
Arrange qualified appliance repair or plumbing service for an active or recurring leak, water near electrical equipment, a fill-only leak at the inlet path, a drain-timed leak beneath the unit, persistent overfill, a damaged gasket that will not seal, a cracked tub, a pump or motor-seal suspicion, or any source that cannot be located through dry, visible access.
Safety scope: A homeowner may stop and contain water, inspect a visible gasket and load, confirm the detergent type, clean an accessible filter as the manual permits, and observe visible dry-access connections. A qualified technician should handle appliance removal, electrical parts, inlet valves, pumps, sumps, tub seals, concealed hoses, overfill faults, and any pressurized or wet connection.
Common questions
FAQ
Why does my dishwasher leak only while it is filling?
A fill-only leak makes the supply hose, fitting, inlet valve, float or overfill path more likely than a wash-only door leak. Stop the cycle, isolate the water safely, and do not disconnect a pressurized connection or pull the appliance out.
Why does water come out of the dishwasher door during wash?
Check for a damaged or displaced gasket, an item caught between the door and tub, poor loading, an appliance that is not square, misdirected spray, or excess suds from hand dish soap or residue. Keep the unit off if the leak continues.
Can dish soap make a dishwasher leak?
Yes. Whirlpool explains that hand dish soap and some pre-wash residue can create suds that push water past the door. Stop the cycle, let foam dissipate, clean accessible overflow, and do not mix cleaners or keep operating if leaking persists.
Should I run the dishwasher again to find the leak?
Not when water is active, near electrical equipment, entering cabinets, or coming from an unknown location. Record the cycle phase and first wet point from safe access and arrange service rather than using repeated cycles as a test.
What information helps diagnose a dishwasher leak?
Provide the model, whether the water first appeared during fill, wash, or drain, the first wet location, photos from dry access, detergent and loading details, filter and gasket observations, recent installation history, and whether the water supply or power was isolated.
Read the exact guide
Official sources
- Leaking - Underneath - DishwasherWhirlpool Product Help · Dishwasher underneath leaks, water and drain connections, suds, stopping a cycle, and service boundary
- Dishwasher Water Supply ConnectionWhirlpool Product Help · Dishwasher water supply shutoff, hose and fitting inspection, leak checks, and safe water isolation
- Dishwasher Leaking Troubleshooting GuideWhirlpool Product Help · Dishwasher leak locations, door gasket, inlet valve, float, pump and motor seals, connections, leveling, filter, detergent, and service boundary
- Leaking from DoorWhirlpool Product Help · Dishwasher door leaks, vent condensation, suds, loading, gasket obstruction, leveling, and tub seal checks
Community feedback
Share a repair observation
Share a plain-text repair observation. Accepted observations are published automatically; this page may take a moment to update.