
On this page
Start here
Quick answer
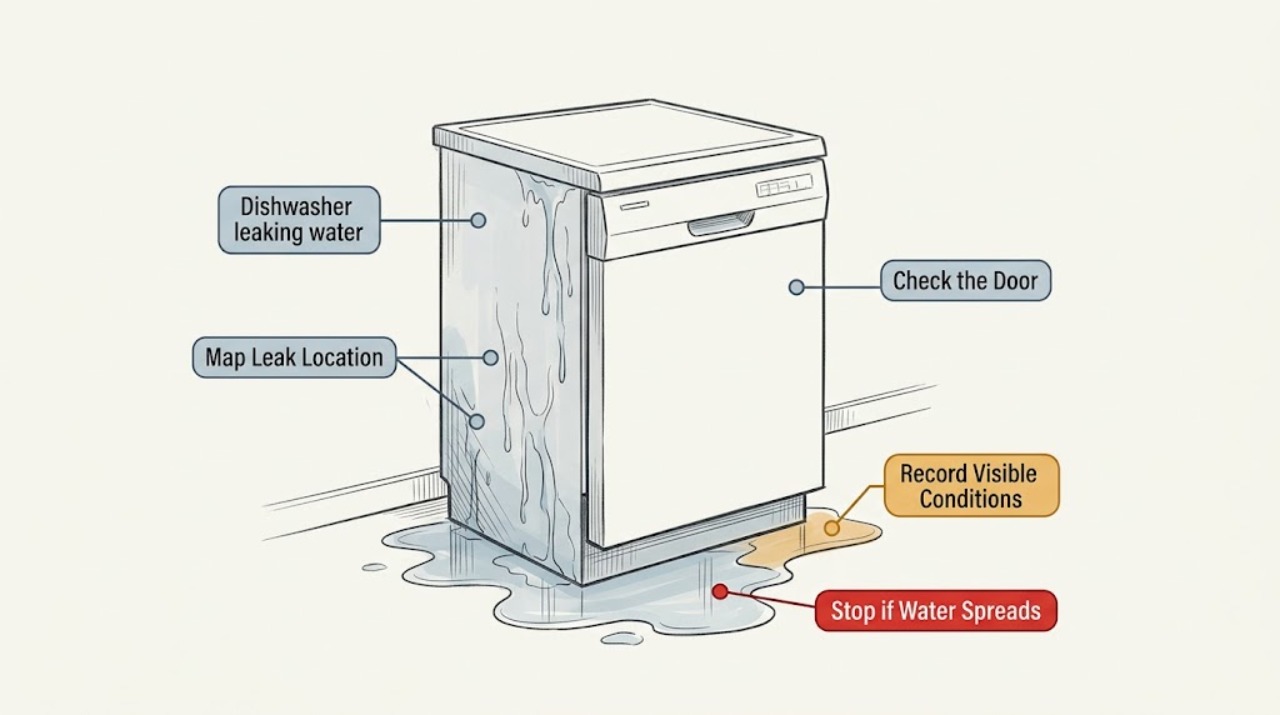
First identify where and when the dishwasher leak appears: at the door, underneath or behind the cabinet, at the sink air gap, or only when suds are present. Stop the cycle using normal controls if it is safe to do so, keep water away from electrical connections, and do not run the appliance again while an active leak is reaching cabinetry, flooring, or wiring. From a dry, accessible position, record the leak location, cycle phase, suds, door-seal condition, and visible hose or sink-drain clues. Do not pull out the dishwasher, remove panels, reach under a wet appliance, or handle electrical or water connections; arrange service when the source is underneath, persistent, or unsafe to inspect.
Work through in order
Diagnostic checks
Use only checks that match the exact appliance or system and its official guide.
-
Check 1
From a dry, stable position, observe and photograph where water first appears: along the door or corners, at the front underside, under the center or rear, behind the cabinet, or at the sink air gap; do not pull the unit out or reach beneath it.
Expected result: Record the first visible location rather than the largest puddle, and note whether water is on the floor, cabinet, door, or inside the tub.
Next step: Use the location to choose the matching branch and send the photo to the service provider; do not assume the puddle location is the leak origin.
Stop if: Stop observing if water is spreading toward an electrical connection, the floor is slippery, or finding the source would require moving the appliance.
Why this matters
Why: Front or door water can involve the seal, suds, loading, or spray direction; underside or rear water can involve plumbing, inlet, drain, pump, or tub components; an air-gap spill can point to the sink-side drain path.
-
Check 2
If the area is dry and safe, record whether the leak begins during filling, washing, draining, when the door opens, or after the cycle ends; do not run repeated cycles to reproduce an active leak.
Expected result: Note whether the leak is immediate, intermittent, limited to one cycle phase, or present while the dishwasher is idle.
Next step: Stop using the appliance and provide the timing pattern to a qualified appliance professional, especially when the leak is underneath or persistent.
Stop if: Do not continue a cycle, open the door into a spreading leak, or handle controls with wet hands or while standing in water.
Why this matters
Why: A fill- or idle-time leak raises concern about the supply or inlet side; a wash-phase front leak can relate to door sealing, loading, spray direction, or suds; a drain-phase or post-cycle leak can relate to the drain path or internal components. This is a routing clue, not a diagnosis.
-
Check 3
With the dishwasher idle and the floor dry, look at the visible door gasket and the door-to-tub edge for tears, flattening, residue, a protruding utensil, or a rack item preventing the door from closing squarely; do not remove panels or force the seal.
Expected result: Record whether the gasket looks intact and seated, whether something crosses the seal, whether the door contacts the counter or cabinet, and whether suds or foam were present.
Next step: Remove only an obvious loose item from the accessible rack area if the appliance is idle and dry; otherwise leave it alone and provide the observation for service. Do not attempt seal replacement as a leak test.
Stop if: Stop if the door, tub, gasket, or cabinet is cracked, misaligned, hot, sharp, or under pressure from a stuck item.
Why this matters
Why: A front leak with an obstruction, damaged seal, door alignment issue, or suds pattern follows the door-area branch. A clean-looking gasket does not rule out an internal or plumbing leak.
-
Check 4
Without adding water or chemicals, note whether bubbles or foam were present and record the detergent type, any rinse-aid spill, and whether dishes were pre-washed with hand dish soap.
Expected result: Classify the interior as no suds, a small amount of foam, or heavy suds pushing toward the door or floor; preserve the product labels for the service conversation.
Next step: Do not run another cycle while the source is uncertain. Tell the technician exactly what product and amount were used and whether the foam preceded the leak.
Stop if: Stop immediately if foam or water is overflowing, the floor is wet near electrical equipment, or cleanup would require reaching under the appliance.
Why this matters
Why: Wrong detergent, excess detergent, hand-soap residue, or a rinse-aid spill can create suds that push water out. No suds makes a seal, plumbing, drain, or component branch more relevant, depending on the location and timing.
-
Check 5
From above and without opening cabinetry, look at the sink basin and any visible air gap or hose area for backup, spillover, or water appearing only during dishwasher draining; do not loosen fittings or pull on hoses.
Expected result: Record whether the sink or air gap backs up, whether water appears at a visible connection, and whether the dishwasher leak occurs at the same time as draining.
Next step: Give the sink/drain timing and photographs to the appliance or plumbing professional, and keep the dishwasher unused until the water path is safe.
Stop if: Stop if water is actively flowing, the cabinet base is saturated, or any connection is behind a panel or beneath standing water.
Why this matters
Why: A sink or air-gap overflow can indicate a drain-path issue separate from a dishwasher door seal. A visible leak at an inaccessible or pressurized connection should be handled by a qualified person rather than tightened experimentally.
Use your observations
Decision map
Find the observation that best matches what you see, then follow the next safe action.
-
PATH 01Next step
What you see
Water first appears at the front or door area, especially with an obstructed seal, door alignment clue, or suds.
Do this next
Keep the dishwasher out of service, document the seal/door/suds pattern, and use the manufacturer-specific door-leak guidance or arrange appliance service.
-
PATH 02Next step
What you see
Water first appears underneath, behind, or at the bottom center with no obvious suds explanation.
Do this next
Do not remove panels or pull the dishwasher out; stop use and arrange service because an inlet, drain, pump, tub, or internal seal may require qualified inspection.
-
PATH 03Next step
What you see
The sink air gap or basin backs up during draining, or the leak is synchronized with drain-out.
Do this next
Request an appliance or plumbing assessment of the drain path and keep the dishwasher unused until the backup is resolved safely.
-
PATH 04Next step
What you see
Water reaches an outlet, cord, junction, wiring, or other electrical connection, or the appliance is flooding.
Do this next
Stop use, keep people away, and have a qualified person isolate and assess the hazard; do not touch wet electrical equipment or reach into the cabinet.
Helpful context
Understand the symptom
Location and timing narrow the problem
Manufacturer guidance groups dishwasher leaks by the front or door area, underneath or behind the unit, and the sink air-gap or drain path. Timing matters too: a leak during filling, washing, draining, or after the door opens points to different areas for a technician to assess. These checks document the pattern without turning a wet appliance into a do-it-yourself disassembly project.
Make water and electricity the first boundary
If water is near an outlet, cord, junction, or other electrical connection, stop using the dishwasher and keep clear until a qualified person makes the area safe. Mop or contain water only from a dry, stable position. Never reach through standing water or remove a kick plate, hose, or cabinet panel to find the source.
Only after diagnosis
Potential parts
- dishwasher door gasket
Consider this category only if the leak is confirmed at the door and the appliance-specific inspection identifies a damaged or incorrectly seated gasket rather than suds, loading, alignment, or an internal leak.
Confirm the dishwasher model and the manufacturer’s fit information before ordering; gasket profiles and installation details vary by model. - dishwasher inlet valve
Consider this category only if a qualified diagnosis links a fill-time or internal leak to the inlet valve; a visible puddle alone does not identify this part.
Confirm exact model fit, water-connection specification, and safety requirements with the manufacturer or qualified technician before ordering. - dishwasher drain hose
Consider this category only if the drain path or hose is confirmed as the source after safe inspection; do not loosen a connection to test it.
Verify model routing, connection type, length, and installation requirements against the appliance documentation before selection.
When checks do not resolve it
Need a professional?
Arrange appliance service for any leak from underneath or behind the dishwasher, a persistent or recurring leak, a cracked tub or component concern, an unexplained drain-phase leak, or a leak that continues after the appliance is stopped. If water reaches electrical equipment or flooding is active, stop use and seek prompt qualified help.
Have this ready
- Provide the model and serial information, first-visible leak location, cycle phase, suds/detergent history, photos from dry accessible positions, sink/air-gap observations, and whether cabinetry or flooring is wet.
Common questions
FAQ
Where do dishwasher leaks commonly start?
They may first appear at the front or door, underneath or behind the cabinet, or at the sink air gap or drain path. Photograph the first visible location from a dry position rather than assuming the largest puddle is the source.
Why does my dishwasher leak only during a wash cycle?
Wash-phase leaks can relate to door sealing, loading, spray direction, suds, or internal components. Record the timing and location, stop using the appliance, and have the pattern assessed instead of repeatedly running it.
Can soap cause a dishwasher to leak?
Yes. Hand dish soap, residue from pre-washing, excess detergent, or a rinse-aid spill can create suds that push water out. Record whether foam was present and do not run another cycle while the leak is unexplained.
Should I replace the door gasket myself?
Do not use gasket replacement as a blind leak test. First confirm that the leak is actually at the door and that the model-specific part and procedure are correct; use service when the source is uncertain or water is near electrical connections.
When should I stop using the dishwasher immediately?
Stop use for an active or recurring leak, water underneath or behind the unit, flooding, wet cabinetry or flooring, or any water near an electrical connection. Keep clear and seek qualified help rather than reaching under the appliance or removing panels.
Read the exact guide
Official sources
- Dishwasher - Preventing LeakingGE Appliances · The manufacturer guidance supports considering suds, plumbing, door/gasket, spray direction, sink/air-gap backup, and visible hose clues; exact access and repairs remain model-specific.
- Dishwasher Leaking Troubleshooting GuideWhirlpool · The manufacturer guide supports distinguishing front/door, bottom/center, and behind/under-cabinet leak patterns and recommends avoiding operation during an active leak; model-specific parts and procedures still require model confirmation.
- Leaking from DoorWhirlpool · This manufacturer page identifies door-area clues such as vent condensation, suds, obstructions at the seal, door alignment, and gasket wear; it is not a universal repair procedure for every dishwasher.
Community feedback
Share a repair observation
Share a plain-text repair observation. Accepted observations are published automatically; this page may take a moment to update.