
On this page
Start here
Quick answer
Identify the complete KitchenAid model and define the installation symptom first: does the dishwasher not fit, sit crooked, leak, fail to fill or drain, fail to power on, or leave the door misaligned? KitchenAid says model and serial information are needed for support, and its installation help directs owners to model-specific manuals. With water and power isolated from a safe, dry position, check only accessible conditions: the cabinet opening and floor, a level door/tub alignment, an accessible water shutoff and undamaged/kink-free supply line, the visible drain route, and the correct outlet or approved electrical connection. KitchenAid warns to follow the owner manual, turn off water before supply work and use professional installation when plumbing, hardwiring, cabinet changes or moving the built-in appliance is required. Do not pull out a connected dishwasher or keep testing a leak.
Before you begin
Safety first
- Do not pull out a connected dishwasher, work on a pressurized water line, alter cabinetry or hardwiring without qualification, run the appliance with a leak, reach into a wet electrical area, or replace a valve, pump, seal or control from an installation symptom alone.
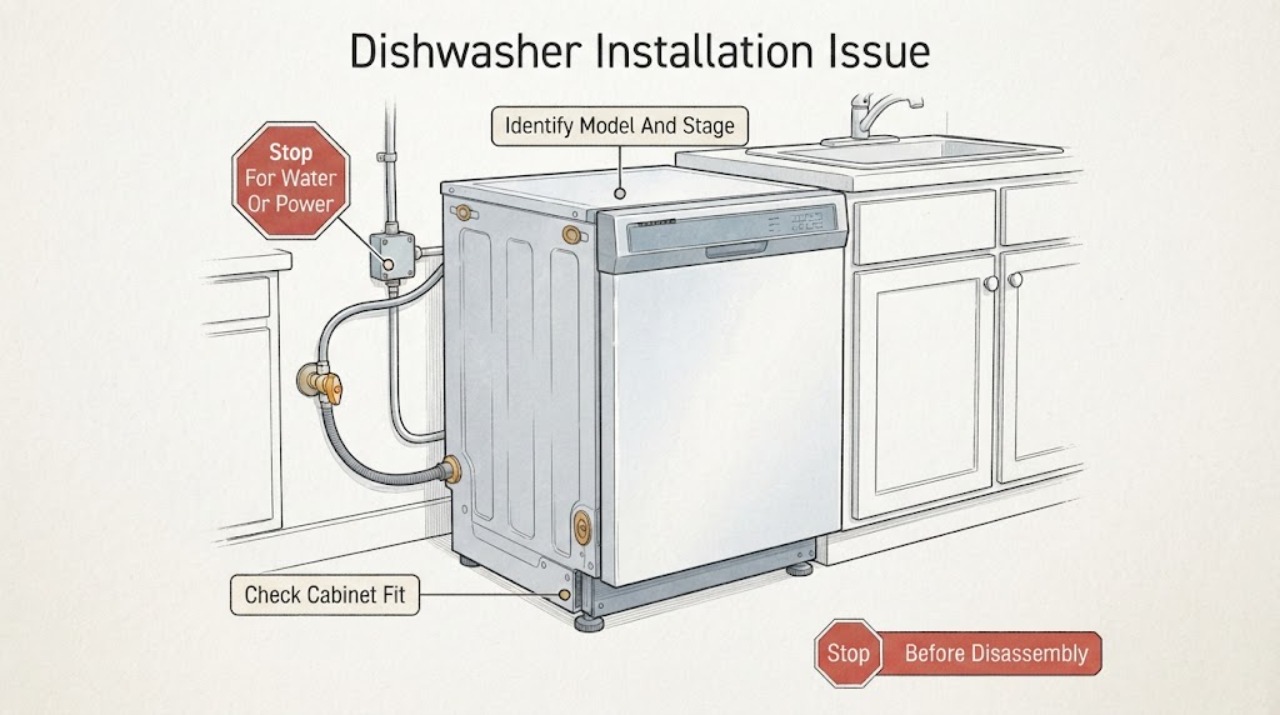
Work through in order
Diagnostic checks
Use only checks that match the exact appliance or system and its official guide.
-
Check 1
Stop the installation or testing if water is pooling, a hose or connection is wet, the floor is wet near electrical equipment, the cord is damaged, or the dishwasher has an electrical smell; from a dry safe position, close the water shutoff and isolate power according to local safe access.
Expected result: There is visible water/electrical exposure or the installation area is dry and safe for external observation.
Next step: Leave the dishwasher off and use qualified plumbing, electrical or appliance service when access is wet or utilities must be disconnected. Do not pull the appliance out while connected.
Why this matters
Why: A leak or wet electrical area is a safety condition, while a dry area permits only the accessible fit/model checks below.
-
Check 2
Record the complete KitchenAid dishwasher model and serial information, region, whether this is a new installation or a move, and the exact symptom before selecting instructions.
Expected result: The model and installation stage are known, or the identity/stage cannot be confirmed.
Next step: Use the exact model's installation literature. If the model remains unknown, limit work to safe external observations and give the identity to the installer or servicer.
Why this matters
Why: KitchenAid routes installation and troubleshooting resources by model; a generic dishwasher instruction may not match the cavity, mounting, water or electrical design.
-
Check 3
From outside the cavity, compare the opening, floor and nearby cabinet obstructions with the exact model's installation instructions; do not cut cabinetry, remove trim or force the dishwasher into place.
Expected result: The unit cannot enter or sit in the opening, a cabinet/floor obstruction is visible, or the opening appears suitable.
Next step: Pause installation and have a qualified installer assess the opening or required approved modification. If the opening is suitable, continue to level and utility observations without moving connected equipment.
Why this matters
Why: Fit and clearance are installation prerequisites; an obstruction is not evidence of a dishwasher component fault.
-
Check 4
With the dishwasher supported and utilities safe, observe whether the door opens/closes smoothly and whether the tub/front appears square; use a level only as the exact installation guide permits and do not pull the unit out to reach legs while connected.
Expected result: The door wobbles or binds, the dishwasher is visibly tilted, water pools, or the unit appears level and square.
Next step: Have the installer correct support/leveling if movement is required. If alignment is sound, proceed to separate water, drain and power checks rather than adjusting random hardware.
Why this matters
Why: KitchenAid links an unlevel or out-of-square installation with door sealing, drainage and water-pooling problems; a level appearance does not rule out a hidden connection issue.
-
Check 5
With the water shutoff closed, inspect the accessible supply valve, hose and connection area for kinks, damage, moisture or pooling; do not over-tighten, substitute unapproved tubing or disconnect a pressurized line.
Expected result: A kink, damage, moisture or pooling is visible, or the accessible supply path appears dry and open.
Next step: Keep water off and have a qualified installer repair or reconnect a damaged/leaking path. If dry, use the exact manual for the controlled fill test and stop if water appears.
Why this matters
Why: KitchenAid identifies these conditions as installation/water-flow concerns; a dry external path does not establish that the internal inlet valve is good or bad.
-
Check 6
Before any controlled test allowed by the model manual, confirm the visible drain route is not crushed or disconnected and that the approved outlet/connection is present and dry; do not access a hardwired junction or move the machine to reach hidden connections.
Expected result: The drain hose is kinked/disconnected, the outlet/connection is absent or unsafe, or visible paths appear correctly routed and dry.
Next step: Correct only an accessible, documented condition with utilities isolated; otherwise use a qualified installer/electrician. Do not run the dishwasher until the connection is safe and the model manual permits testing.
Why this matters
Why: A visible utility fault can explain installation failure, but a clear external path does not prove the pump, wiring or control is functioning.
-
Check 7
Arrange KitchenAid professional installation or qualified plumbing/electrical/appliance service when the unit must be pulled out, the cabinet requires modification, a connection is hardwired, a leak persists, or the exact model instructions do not match the existing setup.
Expected result: Installation requires hidden access, code-dependent work, utility disconnection or a persistent leak/no-fill/no-drain/no-power symptom.
Next step: Provide the model/serial, installation stage, opening measurements, water/drain/electrical observations, photos from a dry safe position and any error or leak history. Keep utilities off when unsafe.
Why this matters
Why: KitchenAid's installation and support resources route these tasks through model-specific documents and professional testing; the installation symptom does not prove a failed pump, valve, seal, control or wiring.
Use your observations
Decision map
Find the observation that best matches what you see, then follow the next safe action.
-
PATH 01Next step
What you see
The dishwasher does not fit the opening or a cabinet/floor obstruction prevents it from sitting correctly.
Do this next
Pause installation and have a qualified installer assess the exact model clearance and any approved cabinet work.
Why this path and its safety boundary
Why it matters: This is a fit or site-preparation problem, not evidence of a dishwasher internal failure.
-
PATH 02Next step
What you see
The door binds, the tub is visibly tilted, or water pools after installation.
Do this next
Keep utilities safe and have the installer level/support the unit using the exact model instructions.
Why this path and its safety boundary
Why it matters: Leveling, support or squareness remains in scope; KitchenAid links an unlevel dishwasher with drainage and door-sealing problems.
-
PATH 03Next step
What you see
The water supply connection is wet, the hose is kinked/damaged, or the shutoff is inaccessible.
Do this next
Close the shutoff, do not run the dishwasher, and obtain qualified plumbing/installation help.
Why this path and its safety boundary
Why it matters: The installation water path is unsafe or restricted.
-
PATH 04Next step
What you see
The drain route, outlet or hardwired connection is absent, damaged or inaccessible.
Do this next
Keep the appliance off and use the exact installation instructions with a qualified installer or electrician.
Why this path and its safety boundary
Why it matters: A utility connection issue must be corrected before operation; it does not identify a failed pump or control.
-
PATH 05Next step
What you see
The model-specific installation checks pass but the dishwasher still leaks, will not fill/drain, or will not power on.
Do this next
Book KitchenAid service with the model, utility observations and any code; do not pull out or open the built-in appliance yourself.
Why this path and its safety boundary
Why it matters: The remaining symptom needs service diagnosis rather than more installation adjustment.
Helpful context
Understand the symptom
Name the installation failure before changing anything
Installation issue can mean a cabinet opening that is too small, a dishwasher that rocks or leaves the door crooked, a supply connection that leaks, a drain that backs up, no power, or a hardwired connection that is not permitted. These paths have different hazards and different model instructions. Record what happened, whether the appliance is new or was moved, and whether water or power is currently connected.
Use the exact KitchenAid manual
KitchenAid's Owner's Center asks for model and serial information and offers installation, use and troubleshooting resources. Find the dishwasher model label in the locations KitchenAid identifies, then use the matching installation instructions. Do not copy cabinet dimensions, mounting, leveling, hose fittings, drain routing or electrical instructions from a different KitchenAid platform.
Check fit and level only from safe access
A dishwasher must be supported and level in the cavity. KitchenAid says an unlevel unit can affect door alignment, drainage and water pooling, and its delivery guidance calls for a level floor throughout the cavity. Observe the door, tub opening and accessible floor; do not pull a connected built-in appliance out or loosen mounting hardware while utilities remain attached. A qualified installer should handle any adjustment that requires moving the unit.
Separate water, drain and power paths
KitchenAid's water guidance says the shutoff should be off during supply work and that connection points should be checked for moisture or pooling. A kinked or damaged supply line can affect filling, while a drain problem can leave water behind. Electrical connection type and local code are model and installation dependent. Do not troubleshoot all three utilities by repeatedly starting cycles after a leak or electrical fault.
Use professional installation for hidden or code-dependent work
KitchenAid's installation service describes supplying and connecting water and drain lines, leveling and testing the dishwasher, while its product-help page recommends using manuals and service resources by model. Cabinet changes, hardwiring, a damaged shutoff, a concealed leak or an appliance that must be pulled out belong with a qualified installer or servicer rather than improvised repairs.
When checks do not resolve it
Need a professional?
Contact KitchenAid or a qualified installer/service provider when the dishwasher must be moved, the opening or floor needs modification, the water/drain/electrical connection is hidden or code-dependent, a leak persists, or operation remains abnormal after the model-specific installation checks.
Safety scope: Do not pull out a connected dishwasher, work on a pressurized water line, alter cabinetry or hardwiring without qualification, run the appliance with a leak, reach into a wet electrical area, or replace a valve, pump, seal or control from an installation symptom alone.
Have this ready
- Provide the complete model and serial, region, new-install versus moved status, opening dimensions, door/level observations, water shutoff and supply condition, drain route, outlet/hardwire type, leak location and any display code.
Common questions
FAQ
Why does KitchenAid require the dishwasher model before installation help?
KitchenAid's Owner's Center says model and serial information are needed for support, and its product-help installation pages direct owners to model-specific manuals. Cabinet fit, leveling, utility routing and electrical details can vary, so do not copy another model's procedure.
Can an unlevel KitchenAid dishwasher cause a problem?
Yes. KitchenAid says an unlevel dishwasher can affect door alignment, drainage, noise, cleaning and water pooling. Observe the door and unit alignment, then use the exact installation instructions or a qualified installer; do not pull out a connected unit to adjust it.
What should I do if the dishwasher connection leaks after installation?
Turn off the water supply from a safe dry position and stop testing. KitchenAid instructs owners to keep the water off during supply work and inspect for moisture or pooling; a persistent leak needs qualified installation or service rather than repeated cycles or over-tightening.
Read the exact guide
Official sources
- Leveling the DishwasherKitchenAid Product Help · Official KitchenAid family-level leveling guidance used for door alignment, level checks and the effects of an unlevel installation; adjustment access remains model and installer dependent.
- Professional Delivery & InstallationKitchenAid · Official KitchenAid installation-service page used for site preparation, level flooring, water/drain connection and testing boundaries; it is not a substitute for an exact model installation guide.
- VIDEO: How to Install a DishwasherKitchenAid Product Help · Official KitchenAid installation-help page used to direct owners to model-specific manuals and service; the embedded video is not treated as a universal installation procedure for an unidentified model.
- Owners Center | KitchenAidKitchenAid · Official KitchenAid Owner's Center used to locate the dishwasher model label and route owners to model-specific resources; it does not diagnose an unspecified installation fault.
- Dishwasher Water Supply ConnectionKitchenAid Product Help · Official KitchenAid water-supply guidance used for shutoff, visible moisture/kink checks and model-manual dependence; no hidden valve diagnosis is asserted.
Community feedback
Share a repair observation
Share a plain-text repair observation. Accepted observations are published automatically; this page may take a moment to update.