
On this page
Start here
Quick answer
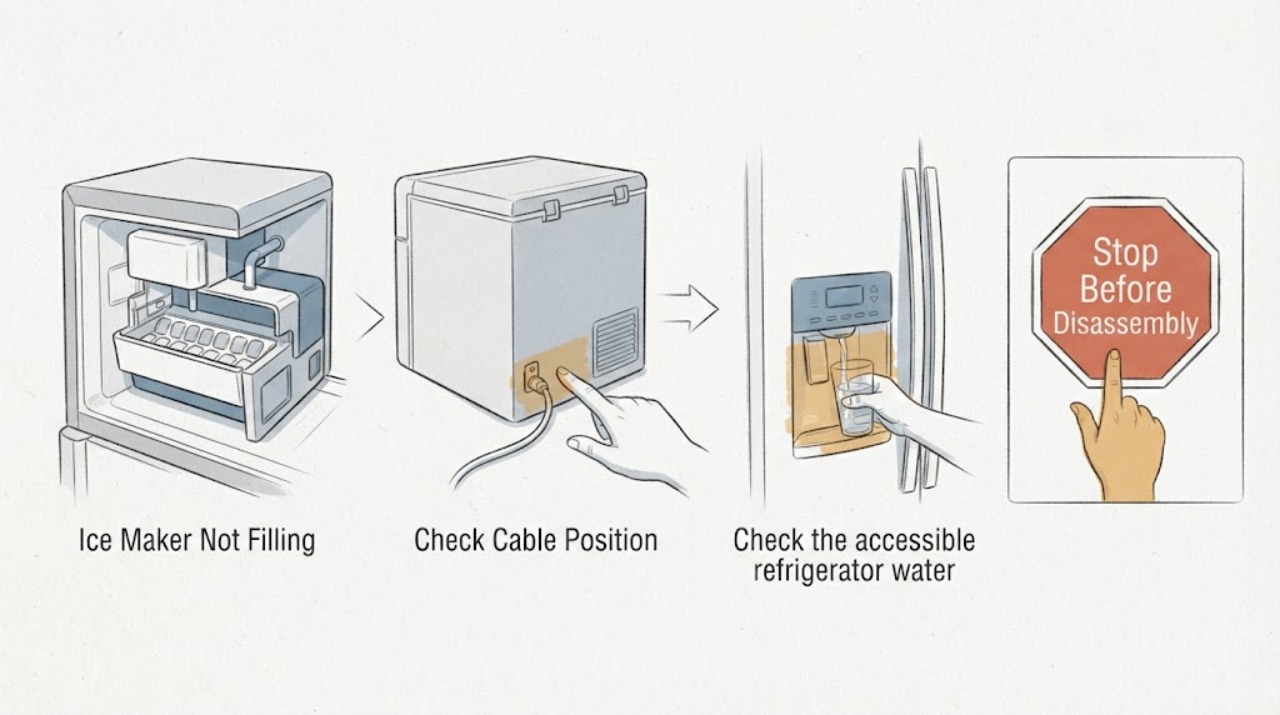
When a KitchenAid ice maker is not filling its tray, first determine whether the ice maker is on and whether the mold is actually empty. KitchenAid's general guidance starts with the ice-maker control or shutoff arm, the refrigerator water shutoff valve and supply line, the water filter, and the freezer temperature. A kinked line, a clogged or incorrectly installed filter, a recently installed refrigerator, a jammed ejector arm, or a freezer that is not cold enough can all prevent normal ice production without proving that an internal valve or control module has failed. Check only accessible controls, the visible line, filter installation, door closure, and visible ice blockage. Use the exact owner manual for the model's controls and timing; if water leaks, the line is damaged, the ice maker remains empty after these checks, or the problem needs an internal component diagnosis, stop and arrange model-specific service.
Work through in order
Diagnostic checks
Use only checks that match the exact appliance or system and its official guide.
-
Check 1
Read the refrigerator or ice-maker rating label and identify whether the appliance is a refrigerator ice maker or a standalone KitchenAid ice machine. From outside the unit, confirm that the ice-maker control is on and that the wire shutoff arm or model-specific switch is in its operating position; do not force the arm.
Expected result: The appliance identity and exact manual are available, and the ice maker is on with the arm or switch in the documented operating position, or the model/operation cannot be confirmed.
Next step: If the ice maker is off, return it to the documented operating state and allow the model's normal production time. If the identity or control position is unclear, keep the unit closed and obtain the exact manual or qualified service rather than forcing a switch or starting an undocumented reset.
Why this matters
Why: KitchenAid says an off or paused ice maker and an incorrectly positioned arm or switch can stop production. A missing model means the control layout and reset behavior cannot be assumed.
-
Check 2
Check the accessible refrigerator water shutoff valve and the visible supply line. Confirm the valve is open and the line is connected, undamaged, and free of a kink; if the refrigerator was moved, leave enough service clearance and do not push it hard against the wall or cabinet.
Expected result: The valve is closed, the line is kinked or damaged, the connection is visibly loose, or the accessible water path looks normal.
Next step: Open only a clearly identified household shutoff and straighten a visible kink without stressing the connection. If there is a leak, damaged tubing, an inaccessible shutoff, or uncertainty about the plumbing, close the water supply if safe and arrange qualified appliance or plumbing service; do not remove tubing from the appliance.
Why this matters
Why: KitchenAid says no water supply, a closed valve, or a kink can prevent or reduce water flow to the ice maker. A normal visible line does not prove that an internal valve or control is working.
-
Check 3
Check the installed water filter using the exact KitchenAid model instructions. Confirm it is seated correctly and within its service life; if the model manual permits a filter-flow comparison, remove the filter only as directed and observe whether the dispenser or ice-maker water flow improves.
Expected result: Water flow improves with the filter removed or the filter is old, clogged, damaged, or not seated; alternatively, flow does not change and the filter is correctly installed.
Next step: Install only the model-specified replacement filter and follow the model's flushing instructions. If the model does not permit filter removal or the housing leaks, stop and request service rather than bypassing or modifying the water system.
Why this matters
Why: KitchenAid states that a clogged or incorrectly installed filter can reduce water flow to the ice maker and dispenser. Improvement points to a filter or filter-installation issue, but no change does not prove a failed inlet valve or board.
-
Check 4
Observe the freezer temperature setting, door or drawer closure, and the ice-maker mold without removing covers. Use the exact owner's manual setting for the appliance; if ice is visibly jammed in the ejector arm, remove only loose ice with a plastic utensil while the appliance is stopped and never use a sharp tool.
Expected result: The freezer is warmer than the model's recommended setting, a door or drawer is not sealing, or an ice cube blocks the ejector arm; alternatively, the mold is empty and no visible blockage or closure issue is present.
Next step: Correct only the documented temperature or closure issue and clear loose ice safely. If the mold remains empty after the model's normal wait, leave the ice maker out of repeated testing and arrange model-specific service.
Why this matters
Why: KitchenAid lists insufficient cold, an incompletely closed door, and a jammed ejector arm among no-ice causes. An empty mold after these accessible checks means the next diagnosis may involve the water fill or internal controls, which cannot be identified safely from the symptom alone.
-
Check 5
If the appliance is a standalone KitchenAid ice maker, follow its exact clean-cycle and water-pan instructions instead of the refrigerator steps. For an ice maker with a clean indicator or significantly reduced production, turn it off before cleaning and do not remove hoses or open electrical compartments.
Expected result: The appliance is a standalone ice maker with a clean indicator or mineral buildup, or it is a refrigerator ice maker with no applicable clean-cycle instructions.
Next step: Use only the exact standalone manual and approved cleaner procedure when the identity matches. If it is a refrigerator ice maker or the identity is uncertain, do not pour cleaner into an undocumented tray; use the water, filter, temperature, and service branches above.
Why this matters
Why: KitchenAid's standalone ice-maker guidance says mineral scale and cleaning status can reduce production, while the refrigerator no-ice guidance follows a different water and freezer path. The two appliance families cannot be treated as interchangeable.
Use your observations
Decision map
Find the observation that best matches what you see, then follow the next safe action.
-
PATH 01Next step
What you see
The ice maker is off, paused, or its arm/switch is in the documented shutoff position.
Do this next
Return it to the exact model's operating position and allow the documented production interval; seek service if it will not remain on or the tray stays empty.
Why this path and its safety boundary
Why it matters: The control state can explain an empty tray without proving a failed component.
-
PATH 02Next step
What you see
The water valve is closed, the visible line is kinked, or flow improves after a correctly performed filter comparison.
Do this next
Open the identified shutoff, correct the visible kink, or install the exact model filter and flush as directed; stop for leaks or damaged tubing.
Why this path and its safety boundary
Why it matters: The accessible water path is restricting the fill, consistent with KitchenAid's troubleshooting guidance.
-
PATH 03Next step
What you see
The freezer is not at the model's recommended setting, a door is not closing, or a loose cube blocks the ejector arm.
Do this next
Correct the documented setting or closure and clear only loose ice with a plastic utensil while stopped; do not pry the mechanism or open the housing.
Why this path and its safety boundary
Why it matters: Temperature, closure, or an accessible ice blockage can interrupt normal ice production.
-
PATH 04Next step
What you see
The model is identified, the ice maker is on, water path and filter checks are normal, the freezer is cold and closed, and the tray still never receives water.
Do this next
Stop repeated cycling and arrange KitchenAid or qualified appliance service with the full model and symptom history. Do not apply live voltage tests, remove covers, or order an internal part from this symptom alone.
Why this path and its safety boundary
Why it matters: The remaining cause may be inside the appliance, but an empty tray does not distinguish a valve, sensor, wiring, motor, or control problem.
Helpful context
Understand the symptom
Start by separating an empty mold from a full or jammed ice maker
The report says the tray is not filling, but it does not include a KitchenAid model or say whether this is a refrigerator ice maker or a standalone undercounter machine. The checks below are limited to the refrigerator-style ice-maker guidance KitchenAid publishes for no ice production. Look only at the accessible mold, arm or switch, controls, supply connection, filter, and freezer conditions. If the appliance is a standalone ice machine or the control layout differs, stop at the identity check and use its exact manual rather than transferring refrigerator instructions.
Low water flow is a branch, not proof of a failed inlet valve
KitchenAid connects slow or no ice production with the water supply, line condition, filter, and in some installations reverse-osmosis pressure. A visible kink or a filter that reduces water flow is an external lead to correct, but it cannot identify an inlet valve, wiring, sensor, or control-module failure. Keep the water path checks model-specific and do not open the refrigerator door or ice-maker housing to perform live electrical tests.
Timing and temperature matter after a recent installation or emptying
KitchenAid owner-manual troubleshooting says ice production can require time after hookup or installation and after a large amount of ice is removed. The same table directs the owner to check the freezer temperature, door closure, filter, and a jammed ejector arm. Those observations explain a delayed or interrupted cycle without establishing a particular internal defect.
When checks do not resolve it
Need a professional?
Stop and close the water shutoff if safe for a leak, damaged tubing, water near electrical parts, or uncontrolled filling., Arrange model-specific service when the tray remains empty after the documented control, supply, filter, temperature, door, and visible-blockage checks., Do not remove the ice-maker housing, test live wiring, bypass a sensor or arm, or select an inlet valve, motor, or control module from an empty tray alone.
Common questions
FAQ
How long should I wait after installing a KitchenAid ice maker or refrigerator?
The applicable KitchenAid owner manual controls the timing. One opened KitchenAid troubleshooting table says to allow 24 hours after hookup and up to 72 hours for full production after installation; do not apply those times to a different model without checking its manual.
Can a water filter stop the ice tray from filling?
Yes. KitchenAid says a clogged or incorrectly installed filter can reduce water flow to the ice maker. Use the exact model instructions for filter removal, replacement, and flushing; a filter symptom does not prove a failed valve or control board.
Should I force the ice-maker arm or use a screwdriver to clear the tray?
No. Check the arm or switch position without forcing it, and use only a plastic utensil for a loose ejector-arm ice blockage when the appliance is stopped. Leave housing removal and internal diagnosis to qualified service.
Do refrigerator ice-maker steps apply to a standalone KitchenAid ice machine?
Not automatically. KitchenAid publishes separate guidance for standalone ice makers, including a clean cycle and water pan. Confirm the appliance identity and use its exact manual before adding cleaner or changing a water connection.
Read the exact guide
Official sources
- Not Dispensing Ice - Built-In RefrigeratorKitchenAid Product Help · Used only for the accessible supply-line and filter principles; it is not used to claim that the task is a built-in refrigerator or to select tubing or parts.
- Ensuring Correct Water PressureKitchenAid Product Help · Used to explain why low flow, a kink, a clogged filter, or reverse-osmosis conditions can reduce ice production. The page says to consult the exact model installation instructions for specific requirements.
- Cleaning the Ice MakerKitchenAid Product Help · Used only for the separate standalone ice-maker branch. It is not transferred to a refrigerator ice-maker tray without model confirmation.
- KitchenAid Owner's Manual – Ice and Water TroubleshootingKitchenAid · Used as an opened KitchenAid manual example for the published troubleshooting branches. Because no task model is supplied, the exact manual must control the appliance's settings, timing, and control layout.
- Refrigerator Ice Maker TroubleshootingKitchenAid · Used as general KitchenAid refrigerator ice-maker guidance because the task has no model. It supports accessible checks and the service boundary, not an internal part diagnosis or a standalone-machine procedure.
Community feedback
Share a repair observation
Share a plain-text repair observation. Accepted observations are published automatically; this page may take a moment to update.