
On this page
Start here
Quick answer
First decide whether the KitchenAid oven is completely without power or has a live display that runs a cycle without producing heat. With no signs of smoke, gas, water, arcing, or repeated breaker trips, check the door, selected cooking mode, temperature, Control Lock or demo mode, and any Delayed Start setting. For an electric model, a tripped breaker or incorrect installation can leave the control or heating circuit without the supply it needs; for a gas or dual-fuel model, the oven also needs a grounded supply and the gas supply and oven shut-off path must be correct. Do not remove panels, test live wiring, adjust gas parts, or keep resetting a breaker. If the oven remains cold after these external, model-appropriate checks, arrange qualified service.
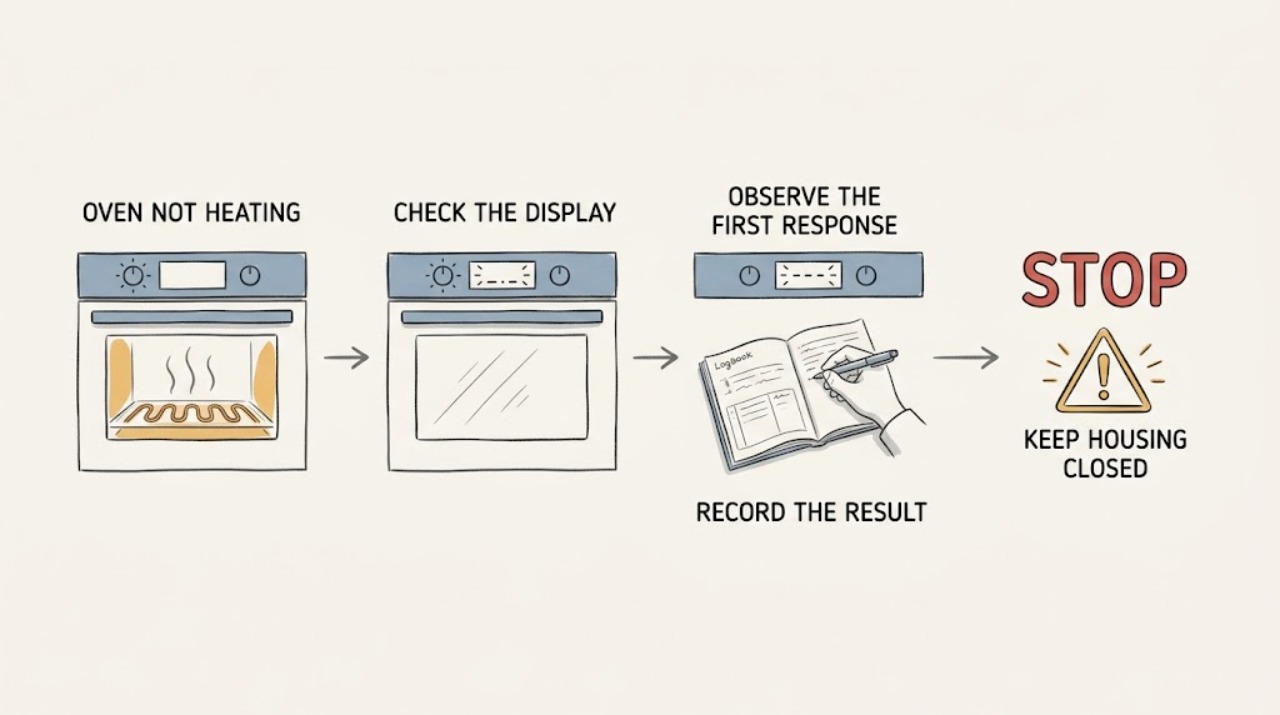
Work through in order
Diagnostic checks
Use only checks that match the exact appliance or system and its official guide.
-
Check 1
Stop and inspect from outside the oven for smoke, a burning smell, gas odor or hissing, an arc or spark, a hot or discolored cord, water near controls, a damaged glass panel, or a breaker that trips again.
Expected result: Any smoke, gas odor or sound, visible arcing, heat damage, wet electrical area, or repeated breaker operation is present.
Next step: Stop using the oven. For suspected gas, leave immediately without operating electrical switches and contact local emergency or gas services from outside. For electrical, smoke, or water hazards, keep clear and arrange qualified help.
Stop if: Do not turn the oven back on, remove covers, move a gas appliance, or repeatedly reset the breaker.
Why this matters
Why: This is a safety event, not a normal temperature-setting problem. Continuing to heat, ignite, or reset the appliance could increase fire, shock, or gas-leak risk.
-
Check 2
Identify the exact model and energy type from the rating label or manual, then note whether the control display is dark, lit but idle, or showing a code or lock indicator.
Expected result: The oven is electric, gas, or dual fuel, and the display state and any code are recorded.
Next step: Open the KitchenAid manual or Product Help page for the same model and use the recorded display state as the starting point. If the model cannot be identified, limit the rest of the checks to visible settings and safety observations.
Why this matters
Why: Electrical heating, gas ignition, and dual-fuel controls have different decision paths. A code or control symbol is model-specific and should not be translated using another KitchenAid model's instructions.
-
Check 3
For a dark display or a recently installed oven, check only the user-accessible supply: confirm the appliance connection is not visibly damaged and inspect the household breaker or fuse position without opening the appliance or touching wiring. A qualified electrician should verify any installation or grounding concern.
Expected result: The breaker or fuse is tripped, the oven remains dark after a single safe reset, the outlet or cord is damaged, or the supply appears normal.
Next step: If the reset restores normal operation and no hazard returns, observe one normal preheat. If it trips again, the display stays dark, or installation is uncertain, leave power off as safely possible and call a licensed electrician or qualified appliance technician.
Stop if: Do not remove the terminal cover, test voltage, change wire configuration, or keep resetting a protective device.
Why this matters
Why: A tripped protective device or installation issue can prevent heating. A repeated trip, damaged connection, or continued blank display points to a supply or internal fault rather than a temperature setting.
-
Check 4
With a live display, close the oven door fully and remove only a visible obstruction such as an oversized dish, rack position problem, or soil at the seal area; do not force the door or dismantle its hinges.
Expected result: The door closes normally and heating begins, or the door remains misaligned, blocked, or indicated as open.
Next step: Retry the same mode only after the door is fully closed and safe. If the indication persists or the door is damaged, stop and arrange service; do not bypass the door switch.
Why this matters
Why: KitchenAid notes that some models will not operate with the door open, and a door or latch that is not sensed as closed can inhibit heating. A damaged hinge, latch, or seal is not a user adjustment.
-
Check 5
Cancel the current cycle and select a basic Bake or model-equivalent heating mode, enter a temperature above room temperature, and check the control for Control Lock, demo mode, or Delayed Start. Use only the exact manual's button sequence to clear a lock or delay.
Expected result: The oven begins a normal preheat, the display is locked or in demo mode, a future start time is set, or the mode accepts settings but remains cold.
Next step: Clear the setting using the same model's manual and watch one supervised preheat. If the oven remains cold, stop changing settings and arrange diagnosis rather than replacing a part based only on the symptom.
Why this matters
Why: A lock, demo state, or delayed start can make a healthy oven appear not to heat. If the controls accept a valid mode but no heat develops, the fault moves from settings toward the supply, igniter, element, sensor, or control system.
-
Check 6
For a gas or dual-fuel model only, check the user-visible gas-supply state described by the model manual without moving the range or touching gas tubing: note whether the cooktop burners operate normally and whether the oven shows ignition attempts, delayed ignition, or no response.
Expected result: The cooktop works but the oven does not ignite, both cooktop and oven are affected, or there is gas odor, repeated clicking, a delayed ignition, or an abnormal flame.
Next step: Stop immediately for gas odor, hissing, delayed ignition, or abnormal flame and follow the gas-emergency branch. If there is no hazard but the oven alone fails, record the observation and request qualified gas-appliance service; do not adjust the regulator, burner, or igniter.
Stop if: Never remove gas tubing, move the range to inspect a connector, light the burner manually, or bypass an ignition or safety control.
Why this matters
Why: A gas oven can have a separate oven shut-off or regulator path even when surface burners work, and ignition still depends on a proper electrical ground. Gas odor, delayed ignition, or abnormal flame is unsafe to troubleshoot by repeated attempts.
-
Check 7
After the safe, model-appropriate checks, observe one supervised preheat for the selected mode and record whether the oven heats, remains cold, displays a code, or develops an abnormal odor, noise, flame, or electrical symptom.
Expected result: The oven reaches normal operation, remains cold with a live display, or produces a repeatable fault or hazard.
Next step: For recurring no-heat or any abnormal behavior, stop using the oven and arrange qualified KitchenAid appliance service with the model, energy type, selected mode, and recorded behavior.
Stop if: Stop at once for smoke, gas odor, arcing, damaged wiring, abnormal flame, excessive heat, or another breaker trip.
Why this matters
Why: Normal preheat ends the investigation. A live display with no heat can indicate an element, igniter, sensor, relay, or control fault, but the symptom alone cannot identify a part.
Use your observations
Decision map
Find the observation that best matches what you see, then follow the next safe action.
-
PATH 01Next step
What you see
Smoke, gas odor or hissing, sparks, water near electrics, visible heat damage, or a repeated breaker trip
Do this next
Stop immediately. Leave for suspected gas and contact local emergency or gas services from outside; otherwise keep clear and obtain qualified electrical or appliance help.
-
PATH 02Next step
What you see
The display is dark, especially after installation or a power event
Do this next
Inspect only the accessible breaker or fuse state once; if it trips again or the display stays dark, stop and arrange electrician or appliance service.
-
PATH 03Next step
What you see
The display is live but the door is open, misaligned, or indicated as open
Do this next
Clear visible obstructions and close the door normally; persistent door sensing or latch problems require service.
-
PATH 04Next step
What you see
The controls are locked, in demo mode, or set for a delayed start
Do this next
Use the exact model manual to clear the setting and begin a basic heating mode; do not guess a button sequence from another model.
-
PATH 05Next step
What you see
A gas or dual-fuel oven has a gas odor, delayed ignition, abnormal flame, or repeated clicking
Do this next
Stop ignition attempts, leave without operating electrical switches, and seek qualified gas-emergency help from outside.
-
PATH 06Next step
What you see
A valid cycle runs but the cavity remains cold after safe external checks
Do this next
Stop user diagnosis and arrange qualified service; provide the model, energy type, mode, display behavior, and any code.
Helpful context
Understand the symptom
Separate a no-heat symptom from a no-power symptom
A dark display and an oven that displays a cycle but stays cold lead to different checks. If the display works, record the selected mode, set temperature, door state, and any lock, demo, delay, or fault indication. If the display is dark, treat the issue as a supply or control problem first. KitchenAid instructions are model-dependent, so use the manual for the exact model before assuming a control label or gas component exists.
Electric, gas, and dual-fuel boundaries
Electric models depend on the correct dedicated supply and intact heating circuit. Gas and dual-fuel models still need electrical power for controls and ignition, and they also need an appropriate gas supply. The checks below stop at user-accessible settings and observations. Wiring, terminal connections, igniters, regulators, valves, heating elements, and control boards are service work.
Only after diagnosis
Potential parts
- heating element
Only consider this category after a qualified diagnosis finds an electric model's element open, damaged, or not receiving the required control signal; no-heat alone does not identify the element.
Confirm the full model number and manufacturer fit information before ordering; installation involves electrical safety. - oven igniter or burner ignition component
Only consider this category for a gas or dual-fuel oven after safe supply checks and a technician's diagnosis of an ignition fault.
Do not light or test gas ignition parts yourself; confirm exact model compatibility with KitchenAid or a qualified gas-appliance technician. - oven temperature sensor
Only consider this category if the exact model's fault evidence or qualified testing points to a sensor or temperature feedback problem.
Confirm the exact model and approved replacement information; do not infer compatibility from a similar-looking sensor. - oven control or relay module
Only consider this category after supply, door, settings, and heating or ignition components have been evaluated by qualified service.
Control modules are model-specific and cabinet-level work should be performed by qualified personnel.
When checks do not resolve it
Need a professional?
Have this ready
- The full model number, electric or gas/dual-fuel type, display state, selected mode and temperature, door or lock indication, exact code or light pattern, whether the cooktop works, and what happened after the breaker or setting check.
Common questions
FAQ
Why is my KitchenAid oven on but not heating?
Check the door, selected heating mode, temperature, Control Lock or demo mode, and Delayed Start. If those settings are correct and the oven stays cold, the supply, element, igniter, sensor, relay, or control may need qualified diagnosis; do not replace a part based on the symptom alone.
Why does my gas KitchenAid oven not heat while the cooktop works?
The oven can have a separate gas shut-off or regulator path, and ignition still depends on the appliance's electrical supply and ground. Check only the model-specific user instructions; do not move the range or adjust gas components. Gas odor, delayed ignition, or abnormal flame requires immediate stop and gas-safety help.
Can I reset the breaker to make the oven heat again?
A single normal reset may be appropriate when the model instructions allow it and there is no hazard. If the breaker trips again, the oven remains cold or blank, or there is heat damage, smoke, arcing, or odor, leave it off and arrange qualified service.
Read the exact guide
Official sources
- Owners Center | KitchenAidKitchenAid · Use the model number to locate the applicable manual and service information.
- Oven Not Heating - Powering On - ElectricKitchenAid · Official Product Help guidance for KitchenAid electric ovens; controls and procedures vary by model.
- CPSC Urges Flood Victims to Take Steps to Prevent CO Poisoning, Electrocution, Explosion and FiresU.S. Consumer Product Safety Commission · General U.S. safety guidance used here only for the gas-odor and wet-electrical stop boundary.
- Oven Not Working - Gas and Dual Fuel RangeKitchenAid · Official Product Help guidance for KitchenAid gas and dual-fuel ranges; gas components and model controls are not universal.
- Oven Not Working - Cooktop Working - Not ClickingKitchenAid · Official Product Help guidance for a gas range whose cooktop may work while the oven does not; use only when the model matches.
- Oven Not Pre-Heating - Wall OvenKitchenAid · Official Product Help guidance for KitchenAid wall ovens; use the exact model's installation instructions for supply requirements.
Community feedback
Share a repair observation
Share a plain-text repair observation. Accepted observations are published automatically; this page may take a moment to update.