
On this page
Start here
Quick answer
First separate a completely blank display from an oven that has power but will not start. If the display is blank, check only the accessible breaker or fuse and the exact model installation requirements; do not remove covers or work in the wiring. If the display works, check whether Control Lock, Demo Mode, a delayed start, an incorrect mode, or an open door is preventing operation, then use the exact KitchenAid manual for a single safe control reset. Gas and dual-fuel models also need the correct gas supply, but never test a gas setting when you smell gas. A gas odor, smoke, sparks, scorching, overheating, repeated breaker trips, or a control that will not turn the oven Off is a stop-use condition. If the oven still does not start after the model-specific low-risk checks, arrange qualified appliance service.
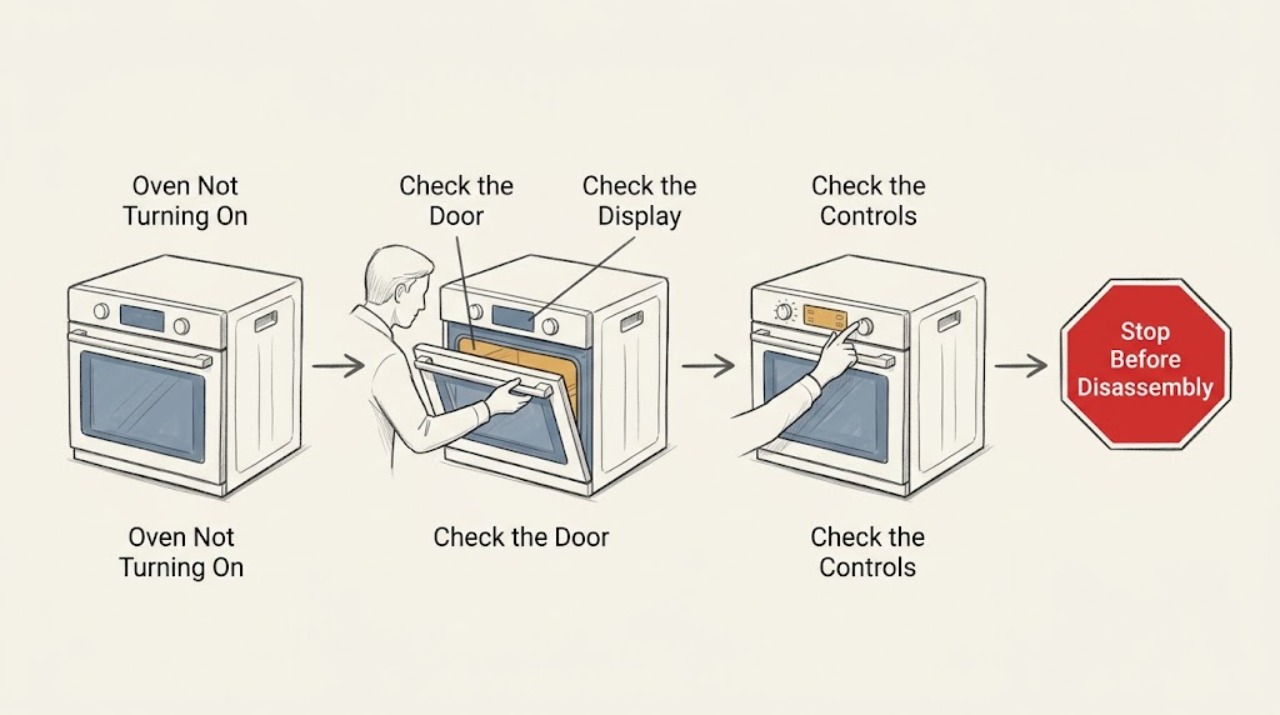
Work through in order
Diagnostic checks
Use only checks that match the exact appliance or system and its official guide.
-
Check whether the display is completely blank
Look at the clock, display, interior light, and control response without opening panels. If the display is blank, check only the accessible appliance breaker or fuse and whether other nearby appliances have power. Do not remove a cover or touch wiring.
Expected result: The display and controls are dead, or the display is lit and accepts input.
Next step: For a dead display, follow the exact model installation guidance and arrange a licensed electrician or qualified appliance service if power is not restored. For a lit display, continue with the control and mode checks.
Why this matters
Why: A dead display points toward supply, breaker or fuse, installation, or a control fault; a lit display moves the diagnosis to control state and operating conditions.
-
Check Control Lock, Demo Mode, and delayed start
With the oven otherwise safe and the display active, look for a lock indicator, a showroom or demonstration message, a delayed start time, or a timer state. Use the exact KitchenAid Owner's Manual to clear a lock or demo setting and cancel a delayed start; do not guess a button sequence from another model.
Expected result: A lock, demonstration message, delayed start, or timer state is present, or no such state is shown.
Next step: Clear only the confirmed model-specific state and select the intended mode once. If the control remains unresponsive or the state returns, stop and arrange service.
Why this matters
Why: A control can appear unresponsive or refuse to heat when it is intentionally locked, operating in demonstration mode, or waiting for a scheduled start.
-
Confirm the door and selected oven mode
Check that the oven door is fully closed and that a valid Bake or other intended cooking mode, temperature, and Start command are selected. Remove only an obvious item preventing the door from closing; do not force the door, defeat a latch, or open the control area.
Expected result: The door was ajar, the selected mode or temperature was missing, or the door and controls appear correct but the oven still does not begin.
Next step: Correct the visible setting once using the model manual. If the door, latch, display, or response remains abnormal, keep the oven out of service and request qualified diagnosis.
Why this matters
Why: KitchenAid notes that some models will not energize heating with the door open and that an incomplete or incorrect control sequence can look like a no-start fault.
-
Separate gas, electric, and dual-fuel behavior
Identify the appliance type from the rating plate and manual. For an electric model, do not probe live terminals; for a gas or dual-fuel model, confirm only from the manual which fuel supply and controls apply. If gas odor is present, do not operate a burner, valve, switch, or ignition control.
Expected result: The model is electric, gas, or dual-fuel and has no active gas odor; or the fuel type is unknown or a gas odor is present.
Next step: Use the exact model instructions for a known safe fuel configuration. For unknown fuel type or any gas odor, stop testing, leave if needed, and obtain qualified or emergency assistance from a safe location.
Why this matters
Why: Power and control symptoms differ by fuel configuration. A gas smell changes the task from starting the oven to emergency response, regardless of whether the oven currently turns on.
-
Perform one model-supported power reset
Only when there is no gas odor, smoke, water contact, scorching, unusual heat, or repeated breaker trip, turn the appliance circuit off using the accessible breaker for the duration specified by the exact KitchenAid support page or Owner's Manual, then restore it once. Do not repeatedly cycle power or use an extension cord or adapter.
Expected result: The display returns normally and the oven accepts one safe start command, or the display remains blank, an error returns, or the breaker trips again.
Next step: If the symptom recurs, leave the oven out of service and arrange qualified repair. Do not keep resetting a tripping circuit or attempt internal electrical work.
Why this matters
Why: A single successful reset can clear a temporary control state; an immediate recurrence points to a supply, control, sensor, heating, or ignition fault that a reset cannot fix.
-
Record the failure and escalate safely
Write down the full model number, fuel type, display state, selected mode, lock or demo message, delayed-start setting, breaker behavior, door condition, and whether any gas odor, smoke, sparks, scorching, or overheating occurred. Give that record to KitchenAid support or qualified service without opening the oven.
Expected result: The oven remains off, the control will not respond, a protective device trips, or any hazardous symptom occurred.
Next step: Keep the oven unused and arrange qualified appliance service. For gas odor, fire, smoke, or suspected electrical danger, leave the area and obtain emergency assistance from a safe location.
Why this matters
Why: Persistent no-start symptoms can involve power distribution, control electronics, a door or safety interlock, gas ignition, or heating components that cannot be confirmed safely by a user.
Use your observations
Decision map
Find the observation that best matches what you see, then follow the next safe action.
-
PATH 01Next step
What you see
The display is blank and the accessible breaker or fuse is tripped, or the oven has no response after one permitted reset.
Do this next
Do not keep resetting. Leave the appliance out of service and arrange a licensed electrician or qualified appliance technician to evaluate the supply and oven.
-
PATH 02Next step
What you see
The display is active but Control Lock, Demo Mode, or Delayed Start is shown.
Do this next
Use only the exact model manual to clear the confirmed state once. If the oven remains unresponsive or the state returns, arrange service.
-
PATH 03Next step
What you see
The door is open, the selected mode or temperature is incomplete, or the Start command was not accepted.
Do this next
Close the door without force and enter one valid model-specific cooking sequence. Stop if the latch or control behaves abnormally.
-
PATH 04Next step
What you see
The appliance is gas or dual-fuel and a gas odor, delayed ignition, abnormal flame, or repeated ignition attempt is involved.
Do this next
Do not operate the ignition or gas controls. Leave the area and contact gas or emergency assistance from a safe location; do not return to test the oven.
-
PATH 05Next step
What you see
Smoke, sparks, scorching, overheating, water contact, or a repeated breaker trip occurred.
Do this next
Stop using the oven. If safe and dry, disconnect it at the accessible control point without touching damaged equipment; otherwise leave it alone and arrange emergency or qualified service.
-
PATH 06Next step
What you see
The display and settings are normal but the oven still does not start after one safe, model-supported reset.
Do this next
Keep the oven out of service and provide KitchenAid support or a qualified technician with the model, fuel type, display state, settings, and reset result.
Helpful context
Understand the symptom
Start with the display state
A blank display points toward incoming power, a breaker or fuse, wiring, or a control fault. A lit display means the oven has at least some power and the next decision is usually control state, mode, door position, delayed start, or a model-specific fault. KitchenAid publishes different guidance for wall ovens, electric ranges, and gas or dual-fuel ranges, so use the model number before applying a setting.
Treat unusual symptoms as stop conditions
Do not keep resetting an oven that trips a breaker, smells like gas, produces smoke or sparks, overheats, or will not respond to Off. CPSC advises leaving when gas is smelled or heard and avoiding electronics before seeking help from outside. Internal wiring, high-voltage parts, gas valves, igniters, and control boards are qualified-service work.
Use one controlled reset only after safe checks
If there is no gas odor, smoke, heat damage, water contact, or repeated trip, a model-supported breaker reset can distinguish a temporary control state from a persistent fault. KitchenAid's support pages describe powering the unit down for about one minute in applicable models. If the symptom returns or the oven remains unresponsive, leave it out of service and arrange repair.
Safety boundary
Stop conditions
- Stop immediately for a gas or rotten-egg odor, hissing, delayed ignition, an abnormal flame, smoke, fire, sparks, scorching, or overheating.
- Stop for a breaker that trips again, a wet appliance, a damaged cord, a control that will not turn the oven Off, or an unexplained burning or electrical odor.
- Do not remove covers, probe live terminals, open gas controls, move a connected gas appliance, defeat a door or safety interlock, or repeatedly reset a protective device.
- If gas is smelled or heard, leave immediately and avoid switches, flames, phones, and electronics in the area; obtain assistance from outside.
Only after diagnosis
Potential parts
- electronic control or user-interface component
Consider only if qualified model-specific diagnosis links a persistent blank display or unresponsive control to that component.
Confirm the complete KitchenAid model and manufacturer fit information before ordering; do not replace a control based on a no-start symptom alone. - door latch or safety interlock component
Relevant only when model-specific inspection shows that a correctly closed door is not being recognized by the control.
Do not defeat or bypass the interlock; exact model confirmation and qualified service are required. - gas igniter or ignition-control component
Consider only for a confirmed gas or dual-fuel model after qualified diagnosis identifies failed ignition without an active gas emergency.
Gas-system diagnosis and repair require qualified service and exact model confirmation. - heating element or temperature-control component
Relevant only when the display and controls operate but qualified testing identifies a heating or temperature-control fault.
Do not perform live electrical testing or order a part without the exact model and professional diagnosis.
When checks do not resolve it
Need a professional?
Arrange qualified KitchenAid appliance service when the display remains blank, the oven will not start after the model-specific low-risk checks and one permitted reset, a control or door interlock behaves abnormally, or a breaker trips again. For gas odor, smoke, fire, sparks, severe overheating, water-contact electrical danger, or suspected carbon-monoxide exposure, leave the area and obtain emergency assistance from a safe location.
Common questions
FAQ
Why is my KitchenAid oven not turning on at all?
Start by separating a blank display from a lit display. A blank display points toward supply, breaker or fuse, installation, or a control fault. A lit display can still be locked, in Demo Mode, waiting for Delayed Start, set incorrectly, or blocked by the door. Use the exact model guidance and arrange service if one safe reset does not help.
What if the display works but the oven will not start?
Check the model-specific Control Lock, Demo Mode, Delayed Start, door position, selected mode, temperature, and Start command. Do not guess settings from another model, and stop if the control or door behaves abnormally.
Should I reset the breaker when the oven will not turn on?
Only once, and only when there is no gas odor, smoke, water contact, scorching, unusual heat, or repeated trip. Follow the exact KitchenAid model guidance. If the breaker trips again or the oven stays unresponsive, leave it out of service and arrange qualified repair.
What should I do if my gas KitchenAid oven smells like gas and will not start?
Do not try to start it or operate a gas control. Avoid flames, switches, and electronics in the area, leave immediately, and obtain gas or emergency assistance from outside. Do not return to test the oven.
What information should I give a KitchenAid technician?
Provide the complete model number, fuel configuration, display state, selected mode and temperature, lock or demo indicator, delayed-start status, door behavior, breaker or fuse history, reset result, and any gas odor, smoke, sparks, scorching, overheating, or error message.
Read the exact guide
Official sources
- Oven Not Working - Gas and Dual Fuel RangeKitchenAid Product Help · KitchenAid gas and dual-fuel oven door, power, ignition, and gas-supply troubleshooting context
- Nothing is Working - Gas RangeKitchenAid Product Help · KitchenAid gas-range main gas valve, breaker or fuse, Control Lock, Delayed Start, and Demo Mode checks
- Nothing Is Working - No Power - Wall OvenKitchenAid Product Help · KitchenAid wall-oven no-power troubleshooting, control lock, supply, breaker or fuse, installation requirements, and power reset guidance
- Gas Appliance SafetyU.S. Consumer Product Safety Commission · Gas-leak emergency response, avoiding ignition sources and electrical equipment, leaving the area, and not moving a gas appliance
- Locked, Lock or Loc - RangeKitchenAid Product Help · KitchenAid range Control Lock indication, model-specific unlock guidance, and one-minute power reset context
- As Winter Storms Impact Millions CPSC Issues Safety Tips to Help Families Prevent Carbon Monoxide Poisoning and FiresU.S. Consumer Product Safety Commission · Gas-leak evacuation, avoiding electronics, and carbon-monoxide warning context
- Oven Not Heating - Powering On - ElectricKitchenAid Product Help · KitchenAid electric oven door, installation, Control Lock, Demo Mode, and Delayed Start checks
- Oven Not Working - GasKitchenAid Product Help · KitchenAid gas-oven installation, grounded power, ignition, and main gas-valve context
Community feedback
Share a repair observation
Share a plain-text repair observation. Accepted observations are published automatically; this page may take a moment to update.