
On this page
Start here
Quick answer
An LG oven light that blinks only at a documented cooking event may be normal: LG describes the light blinking when some ranges reach the set temperature during bake or convection operation. Flicker that follows the door, occurs randomly while the oven is steady, affects the display or other lights, or continues after a cool-down points instead to a loose or failing bulb, socket, door switch, wiring, control, or power problem. Let the oven and bulb cool, then identify the exact model and use its manual before touching the lamp. If the light socket is hot, scorched, loose, or sparking—or there is smoke, a burning smell, an arc in the cavity, damaged wiring, or repeated breaker trips—turn the oven off, isolate power only from a dry safe position, and do not test it again. Never remove a bulb cover or lamp while energized, and do not open the control panel or bypass a door switch.
Before you begin
Safety first
- This article supports cool, power-isolated, ordinary-access observations and an exact-manual bulb procedure only. Do not operate after an electrical or fire warning, touch hot or wet parts, bypass a door switch, open the control panel, test live wiring, or force the lamp assembly.
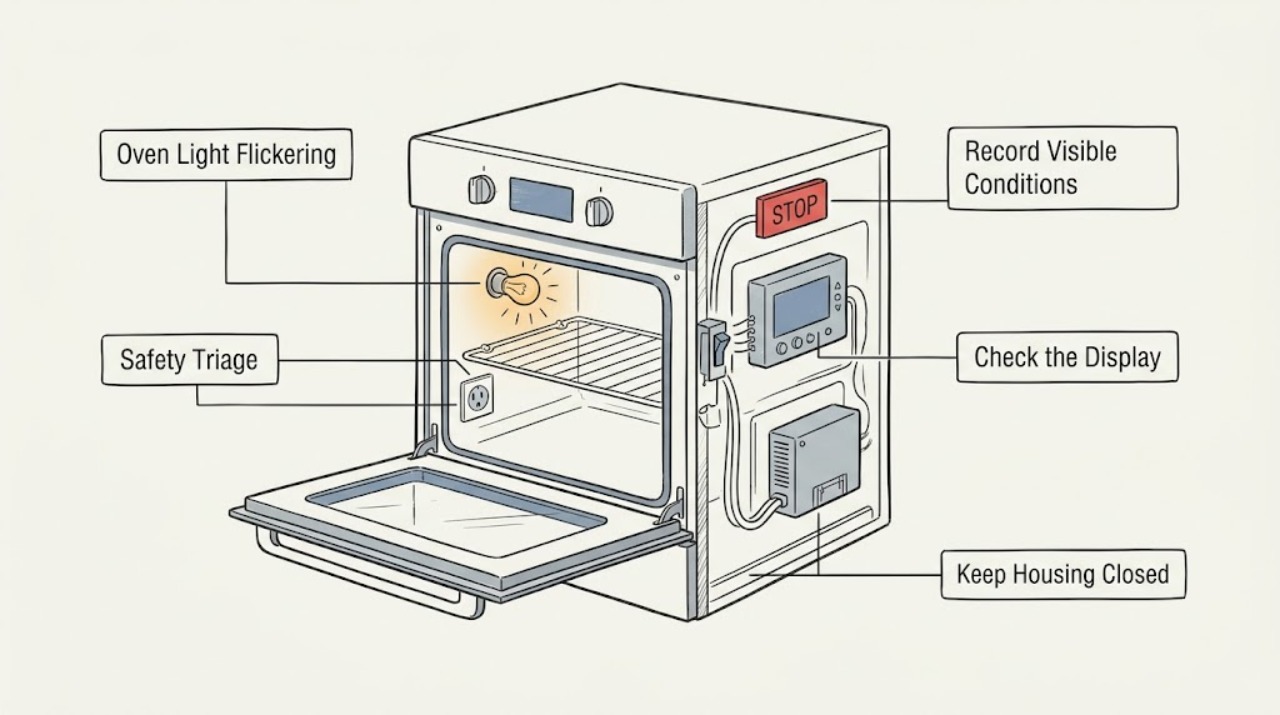
Work through in order
Diagnostic checks
Use only checks that match the exact appliance or system and its official guide.
-
Check 1
Stop the oven using its normal control if it responds, keep clear of hot surfaces, and identify from a safe position whether there is smoke, flame, a burning or melting smell, a visible arc or spark in the cavity, a hot or discolored lamp socket, damaged wiring, or a breaker trip.
Expected result: Classify the event as a safety warning, a wet or damaged electrical area, a flicker with no heat or odor, or no abnormal condition that can be observed safely.
Next step: If safe without touching wet or damaged equipment, isolate power at the breaker or unplug by the intact plug while standing clear; leave the area and follow local emergency procedures for smoke or fire. Otherwise keep clear and obtain qualified electrical/appliance service. Continue only with cool, non-invasive observations when no warning is present.
Stop if: Do not touch a hot or wet socket, pull a damaged cord, pour water on an electrical fire, repeatedly reset a breaker, or turn the oven back on after smoke, sparks, an arc, burning smell, melting, or a hot connection.
Why this matters
Why: Smoke, arcing, melting, burning odor, a hot socket, damaged wiring, repeated tripping, or a spark in the oven is not an ordinary light-bulb symptom. Continuing to operate can turn an electrical or fire fault into a larger hazard.
-
Check 2
After the oven is off and cool enough to approach, record exactly when the light flickers: when the door opens or closes, while the door is held still, during preheat, at the temperature-reached signal, during bake/broil, during self-clean, or while the controls are idle.
Expected result: Note whether the blink is repeatable at a documented temperature or mode, follows door movement, is random, or occurs at the same time as display/clock or other house-light changes.
Next step: Record the mode, door state, display state, and model number and compare them with the exact LG manual. Do not repeatedly cycle the oven to reproduce a random or hazardous flicker.
Stop if: Do not hold a hot door open, move the door against a loose hinge or switch, or run self-clean or high-heat modes to test the lamp when the flicker is unexplained.
Why this matters
Why: A repeatable blink at the end of preheat can be an LG operating indication on some models. A door-dependent or random blink suggests a lamp, socket, door switch, wiring, or control issue; a whole-range flicker points toward supply or control rather than the lamp alone.
-
Check 3
With the oven off and safe, observe whether only the cavity lamp flickers or whether the clock, control-panel LEDs, display, cooktop indicators, or nearby lights change at the same time.
Expected result: Classify the symptom as cavity lamp only, cavity lamp plus control panel, all range functions, or the whole room/house circuit.
Next step: Keep a lamp-only symptom within the model-manual path. For control or supply flicker, stop operating the range and arrange qualified appliance/electrical diagnosis; do not open the console.
Stop if: Stop for a hot outlet or plug, buzzing or crackling from the control area, smoke, burning odor, visible arcing, damaged wiring, or repeated breaker trips.
Why this matters
Why: A lamp-only symptom supports a bulb, socket, door switch, lamp wiring, or local control path. A display or whole-range change raises a supply, control-board, or connection issue; a house-wide change needs electrical assessment rather than lamp replacement.
-
Check 4
Find the full LG model number and read the lamp section of its owner manual or product support page; determine whether the oven uses a replaceable appliance bulb, an LED module, a special cover, or a door-controlled lamp.
Expected result: Record the documented bulb type and rating if any, the cover location, whether a lamp is expected to turn on with the door, and whether the manual directs service instead of user replacement.
Next step: Use only the exact manual's lamp specification and procedure. If the model cannot be identified, the instructions are missing, or the lamp type is unclear, stop at external observation and request LG or qualified service.
Stop if: Do not guess a wattage or base, insert a household bulb, pry a cover, or remove a lamp module while the oven is hot or connected to power.
Why this matters
Why: A bulb, socket, LED module, and door-switch circuit have different safe procedures. A rating or replacement part from another model is not evidence of compatibility, and an LED or sealed assembly may require service.
-
Check 5
If the exact manual permits ordinary bulb replacement and no safety warning occurred, let the oven and bulb cool completely, then disconnect electrical power at the plug or the main circuit breaker before touching the cover or lamp.
Expected result: Confirm the oven is cool, the light is off, the circuit is isolated, and the cover and socket are dry and visibly intact before any model-directed lamp handling.
Next step: Proceed only with the exact LG manual's cool, power-off bulb procedure. If the lamp is an LED module, the cover will not release normally, or the socket shows damage, stop and arrange service.
Stop if: Do not rely on the oven's Off or Light button as electrical isolation, work with a hot bulb, reach into the cavity with power connected, or force the cover or socket.
Why this matters
Why: The lamp circuit may remain energized even when the oven control is off. Power isolation and cooling prevent shock and burn injury; a cracked, loose, wet, scorched, or stuck cover/socket is a service condition.
-
Check 6
With power isolated and the oven cold, inspect only the ordinary-access bulb, glass cover, and socket as the exact manual allows; look for a loose bulb, darkened glass, cracked cover, corrosion, moisture, soot, melted plastic, or a socket that moves.
Expected result: Record an intact lamp and socket, a loose or failed bulb, a damaged cover, corrosion/moisture, a scorched or loose socket, or a component that cannot be safely reached.
Next step: Use only the exact manual's approved bulb and cover replacement if the socket is cool, dry, intact, and stationary. Refer a damaged socket, wiring, cover, or LED assembly to qualified service.
Stop if: Do not touch exposed conductors, bend socket contacts, use foil or tape as a cover, bypass the lamp, or continue if there is soot, melting, moisture, an arc mark, or a burnt smell.
Why this matters
Why: A loose or failed bulb may cause intermittent contact, but heat damage, moisture, corrosion, or a loose socket can indicate a larger fault. A cover is part of the oven's intended protection and should not be bypassed.
-
Check 7
When the oven is cold and power remains isolated, inspect the visible door alignment, hinge area, and door-switch contact area without removing panels or forcing the door; compare whether the light changes only as the door reaches its normal open or closed position.
Expected result: Note a normal door and repeatable lamp response, a loose or misaligned door, a switch area that appears damaged, flicker when the door is gently moved, or no relationship to the door.
Next step: Leave the door and switch intact and provide the phase pattern to service if the light flickers with door movement or the door is damaged. If the manual identifies a simple external alignment check, perform only that cool, power-off check.
Stop if: Do not remove the door, defeat or bridge the door switch, reach into hinge springs, bend the switch, or operate with a door that will not close or seal normally.
Why this matters
Why: A door-dependent flicker can involve the switch, actuator, harness, or lamp contact, while a damaged or misaligned door can also affect heat retention. The circuit cannot be safely confirmed by bypassing the switch or probing live wiring.
-
Check 8
Compare the flicker with the selected mode and normal cooling behavior using the exact manual: note bake, broil, convection, warming, self-clean, and post-cook cooling phases without starting a high-heat test solely for this diagnosis.
Expected result: Record a blink only at a documented preheat or mode event, a blink during ordinary cooking, a blink after canceling while the oven cools, or a blink while the oven is idle and cool.
Next step: Use the manual to decide whether the documented behavior is expected. If the pattern is not documented, stop high-heat use and arrange lamp/control diagnosis rather than trying every mode.
Stop if: Do not use self-clean, broil, or prolonged high heat to reproduce an unexplained flicker, and stop immediately for smoke, strong odor, arcing, overheating, or a breaker trip.
Why this matters
Why: Some LG convection/bake models blink the oven light when the set temperature is reached; a mode-specific, repeatable behavior may therefore be normal. Random blinking during stable operation or while cool and idle is not explained by that indication.
-
Check 9
Only when there is no heat damage, odor, smoke, spark, leak, or breaker event, use the exact LG manual or support guidance for one normal power interruption or control reset if it applies to the observed panel symptom; otherwise leave power off.
Expected result: Record whether the lamp and display return to normal, the lamp-only flicker returns, the control panel also flickers, an error appears, or the breaker trips again.
Next step: If the symptom returns, keep the range isolated and provide the model, mode, door state, display behavior, and timing to LG or a qualified technician. Do not repeat the reset as a test.
Stop if: Do not reset after arcing, smoke, burning smell, melting, a hot connection, or a breaker trip, and do not open the control panel or measure live circuits.
Why this matters
Why: A reset can clear a temporary control state but cannot repair a loose socket, damaged wire, failing lamp driver, or unstable supply. A returning symptom or any electrical warning requires service.
-
Check 10
Prepare the full LG model number, oven type, mode and temperature, door state, exact blink pattern, cavity lamp type, bulb/cover/socket condition, display or clock behavior, breaker history, and safe photos for LG or a qualified appliance/electrical technician.
Expected result: Confirm whether the evidence supports a documented preheat indication, lamp or socket issue, door-switch path, control fault, power fluctuation, or an unresolved safety condition.
Next step: Use LG product support and repair resources for model-specific diagnosis. Keep the oven out of service when the flicker is unexplained, recurs after a safe manual-directed check, or has any heat, odor, smoke, spark, damage, or breaker symptom.
Stop if: Do not return the oven to use while a socket, cord, control, door switch, wiring, or power fault is unexplained; do not replace internal parts based on flicker alone.
Why this matters
Why: This record lets service distinguish a normal mode indication from a lamp circuit or supply issue without the owner opening a hot oven or repeating a hazardous test.
Use your observations
Decision map
Find the observation that best matches what you see, then follow the next safe action.
-
PATH 01Safety boundary
What you see
The light blinks repeatably when the exact LG model reaches the set temperature during a documented bake or convection operation, with no odor, heat damage, smoke, spark, or display instability.
Do this next
Confirm the behavior in the exact manual and continue ordinary use only if all other functions and safety conditions are normal; arrange service if it becomes random or occurs while cool and idle.
Why this path and its safety boundary
Why it matters: This may be a normal operating indication rather than a failed bulb.
Safety stop: Stop for a hot socket, burning smell, smoke, arcing, damaged wiring, abnormal oven heating, or a breaker trip.
-
PATH 02Safety boundary
What you see
The cavity lamp flickers when the door opens, closes, or moves, while the display and other lights remain stable.
Do this next
Use only the cool, power-isolated lamp inspection allowed by the exact manual. Arrange service for a loose socket, damaged door, switch, wiring, or recurrence after an approved bulb replacement.
Why this path and its safety boundary
Why it matters: A bulb contact, socket, door switch/actuator, harness, or door alignment issue is plausible; it is not safe to bypass the switch.
Safety stop: Do not move a damaged door, reach into hinge hardware, bridge the door switch, or operate if the lamp socket is hot, scorched, wet, or arcing.
-
PATH 03Safety boundary
What you see
Only the cavity lamp flickers randomly during steady cooking or while the oven is cool, without a documented preheat indication.
Do this next
Let the oven cool, isolate power, identify the exact lamp type, and follow only the model-directed bulb check; refer an LED assembly, damaged socket, or recurring flicker to service.
Why this path and its safety boundary
Why it matters: A loose/failed bulb, socket, lamp driver, local wiring, or control path is more likely than normal mode behavior.
Safety stop: Do not repeatedly cycle the oven, use a guessed bulb, force the cover, touch energized wiring, or continue after odor, heat, smoke, sparks, or melting.
-
PATH 04Safety boundary
What you see
The display, clock, control LEDs, cooktop indicators, or the whole range flickers with the cavity lamp, or nearby lights change at the same time.
Do this next
Stop using the range and arrange qualified appliance/electrical assessment; do not open the console or assume a bulb replacement will solve a whole-range power symptom.
Why this path and its safety boundary
Why it matters: The symptom may involve the supply, control, or a shared connection rather than the lamp alone.
Safety stop: Stop immediately for a hot/discolored plug or outlet, buzzing, smoke, burning smell, arcing, damaged cord, or repeated breaker trips.
-
PATH 05Safety boundary
What you see
The bulb, cover, socket, or visible wiring is cracked, wet, scorched, loose, melted, corroded, or cannot be safely accessed.
Do this next
Keep the oven powered off and arrange qualified appliance service; provide photos and the model number without touching the damaged area.
Why this path and its safety boundary
Why it matters: The lamp circuit has a damage or shock/fire risk and should not be treated as a routine bulb change.
Safety stop: Do not fit a new bulb into a damaged socket, bypass the cover, bend contacts, use foil/tape, or restore power to test.
-
PATH 06Safety boundary
What you see
The flicker is accompanied by a visible spark or arc in the oven cavity, smoke, flame, burning/melting smell, hot lamp housing, or a breaker trip.
Do this next
Keep clear, isolate power only from a dry safe position, follow local emergency procedures for smoke or fire, and obtain qualified appliance/electrical service. Do not re-energize for diagnosis.
Why this path and its safety boundary
Why it matters: This is an immediate electrical, fire, or appliance fault; the lamp symptom is secondary.
Safety stop: Do not touch the cavity or socket while hot, pour water into the oven, reset the breaker repeatedly, or run another bake, broil, or self-clean cycle.
Helpful context
Understand the symptom
The timing of the blink is the first clue
Do not treat every blink as a failed lamp. On some LG ranges, the oven light blinks after preheating reaches the set temperature, so a repeatable blink at that point can be an operating indication. A light that cuts out when the door moves, flickers with no change in oven state, or makes the display or other lights flicker is a different pattern. Record whether it happens with the door open, during preheat, after the oven reaches temperature, during broil or self-clean, or while the controls are idle.
Lamp replacement is model- and bulb-type dependent
LG ovens use different generations and lamp arrangements. A model-specific LG manual may describe a user-replaceable appliance bulb, while another unit may use an LED module or a different cover and socket. Do not assume a wattage, base, or cover style from another LG range. If the exact manual permits a bulb change, wait until the oven is cool and disconnect power at the plug or breaker before handling the cover; stop if the cover or socket is damaged, stuck, wet, or scorched.
A flickering lamp can be a symptom of a wider power fault
If the control display, clock, cavity light, or other appliance loads flicker together, the issue may be upstream power, a loose connection, or the range control rather than the lamp alone. LG's control guidance allows a model-appropriate power interruption check for some control-panel symptoms, but a breaker that trips, a warm or discolored connection, burning odor, or visible arcing is not a reset problem. Keep the range out of service and have the electrical and appliance sides assessed.
Safety boundary
Stop conditions
- Stop immediately for smoke, flame, visible arcing or sparking, burning or melting odor, a hot/discolored socket, damaged wiring or cord, repeated breaker trips, or a lamp cover that is wet, cracked, loose, or scorched.
- Do not remove a bulb cover or lamp while the oven is hot or electrically connected; the control's Off or Light button is not a substitute for power isolation.
- Do not bypass a door switch, touch hinge springs or live wiring, open the control panel, measure live circuits, or force a stuck cover or socket.
- Do not use a guessed bulb, wattage, LED module, foil, tape, or household lamp; follow only the exact LG model's manual and replacement specification.
- Do not use self-clean, broil, or repeated high-heat cycles to reproduce an unexplained flicker, and do not restart after an electrical, fire, or control warning.
Only after diagnosis
Potential parts
- oven appliance bulb
Consider this category only if the exact LG manual identifies a user-replaceable bulb and cool, power-isolated inspection confirms a loose or failed bulb with an intact socket and cover.
Confirm the full model, bulb type, base, rating, and manual specification; do not substitute a household bulb or install it while energized. - oven lamp cover
Consider this category only if the exact model's cover is cracked or damaged while the socket and lamp circuit are otherwise assessed as safe.
Confirm the exact model and heat-rated cover design; do not bypass the cover with foil, tape, or an unverified substitute. - oven lamp socket or LED module
Consider this category only after qualified diagnosis links recurring flicker to the exact model's socket, lamp driver, or LED assembly rather than a normal preheat indication.
Confirm the exact model and diagnosed assembly; socket and LED work may require service and must not be inferred from a flicker alone.
When checks do not resolve it
Need a professional?
Arrange LG or qualified appliance/electrical service when the lamp flickers randomly, follows door movement, affects the display or whole range, returns after an exact-manual bulb check, involves an LED module, or is accompanied by a loose/damaged socket, hot connection, smoke, odor, spark, arc, wiring damage, or breaker trip. A repeatable blink at a documented preheat event may be normal on some LG models, but the exact model manual controls.
Safety scope: This article supports cool, power-isolated, ordinary-access observations and an exact-manual bulb procedure only. Do not operate after an electrical or fire warning, touch hot or wet parts, bypass a door switch, open the control panel, test live wiring, or force the lamp assembly.
Common questions
FAQ
Is it normal for an LG oven light to blink?
It can be normal on some LG models when the oven reaches the set temperature during bake or convection operation. A random blink, a blink tied to door movement, or flicker while the oven is cool and idle needs a model-specific lamp, socket, control, or power assessment.
Why does my LG oven light flicker when I open the door?
A door-dependent flicker can involve the bulb contact, socket, door switch, harness, or door alignment. Let the oven cool, isolate power, and follow only the exact manual's lamp inspection. Do not bypass the door switch or operate with a damaged, hot, wet, or scorched socket.
Can I replace an LG oven bulb myself?
Only if the exact LG manual identifies a user-replaceable bulb and gives the procedure. The oven and bulb must be cool and electrical power must be disconnected before handling the cover. LED modules, stuck covers, damaged sockets, and unclear bulb specifications require service.
Why does the oven light flicker with the LG display?
When the display, clock, control LEDs, or other range functions flicker too, the problem may be the supply, control, or shared connection rather than the cavity bulb. Stop using the range and arrange qualified appliance/electrical assessment, especially for a hot connection, smell, smoke, sparks, or breaker trips.
Should I reset the breaker for an LG oven light flicker?
Do not reset after smoke, burning smell, melting, arcing, a hot connection, or a breaker trip. If there are no safety warnings and the exact LG support guidance applies to a control-panel symptom, one normal power interruption may document the result; a returning flicker needs service rather than repeated resets.
What if the oven light socket is hot or discolored?
Stop using the oven and do not touch the socket or install another bulb. From a dry, safe position isolate power and arrange qualified appliance/electrical service. Heat damage, discoloration, melting, smoke, or a burning odor can indicate a fault beyond the bulb.
Can a spark in the oven cavity be treated as a light problem?
No. A visible spark or arc, smoke, flame, burning or melting smell, damaged wiring, or repeated breaker trip is an immediate stop condition. Keep clear, isolate power only when safe, follow local emergency procedures for smoke or fire, and do not restart the oven to test the lamp.
Read the exact guide
Official sources
- LG Range - Understanding Convection CookingLG USA Support · LG support article for ranges with the described convection behavior; modes and indicators vary by model.
- LG Range – Troubleshooting the Control PanelLG USA Support · LG USA support guidance for range control panels; it does not diagnose a particular light socket or model.
- How To Replace The Light Bulb In An LG OvenLG USA Support · LG USA Help Library article for oven light support; exact model manuals control bulb type and replacement procedure.
- Owner's ManualLG Electronics · Owner's manual for an LG LDG3017ST gas double oven range; use as an example of model-specific behavior and follow the exact model manual for another LG oven.
- Appliance and Electrical Fire SafetyU.S. Fire Administration · Government fire-safety guidance for major household appliances; it does not diagnose an LG oven.
Community feedback
Share a repair observation
Share a plain-text repair observation. Accepted observations are published automatically; this page may take a moment to update.