
On this page
Start here
Quick answer
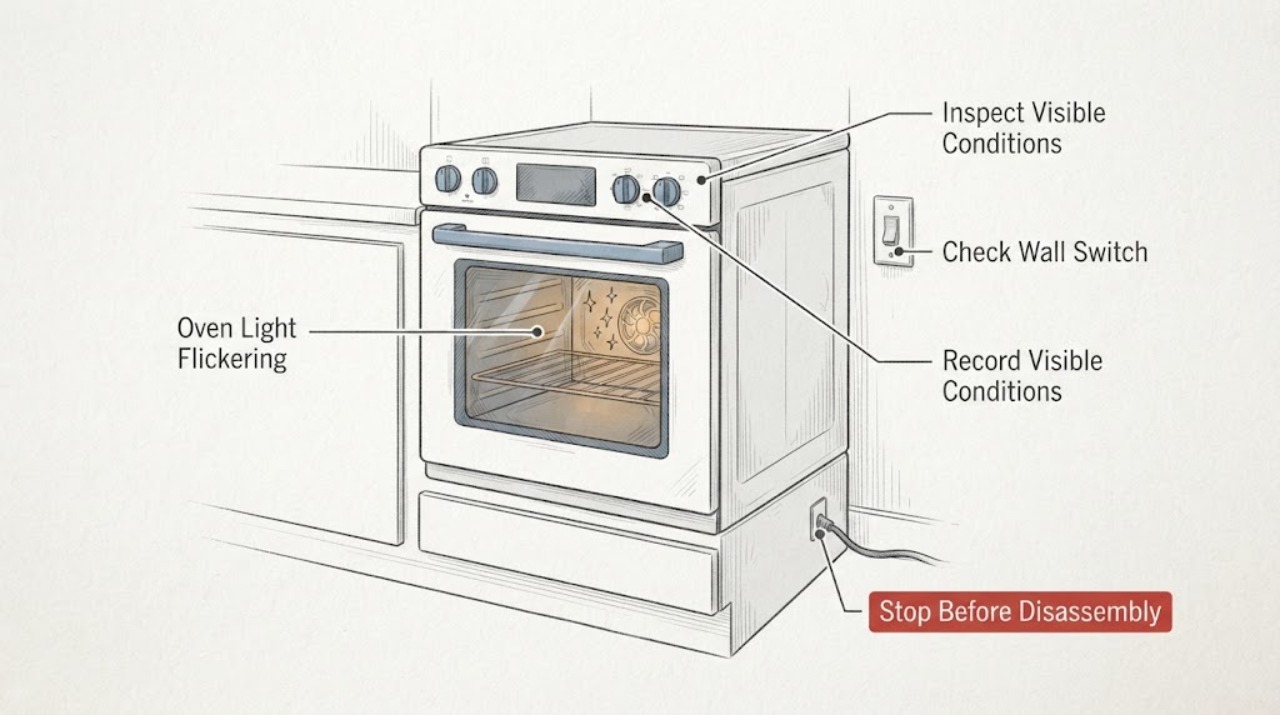
A Samsung oven light may change when the door switch, Lamp control, preheating, or a high-heat function changes state. Flickering that follows the door or a selected mode can be a control or switch clue; flickering at random, across the whole appliance, or together with a blinking display suggests a power, control, or connection problem. Let the oven and lamp cool completely and isolate power before any visible bulb, lens, or socket check, and follow the exact model manual because lamp designs differ. Do not touch a live socket, remove panels, or keep operating the oven with arcing, a burning smell, smoke, heat damage, a loose connection, or repeated breaker trips. Stop the appliance and arrange qualified Samsung appliance or electrical service.
Work through in order
Diagnostic checks
Use only checks that match the exact appliance or system and its official guide.
-
Check 1
Record the complete Samsung model number and observe the symptom from a safe position. Note whether only the interior lamp flickers, whether the display or clock blinks too, whether the door is moving, and which mode or control was active.
Expected result: The lamp changes only with door movement or a Lamp command, only during preheat or a special mode, flickers at random, or the entire panel and other lights fluctuate.
Next step: Do not test further if smoke, arcing, burning odor, hot wiring, or repeated tripping is present. Otherwise continue with the matching low-risk branch and the model manual.
Why this matters
Why: A repeatable door or mode relationship points to a switch or control state. Random lamp changes with a stable display point toward the lamp circuit, while a blinking panel or multiple lights points toward supply or control behavior.
-
Check 2
With the oven cool and stationary, open and close the door normally once while watching the lamp. Do not slam the door, hold the door switch in, or reach into the cavity; compare the lamp behavior with the door fully open and fully closed.
Expected result: The light changes cleanly with the door position, flickers when the door is barely moved, stays on or off regardless of position, or the door, plunger, or frame is visibly damaged.
Next step: Stop using the oven if the door switch, frame, lens, or wiring area is damaged. Do not tape, wedge, or bypass a switch; use the exact manual or arrange service.
Why this matters
Why: A response tied to door position can involve the model's door switch or lamp logic. A light that flickers with slight movement, remains wrong in every position, or has visible damage needs service rather than switch manipulation.
-
Check 3
Check the selected mode and status icons against the model manual. Note whether the lamp change occurs during Self Clean, another extreme-heat function, preheat, convection, or an ordinary bake, and record any locked-panel or light icon.
Expected result: The light is disabled only during a documented high-heat function, a light or mode icon changes normally, or the lamp flickers during an ordinary mode with no expected transition.
Next step: Allow a high-heat cycle to finish and cool naturally. If the lamp behaves abnormally in ordinary cooking, stop repeated testing and move to the cool, power-isolated inspection or service branch.
Why this matters
Why: Samsung states that the interior lamp may not function during extreme-heat cleaning and that icons vary by model. A lamp that flickers outside a documented state is not explained by that normal mode behavior.
-
Check 4
After the oven and lamp are fully cool, turn off power at the approved disconnect or breaker and verify the appliance is not energized before looking at the lens, bulb, and visible socket area. Check only for a loose-looking bulb, cracked lens, darkened socket, moisture, or heat damage; do not remove a cover unless the exact manual gives a safe owner procedure.
Expected result: A bulb appears loose or darkened, the lens or socket is damaged, moisture or scorching is visible, the lamp is an integrated module, or the visible area looks intact.
Next step: Keep power off for damage, moisture, scorching, or an integrated module. If the manual explicitly permits bulb replacement, use only the specified part and cool, power-off procedure; otherwise arrange Samsung service.
Why this matters
Why: A loose or failed replaceable bulb may explain isolated flicker, but a damaged socket, moisture, scorching, or integrated LED/module shifts the issue to qualified repair. A clean visible area does not rule out a control or wiring fault.
-
Check 5
From outside the oven, compare the lamp with the display and nearby kitchen lights while the appliance is idle and while a normal control is selected. Do not use a meter, remove a cover, or access the terminal block; note whether a breaker or residual-current device changes state.
Expected result: Only the lamp flickers, the display also blinks, household lights dip, the breaker trips, or the symptom stops when the appliance is isolated.
Next step: Leave the appliance isolated and arrange qualified appliance or electrical service for any panel fluctuation, trip, hot connection, or recurring flicker. Do not repeatedly reset protection.
Why this matters
Why: A lamp-only symptom is more local to the light circuit, while a blinking panel, house-light change, or trip raises a supply, connection, or control concern. Isolation stopping the symptom does not make live electrical work safe.
-
Check 6
If the model manual provides a documented user reset for a non-hazardous control issue, perform it once with the oven cool and the surrounding area dry. Record whether the display and Lamp control recover; do not use a reset to continue a unit with heat or electrical warning signs.
Expected result: The lamp returns to stable operation, the panel still blinks, the fault returns immediately, or a trip, smell, smoke, or spark occurs.
Next step: Stop using the oven for a returning or hazardous fault and arrange service. Do not repeat power cycling or enter an undocumented diagnostic mode.
Why this matters
Why: A reset can clear a temporary control state but cannot repair a loose socket, failed LED module, switch, wiring, or supply problem. A returning fault needs diagnosis.
-
Check 7
After one documented, safe correction, observe one ordinary, attended oven-light operation from outside. Confirm that the lamp is stable, the display is stable, the door operates normally, and there is no heat damage, smoke, burning odor, arcing, or trip.
Expected result: The lamp remains stable in the expected door and mode states, or flickering returns, the light remains on or off incorrectly, the display fluctuates, or any hazard appears.
Next step: Stop user troubleshooting for an abnormal result. Give qualified service the model, mode, door relationship, lamp type, display behavior, power history, and photographs taken only after isolation and cooling.
Why this matters
Why: Stable behavior after a documented bulb or control correction supports that specific cause. Recurrence or a broader power symptom points to a lamp circuit, door switch, LED module, control, or supply fault.
Use your observations
Decision map
Find the observation that best matches what you see, then follow the next safe action.
-
PATH 01Next step
What you see
The light changes only when the door is opened or closed, and the display and oven operation remain stable.
Do this next
Use the exact model manual to confirm the expected Lamp behavior. Stop if movement causes random flicker, the door switch or frame is damaged, or the light never reaches a stable state; arrange service.
Why this path and its safety boundary
Why it matters: The door switch or model lamp logic is the leading branch; the change may be an intended door-controlled state or a switch/contact fault.
-
PATH 02Next step
What you see
The light is off or changes only during Self Clean or another documented extreme-heat function.
Do this next
Do not interrupt or repeatedly restart the function. Let the oven cool, then verify ordinary-mode behavior using the model manual; arrange service if the lamp flickers outside the documented mode.
Why this path and its safety boundary
Why it matters: The mode may intentionally restrict the interior lamp or other controls while heat is high.
-
PATH 03Next step
What you see
With power isolated and the oven cool, a replaceable bulb appears loose or darkened but the lens and socket show no damage.
Do this next
Follow the exact model manual's cool, power-off bulb procedure only if it explicitly permits owner replacement. Use the specified lamp type and stop for service if flicker remains or the light is an integrated module.
Why this path and its safety boundary
Why it matters: A lamp or bulb connection may be causing an isolated flicker.
-
PATH 04Next step
What you see
The lamp flickers randomly, the lens or socket is scorched or wet, the light is an integrated LED/module, or the display also blinks.
Do this next
Keep the oven isolated and arrange qualified Samsung appliance or electrical service. Do not remove panels, touch a socket, or substitute a bulb without model confirmation.
Why this path and its safety boundary
Why it matters: A light module, wiring, control, or appliance power fault remains possible.
-
PATH 05Next step
What you see
The breaker or residual-current device trips, household lights dip, the cord or outlet is hot, or the flicker accompanies a burning smell, smoke, or visible arc.
Do this next
Stop using the oven, do not reset protection repeatedly, and obtain qualified electrical or appliance help from a safe position. Leave the area and follow local emergency guidance for smoke or fire.
Why this path and its safety boundary
Why it matters: There is an electrical or fire hazard, not a lamp-adjustment problem.
Helpful context
Understand the symptom
First identify what is flickering
Watch the oven light and the control display separately. Note whether the light changes only when the door moves, when the Lamp control is pressed, during preheat or convection, or while a self-clean or other high-heat function is active. If the display, clock, or other appliance lights also blink, treat the symptom as a supply or control issue rather than a lamp-only problem.
Use the model manual before touching a lamp
Samsung's support pages emphasize that icons, controls, and procedures vary by model. Record the full model number and use its manual to determine whether the light is a replaceable bulb, an integrated light module, or a service-only assembly. Any visible check must wait until the oven and lamp are cool and power is safely isolated.
A hazard ends the light diagnosis
A brief change during a documented mode is different from a lamp that flashes randomly or an electrical connection that is heating. Do not keep cycling the Lamp control to reproduce a fault. Smoke, arcing, a burning or melting smell, a hot plug or outlet, a damaged lens, or repeated tripping requires immediate stoppage and qualified help.
Only after diagnosis
Potential parts
- oven light bulb and lens
Consider only when the exact model manual identifies a user-replaceable bulb and a cool, power-isolated inspection confirms a failed bulb or damaged lens without socket or wiring damage.
Lamp type, wattage, lens, and access method are model-specific; confirm the complete model and the manufacturer's instructions before ordering or fitting. - oven LED light module or socket
Consider only after qualified diagnosis confirms an integrated light module or socket fault rather than a door-state, mode, or supply issue.
Modules and sockets are model- and revision-specific electrical parts; do not access or replace them while energized. - oven door switch or control assembly
Consider only when the exact model's door-state behavior and power checks point to a switch, control, or sensing fault.
Switches and controls are safety-related and model-specific; qualified service should confirm fit and the safe procedure.
When checks do not resolve it
Need a professional?
Arrange qualified Samsung appliance or electrical service when flicker is random or persistent, the light does not match the model's door or mode behavior, a bulb or socket is damaged, the light is an integrated LED/module, the display also blinks, one documented reset fails, or any smoke, burning smell, arcing, heat damage, hot connection, or repeated trip occurs.
Common questions
FAQ
Why does my Samsung oven light flicker when I move the door?
The lamp may be controlled by the door state, but flicker with slight movement can also indicate a switch, socket, or control issue. Check the exact model's expected Lamp behavior from a safe position. Do not hold, tape, or bypass the door switch; arrange service for persistent flicker or visible damage.
Can the Samsung oven light be off during Self Clean?
Samsung says the interior lamp may not function during extreme-heat cycles such as Self Clean. Let the oven cool and compare ordinary-mode behavior with the model manual. Flicker outside a documented mode is not explained by Self Clean alone.
Should I replace a Samsung oven light bulb that is flickering?
Only if the exact model manual identifies a user-replaceable bulb and the oven and lamp are cool with power safely isolated. If the lamp is an integrated module, the socket is damaged, or the display also flickers, keep the oven out of use and arrange qualified service.
Read the exact guide
Official sources
- Door will not close on Samsung ovenSamsung Support · Samsung oven door, plunger, latch, physical-damage, and service guidance
- Self Clean or other buttons do not light up or respond, or panel is locked on Samsung ovenSamsung Support · Samsung oven mode-dependent control and interior-lamp behavior, panel lock, power cycle, and service guidance
- Ranges | Samsung Support USSamsung Support · Samsung range model search, manuals, and request-repair support routing
- An icon appears on my Samsung oven displaySamsung Support · Samsung oven light, preheat, self-clean, lock, and model-varying status icons
- The oven control panel, Setting the clock, Temp Adjust, Demo mode, and Using the Sabbath feature: NE63*811***Samsung Support · Samsung model-specific oven Lamp control, display, oven lock, and settings reference
- Samsung range or wall oven panel is blank, blinking, or incorrectSamsung Support · Samsung oven panel power-supply checks, controlled breaker restart, and service guidance
Community feedback
Share a repair observation
Share a plain-text repair observation. Accepted observations are published automatically; this page may take a moment to update.