
On this page
Start here
Quick answer
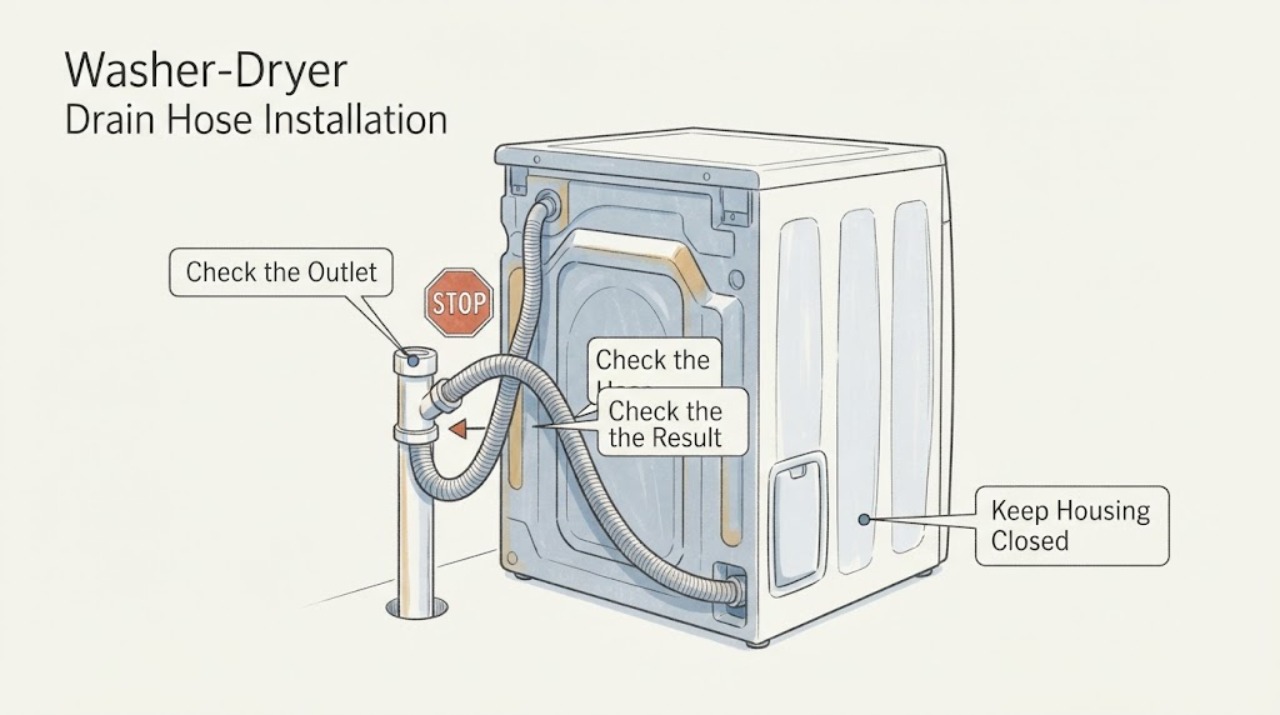
For the LG FV1413H2BA washer-dryer, treat a drain-hose installation problem as a geometry and routing question before blaming the pump. In the model's opened LG manual, the drain hose should be no higher than 100 cm above the floor, the elbow bracket should be within 10 cm of the hose end, and the hose should enter the drain no more than 15 cm; it must be secured so it cannot jump out. A kinked or blocked hose can stop or slow draining, while an incorrectly installed hose can siphon water back into the appliance and contribute to odor. Keep the appliance off if water is spreading or near electrical parts. From a dry, ordinary-access position, compare the visible routing with those model-specific limits and inspect for a loose hose or household drain backup. Do not add a temporary seal, force excess hose into the appliance, pull the washer out, disconnect a pressurized connection, or open the cabinet. If the source cannot be confirmed without moving the machine, or the hose still leaks or drains poorly after the documented routing is corrected, use qualified LG appliance or plumbing service.
Work through in order
Diagnostic checks
Use only checks that match the exact appliance or system and its official guide.
-
Check 1
Stop the programme normally if it is safe, keep people and pets away from any water, and look from a dry position for active flooding, water near the cord or outlet, a wet cabinet, smoke, sparks, heat, or an unstable washer. Do not touch a wet plug, outlet, cord, or cabinet.
Expected result: Water is spreading or touching an electrical area; the leak stops but the floor remains wet; or the area is dry and the problem is limited to slow draining, backflow, or a hose that has moved.
Next step: Keep the appliance off. From a dry safe location, isolate power only when that can be done without touching water, and close the water taps if a continuing supply leak is possible. Use appliance, electrical, or emergency help as appropriate; otherwise continue only with the visible hose route.
Stop if: Do not pull a plug through water, stand in pooled water, reset a tripped breaker repeatedly, run another cycle to reproduce the leak, or reach under a running washer.
Why this matters
Why: Water near electricity, active flooding, smoke, sparks, heat, or instability is a stop-use condition and does not permit a routing experiment. A dry, stable area permits only ordinary-access observation; it does not prove that internal parts are safe.
-
Check 2
With the washer stopped and the area dry, observe the drain hose from the side or front without pulling the appliance out. Follow its visible path to the standpipe, floor drain, or sink and note the floor-to-hose height, whether the hose is kinked or trapped, and whether the elbow bracket is close to the hose end.
Expected result: The hose rises above 100 cm, is pinched or sharply kinked, is unsupported, or the elbow bracket is not within 10 cm of the end; or the visible route is smooth and supported.
Next step: If the route can be corrected from ordinary access without moving the appliance, follow the FV1413H2BA manual and secure the hose. If the route is behind the machine, inaccessible, damaged, or would require pulling or lifting the washer, leave it off and arrange qualified installation or appliance service.
Stop if: Do not pull the washer across a wet floor, reach behind it, use a sharp tool to free the hose, add a temporary seal, or force a long hose into the cabinet.
Why this matters
Why: On this exact model, a drain higher than 100 cm can prevent or slow drainage, and the manual says the elbow bracket should be installed within 10 cm of the hose end. A kink or trapped section can restrict flow. A smooth visible route makes the household drain or an internal path more relevant, but does not prove either one.
-
Check 3
From a safe visible position, compare the hose end with the model manual's insertion rule. The FV1413H2BA manual says the hose should enter the drain no more than 15 cm, and a sink connection should be secured tightly with string; the hose must not be left loose where draining can push it out.
Expected result: The hose is inserted more than 15 cm, is sealed tightly into the drain, has fallen out or shifted, or is secured at the documented depth and cannot move.
Next step: If the connection is accessible and no water or electrical hazard is present, restore only the documented insertion depth and secure the hose as the manual describes. If you cannot do this without disconnecting a wet connection or moving the machine, stop and provide photographs and the exact model to an installer or service provider.
Stop if: Do not push the hose farther into the drain to stop splashing, pack the gap with cloth or tape, use drain chemicals, disconnect a hose containing residual water, or restore water merely to test a suspected leak.
Why this matters
Why: Excessive insertion or an airtight fit can promote siphoning or poor drainage, while an unsecured hose can discharge onto the floor. A hose that is too shallow or has moved can explain a drain-only leak. The visible geometry does not identify a pump fault.
-
Check 4
Record when the symptom occurs and what the water does: filling, washing, draining, spinning, immediately after the cycle, or while the washer is idle. From a dry position, look for water backing up from the standpipe or sink and note whether the water is clean, sudsy, or wastewater.
Expected result: Water appears only during draining and backs up from the household drain; water returns into the drum or an odor develops after the cycle; or the appliance does not drain even though the external route looks correct.
Next step: Use plumbing service for an independent standpipe or sink backup. For persistent poor drainage, an unknown first wet point, or water from underneath or the pump-filter area, keep the washer off and request qualified LG appliance service. Give the provider the cycle phase, first wet point, hose measurements, and photos.
Stop if: Do not add water to an already backing-up drain, continue cycling against wastewater, open the cabinet, reach into the pump, or perform a live test.
Why this matters
Why: A household drain backup points to plumbing capacity or restriction. Incorrect hose routing can allow siphoning or backflow and may contribute to odor. A correct-looking external route with persistent poor drainage leaves the drain filter, pump, or another internal path unresolved rather than proving one component.
-
Check 5
If the hose geometry has been corrected from safe ordinary access and the floor, outlet, cord, and cabinet remain completely dry, document one normal supervised cycle rather than repeatedly testing. Watch only from a safe position for the first wet point and the drain phase; stop the programme if water escapes or the hose moves.
Expected result: The cycle drains without leakage and the hose stays secured; water still leaks or backs up; or drainage remains slow and the machine shows an outlet error or leaves water behind.
Next step: Keep the corrected setup only if it remains within the manual's limits and the result is repeatably dry. Otherwise keep the washer off, save the observations, and arrange LG appliance service or plumbing assessment according to the branch.
Stop if: Do not run an empty or repeated cycle to force a diagnosis, bypass a door or safety control, tilt the washer, remove the pump filter while water is uncontrolled, or open any panel.
Why this matters
Why: A successful cycle supports an installation or household-drain branch but does not certify the internal pump for every load. A repeat leak, backflow, slow drain, or outlet error after documented routing is corrected needs service; the symptom alone does not select a replacement hose, pump, or filter.
Use your observations
Decision map
Find the observation that best matches what you see, then follow the next safe action.
-
PATH 01Next step
What you see
The hose is above 100 cm, kinked, trapped, or unsupported, and the problem occurs during draining or as a floor leak.
Do this next
Correct only the visible route according to the FV1413H2BA manual if it can be done without moving the appliance or handling water. Otherwise use qualified installation or appliance service.
Why this path and its safety boundary
Why it matters: The model-specific installation geometry is a supported first explanation for slow drainage or the hose leaving the drain. It is not evidence of a failed pump.
-
PATH 02Next step
What you see
The hose is inserted more than 15 cm, sealed tightly into the drain, or lacks the required support near its end, and the symptom is backflow, odor, or a hose that jumps out.
Do this next
From safe ordinary access, reset the hose to no more than 15 cm and use the model's elbow bracket or sink securing method. Do not improvise a seal or disconnect a wet connection; escalate inaccessible or recurring problems.
Why this path and its safety boundary
Why it matters: Insertion depth and securing can change the drain path: excessive insertion can encourage siphoning or poor flow, while insufficient support can send wastewater onto the floor. The result remains an installation branch until the documented geometry is restored.
-
PATH 03Next step
What you see
The household standpipe or sink backs up independently when the washer drains, even though the visible hose is within the model's height and insertion limits.
Do this next
Stop using the washer against the backup and arrange plumbing service. Keep the appliance off if wastewater reaches the floor or electrical area, and do not use drain chemicals as a washer diagnostic.
Why this path and its safety boundary
Why it matters: The pattern makes a restricted or undersized household drain more likely than an appliance-side hose installation error, although the appliance may also need inspection if water remains in the drum.
-
PATH 04Next step
What you see
The external hose route is within the documented limits and the household drain does not back up, but the washer still drains slowly, leaves water behind, shows an outlet error, or leaks from underneath or an unknown location.
Do this next
Keep the washer off and arrange qualified LG appliance service. Provide the complete model, measured hose height and insertion, cycle phase, first wet point, water type, any display message, and any recent installation work.
Why this path and its safety boundary
Why it matters: The installation hypothesis is not sufficient. A drain filter, pump, internal hose, or another cabinet path remains possible, but the observation does not select a part.
-
PATH 05Next step
What you see
Water is near the power connection, flooding is active, there is smoke, sparking, heat, a damaged cord, severe movement, or the hose cannot be checked without moving or opening the appliance.
Do this next
Keep people away, isolate power only from a dry safe location, close water taps when safe, and obtain appropriate appliance, electrical, plumbing, or emergency help. Do not restart the washer.
Why this path and its safety boundary
Why it matters: This is a safety and access boundary, not a routing experiment. The user cannot establish the cause safely from the outside.
Helpful context
Understand the symptom
Check the drain geometry before the pump
A leak, slow drain, repeated drain attempt, or water returning to the drum does not by itself prove a failed pump. On the FV1413H2BA, the visible hose height, insertion depth, elbow-bracket position, kink-free route, and the condition of the household drain are separate observations. Correct only the documented external setup; keep an internal restriction or pump fault as an unresolved service branch.
Use the FV1413H2BA manual, not a different LG diagram
LG's exact product support page lists FV1413H2BA and provides its owner-manual route. The measurements in this article come from that opened manual: this model's drain hose is limited to 100 cm above the floor and 15 cm into the drain. Do not substitute dimensions from another LG family or from a generic installation picture.
When checks do not resolve it
Need a professional?
Use qualified LG appliance service for persistent poor drainage, an unknown or underneath leak, a recurring outlet error, or any internal access. Use plumbing service when the household drain backs up independently. Use electrical or emergency help for an active electrical or fire hazard.
Have this ready
- Provide the complete FV1413H2BA model, the drain destination, measured hose height from the floor, insertion depth, elbow-bracket position, whether the hose moved, the first wet point, cycle phase, water type, any odor or display message, and photos taken from a dry safe position.
Common questions
FAQ
How high can the FV1413H2BA drain hose be?
The opened FV1413H2BA manual says the drain hose should not be higher than 100 cm above the floor. A higher route can prevent or slow drainage. Measure from the floor and use the exact manual rather than a dimension from another LG model.
How far should the drain hose enter the standpipe or drain?
For this model, the manual says the hose should enter the drain no more than 15 cm. It also says to place the elbow bracket within 10 cm of the hose end and secure the hose so it cannot come out during draining.
Can I seal the gap around the drain hose to stop a leak?
Do not make an airtight or temporary seal. Excessive insertion or an incorrectly sealed route can alter drainage and encourage siphoning or backflow. Restore only the documented insertion depth and support, or ask an installer or service provider to correct an inaccessible connection.
Does slow draining prove that the drain pump has failed?
No. The exact manual lists hose kinks or blockage, a drain above 1 m, a blocked drain filter, improper hose installation, and a household drain restriction as separate possibilities. If the external route and household drain are correct but the symptom continues, qualified service should diagnose the internal path instead of guessing a pump.
Read the exact guide
Official sources
- Owner's Manual — Washer and Dryer FV1413H2BALG Electronics · Opened directly from the LG FV1413H2BA product support page; the PDF identifies FV1413H2BA on its cover and specification page. Its drain-hose geometry and troubleshooting entries are used for this exact model.
- LG FV1413H2BA Product Support: Manuals, Warranty & MoreLG Electronics · Opened LG product-support page showing the FV1413H2BA product identity and linking its English owner manual and online manual. Regional support details may differ; the exact model manual remains the installation authority.
Community feedback
Share a repair observation
Share a plain-text repair observation. Accepted observations are published automatically; this page may take a moment to update.