
On this page
Start here
Quick answer
First identify when and where an LG washer leaks: at the door or lid, dispenser, inlet connections, drain hose or standpipe, pump-filter access area, rear, or underneath. Keep hands and feet away from moving parts and do not touch a plug, outlet, or wiring in a wet area. A door leak can be debris at the gasket or a torn seal; a dispenser or rear leak can follow excess suds or a supply connection; a leak only during draining can be a loose drain hose or household-drain backflow. Stop using the washer and arrange service for an unknown leak, a damaged hose or gasket, water under the cabinet, repeated leaking, active flooding, or water near electricity. Only make a normal-access check or one empty rinse test when the area is dry and the LG model instructions permit it; do not open panels, move the appliance, or disconnect wet plumbing as a guess.
Before you begin
Safety first
- This article supports dry ordinary-access observation, visible gasket and hose checks, model-directed care, and at most one controlled empty observation when the area is safe. Do not handle wet electrical connections, force a door or lid, move the washer, disconnect wet or pressurized plumbing, open panels, test live parts, bypass interlocks, or keep operating an active leak.
Work through in order
Diagnostic checks
Use only checks that match the exact appliance or system and its official guide.
-
Check 1
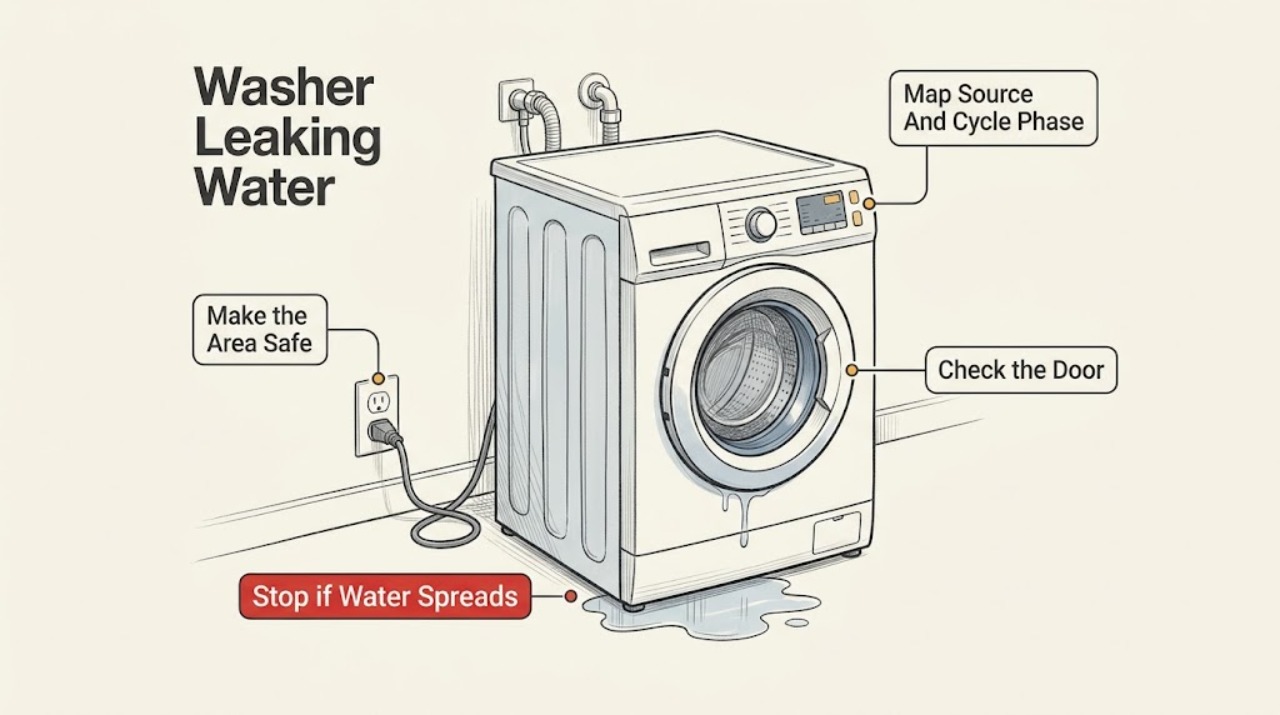
Stop the cycle using the normal control if it is safe to do so, keep people and pets away from the water, and look from a dry position for active flooding, water near the outlet or cord, a hot or damaged cord, smoke, sparks, or a washer that is moving or unstable. Do not touch a wet plug, outlet, cord, or cabinet.
Expected result: Record whether water is spreading, whether the power connection is wet or damaged, whether the leak continues while the washer is idle, and whether there is any smoke, sparking, heat, or severe movement.
Next step: Leave the washer off and arrange qualified appliance or electrical help for water near electricity, a damaged connection, smoke, sparks, heat, active flooding, or instability. If the leak is small and the power area is completely dry, continue only from safe access.
Stop if: Do not pull a plug through water, reset a tripped breaker repeatedly, stand in pooled water, touch live-looking parts, or continue a cycle to locate an electrical or severe leak.
Why this matters
Why: A wet electrical area, active flooding, smoke, sparks, heat, or an unstable appliance is a stop-use and professional-help condition. A dry, stable area permits only ordinary-access observation; it does not establish that internal parts are safe.
-
Check 2
From a dry, ordinary-access position, observe the first wet point and the cycle phase: filling, washing, draining, spinning, or after the cycle. Check the front door or top lid, dispenser, rear inlet area, drain hose and standpipe, pump-filter access cover if already visible, and floor beneath without moving the washer.
Expected result: Record the first wet location, whether water is clean or contains suds or wastewater, how quickly it appears, and whether it occurs only during a particular phase or while the washer is idle.
Next step: Photograph the first wet point and use the matching diagnostic branch. If the source cannot be seen without moving the washer or opening a panel, leave it off and request service.
Stop if: Do not reach under a running washer, place hands near the drum or belt, remove panels, force a door or lid, or move a washer across a wet floor to find the source.
Why this matters
Why: A phase-linked location narrows the next check: door or lid during washing, supply connections while filling, drain hose or standpipe during draining, and an underneath or unknown source need more caution. A leak while idle can indicate a continuing supply or valve issue even when no cycle is running.
-
Check 3
If the first wet point is the front door, inspect the visible glass and gasket after the drum stops and the door is safely released; if it is a top loader, inspect the lid rim and opening. If it is the dispenser, inspect the drawer or cup and surrounding surfaces for residue or overflow without spraying controls.
Expected result: Record hair, lint, clothing, detergent buildup, a distorted or torn gasket, a door that does not close evenly, an overloaded or splashing top-load tub, dispenser residue, or no visible obstruction.
Next step: Remove only loose visible debris from an unpressurized, safely released gasket or wipe accessible surfaces as the exact model instructions allow. Use the model-specific service path for a torn gasket, distorted door or lid, recurring dispenser leak, or leak that remains after the visible obstruction is gone.
Stop if: Do not force a locked door or lid, pull a gasket out of its channel, use sharp tools, disassemble the dispenser, or continue the washer with a torn seal or water entering the cabinet.
Why this matters
Why: LG identifies foreign material between the front door and gasket as a possible localized leak when the gasket is intact, while a torn gasket or persistent door leak needs service. Excess detergent or residue can create suds and overflow; top-load splashing can follow an overloaded or tightly packed tub.
-
Check 4
If the first wet point is at the rear inlet hoses, faucet, or valve connections, keep the floor dry and observe the hose length and both visible connectors for a crack, kink, wet fitting, damaged seal, or water running down from the household faucet. If safe and accessible, close the hot and cold supply valves before any further inspection; do not loosen a wet connector.
Expected result: Record whether the leak is at the faucet, hose body, hose-to-washer connection, or inlet valve area, and whether it continues while the washer is idle or only during filling.
Next step: Keep the supply valves closed and arrange appliance or plumbing service for a damaged hose, persistent faucet leak, inaccessible rear connection, or any water near electricity. Provide photos of the connection without moving the washer.
Stop if: Do not reach behind the washer on a wet floor, cross-thread or force a fitting, disconnect a pressurized hose, use tape as a substitute for a seal, or restore water to confirm a suspected damaged connection.
Why this matters
Why: A wet faucet or connector can be a supply-side issue; a cracked, kinked, or damaged hose can leak independently of the washer. LG's guides identify hose condition, connection alignment, and rubber seals as relevant, but the exact model determines safe access and replacement.
-
Check 5
If the leak begins during draining, inspect from the side or front whether the visible drain hose remains secured in the standpipe or drain opening and whether water is backing up at the standpipe or floor drain. Look for a kink, crush, crack, or hose displacement without disconnecting it or moving the washer.
Expected result: Record whether the hose is loose or damaged, whether the standpipe or floor drain overflows, whether water travels from the rear toward the front, and whether the washer leaves water behind after the cycle.
Next step: Leave the washer off for wastewater, backflow, standing water, a damaged hose, or an unknown source and arrange appliance or plumbing service. Do not test a restricted drain by adding water if it is already overflowing.
Stop if: Do not pour drain cleaner into the washer or drain, disconnect a hose containing residual water on a wet floor, reach behind the machine, or run repeated drain tests while the floor is flooding.
Why this matters
Why: LG links drain-only floor leaks to a loose hose or clogged household drain with backflow; a kinked, crushed, cracked, or pinched hose is a repair lead. Backflow or an overflowing standpipe can be a plumbing problem rather than a failed washer tub.
-
Check 6
If the visible leak is at a front-load pump-filter or residual-water access cover, use that exact LG model's instructions before opening it; only after the washer is off, cool, and the area can contain residual water, check whether a cap or filter cover is visibly not seated. Do not open it by force.
Expected result: Record whether the access cover is closed, whether a residual-water hose cap or filter cap appears displaced, and whether water continues from that area without touching internal wiring or pump parts.
Next step: If the manual explicitly permits a dry, ordinary-access reseating step, follow it once and observe for a new leak; otherwise keep the washer off and provide the cover, model, and leak photos to service.
Stop if: Do not open an access cover with water near electricity, force a filter, reach into the pump, lose a cap, tilt the washer, or operate with a missing or damaged filter seal.
Why this matters
Why: LG notes that an improperly installed drain-filter or residual-water-hose cap can leak after filter cleaning. A damaged cover, unknown access procedure, continuing leak, or internal water path needs service rather than a guessed reseating or replacement.
-
Check 7
Only when the washer is stable, the floor and power area are dry, supply connections are not visibly damaged, no active flooding or electrical hazard is present, and the exact LG instructions permit it, run one empty rinse or rinse-and-spin observation from a safe position; stop immediately when water appears.
Expected result: Record whether the empty test leaks, the phase when it begins, the first wet location, and whether no leak occurs; do not walk behind or under the machine during the test.
Next step: Do not repeat the test more than once. If any leak occurs, leave the washer off and request service; if no leak occurs, document the load, detergent, cycle, and drain conditions that preceded the original leak and arrange service if it returns.
Stop if: Do not perform this test during active flooding, with water near electricity, after a circuit trip, with a damaged hose or cord, when the source is underneath or inaccessible, or when the washer must be moved or opened.
Why this matters
Why: A repeatable leak during an empty cycle supports a washer-side or connected-hose fault. No leak makes a load, detergent, splash, household drain, or intermittent connection more plausible but does not clear a concealed or intermittent leak.
-
Check 8
Gather the exact LG model and serial information if safely visible, the first wet location, cycle phase, load and detergent details, photos, leak frequency, and any error, noise, vibration, drain, door, or lid symptom before requesting service.
Expected result: Confirm whether the leak is isolated or recurring, whether water continues while idle, whether the supply valves are closed, and whether the source is appliance-side, hose-side, or household-drain-side.
Next step: Request qualified LG or appliance service for a repeated, unknown, underneath, or internal leak; request plumbing help for a leaking faucet or backed-up standpipe; request electrical help for a wet, hot, damaged, or repeatedly tripping power connection.
Stop if: Do not order a gasket, hose, pump, valve, or control solely from the puddle location, and do not open the cabinet or test energized parts to confirm the diagnosis.
Why this matters
Why: A location-and-phase record lets service distinguish a gasket or dispenser issue from a supply connection, drain backflow, pump-filter, hose, tub, or concealed internal fault without guessing from the puddle alone.
Use your observations
Decision map
Find the observation that best matches what you see, then follow the next safe action.
-
PATH 01Next step
What you see
Water first appears at a front-load door during washing, and hair, lint, clothing, or detergent residue is trapped at an otherwise intact gasket; or the gasket is torn, distorted, or the leak persists after visible debris is removed.
Do this next
For loose visible debris, follow the exact LG model's ordinary-access gasket-care instructions once and observe. A torn or distorted gasket, persistent leak, or water entering the cabinet requires LG or qualified appliance service; do not force the door or run the washer with a damaged seal.
-
PATH 02Next step
What you see
Water or suds first appears at the dispenser or rear during filling, or a top-loader splashes over the lid during washing; the detergent amount, dispenser residue, load packing, or supply pressure changed with the symptom.
Do this next
Stop the cycle, follow the model's dispenser and loading guidance, and use only the label-directed detergent amount. Request service when the dispenser still overflows, the inlet area leaks, the lid or tub is damaged, or the cause is not visible without opening the machine.
-
PATH 03Next step
What you see
Water is present at the faucet, inlet-hose body, hose connector, or rear inlet area, especially while filling or even while the washer is idle; the hose is cracked, kinked, wet at a seal, or the faucet itself leaks.
Do this next
Keep the hot and cold supply valves closed, avoid wet electrical areas, and arrange appliance or plumbing service. Do not disconnect or reconnect a wet or pressurized hose as a trial; provide the model and connection photos.
-
PATH 04Next step
What you see
The floor becomes wet only during draining or spinning, the drain hose is loose or visibly damaged, or the standpipe or floor drain backs up and water travels from the rear toward the front.
Do this next
Leave the washer off and request plumbing assessment for a restricted or overflowing household drain and appliance service for a damaged or inaccessible drain hose. Do not use drain chemicals or keep cycling against backflow.
-
PATH 05Next step
What you see
Water comes from a pump-filter access area, underneath the cabinet, from an unknown location, while the washer is idle, or after a filter or hose was recently handled; the source cannot be confirmed from dry ordinary access.
Do this next
Keep the washer off and request qualified service. Give the technician the model, recent filter or installation work, first wet point, cycle timing, and photos; do not tilt, move, open, or repeatedly test the appliance.
Helpful context
Understand the symptom
Find the first wet location, not just the puddle
Water can travel across a washer base or floor, so the puddle's edge may not be the source. Note whether the first wet point is at the front door or lid, detergent dispenser, rear supply connections, drain hose or standpipe, pump-filter access area, or underneath. Also record whether the leak begins while filling, washing, draining, spinning, or only after the cycle. LG's official guides use this location-and-timing approach and warn that a household drain overflow can look like a washer leak.
Front-load and top-load checks are not interchangeable
For a front loader, inspect the door glass and rubber gasket for hair, lint, residue, distortion, or a tear, and consider the dispenser and pump-filter access area. For a top loader, the lid area, load level, inlet hoses, dispenser, and drain path are different leads. LG notes that its general guides cover many models and that images or procedures can differ, so use the exact model's instructions before opening an access cover or handling residual water.
A drain leak may be a plumbing overflow
If water appears only during draining, check from a dry, safe position whether the drain hose is still secured and whether the standpipe or floor drain accepts water without backing up. A loose hose can spill directly onto the floor; a restricted household drain can overflow around the hose and be mistaken for a washer failure. Do not pour drain chemicals into the washer or move the appliance to reach a wet connection. Plumbing service is appropriate when the standpipe backs up or the source remains outside the machine.
Use one controlled test only when there is no hazard
When the floor and power area are dry, there is no active flooding or electrical concern, the washer is stable, and the exact LG instructions permit it, one empty rinse or rinse-and-spin observation can show whether the washer itself leaks during operation. Stop as soon as water appears and record the phase and source. Do not repeat tests on an active leak, a damaged cord, an inaccessible source, or a machine that needs a panel removed.
Safety boundary
Stop conditions
- Water is near an outlet, plug, cord, wiring, or other electrical connection; the cord or outlet is hot or damaged; a breaker or GFCI trips; or there is smoke or sparking.
- Active flooding, rapidly spreading water, wastewater on the floor, a washer that is unstable or moving severely, or any need to stand in pooled water.
- The leak source is underneath, inside the cabinet, behind the washer, or otherwise inaccessible without moving the appliance or removing a panel.
- A front-load gasket, door, top lid, hose, filter cap, or other water-sealing component is torn, cracked, missing, distorted, or cannot be safely identified.
- The drain or standpipe backs up, the washer retains water, or a damaged or displaced hose would need to be disconnected while wet or pressurized.
- A door or lid will not safely release, the drum is moving or hot, or a lock or safety interlock would need to be bypassed.
- The washer leaks again after one model-permitted ordinary-access correction or one controlled empty observation, or it also has an error, heat, unusual noise, severe vibration, or poor draining.
- Any proposed step requires opening the cabinet, testing live wiring, reaching under a running machine, moving the appliance across a wet floor, or selecting a part without the exact model information.
Only after diagnosis
Potential parts
- front-load door gasket or top-load lid seal
Consider only when the exact washer type and model match, the visible seal is torn, distorted, or leaking, and the technician or model instructions identify the seal as the source.
Confirm the full LG model and revision and the manufacturer's fit information; do not order from a front-versus-top-loader assumption or install a seal as a trial. - washer inlet hose or connector seal
Consider only when the visible hose body, connector, or seal is damaged and the supply-side source has been separated from a leaking faucet or valve.
Verify the exact model, connection style, hose specification, and safe water-shutoff procedure before replacement; plumbing faults may remain outside the washer. - drain hose
Consider only when the drain hose is confirmed cracked, crushed, kinked, displaced, or unable to remain securely routed after the household drain is assessed.
Confirm model-specific routing, length, connectors, and installation instructions; do not use a hose replacement to mask standpipe backflow. - drain pump filter, pump, or residual-water cap
Consider only when the leak is localized to the filter or pump area and diagnosis confirms a damaged seal, cap, filter housing, or pump rather than an incorrectly closed access part or external drain problem.
Confirm the full model and the exact access procedure; residual water and internal electrical parts require safe isolation and may require professional service. - dispenser assembly or internal hose
Consider only when a persistent dispenser leak is confirmed after correct detergent use and visible residue care, and the exact model diagnosis identifies a damaged dispenser or hose.
Verify the washer model, dispenser design, and internal routing; do not remove panels or substitute a generic assembly.
When checks do not resolve it
Need a professional?
Arrange qualified LG or appliance service for a leak from the cabinet, underneath, an unknown source, a damaged gasket or hose, a persistent or recurring leak, a leak during a safe empty test, or a leak accompanied by standing water, poor draining, abnormal noise, severe vibration, an error, or a door or lid problem. Request plumbing service for a leaking faucet or backed-up standpipe and electrical help for a wet, hot, damaged, or repeatedly tripping power connection. Treat active flooding, smoke, or sparks as urgent stop-use conditions.
Safety scope: This article supports dry ordinary-access observation, visible gasket and hose checks, model-directed care, and at most one controlled empty observation when the area is safe. Do not handle wet electrical connections, force a door or lid, move the washer, disconnect wet or pressurized plumbing, open panels, test live parts, bypass interlocks, or keep operating an active leak.
Common questions
FAQ
Why is my LG front-load washer leaking from the door?
Hair, lint, clothing, or detergent residue between the glass and an intact gasket can let water pass. If the gasket is torn or distorted, the door does not close evenly, or cleaning visible debris does not stop the leak, leave the washer off and request service.
Why does my LG washer leak only when draining?
LG identifies a loose or displaced drain hose and a clogged household drain causing backflow as common drain-phase leads. Observe the hose and standpipe from a dry position; do not disconnect a wet hose or keep cycling while wastewater backs up.
Can too much detergent make an LG washer leak?
Yes. LG says excess detergent can create suds and contribute to rear or dispenser leakage, and residue can accumulate. Follow the exact washer and detergent-label directions; a recurring leak still needs diagnosis rather than more detergent adjustment alone.
What if water is leaking from the LG washer hose or faucet?
Keep the supply valves closed if it is safe to reach them from a dry position, and do not loosen a wet or pressurized fitting. A cracked hose, damaged seal, misaligned connection, or leaking faucet may require appliance or plumbing service.
Should I run an empty rinse to test an LG washer leak?
Only if the floor and power area are dry, the machine is stable, no active flooding or electrical hazard is present, the leak source is accessible from a safe position, and the exact LG instructions permit it. Run at most one controlled empty observation and stop immediately when water appears; do not use a test to investigate an underneath or electrical leak.
When should I stop using a leaking LG washer?
Stop for water near electricity, active flooding, a damaged cord or hose, a torn gasket, a leak underneath or from an unknown source, wastewater backflow, repeated leaking, or a leak with noise, vibration, heat, an error, or poor draining. Keep the washer off and arrange qualified appliance, plumbing, or electrical help as appropriate.
Read the exact guide
Official sources
- [LG Front Load Washing Machine] Troubleshooting LeaksLG Electronics · General LG front-load guide; LG states the guide was created for all models and images or content may differ, so model-specific instructions control.
- LG Top Load Washer - LeakingLG Electronics · Applies to LG top-load washers as a model-family guide; use the exact model's instructions before handling hoses, residual water, or access parts.
- LG front load washer leak: Water leaks from the drain outlet and drain hose during drainageLG Electronics · Supports drain-only leak interpretation for LG washer families; model-specific hose routing and plumbing conditions still control.
- LG front load washing machine - Leakage] The washing machine leaks water at the front.LG Electronics · Supports the front-door gasket and drain-filter-cap checks for LG front-load families; the exact model and service instructions control access.
- Product Support: Support Home | LG USA SupportLG Electronics · Use to locate the exact LG product support and model documentation; it is not a leak diagnosis by itself.
- LG washing machine water leakage] Water leaks from the faucet and the hose connectionLG Electronics · Supports visible supply-connection diagnosis for LG washer families; use the exact model and local plumbing procedure for any replacement or disconnection.
- LG Washer – Why is My Front Load Washing Machine Leaking?LG Electronics · Applies to LG front-load washers as a model-family guide; the exact model instructions and visible product design control the procedure.
Community feedback
Share a repair observation
Share a plain-text repair observation. Accepted observations are published automatically; this page may take a moment to update.