
On this page
Start here
Quick answer
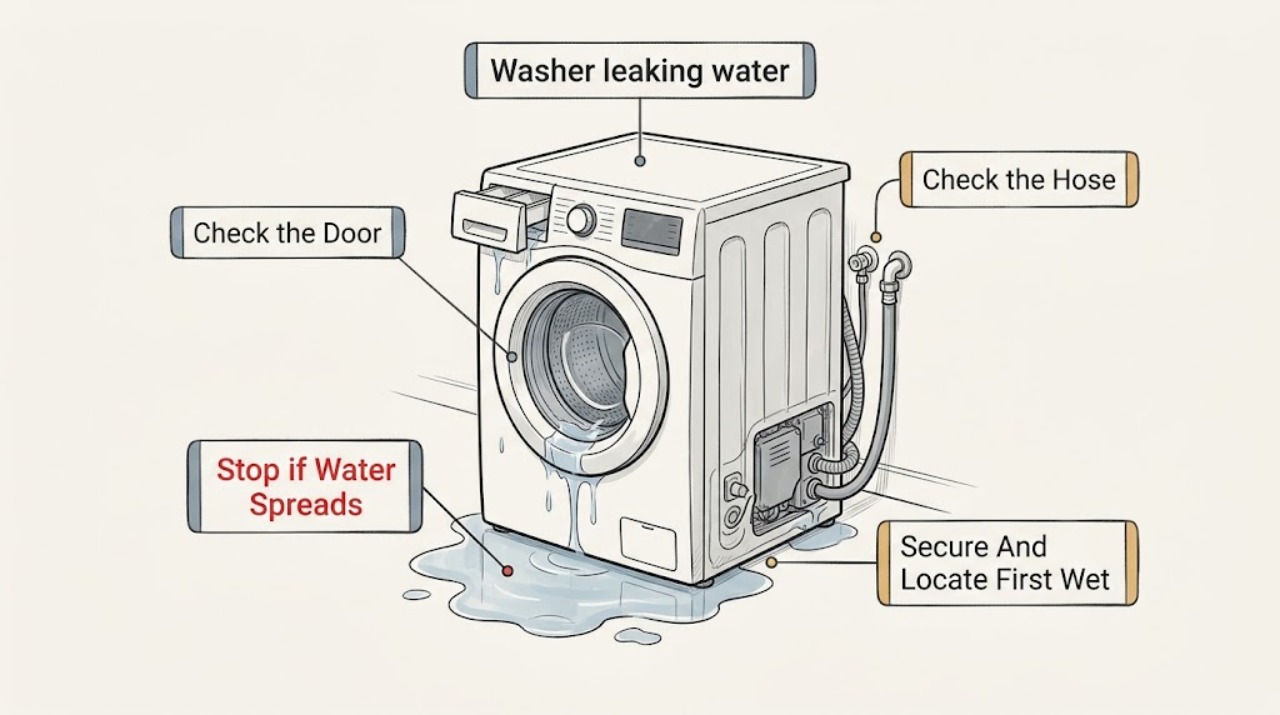
Find the first wet point and note when the Hotpoint washer leaks: while filling, during washing, during drain or spin, or while idle. A front-load leak at the door points toward debris or a damaged door seal; water from the dispenser points toward product buildup or blocked dispenser ports; a rear leak points toward an inlet or drain hose, installation, or household plumbing; and a leak during agitation may be oversudsing or overflow on a top-loader. Pause or turn the washer off from the controls, and if water is flooding or near the outlet, do not unplug it while standing in water. From a safe, dry location isolate power, shut the household water valves, and keep the washer out of service. Check only visible hoses, the door seal, dispenser, and drain connection using the exact Hotpoint model instructions. Do not open the cabinet or replace a part by guesswork.
Work through in order
Diagnostic checks
Use only checks that match the exact appliance or system and its official guide.
-
Check 1
Pause or turn off the washer at the control panel and watch from a dry, safe position for the first wet point; note the washer style, cycle stage, water amount, and whether water is near the cord or outlet. If flooding is active, do not unplug while standing in water.
Expected result: The leak is a few drops or a flood, starts while filling, appears during agitation, begins during drain or spin, occurs at the rear, or appears while the washer is idle; water may or may not be near electrical connections.
Next step: For flooding, water near the outlet, smoke, arcing, or a hot or damaged cord, keep clear, isolate power only from a safe dry location, close the water valves when safe, and arrange qualified or emergency help. Otherwise continue with the matching visible check below.
Why this matters
Why: The stage and first wet point separate the door or dispenser path from inlet hoses, drain routing, overflow or suds, and a valve or hose that leaks while idle. Water near electrics changes this from a normal troubleshooting check to a stop-use event.
-
Check 2
On a front-load Hotpoint washer, with the drum stopped, inspect the visible door glass, rubber boot, and dispenser opening for clothing caught at the door, lint, soil, soap buildup, or a tear. Wipe only accessible surfaces and remove the dispenser drawer only by the model's normal release method; do not pull the gasket from its groove.
Expected result: The first wet point is the door edge, the gasket has debris or damage, the dispenser is overfilling or has residue, or these areas are dry while water appears elsewhere.
Next step: Clean and dry only as the exact Hotpoint model instructions allow, ensure clothing is fully inside the drum, and do not run another cycle if the seal is torn or the leak returns. Arrange service for a damaged gasket, cabinet leak, or unresolved dispenser leak.
Why this matters
Why: Debris at the gasket can create a small front leak, while blocked dispenser ports or product buildup can make water back up and spill from the dispenser. A torn seal or persistent leak after cleaning needs service; a dry front shifts suspicion to a hose, drain, or top-load overflow path.
-
Check 3
From a dry position, inspect the visible hot and cold inlet hose connections, hose bodies, drain-hose connection, and rear floor for a missing or damaged washer, crack, kink, loose connection, or water trail. Do not loosen a pressurized connection; close the water supply valves before any approved hose inspection.
Expected result: Water first appears at an inlet connection, along an inlet hose, at the drain-hose connection, behind the washer, or only on the floor with no visible source.
Next step: Keep the washer off and the water valves closed if a hose is damaged or leaking. Replace an inlet or drain hose only when the exact model and installation instructions confirm the correct part and procedure; otherwise arrange appliance service. Have a plumber check household plumbing if the standpipe or drain backs up.
Why this matters
Why: A rear leak is commonly associated with installation, hoses, or household plumbing. A damaged hose or seal at a connection can continue leaking even when the washer is not running; an unseen trail may be traveling from another point.
-
Check 4
If the leak starts during drain or spin, observe the drain hose end and standpipe from a safe position without pushing the hose farther into the pipe or opening the washer. Note whether the pipe backs up, the hose is unsecured or kinked, or water exits at the washer connection.
Expected result: Water rises in or spills from the standpipe, the hose moves or is too deeply inserted, the hose connection leaks, or the drain path looks normal but water remains in the tub.
Next step: Stop the cycle for any backup or active leak. Close the water valves when safe, keep the washer out of service, and arrange plumbing service for a household drain problem or qualified appliance service for an appliance-side drain fault. Do not use chemical drain cleaner in the washer.
Why this matters
Why: Standpipe backup points toward household plumbing; incorrect hose placement can cause siphoning or flooding; a leaking washer connection points toward the hose or pump-side service path. Retained water with a normal visible hose needs model-specific diagnosis, not chemical drain cleaner.
-
Check 5
If the Hotpoint washer is a top-loader and the leak begins at the front or during agitation, note whether the water is sudsy, the load is overloaded or out of balance, or the washer is not level. Do not reach into a moving basket or add detergent to the leaking cycle.
Expected result: The water contains heavy suds, the leak disappears during a supervised no-detergent model-approved test, the washer is unstable, or the washer leaks with clear water despite a level installation.
Next step: Use only HE detergent and the model-specified amount on a future load; do not keep testing a washer that leaks clear water, walks, or overflows. Arrange service for a repeat leak, unstable installation that cannot be safely corrected, or any internal fault.
Why this matters
Why: Excess detergent can create suds that overflow, while an out-of-balance or unlevel washer can worsen splashing. A clear-water leak that remains after those observations makes a hose, valve, tub, or other appliance fault more likely.
-
Check 6
Record the complete Hotpoint model, the cycle stage, first wet point, hose and seal condition, detergent type and amount, and whether the washer leaks while idle. Only if there was no flooding, wet electrical area, damaged hose, or continuing leak, use the exact model instructions for one supervised confirmation; do not remove panels.
Expected result: The leak does not return after an allowed visible correction, returns at the same point, occurs while idle, or cannot be localized without moving or opening the cabinet.
Next step: Keep the washer off and water valves closed for a recurring, idle, inaccessible, or unexplained leak, and provide the recorded model and pattern to qualified service. Do not continue cycling a leaking machine or order a part based only on the puddle location.
Why this matters
Why: A corrected routing, residue, or detergent condition can explain a one-time leak. An idle leak suggests a water valve or supply-side fault; a recurring or inaccessible leak needs a model-specific appliance diagnosis.
Use your observations
Decision map
Find the observation that best matches what you see, then follow the next safe action.
-
PATH 01Next step
What you see
Do this next
Close the household water valves and keep the washer off. Arrange service for a damaged hose or appliance-side leak; have a plumber inspect the household drain if the standpipe backs up.
-
PATH 02Next step
What you see
Do this next
Clean only accessible areas under the exact model instructions and correct the load or detergent placement. Stop and arrange service for a torn seal, cabinet leak, or a leak that returns after cleaning.
-
PATH 03Next step
What you see
Do this next
Stop the cycle and do not push the hose farther into the pipe or use chemical drain cleaner. Arrange plumbing service for a standpipe backup or qualified appliance service for an appliance-side drain leak.
-
PATH 04Next step
What you see
Do this next
Stop the leaking cycle, correct only the model-approved load, level, and HE-detergent practice, and do not continue testing if clear water leaks, the washer walks, or overflow repeats.
-
PATH 05Next step
What you see
Do this next
Do not touch the plug or enter standing water to unplug the washer. Keep clear, isolate power only from a safe dry location, close water valves when safe, and obtain qualified or emergency help as appropriate.
Helpful context
Understand the symptom
The first wet point is more useful than the puddle location
Water can travel across a floor or cabinet, so look from a safe position at the hose connections, dispenser, door opening, and drain outlet while noting the first place that becomes wet. Record whether the leak begins during fill, agitation, drain, spin, or when the washer is not running. A floor wet at the front does not prove the leak started at the front.
Hotpoint washer styles change the likely path
A front-load washer adds a door boot and dispenser path; a top-load washer can overflow or splash during agitation. Drain hose routing and household plumbing affect both styles. Use the exact Hotpoint model's installation and owner instructions for any hose routing, cleaning, or access step.
Treat flooding and wet electrics as a stop-use event
Do not unplug a washer while standing in water. Pause or turn it off at the control panel if you can do so without entering water, then isolate power only from a safe, dry location and close the water valves. Keep hands away from wet plugs, cords, and outlets. A continuing leak, damaged hose, or water near electrics needs qualified service rather than repeated test cycles.
Only after diagnosis
Potential parts
- washer door boot seal
Consider this only when a front-load inspection finds a torn, deformed, or leaking door boot after clothing and debris have been removed and the model-specific diagnosis confirms the seal.
Door-boot shape and installation vary by model. Confirm the complete Hotpoint model and the manufacturer's fit information before ordering. - washer inlet hose
Consider this only when the first wet point is a cracked inlet hose or its connection and the model's installation instructions identify the correct hose and sealing arrangement.
Hose length, ends, screens, and connection requirements vary. Confirm the complete model and the manufacturer's installation guidance before ordering. - washer drain hose
Consider this only when inspection identifies a damaged or leaking washer drain hose after household plumbing and standpipe backup have been separated from the appliance fault.
Routing, retainers, and connection details vary by washer design. Confirm the complete model and the manufacturer's fit and installation information before ordering.
When checks do not resolve it
Need a professional?
Stop using the Hotpoint washer for flooding, water near the cord or outlet, smoke, arcing, a hot or damaged cord, a continuing uncontrolled leak, a torn seal, a damaged hose, standing water, or any leak that returns after the model-authorized visible check. Do not unplug while standing in water, touch wet electrical connections, open the cabinet, or use chemical drain cleaner.
Common questions
FAQ
Why is my Hotpoint washer leaking from the front?
On a front-loader, check the visible door boot and dispenser for clothing, lint, soil, soap buildup, or a damaged seal. On a top-loader, front water can also be overflow or suds. Find the first wet point and stop for a recurring or clear-water leak.
Why is water leaking from the back of my Hotpoint washer?
A rear leak commonly involves an inlet or drain hose, a connection, installation, or household plumbing. Close the water valves for an active hose leak and have the standpipe checked if it backs up.
Can too much detergent make a Hotpoint washer leak?
Yes. Excess detergent can create suds that overflow, especially on a top-loader, and product buildup can contribute to dispenser problems. Use the model-specified HE detergent and amount; do not continue a leaking cycle to test this.
What should I do if the drain pipe backs up when the washer drains?
Stop the cycle and do not push the drain hose farther into the standpipe. A standpipe that backs up points toward household plumbing; arrange plumbing service rather than using chemical drain cleaner in the washer.
Should I unplug a leaking Hotpoint washer?
Do not unplug it while standing in water. If water is near the outlet or cord, keep clear and isolate power only from a safe, dry location; close the water valves when safe and arrange qualified help.
Is a small leak from the Hotpoint door seal safe to ignore?
No. Inspect only the accessible gasket and glass for debris or clothing caught at the door. If the seal is torn, the leak returns, or water reaches the cabinet or electrics, keep the washer off and arrange service.
Why does my washer leak when it is not running?
An idle leak makes a supply hose, connection, or appliance water valve more likely than a load or suds issue. Close the water valves, do not run another cycle, and arrange appliance service if the visible connections are not the cause.
When should a Hotpoint washer leak be serviced?
Arrange service for a recurring or unexplained leak, damaged seal or hose, standing water, a leak requiring cabinet access, or any leak after safe visible checks. Stop immediately for flooding, water near electrics, smoke, arcing, or a hot or damaged cord.
Read the exact guide
Official sources
- Front Load Washer - Leaking WaterGE Appliances · Official GE Appliances support for front-load and Hotpoint-family washer leak checks, door gasket, dispenser ports, suds, and water safety
- Top Load Washer - Leaking Water in FrontGE Appliances · Official GE Appliances support for top-load washer front leaks, overflow, suds, load balance, and leveling
- Frequently Asked Questions About GE WashersGE Appliances · Official GE Appliances washer FAQ that routes leak troubleshooting by washer type and leak situation
- Washer - Drain Hose InformationGE Appliances · Official GE Appliances guidance for GE and Hotpoint branded top-load, front-load, combo, and unitized washer drain-hose installation
- Washer - Leaking in RearGE Appliances · Official GE Appliances support for rear leaks on GE and Hotpoint top-load and front-load washers
Community feedback
Share a repair observation
Share a plain-text repair observation. Accepted observations are published automatically; this page may take a moment to update.