
On this page
Start here
Quick answer
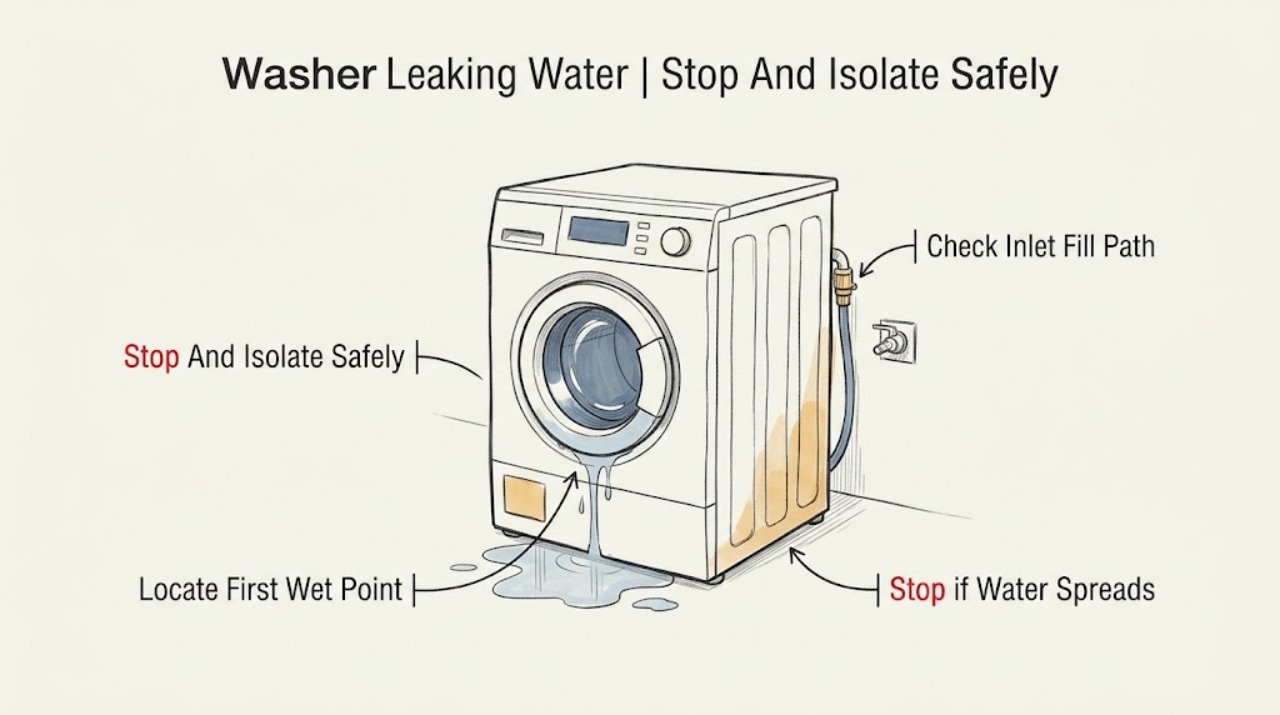
Stop the Amana washer and keep water away from electrical connections. From a safe, dry position, note the first wet point and whether the leak starts during filling, washing, draining, or while the washer is idle. Close the washer's water valves when it is not in use while waiting for service, especially if water enters the tub while the washer is off. Check only the matching external path: inlet-hose connections and washers at the rear, the dispenser and door seal on a front-load model, the level/load and splash pattern on a top-load model, or the drain hose and household drain during drain-out. Do not reach under a powered wet washer, tip it, force a door, or open a filter while hot water may be inside. If the leak is active, reaches power, comes from inside the cabinet, or returns after an external correction, leave the washer off and request Amana or qualified appliance service.
Work through in order
Diagnostic checks
Use only checks that match the exact appliance or system and its official guide.
-
Check 1
Stop the washer with its normal control, keep hands and feet out of the water, and from a safe dry position close both household water valves; disconnect power only if the plug and outlet are dry and safely reachable.
Expected result: Record whether water stops when the washer is off and the valves are closed, whether the tub continues filling while idle, and whether water is touching the cord, outlet, control area, or other electrical connection.
Next step: Keep the valves closed and the washer out of service while arranging Amana or qualified appliance service. If smoke, sparking, a burning odor, or an energized wet area is present, move away and use the appropriate emergency response.
Stop if: Do not reach through water to unplug the washer, reset a breaker, move the machine, or touch a wet cord or outlet.
Why this matters
Why: A leak that continues while the washer is off points toward a supply or internal water-valve problem rather than a drain-only event. Water at an electrical area makes further inspection unsafe even if the puddle is small.
-
Check 2
Without running another cycle or pulling the washer out, use good lighting and dry paper towels from the front and sides to trace the highest or first wet point that is safely visible.
Expected result: Classify the source as rear inlet connection, dispenser/front door, drain hose or household drain, top-load basket or load edge, cabinet bottom, or not visible; note whether water appears only during fill, wash, drain, or idle time.
Next step: Photograph the first wet point and the complete model label without moving the washer. Follow only the matching model-style and phase branch below.
Stop if: Stop if the point is under the cabinet, behind a panel, near wiring, inaccessible without moving the washer, or associated with sharp metal, smoke, or electrical odor.
Why this matters
Why: The first wet point is more useful than the size of the floor puddle. An inlet point supports a supply check, a dispenser or door point supports a front-load check, a basket edge supports top-load splash/level checks, and a bottom or hidden point requires service.
-
Check 3
If the first wet point is at the rear inlet connection or the leak starts during filling, keep the water valves closed and inspect the visible hose ends for a washer at each connection, a loose fitting, a crack, kink, or water tracking from the household tap.
Expected result: Record whether both hose ends have washers, whether the connection is visibly loose or damaged, and whether the tap, hose, or washer-side fitting is the highest wet point.
Next step: Replace or reconnect an external hose only when the exact model and hose procedure make it safe, then keep the valves closed until the connection can be checked without exposing power. Request service for any washer-side, hidden, or recurring leak.
Stop if: Do not loosen a pressurized hose, work from a wet floor, reach behind a tight installation, or reopen water to a connection that is cracked or cannot be observed safely.
Why this matters
Why: Amana says missing hose washers or loose connections can leak at the supply; a cracked external hose needs replacement, while a leak from the washer-side valve or a hidden point needs service. A leak that starts while idle should not be tested by reopening the valves.
-
Check 4
On a front-load Amana washer, inspect the visible door glass and rubber seal for clothing, lint, residue, a tear, or a blocked drainage opening; also confirm the dispenser drawer is fully closed and free of a visible buildup, without forcing it.
Expected result: Record whether the leak begins at the door, dispenser, or front edge during washing, whether an item is trapped in the seal, whether the gasket is torn, and whether the drawer is clogged or not fully closed.
Next step: Remove only loose visible debris and wipe the accessible seal with a damp cloth when the washer is off; use the correct HE detergent amount on future loads. Keep the washer unused and request service for a tear, damaged glass, dispenser damage, or a leak that returns.
Stop if: Do not pull the gasket off, puncture it, force the drawer, run a cycle to retest a torn seal, or reach behind the front panel.
Why this matters
Why: Amana identifies debris at the door seal, clothing caught under the seal, a clogged or open dispenser, excess suds, and overloading as front-leak contributors. A torn gasket, damaged glass, or leak from behind the front panel is not a cleaning fix.
-
Check 5
On a top-load Amana washer, compare the first wet point with the basket rim and load edge, and note whether a large, bulky, water-resistant, or uneven load was used or clothing was added after filling began; check level only from a stable, accessible position.
Expected result: Record whether water splashes over the basket or load, whether the cabinet is visibly out of level, whether the leak is actually from a hose or drain, and whether the load was added after the cycle started.
Next step: Stop adding items after the cycle begins and use the model's load guidance. Request service if the washer is not stable, the leak comes from underneath, or the same splash occurs with a suitable load and level installation.
Stop if: Do not tip or lift the washer, put hands beneath it, adjust feet from a wet floor, or continue operating it to prove the source.
Why this matters
Why: Amana says an unlevel top-load washer or a large, oversized, water-resistant, or uneven load can splash water over the basket or load. Water from underneath or a rear connection is not explained by splash alone.
-
Check 6
If water first appears during drain-out or at the rear/floor, inspect only the visible drain hose connection, standpipe or laundry-tub area, and household drain for a loose hose, backflow, blockage, or water escaping from the drain rather than the washer.
Expected result: Record whether the hose is loose, kinked, or displaced, whether the household drain backs up when water arrives, whether the puddle begins at the drain, and whether the washer cabinet stays dry.
Next step: Secure only an obviously displaced external drain hose if it can be done without moving the washer or entering water, and have a plumber address household backflow. Keep the washer off and request appliance service for a cabinet, pump, filter, or recurring leak.
Stop if: Do not open a filter with hot water inside, remove a pump cover without the exact model procedure, run a drain cycle over a backflowing drain, or handle water near power.
Why this matters
Why: Amana says a loose drain hose or clogged household drain can send water back onto the floor. A dry cabinet with drain overflow points to household plumbing; water from the cabinet or a filter/cover area points toward washer service or a model-specific filter procedure.
Use your observations
Decision map
Find the observation that best matches what you see, then follow the next safe action.
-
PATH 01Safety boundary
What you see
Water continues entering the tub or appearing at a supply connection while the washer is off.
Do this next
Close both water valves, keep the washer out of service, and request Amana or qualified appliance service. Photograph the first wet point without reopening the valves.
Why this path and its safety boundary
Why it matters: A supply-side or internal water-valve problem is more likely than splash or drain backflow, and continued pressure can worsen floor damage.
Safety stop: Do not run a cycle, reopen the valves for a test, or reach behind the washer from a wet floor.
-
PATH 02Safety boundary
What you see
The first wet point is a rear inlet hose, washer, or tap connection and the leak starts during fill.
Do this next
Keep water off and correct only an obvious external connection under the model procedure; request service for a washer-side fitting, cracked hose, hidden leak, or any repeat leak.
Why this path and its safety boundary
Why it matters: A missing washer, loose connection, damaged external hose, or washer-side inlet issue is more likely than a front seal or load problem.
Safety stop: Do not loosen a pressurized hose, move a tight washer, or restore water when the connection cannot be observed safely.
-
PATH 03Safety boundary
What you see
A front-load washer wets first at the door seal, front edge, or dispenser during washing.
Do this next
With the washer off, remove loose visible debris and confirm the drawer is closed; keep the washer unused and request service for a torn seal, damaged glass, front-panel leak, or recurrence.
Why this path and its safety boundary
Why it matters: A trapped item, dirty or torn gasket, dispenser blockage/open drawer, excess suds, or overloaded/poorly positioned load is more likely than a rear drain leak.
Safety stop: Do not remove the gasket, force the drawer, run another cycle over a tear, or open the front panel.
-
PATH 04Safety boundary
What you see
A top-load washer wets at the basket or load edge during fill or washing, especially with a bulky, water-resistant, uneven, or added-after-start load.
Do this next
Stop adding items after fill begins, use the model's load guidance, and correct only a clearly safe level issue. Request service when the washer is unstable or splash persists with a suitable load.
Why this path and its safety boundary
Why it matters: Splash over the basket from level, load size, or load placement is more likely. Water that begins underneath, at the rear, or while idle needs another branch.
Safety stop: Do not lift, tip, reach under, or continue operating the washer to reproduce the splash.
-
PATH 05Safety boundary
What you see
The first wet point appears during drain-out at the drain hose/household drain, or water comes from the cabinet bottom, filter area, or another hidden point.
Do this next
Stop the washer. Address only an obvious external drain displacement without moving the machine; have a plumber inspect household backflow and request appliance service for any cabinet, pump, filter, or recurring leak.
Why this path and its safety boundary
Why it matters: A loose drain hose or household backflow is plausible when the cabinet stays dry; a cabinet, pump, filter, or internal hose leak is more likely when water starts inside or under the washer.
Safety stop: Do not open a hot or pressurized filter, place hands under the cabinet, run another drain cycle over a backflow, or touch wet electrical areas.
Helpful context
Understand the symptom
Find the first wet point before changing parts
Water can travel along a hose, cabinet, floor, or drain path, so the puddle location is not always the source. Stop the cycle, keep the floor and power area safe, and inspect without moving the washer or reaching into its underside. Note whether the first wet point is at an inlet connection, dispenser, front door seal, rear hose, household drain, or the cabinet bottom. Amana's top-load and front-load guides use different checks, so identify the washer style before following a branch.
The phase changes the likely cause
A leak that starts as water enters points toward supply hoses, washers, valves, a dispenser, or a top-load splash path. A front leak during washing can involve the door glass/seal, trapped clothing, dispenser flow, excess suds, overloading, or leveling. A rear or floor leak during drain-out can involve a loose hose or household drain backflow. Water entering an idle washer is a separate stop condition: close the water valve and arrange service rather than running another cycle.
Keep hot water and electrical contact out of the diagnosis
Do not place hands under a powered washer or touch a plug, outlet, cord, or connection from a wet floor. Amana's washer guidance says to turn off water before removing inlet hoses and warns that water can back up from a slow household drain. If you must inspect a filter or residual-water area on a model that provides one, use only its manual procedure after the tub is cool and water can be contained; a hidden leak or cabinet leak is a service boundary.
Safety boundary
Stop conditions
- Stop the washer and keep water away from power for any active leak, water near a cord/outlet/control, smoke, sparking, burning odor, or damaged electrical connection.
- Close both water valves and keep the washer unused when water enters while idle or while waiting for service.
- Do not open a filter or residual-water area while the tub may contain hot water; do not force a door, tip the washer, or reach under a powered or wet cabinet.
- Do not keep running cycles to locate a leak, and do not treat a hidden cabinet leak, torn gasket, damaged glass, or recurring leak as a cleaning or hose-adjustment issue.
When checks do not resolve it
Need a professional?
Request Amana or qualified appliance service for a leak from inside or under the cabinet, a washer-side inlet valve or hose, torn door gasket or damaged glass, a pump/filter area that cannot be safely accessed, a leak that returns after an external correction, or water entering while idle. Escalate immediately for water at electrical parts, smoke, sparking, burning odor, or an uncontrolled leak.
Common questions
FAQ
What is the first thing to check when an Amana washer leaks?
Stop the cycle, keep water away from power, close the water valves, and locate the first wet point without moving the washer. Then identify whether the leak begins at an inlet connection, front door or dispenser, top-load basket, drain hose/household drain, or the cabinet bottom; the phase and washer style determine the next safe check.
Why does an Amana washer leak only when it drains?
Amana says a loose drain hose or a clogged household drain can allow water to spill or back up during drain-out. Check only the visible hose and drain from a dry safe position; request appliance or plumbing service when the cabinet leaks, backflow continues, or the hose requires moving the washer.
What if water enters my Amana washer while it is off?
Close the water valve and keep the washer unused while waiting for service. Amana lists this as a service condition; do not reopen the valve to run a test or reach behind the washer from a wet floor.
Can I keep using an Amana washer with a small leak?
Do not continue normal cycles until the first wet point is identified and the cause is cleared. A leak from the cabinet, door gasket, washer-side hose, pump/filter area, or an electrical area needs service; even an external correction should be checked without exposing power or running repeated cycles.
Read the exact guide
Official sources
- Wash Light On or FlashingAmana · Amana top-load washer fill and drain hose checks when the wash light is on or flashing
- Leaking from Dispenser - Front Load WasherAmana · Amana front-load washer dispenser closure, blockage, and safe cleaning guidance
- Leaking from Front - Front Load WasherAmana · Amana front-load washer door seal, dispenser, load, level, detergent, and front-leak guidance
- Leaking Water Underneath - WasherAmana · Amana top-load washer leaks underneath, inlet connections, drain backflow, and load-added-after-start guidance
- Leaking from Front or Top - WasherAmana · Amana top-load washer splash, level, oversized-load, and water-resistant-material guidance
- Leaking Inside the Tub - WasherAmana · Amana washer water entering while idle and water-valve shutoff while awaiting service
- Leaking from Underneath or Bottom - Front Load WasherAmana · Amana front-load washer leaks underneath, external hoses, drain backflow, dispenser, detergent, and service boundary
Community feedback
Share a repair observation
Share a plain-text repair observation. Accepted observations are published automatically; this page may take a moment to update.