
On this page
Start here
Quick answer
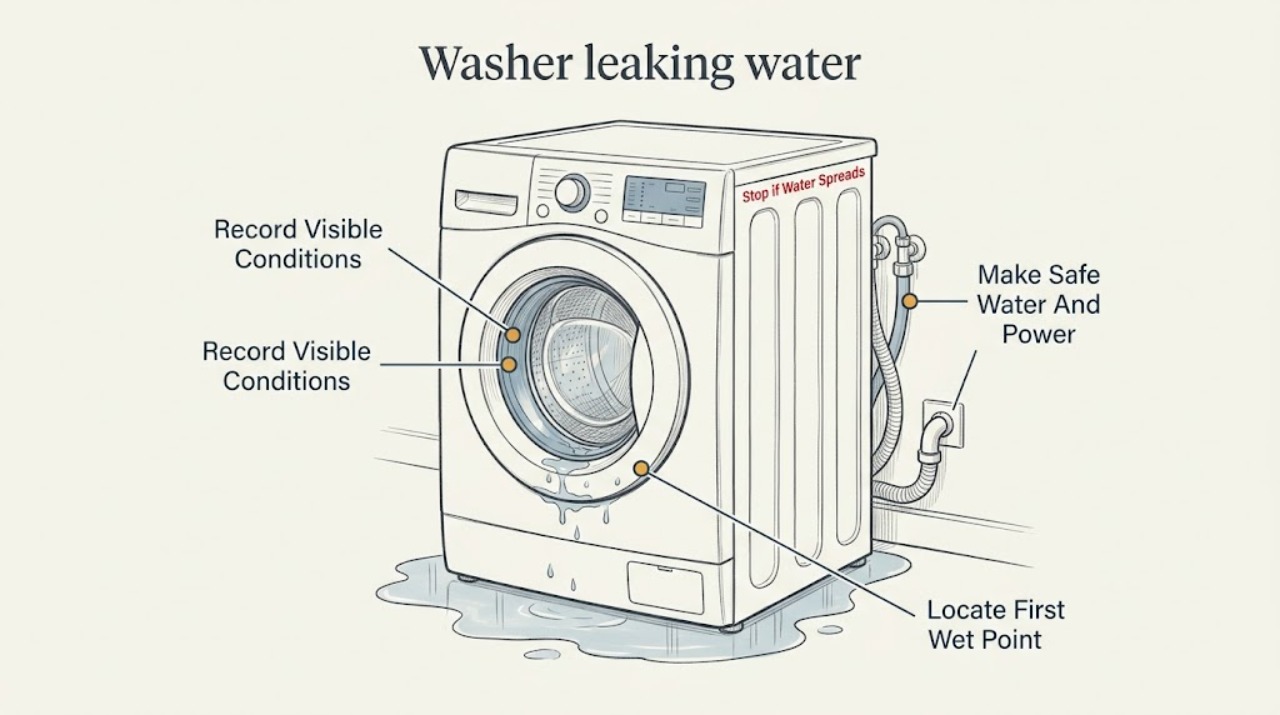
Stop the GE washer and locate the first wet point before replacing anything. Record whether water appears while the washer is idle, filling, washing, draining, or spinning; then distinguish a front-load door gasket or dispenser leak from a top-load overflow or suds leak and a rear hose, drain, or household-plumbing leak. GE advises pausing or turning the appliance off for a substantial leak, not unplugging while standing in water, then shutting off the household water supply once power is safely off. Do not run another cycle to find a leak near a wet outlet, cord, or plug, and do not reach into hot or moving water. Small front-load drips can come from debris at the gasket or a blocked dispenser, while rear leaks can involve fill hoses, drain hoses, installation, or a backed-up standpipe; a washer that overfills while filling may need service for its water valve or pressure switch. Repair or replace only the exact model-compatible hose, seal, filter, or valve after the leak path is confirmed.
Before you begin
Safety first
- This article supports dry, ordinary-access observation and model-approved corrections only. Do not unplug from a wet area, touch wet electrical parts, reach into moving or hot water, loosen pressurized hoses, tip or dismantle the washer, or open panels.
Work through in order
Diagnostic checks
Use only checks that match the exact appliance or system and its official guide.
-
Check 1
Stop the cycle from a dry, safe position and record the washer design, model, and the exact phase when water first appeared: idle, fill, wash/agitation, drain, or spin.
Expected result: Note whether the washer is front-load or top-load, whether the door or lid is closed, whether water is hot, whether the drum or tub contains water, and whether the leak is a few drops, a steady stream, or flooding.
Next step: If the area is dry and safe, continue by locating the first wet point; if water is spreading toward electrical equipment, keep away and arrange service.
Stop if: Do not unplug while standing in water, reach into moving or hot water, or restart a flooding washer.
Why this matters
Why: The first phase and severity narrow the path: idle/fill favors supply or valve issues, front-load wash favors gasket or dispenser issues, and drain/spin favors the drain path or household plumbing. Flooding or hot water is a safety event, not a normal troubleshooting branch.
-
Check 2
From a dry position, pause or turn the washer off; once power is safely off, close the household hot and cold water faucets behind the washer if accessible without entering a wet electrical area.
Expected result: Record whether water stops when the cycle and supply are stopped, whether water continues while idle, and whether the plug, cord, outlet, or cabinet area is wet, hot, discolored, or damaged.
Next step: Keep the machine out of use, protect the floor without covering electrical equipment, and photograph the first wet point and connections from a safe position.
Stop if: Do not touch a wet plug or outlet, unplug from a wet area, reset a tripping breaker, or operate the washer with water near electrical parts.
Why this matters
Why: A leak that continues while the washer is idle can involve the pressurized supply, inlet hose, or water valve. A leak that stops with the cycle may be in the active fill, tub, drain, or overflow path. Wet or damaged electrical equipment requires service rather than a hands-on hose check.
-
Check 3
With the washer stopped and the water supply closed when safe, inspect from ordinary access without moving the appliance whether the first wet point is at the front door or gasket, dispenser, top-load front corner, rear fill hoses, rear drain hose, standpipe, or underneath.
Expected result: Use dry visual cues and photos to classify the source as door/gasket, dispenser, front overflow or suds, supply connection, drain hose or standpipe, underside, or still unknown; note soap residue, torn rubber, loose clamp, hose damage, or water backing up.
Next step: Follow only the matching front-load, top-load, rear-hose, or plumbing branch and avoid removing panels or tipping the washer.
Stop if: Do not slide or tip the appliance, remove panels, loosen a pressurized fitting, or probe underneath while power or water is connected.
Why this matters
Why: The first wet point is more useful than the puddle location. GE identifies gasket debris, blocked dispenser ports, oversudsing, fill/drain hose damage or installation, and household drain clogs as different causes; an unknown underside source needs service.
-
Check 4
For a front-load GE washer, inspect the door gasket folds, drain holes, door edge, and detergent dispenser from ordinary access; remove only loose debris or residue the exact owner's manual permits.
Expected result: Record whether fibers or clothing are caught in the gasket, the gasket is torn or deformed, the door is not fully closed, the dispenser door is ajar, detergent buildup blocks ports, or the leak begins when the dispenser fills.
Next step: Clean and refit only as the exact manual directs, use the correct detergent placement and amount, then verify one normal fill while staying nearby; stop if the leak returns.
Stop if: Do not stretch, glue, puncture, or replace the gasket by appearance, and do not run a cycle with a torn seal or water near electrical parts.
Why this matters
Why: Debris at the gasket can produce a small front leak, while blocked dispenser ports can back up fill water and cause a larger leak. A torn gasket, persistent leak after cleaning, or water from the cabinet or underside needs service.
-
Check 5
For a top-load GE washer leaking at the front during fill or agitation, observe the water level and suds from outside the machine without opening the lid while the basket is moving.
Expected result: Record whether the leak is at the front-left overflow path, whether excessive suds rise above the basket, whether the load is overloaded or out of balance, and whether the washer still leaks during a model-permitted no-soap check.
Next step: Use the correct HE detergent amount and load guidance, then arrange service for recurring leaks, overfill, or any hidden-source leak.
Stop if: Do not open the lid over a moving basket, add chemicals to suppress suds, bypass the lid or water-level control, or keep operating while water approaches electrical parts.
Why this matters
Why: GE says front-corner leaks are often associated with the overflow path and that excessive detergent or suds can push water over the basket. A leak that persists without soap, an overfill while filling, or a control that does not stop water points to service rather than more detergent experiments.
-
Check 6
With power safely off and household water closed, inspect accessible rear fill-hose connections, rubber washers, hose bodies, drain-hose attachment, standpipe, and floor drain without pulling the washer forward or disconnecting a pressurized hose.
Expected result: Record a cracked or bulged hose, missing or damaged washer, a connection that leaks, a drain hose that is loose or incorrectly inserted, or water backing up from the standpipe during drain or spin.
Next step: Close the supply valves, photograph the connection, and use only the exact installation instructions for a safe accessible correction; arrange appliance or plumbing service for damaged parts, backflow, or recurrence.
Stop if: Do not loosen a pressurized fitting, use force to remove a stuck hose, move an unstable machine, or keep the washer connected to a leaking hose.
Why this matters
Why: GE identifies rear leaks as commonly related to installation, fill or drain hoses, and plumbing; a standpipe that backs up during spin may require a plumber. A supply leak that continues while idle is more urgent than a one-time spill during installation.
-
Check 7
After an exact model-approved cleaning or installation correction, run one short, supervised verification with the floor dry and water and power connections safe; do not test an unresolved leak with a full load.
Expected result: Record whether the first wet point stays dry through the same phase, the washer fills and drains normally, the door or lid seals, no suds or overflow appears, and no water reaches the cord or outlet.
Next step: Save the leak photos, phase timeline, model, checks, and result for the technician; keep the washer out of use if the cause is not certain.
Stop if: Stop immediately for any water return, flooding, hot water, electrical odor, sparking, breaker trip, or need for internal access.
Why this matters
Why: A dry short verification supports the corrected path but does not prove an inaccessible seal, pump, valve, or plumbing fault is repaired. Any return of the leak, new wet point, standing water, or abnormal noise requires service.
Use your observations
Decision map
Find the observation that best matches what you see, then follow the next safe action.
-
PATH 01Safety boundary
What you see
A front-load washer first wets at the door gasket or dispenser during fill or wash, and debris, residue, a door obstruction, or a blocked dispenser is visible.
Do this next
Follow the exact GE model manual for gentle cleaning and detergent placement, then perform one supervised verification; arrange service if the gasket is damaged or the leak returns.
Why this path and its safety boundary
Why it matters: A gasket or dispenser path is more likely than a rear hose, but a torn seal or leak from behind the cabinet is not a cleaning-only issue.
Safety stop: Do not run with a torn gasket, force the door, or remove the dispenser housing.
-
PATH 02Safety boundary
What you see
A top-load washer wets at the front during fill or agitation and excessive suds or water rises toward the overflow path.
Do this next
Correct detergent quantity and load only as the model instructions allow, then request service if the washer leaks without soap, overfills, or repeats the symptom.
Why this path and its safety boundary
Why it matters: GE identifies oversudsing and overflow as common contributors to this top-load front-leak pattern; detergent amount, HE suitability, load, or a water-level fault may be involved.
Safety stop: Do not bypass the lid or water-level control, add another chemical, or operate near electrical equipment.
-
PATH 03Safety boundary
What you see
The first wet point is a rear fill-hose connection, hose body, or water valve area, especially while the washer is idle or filling.
Do this next
Close the household supply valves and arrange qualified appliance service or a safe model-specific hose correction; do not use the washer until dry and leak-free.
Why this path and its safety boundary
Why it matters: A pressurized supply connection, missing or damaged washer, hose damage, or inlet valve may be involved; the leak is not explained by detergent or a front gasket.
Safety stop: Do not touch a wet electrical connection or loosen a pressurized hose.
-
PATH 04Safety boundary
What you see
The leak starts during drain or spin and the first wet point is the drain hose, standpipe, floor drain, or nearby plumbing.
Do this next
Keep the washer off, photograph the backflow and hose routing, and arrange plumbing or appliance service according to the confirmed source.
Why this path and its safety boundary
Why it matters: A drain-hose installation problem, hose damage, pump path, or household drain blockage is more likely. GE notes that a backed-up standpipe during spin may require plumbing service.
Safety stop: Do not repeatedly spin-test, pull the washer into a wet area, or open wall plumbing.
-
PATH 05Safety boundary
What you see
Water enters or drips into the tub while the washer is off, or the machine overfills during filling and does not stop at the expected level.
Do this next
Close the household water faucets, keep the washer out of use, and arrange qualified appliance service; do not rely on the control panel to stop a valve that may be stuck.
Why this path and its safety boundary
Why it matters: A water valve, pressure-sensing/control path, or pressurized supply fault may be present and can cause flooding even without a running cycle.
Safety stop: Do not keep the supply open, bypass the water-level control, or open the console.
-
PATH 06Safety boundary
What you see
The first wet point is underneath or hidden, the leak returns after an approved ordinary correction, or the machine has a damaged seal, hose, cabinet, or electrical symptom.
Do this next
Keep the washer disconnected from service as appropriate, close the water supply, and provide the technician with the model, phase, first-wet-point photos, and timeline.
Why this path and its safety boundary
Why it matters: An internal tub, pump, valve, seal, cabinet, or plumbing fault remains unresolved; the puddle alone cannot identify a safe part.
Safety stop: Do not tip, dismantle, operate with a wet electrical area, or continue cycles to make the source appear.
Helpful context
Understand the symptom
Find the first wet point, not the largest puddle
Water can travel along the cabinet or floor, so the puddle's location may not be the source. GE says a rear leak can appear at the front on an uneven floor and recommends determining the actual location. Observe from a dry, safe position and use a towel or paper strip only where it cannot contact energized equipment; note the first drop at the door or lid, dispenser, front corner, underside, fill-hose connection, drain hose, standpipe, or floor drain.
The phase changes the likely branch
A leak while the machine is idle points toward a water valve that is not closing, a pressurized fill hose, or a supply connection. A leak during fill can come from the dispenser, inlet hoses, overfill, or a hose connection. A leak during agitation or wash can involve suds, a gasket, a tub path, or a load issue. A leak during drain or spin makes the drain hose, pump path, standpipe, or household plumbing more relevant. These are decision clues, not proof of a failed part.
Top-load and front-load checks differ
For a front-load GE washer, the door gasket, detergent door, dispenser tray, and any model-accessible pump filter are distinct checks. For a top-load washer, front-corner water is often associated with overflow or excessive suds, while a rear leak points more toward hoses or plumbing. Use the exact GE owner's manual before opening a filter, changing a hose, or running a clean or diagnostic cycle.
Water and electricity require a hard stop
GE's leak guidance says to pause or turn the washer off, not unplug while standing in water, and turn household water off after power is off. The GE owner manual also says to disconnect power before maintenance and not to operate a damaged, malfunctioning, partially disassembled, or broken appliance. If water is near the outlet, plug, cord, or internal wiring, keep clear and arrange qualified service.
Safety boundary
Stop conditions
- Do not unplug while standing in water, touch a wet plug or outlet, or operate the washer when water is near the cord, cabinet wiring, or electrical equipment.
- Stop for flooding, hot water, a leak that continues while the washer is idle, a damaged hose or door gasket, or water that cannot be controlled by safely closing the household supply.
- Do not reach into a moving basket or drum, force a locked or hot door, tip or slide the appliance, or open panels to find an underside leak.
- Do not loosen pressurized water fittings, bypass the lid or water-level control, run repeated spin tests, or open household plumbing as a homeowner diagnostic.
- Do not run a washer with a torn seal, leaking hose, damaged cord or plug, repeated breaker trip, smoke, burning odor, sparking, or visible cabinet damage.
- Stop after one model-approved ordinary correction and supervised verification if the first wet point returns, the source remains unknown, or internal pump, valve, tub, wiring, or plumbing access is needed.
Only after diagnosis
Potential parts
- fill hose and rubber washer set
Consider this category only when the first wet point is a damaged or leaking supply hose or connection after the water is shut off and the exact installation guidance is checked.
Confirm the GE model, hose connection, length, washer material, and installation instructions; do not replace a hose from a puddle location alone. - front-load door gasket or dispenser component
Consider this category only when front-load inspection and the exact manual identify a torn gasket, damaged seal, or dispenser path that leaks after permitted cleaning.
Confirm exact GE model, gasket/door configuration, dispenser design, and fit information; do not use a damaged seal or force the dispenser. - drain pump or water inlet valve
Consider this category only after qualified diagnosis links an internal drain or fill-control fault to the confirmed first wet point and cycle phase.
Confirm exact GE model, pump or valve configuration, electrical connections, and service procedure; do not replace either part solely because the washer leaked.
When checks do not resolve it
Need a professional?
Arrange qualified GE appliance service for a leak that continues while idle, flooding, overfill, a damaged door or lid seal, an underside or cabinet leak, a failed water valve or pump suspicion, any leak near electrical equipment, repeated breaker trips, or a leak that returns after an exact model-approved hose, gasket, dispenser, detergent, or drain correction. Use plumbing service when the standpipe, floor drain, or household drain backs up or cannot accept the washer's discharge.
Safety scope: This article supports dry, ordinary-access observation and model-approved corrections only. Do not unplug from a wet area, touch wet electrical parts, reach into moving or hot water, loosen pressurized hoses, tip or dismantle the washer, or open panels.
Common questions
FAQ
Where should I look first when a GE washer leaks?
Find the first wet point, not just the puddle. Record whether it appears at the front door or gasket, dispenser, top-load front overflow area, rear fill or drain hose, standpipe, or underneath, and note whether it occurs while idle, filling, washing, draining, or spinning.
Can I unplug a leaking GE washer?
Do not unplug it while standing in water. GE's leak guidance says to pause or turn the appliance off and, when power is off, turn the household water off; keep away from wet plugs, outlets, cords, and wiring. Arrange service if the electrical area is wet.
Why does a front-load GE washer leak from the door?
GE identifies debris or fibers in the gasket, items caught at the door, a door that is not fully closed, and dispenser buildup or blocked ports as possible front-load causes. A torn gasket or leak that returns after the exact model cleaning procedure needs service.
Why does a top-load GE washer leak from the front?
GE says top-load front leaks are often associated with the overflow path and excessive suds. Detergent amount, soft water, load balance, overfill, or a water-level problem can matter. Do not bypass the lid or water-level control, and arrange service if it leaks without soap or overfills.
What if the GE washer leaks from the back during spin?
Check from a dry, safe position for damaged or loose fill and drain hoses and for water backing up from the standpipe. GE says a standpipe that overflows during spin may indicate a household plumbing problem. Close the supply valves and arrange appliance or plumbing service for recurrence or damage.
Should I keep running a GE washer to find the leak?
No. Record the phase and first wet point from a safe position, then perform only a model-approved, supervised verification after the source is corrected. Stop for flooding, hot water, water near electrical equipment, a damaged seal or hose, a continuing idle leak, or any need to open panels.
Read the exact guide
Official sources
- About the washer features.GE Appliances · Official GE owner manual for the named older models; used for general safety boundaries that must be checked against the current model manual.
- Washer - Leaking in RearGE Appliances · Official GE article for top-load and front-load washers with rear or installation-area leaks.
- Front Load Washer - Leaking WaterGE Appliances · Official GE article for front-load washers; use exact model manual for cleaning and access.
- Washer OverflowingGE Appliances · Official GE overflow guidance for a washer that fills too full; it does not replace model-specific diagnosis.
- Washer - Leaking TroubleshootingGE Appliances · Official GE overview that routes washer leaks by front-load, top-load front, rear, overflow, and other symptom patterns.
- Top Load Washer - Leaking Water in FrontGE Appliances · Official GE article for top-load washers leaking at the front; exact model controls any load or detergent test.
Community feedback
Share a repair observation
Share a plain-text repair observation. Accepted observations are published automatically; this page may take a moment to update.