
On this page
Start here
Quick answer
First note where and when the water appears: while filling, during washing, while draining or spinning, after the washer is idle, from the front or top, or underneath. Stop the cycle and keep clear of wet electrical parts; from a dry, safe position, close the water faucets if needed. Maytag identifies inlet-hose washers and connections, the drain hose and household drain, an unlevel or overloaded washer, and seals, pumps, or valves as different possibilities. Inspect only visible, reachable items without moving the washer or opening its cabinet. If water reaches the cord or outlet, the leak is continuous or flooding, the hose or cabinet is damaged, or the source is internal, stop using the washer and arrange qualified appliance or plumbing service.
Before you begin
Safety first
- Keep the washer off for wet electrical areas, flooding, continuous leaks, damaged hoses, smoke, burning or electrical odor, arcing, shock, hot connections, or repeated breaker trips. Do not open the cabinet, move the washer, or run another test cycle.
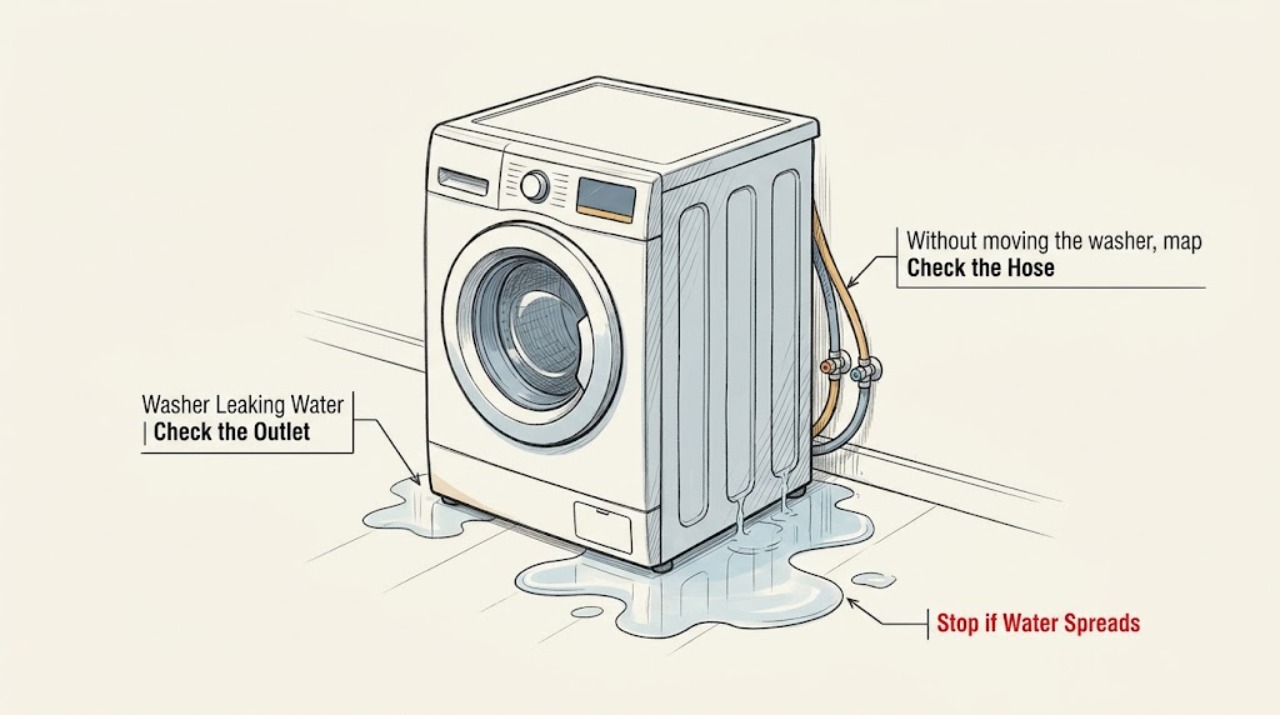
Work through in order
Diagnostic checks
Use only checks that match the exact appliance or system and its official guide.
-
Check 1
Press pause or stop and wait for the basket to become fully still. From a dry, safe position, note whether water is near the cord, plug, outlet, or other electrical parts; if it is safe to reach without stepping in water, close the washer's water faucets. Do not touch a wet plugged-in appliance, cord, or receptacle.
Expected result: Water reaches electrical parts, the floor is flooding, the leak continues with the washer off, the hose has burst, or the machine shows smoke, burning odor, arcing, shock, or repeated breaker trips.
Next step: Stop using the washer. Keep clear and isolate power only from a dry, safe location; arrange qualified appliance/plumbing service or emergency help as appropriate. Do not restart to test.
Why this matters
Why: This is an electrical, water-damage, fire, or injury boundary, not a routine washer adjustment.
-
Check 2
Without moving the washer, map the first visible water and the phase in which it appears: filling, washing/agitation, draining, spinning, immediately after a cycle, or while idle. Look from the front and sides with the washer stopped; do not reach under the cabinet.
Expected result: The leak starts during fill or idle, only during drain or spin, appears at the front/top, or collects underneath with no visible external source.
Next step: Follow the matching branch below and provide the exact phase and location to service if the source cannot be seen safely.
Why this matters
Why: Fill or idle patterns make the inlet side more likely; drain/spin patterns make the drain hose, household drain, pump, or a movement-related splash more likely; front/top patterns make load, level, lid/door, or gasket issues more likely; an unexplained underside leak raises the internal-component boundary.
-
Check 3
From a dry position, inspect the visible inlet hoses and their connections at the wall and washer. Check for a missing or displaced washer, a loose connection, a cross-connected hot/cold port, a kink, or a split hose; do not move the appliance, loosen a pressurized connection, or work around pooled water.
Expected result: A connection is visibly loose or wet at its fitting, a hose is damaged, the hot/cold ports do not match the installation, or all visible supply connections remain dry.
Next step: Keep the faucets closed and have a qualified person replace or reseat the model-appropriate hose/washer when the connection is damaged or cannot be safely corrected. If all visible supply points are dry, continue only with the drain and front/top checks; do not open the washer.
Why this matters
Why: A wet fitting or damaged hose supports an external supply leak. Dry fittings make the supply connection less likely but do not rule out an internal inlet valve or a leak that runs along the cabinet.
-
Check 4
Inspect the visible drain hose where it leaves the washer and enters the household drain or standpipe. Look for a loose hose, kink, obstruction, or water backing up at the household drain; do not seal the opening with tape, pour chemicals into the washer, or pull the washer out.
Expected result: The hose is loose or kinked, the household drain backs up when the washer drains, the hose and drain look normal, or water appears under the cabinet during drain.
Next step: Correct only a clearly visible routing issue allowed by the exact model instructions. Use plumbing service for a backing-up household drain; use appliance service for an underside or internal leak, and do not run another cycle to confirm it.
Why this matters
Why: A loose or restricted route can leak or overflow during discharge. A normal visible route with an underside drain-stage leak makes an internal pump, hose, clamp, or tub path more likely.
-
Check 5
For a front/top leak, with the washer stopped, inspect the door or lid area, gasket, dispenser area if present, and the load position from outside. Note whether the washer rocks and whether the load is oversized, water-resistant, tightly packed, or uneven; do not force a door, remove a gasket, or reach into a moving basket.
Expected result: Water splashes from the top, the washer is not level or rocks, the load is uneven or unsuitable, the door/lid does not close normally, or the gasket is visibly torn or displaced.
Next step: Only after the basket is still, correct a clearly visible load-distribution issue and use the exact model's safe leveling guidance. Keep the washer off and request service for a torn gasket, damaged latch, persistent front leak, or any movement that would require moving connected services.
Why this matters
Why: Maytag associates top/front splashing with leveling and load conditions, while a damaged door/lid seal or persistent leak after a suitable load points to service rather than a setting change.
-
Check 6
Record the exact Maytag model, washer style, selected cycle, phase, water location, hose observations, load condition, and whether the leak stopped when water supply was closed. Take photos from a dry position and check only the matching Maytag manual for any user-accessible filter or drain instruction.
Expected result: The visible external checks identify a supply, drain, load, or leveling path, or no safe check explains the leak.
Next step: Give the record and photos to qualified appliance service, or to a plumber when the household drain or supply plumbing is the evidence-supported source. Keep the washer off until the cause is resolved.
Why this matters
Why: A precise record helps separate supply plumbing, household drainage, installation, and internal washer faults; an unexplained or recurring leak needs model-specific diagnosis.
Use your observations
Decision map
Find the observation that best matches what you see, then follow the next safe action.
-
PATH 01Next step
What you see
Water appears while the washer fills or drips while it is idle, and a visible inlet fitting, hose, or washer is wet.
Do this next
Keep the water faucets closed and arrange qualified repair for a damaged connection or suspected valve. Do not loosen a pressurized fitting or open the cabinet.
Why this path and its safety boundary
Why it matters: The supply side is more likely than a spin splash. A loose/damaged hose or fitting can leak at the wall or washer connection; an idle drip with dry hose connections can involve an inlet valve.
-
PATH 02Next step
What you see
Water appears only during draining or spinning, and the drain hose is loose/kinked or the household drain backs up.
Do this next
Correct only a visible, model-authorized hose-routing issue. Use plumbing service for a backing-up household drain; use appliance service if the route is sound or water comes from under the cabinet.
Why this path and its safety boundary
Why it matters: Discharge restriction, a loose hose, or plumbing backup is more likely than an inlet leak.
-
PATH 03Next step
What you see
Water splashes from the front or top with an oversized, water-resistant, or uneven load, or the washer rocks.
Do this next
After all motion stops, use the exact model guidance to make one suitable, balanced load and correct a clearly visible leveling issue. If the leak returns, the door/lid area is damaged, or the washer cannot be stabilized safely, request service.
Why this path and its safety boundary
Why it matters: Load distribution or leveling can make water bounce out without proving a failed seal.
-
PATH 04Next step
What you see
Water collects underneath with no visible hose, drain, load, or leveling explanation, especially during drain or spin.
Do this next
Keep the washer off and arrange qualified appliance service. Do not tilt or move the washer, remove panels, reach under it, or keep running cycles to locate the source.
Why this path and its safety boundary
Why it matters: An internal pump, tub seal, drain pipe, clamp, or other cabinet-side path is more likely and cannot be confirmed safely from outside.
-
PATH 05Next step
What you see
Water is near electrical parts, the leak is continuous or flooding, or there is smoke, burning odor, arcing, shock, a hot connection, or repeated breaker operation.
Do this next
Stop immediately, keep people away, and isolate power only from a dry, safe location. Arrange emergency or qualified service as appropriate; do not touch the wet appliance or restart it.
Why this path and its safety boundary
Why it matters: The immediate risk is electrical shock, fire, injury, or water damage; the leak diagnosis must wait.
Helpful context
Understand the symptom
Use timing and location as the first diagnostic split
A Maytag washer that leaks while filling is different from one that leaks only when the pump drains or the basket spins. A drip while the machine is idle can indicate a supply-side valve or connection, while water under the cabinet can involve the pump, tub seal, drain pipe, or another internal path. Record the phase, side of the washer, water appearance, and whether the flow stops when the cycle stops.
Keep model and washer style in scope
Maytag top-load and front-load washers do not expose the same seals, hoses, controls, or service access. Use the exact model manual for any control sequence, drain-filter location, or permitted user check. Do not copy a procedure from a different Maytag design or assume that a visible hose is the source just because water is found near it.
What a visible check can and cannot establish
A dry, correctly seated inlet connection or clear visible drain route makes that external cause less likely, but it does not prove that an internal valve, pump, tub seal, or door seal is healthy. Do not move the washer to reach its rear or underside, remove panels, or run repeated cycles to make a hidden leak appear. Give the technician the phase, location, model, and photos from a safe position.
Safety boundary
Stop conditions
- Stop immediately if water reaches the cord, plug, outlet, control area, or other electrical parts; never touch a wet appliance that remains plugged into an electrical source.
- Stop for flooding, a burst or damaged hose, a leak that continues with the washer off, smoke, burning odor, arcing, shock, a hot plug or outlet, or repeated breaker trips. Do not restart to test.
- Do not move or tilt the washer, remove cabinet panels, reach underneath, loosen pressurized hoses, disassemble a pump or valve, force a door/lid, or use energized electrical tests.
- Close the washer's water faucets only from a dry, safe position. Use appliance service for an internal washer leak and plumbing service for a confirmed household supply or drain backup.
Only after diagnosis
Potential parts
- washer inlet hose and hose washers
Consider this category only when a visible supply connection or hose is wet, damaged, or missing its washer and the exact model installation confirms the replacement.
Confirm the exact Maytag model, hose connection, and installation requirements before selecting a part; do not assume a generic fit. - washer drain hose or clamp
Consider this category only when the visible drain hose or clamp is damaged or loose and the household drain is not the source.
Drain routing and clamps vary by model and installation. Confirm the model and diagnosis before ordering. - door or lid gasket
Consider this category only when the matching front/top inspection and qualified diagnosis identify a torn, displaced, or damaged seal.
Door and lid seals differ across Maytag washer designs. Confirm exact model and washer style before any part decision. - drain pump, inlet valve, or tub seal
Consider this professional-repair category only after an underside or timing pattern and qualified inspection identify the internal component.
Internal parts and service access are model-specific; do not select by appearance or symptom alone.
When checks do not resolve it
Need a professional?
Arrange qualified Maytag or appliance service when the leak comes from underneath, a pump, tub seal, inlet valve, door/lid gasket, clamp, or cabinet path is suspected; a hose or latch is damaged; the leak returns after a visible load/leveling correction; or the source cannot be identified safely. Use plumbing service when the household drain backs up or the wall-side supply connection is the evidence-supported source. Treat wet electrical parts, flooding, smoke, arcing, shock, or repeated breaker trips as immediate safety issues.
Safety scope: Keep the washer off for wet electrical areas, flooding, continuous leaks, damaged hoses, smoke, burning or electrical odor, arcing, shock, hot connections, or repeated breaker trips. Do not open the cabinet, move the washer, or run another test cycle.
Common questions
FAQ
Why is my Maytag washer leaking only during the fill?
A fill-only leak makes the inlet hoses, hose washers, connections, ports, dispenser path, or an internal inlet valve more likely than a spin splash. From a dry position inspect only visible connections, close the faucets if safe, and use qualified service for a damaged hose, valve, or cabinet leak.
Why does water come from underneath my Maytag washer?
An underside leak can be a drain hose, clamp, pump, tub seal, drain pipe, or water that ran down from another connection. If the source is not clearly visible from a safe position, keep the washer off and do not tilt or open it; arrange appliance service.
Can an unbalanced Maytag load cause water to leak?
Yes. Maytag says an unlevel washer or an oversized, water-resistant, or unevenly distributed load can allow water to bounce or splash from the top. Once the basket is still, correct only a clearly visible load or leveling issue using the exact model guidance; service a returning leak.
Should I keep running the washer to find the leak?
No. Repeated cycles can increase water damage and risk. Record the phase and first location from a dry position, and stop immediately for wet electrical parts, flooding, a damaged hose, smoke, arcing, shock, or a continuous leak.
Read the exact guide
Official sources
- How To Fix a Washing Machine That is LeakingMaytag · Maytag manufacturer troubleshooting overview; exact washer model instructions control.
- Leaking from Behind - WasherMaytag · Maytag Product Help page for rear-side leak patterns; do not move a wet or connected appliance to inspect it.
- CPSC Warns of Generator Carbon Monoxide and Fire Hazards Ahead of Hurricane SeasonU.S. Consumer Product Safety Commission · Government electrical-safety warning used for the wet plugged-in appliance boundary.
- Leaking Water Underneath - WasherMaytag · Maytag Product Help page for top-load washers; model and installation details can differ.
- Leaking Inside - Front Load WasherMaytag · Maytag Product Help page for front-load washer leaks; model-specific door, dispenser, inlet, drain, and detergent guidance applies.
- Leaking from Front or Top - WasherMaytag · Maytag Product Help page for top-load front/top leaks; exact washer design and manual control.
Community feedback
Share a repair observation
Share a plain-text repair observation. Accepted observations are published automatically; this page may take a moment to update.