
On this page
Start here
Quick answer
A leaking Liebherr freezer can be producing normal defrost water, overflowing because a drain path is blocked, admitting moisture through a door seal, or leaking from an IceMaker/water connection on models that have one. First protect the floor and keep water away from the plug and electrical parts, then trace the water to the rear wall or drain, door edge, interior ice, or rear water connection. Do not pull the appliance out of a tight space, remove covers, pierce ice, or work on a water or sealed cooling system. Use the exact Liebherr manual for any accessible drain or defrost step; if water returns, the freezer warms, the gasket is damaged, or a connection leaks, shut off the water supply if fitted and arrange qualified service.
Work through in order
Diagnostic checks
Use only checks that match the exact appliance or system and its official guide.
-
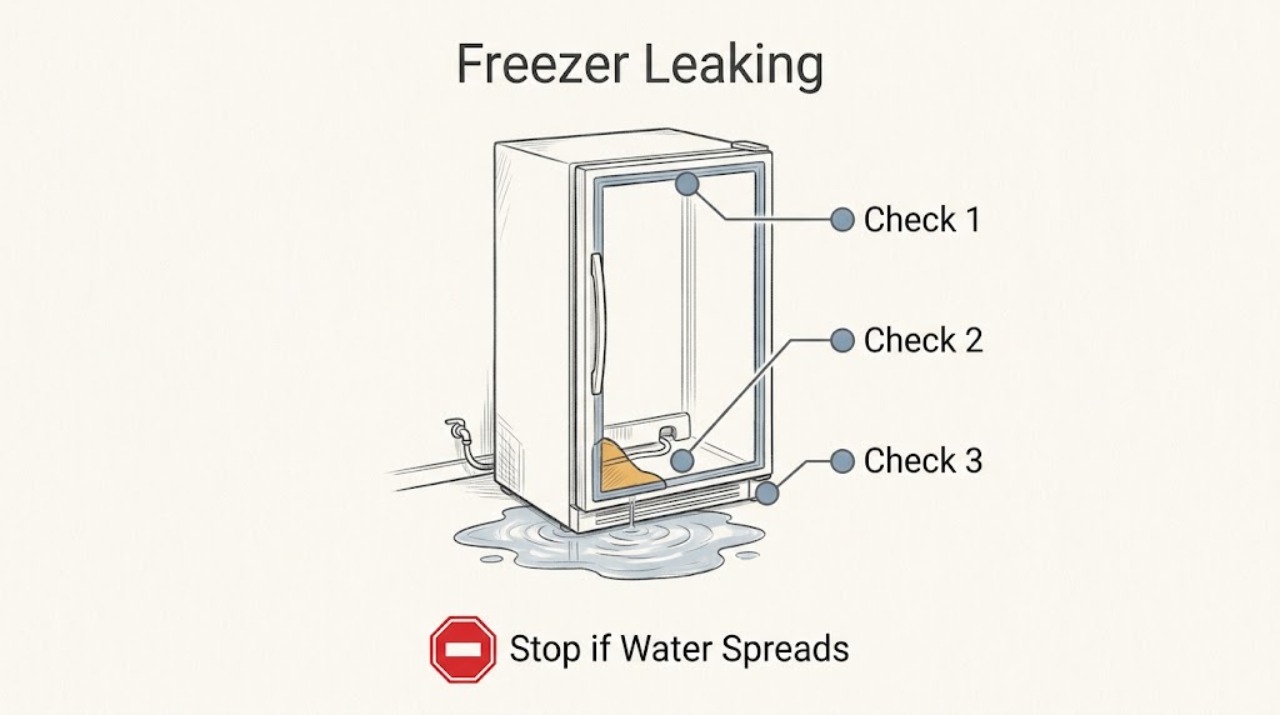
Check 1
Contain visible water with towels or a shallow container without moving the freezer, and trace upward from the floor to the rear, front, side, or underside to identify the first wet point.
Expected result: Water begins at the interior rear wall or bottom; it comes from the door edge or gasket; it appears under the rear water connection; it follows a defrost event; or the source cannot be seen.
Next step: Photograph the source, note whether the model has an IceMaker or water connection, and locate the exact operating instructions using the service or serial number.
Stop if: Stop if water reaches the plug, outlet, controls, wiring, or a concealed underside, or if the appliance is unstable or must be pulled out to inspect it.
Why this matters
Why: The first wet point separates defrost or drain water from a door-seal or plumbed IceMaker leak. Water that appears only during defrost may follow a different path from continuous dripping.
-
Check 2
Inspect the accessible door gasket, door edge, drawers, and packages for a gap, torn or displaced seal, ice preventing closure, or an item holding the door open; do not pull or heat the gasket.
Expected result: The door seals evenly; a package or drawer blocks closure; the gasket is damaged or out of its groove; or frost is concentrated around the door edge.
Next step: Remove only an obvious accessible obstruction and close the door gently. If the gasket or door is damaged, the gap remains, or the leak returns, arrange qualified service.
Stop if: Do not pry the door, bend hinges, glue or cut the gasket, chip ice, or continue storing food if the door cannot seal and temperature is rising.
Why this matters
Why: An incomplete door seal can admit humid air, create frost, and allow meltwater to run toward the front. A persistent gap or damaged seal requires model-specific replacement or alignment, not repeated wiping.
-
Check 3
If the exact manual identifies an accessible defrost gutter or drain opening, inspect it after disconnecting power as instructed and remove only loose surface debris with the approved tool or method; do not probe beyond the opening or remove a cover.
Expected result: The drain opening is visibly blocked; water collects in the documented gutter or drain well; the drain is clear but water still escapes; or the model has no user-accessible drain procedure.
Next step: Follow one exact-manual cleaning or drain step and dry the area. If the leak persists, the drain is hidden, or ice blocks an internal path, stop and arrange service.
Stop if: Do not use sharp objects, compressed air, chemicals, steam, boiling water, or force; do not open an interior or rear panel.
Why this matters
Why: Liebherr says defrost water must drain unhindered on applicable models, while other NoFrost models evaporate freezer moisture automatically and should not be manually defrosted. A clear drain does not rule out a frozen internal channel or failed defrost system.
-
Check 4
If the freezer has an IceMaker or plumbed water connection, inspect only the visible hose, valve, nut, and connection area from a dry, stable position; if dripping is present, close the accessible water shutoff without loosening the connection.
Expected result: No water connection is fitted; the visible hose or valve is wet; water appears only during IceMaker operation; or the leak is behind a cover or inaccessible.
Next step: Stop the IceMaker and water supply if the manual permits, dry the visible area, and arrange qualified service for the hose, valve, fitting, or any leak behind the appliance.
Stop if: Do not tighten fittings by force, reuse an old hose, pull the appliance out alone, disconnect a water line, or touch wet electrical parts.
Why this matters
Why: A water-connected model has a separate leak path from defrost water. Liebherr installation guidance warns that a damaged or incorrectly seated connection can leak and calls for a reachable shutoff; the exact fitting and pressure are model-specific.
-
Check 5
Use the exact manual to determine whether the freezer is NoFrost or requires manual defrosting; if manual defrosting is explicitly allowed, protect food, switch off as instructed, let ice melt naturally, collect water, and dry the compartment.
Expected result: The manual says the freezer defrosts automatically; it provides a manual-defrost and drain procedure; ice is around a hidden fan or cover; or meltwater cannot be contained safely.
Next step: Follow only the exact documented procedure. If the model does not permit user defrosting, the ice is inaccessible, or the leak continues after defrosting, keep the appliance off as needed and call service.
Stop if: Never chip or pierce ice, apply direct heat, use a hairdryer or steam cleaner, pour water into the appliance, or remove a cover to reach the evaporator or fan.
Why this matters
Why: A NoFrost freezer may not need user defrosting, while a manual-defrost model may direct water into a drain or container. Thick ice around a hidden component is not a safe DIY access point.
-
Check 6
After one documented correction, monitor the source, door seal, internal temperature, and display without repeatedly opening the freezer; keep the floor and electrical area dry.
Expected result: The leak stops and temperature remains stable; water returns at the same location; the freezer warms or shows an alarm; or the source is still hidden.
Next step: Move food to known-safe storage if temperature is unsafe, shut off a fitted water supply, and arrange qualified Liebherr service with photos, model details, and the correction attempted.
Stop if: Stop using the freezer if water reaches electrical parts, the door cannot seal, the leak is continuous, food is warming, or any smoke, burning, or refrigerant symptom appears.
Why this matters
Why: A stopped leak after removing a clear obstruction or following an exact drain step supports an accessible cause. Recurrence, warming, or a hidden source indicates unresolved sealing, drain, defrost, cooling, or water-system trouble.
Use your observations
Decision map
Find the observation that best matches what you see, then follow the next safe action.
-
PATH 01Safety boundary
What you see
Water droplets appear only on the interior rear wall of a model whose manual or Liebherr FAQ describes normal defrost drainage, with stable temperature and no floor water.
Do this next
Confirm the exact model manual and check that the documented drain path is unobstructed; monitor for water outside the cabinet or temperature change.
Why this path and its safety boundary
Why it matters: The droplets may be a functional defrost feature rather than a leak from the appliance.
Safety stop: Do not ignore droplets that overflow, freeze into a heavy blockage, or accompany warm food or an alarm.
-
PATH 02Safety boundary
What you see
Water is at the door edge and a package, drawer, frost ridge, displaced gasket, or damaged seal prevents a full closure.
Do this next
Remove the accessible obstruction or follow one exact-manual seal step, then monitor the door and temperature.
Why this path and its safety boundary
Why it matters: Warm-air entry and meltwater from the poor seal may be causing the leak.
Safety stop: Do not bend, glue, heat, cut, or force the gasket or door.
-
PATH 03Safety boundary
What you see
The exact manual documents an accessible drain or defrost-gutter check and visible loose debris is present.
Do this next
Disconnect power as instructed, clear only surface debris with the approved method, dry the area, and test once.
Why this path and its safety boundary
Why it matters: A blocked documented drain path may be diverting meltwater.
Safety stop: Do not use sharp or heated tools, probe a hidden passage, or remove an interior or rear cover.
-
PATH 04Safety boundary
What you see
A plumbed IceMaker or visible water connection is wet or drips when the IceMaker operates.
Do this next
Stop the IceMaker and close the accessible water shutoff if safe, then arrange qualified service for the exact hose, valve, or fitting.
Why this path and its safety boundary
Why it matters: The leak is on the water-supply path rather than ordinary defrost drainage.
Safety stop: Do not loosen fittings, reuse hoses, move the appliance alone, or touch wet electrical parts.
-
PATH 05Safety boundary
What you see
The freezer is a NoFrost model that the manual says does not need manual defrosting, or ice/water is behind a hidden cover.
Do this next
Keep the freezer off if water or temperature is unsafe, protect food, and call qualified Liebherr service.
Why this path and its safety boundary
Why it matters: The leak needs service diagnosis of the internal drain, defrost, airflow, or cooling system.
Safety stop: Do not force a NoFrost defrost, remove panels, chip ice, or direct heat at the liner or evaporator.
-
PATH 06Safety boundary
What you see
The leak returns after one exact-manual correction, the freezer warms, or water reaches electrical components.
Do this next
Move food as appropriate, disconnect power only when safe, shut off a fitted water supply, and arrange qualified service.
Why this path and its safety boundary
Why it matters: The underlying cause remains and may present food-safety or electrical risk.
Safety stop: Do not restart, repeatedly wipe and test, or keep storing food while the leak or unsafe temperature remains.
Helpful context
Understand the symptom
Trace the leak before cleaning it up
Water on the floor does not reveal where it started. It may have come from meltwater inside the freezer, a blocked drain or gutter, a door that is not sealing, or an IceMaker connection. Some Liebherr models route normal defrost water to an evaporation tray, while others have a user-accessible drain or a manual-defrost drain well. Identify the freezer model and inspect only accessible areas before choosing a procedure.
Electrical and food safety come first
If water is near the plug, outlet, controls, or wiring, do not touch wet electrical parts. Disconnect power only if the plug and outlet are dry and reachable without stepping in water; otherwise isolate the circuit safely and call for help. Keep the door closed while protecting frozen food, and move food to known-safe storage if the freezer is warming.
Do not assume every Liebherr freezer has a drain or water line
NoFrost, SmartFrost, chest-freezer, integrated, and IceMaker-equipped models use different water and defrost arrangements. A manual may say that a freezer does not need manual defrosting, while another model provides a drain or drain well for meltwater. The exact service number or serial number is the safest route to the correct instructions.
Safety boundary
Stop conditions
- Stop immediately if water reaches the plug, outlet, controls, wiring, or a concealed underside, or if there is smoke, sparking, burning odor, severe heat, or suspected refrigerant damage.
- Do not chip or pierce ice, apply direct heat, use steam or chemicals, remove covers, disconnect hidden water lines, or work on a sealed cooling system.
- Stop relying on the freezer for food storage when the door cannot seal, water continues, temperature rises, or food is softening.
When checks do not resolve it
Need a professional?
Call for recurring or hidden leaks, damaged seals, water-line leaks, warm temperature, a blocked internal drain, or any need to move the appliance or remove covers.
Have this ready
- Exact Liebherr appliance designation and service or serial number
- Photos of the first wet point, door gasket, interior frost, and visible water connection if fitted
- Whether the freezer is NoFrost, SmartFrost, manual-defrost, or IceMaker-equipped
- Current temperature, display alarms, and recent defrost, power, door, or IceMaker history
- The one documented drain, seal, or defrost check attempted and its result
Common questions
FAQ
Why is my Liebherr freezer leaking water?
Common paths include normal or overflowing defrost water, a blocked documented drain, a door gasket that does not seal, or an IceMaker water connection on equipped models. Trace the first wet point and use the exact model manual before attempting any correction.
Are water droplets inside a Liebherr freezer normal?
Some rear-wall droplets can be a normal defrost function on applicable models. They are not normal if water overflows, reaches the floor, the freezer warms, or the exact manual identifies a blocked drain or fault.
Can I unclog a Liebherr freezer drain?
Only if the exact model manual documents an accessible drain and method. Disconnect power as instructed and remove only surface debris with the approved method; never use sharp objects, heat, steam, chemicals, or force.
What if the leak comes from my Liebherr IceMaker?
Stop the IceMaker and close the accessible water shutoff if safe. Do not loosen the fitting or pull the appliance out alone; a wet hose, valve, or connection needs exact model diagnosis and qualified service.
Should I unplug a leaking Liebherr freezer?
Disconnect power only when the plug and outlet are dry and reachable without standing in water. If water is near electrical parts or the source is concealed, isolate power safely and arrange qualified help; protect food if temperature rises.
Read the exact guide
Official sources
- MaintenanceLiebherr-Hausgeräte · Applicable to the appliance family covered by the opened manual; exact model instructions govern.
- Operating instructions of your Liebherr refrigerator or freezerLiebherr-Hausgeräte · Applicable to locating the exact manual using the appliance service or serial number.
- Customer service for you: Contact us nowLiebherr-Hausgeräte · Applicable to service escalation and serial-tag identification; regional service channels vary.
- User Guide base unit freezerLiebherr-Hausgeräte · Applicable to the freezer model covered by the opened guide; exact model instructions govern.
- FAQs – frequently asked questions about Liebherr refrigerators & freezersLiebherr-Hausgeräte · General Liebherr guidance; exact appliance instructions govern.
- User Guide freezerLiebherr-Hausgeräte · Applicable only to water-connected appliance configurations covered by the opened guide; exact model fittings govern.
Community feedback
Share a repair observation
Share a plain-text repair observation. Accepted observations are published automatically; this page may take a moment to update.