
On this page
Start here
Quick answer
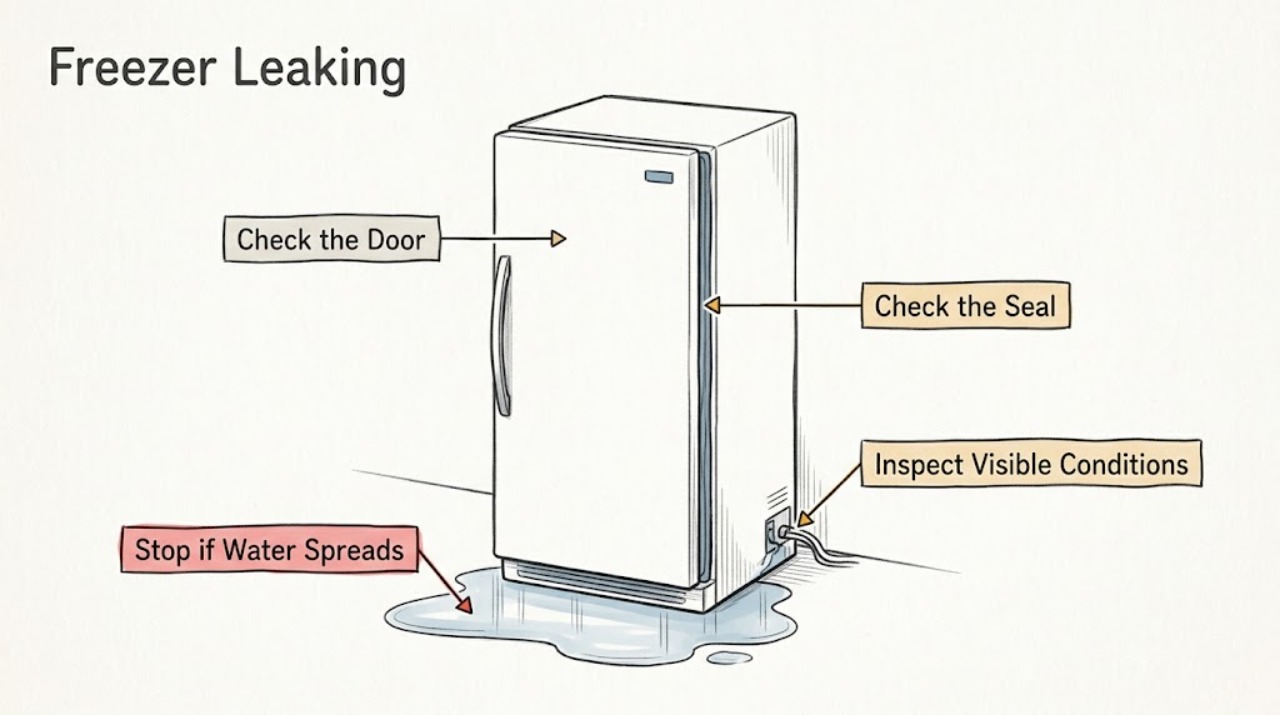
First locate where water appears: around the door, inside the compartment, beneath the freezer, at a drain or drip pan, or near an ice-maker or water connection if fitted. A door that does not seal can admit warm air and create condensation or frost; a blocked defrost drain can overflow or freeze; an ice-maker line or connection can leak; and a spill or melting ice outside the appliance can be mistaken for a freezer leak. Keep the door closed, move food away from water, and isolate power and water only from a dry, safe position when there is active water near electrical parts. Do not remove panels, use sharp tools or direct heat on ice, move a heavy appliance, or keep running a freezer with repeated internal leakage, damaged tubing, exposed wiring, or a severe temperature rise.
Work through in order
Diagnostic checks
Use only checks that match the exact appliance or system and its official guide.
-
Check 1
From a dry, safe position, identify whether the water is inside the compartment, under the front, at the door edge, behind the freezer, below an ice maker, or coming from somewhere else. Note when it appears—after defrost, door opening, ice production, a fill cycle, or continuously—and protect the floor with a towel without reaching near energized parts.
Expected result: The leak has a clear location and timing, or water is spreading near the cord, outlet, controls, wiring, or another electrical component and the source is uncertain.
Next step: For active water near electrical parts or an unknown source, stop use and isolate power only from a dry, safe position if possible, then arrange service. Otherwise continue with the matching source check and keep the door closed.
Stop if: Do not touch wet electrical parts, stand in water, pull the freezer forward, or continue operation when the source is near wiring or the appliance is unstable.
Why this matters
Why: Location separates door condensation, defrost drainage, ice-maker supply, drip-pan, and non-appliance spills. Water near electrical parts creates a shock and equipment hazard and should not be investigated while energized.
-
Check 2
Check the door and gasket with the compartment cool enough to handle. Remove packages that press against the door, verify shelves or drawers are seated, clean the intact gasket with a soft damp cloth and dry it, then close the door gently on a sheet of paper at several points around the seal.
Expected result: The door was blocked, the gasket was dirty or out of its channel, the paper pulls out with little resistance, or the seal is even and the leak is not at the door.
Next step: Correct only a loose package or intact gasket seating that the manual permits, then recheck closure. Arrange service for a torn or brittle gasket, a persistent gap, or leakage that continues with a good seal.
Stop if: Do not glue, stretch, cut, heat, or force the gasket, and do not close the door on fingers or an object other than the brief paper check.
Why this matters
Why: A gap admits warm moist air, which can create condensation and frost that later melts onto the floor. Easy paper release or a damaged gasket indicates poor sealing; an even seal shifts attention to drainage, water connections, or another source.
-
Check 3
Inspect the inside bottom, rear drain area, visible channels, and drip-pan area only as the exact model manual allows. Look for frost covering the drain, food or debris, a pan that is full or displaced, or water that returns after a defrost event; keep hands away from hidden fans, wiring, and sharp ice.
Expected result: A visible drain obstruction or light surface frost is present, heavy frost covers the drain or panel, the drip pan is inaccessible, or the drainage path looks clear but water returns.
Next step: Use only the manual's approved surface cleaning or defrost procedure for a clearly accessible light obstruction. Keep the freezer off and arrange service for heavy frost, inaccessible panels, a damaged pan, or recurring internal leakage.
Stop if: Do not remove panels, flush hidden passages, chip ice, use sharp tools or direct heat, or pour water near electrical components.
Why this matters
Why: Food or debris can clog a defrost drain, allowing water to leak or freeze. Heavy frost, an inaccessible drain, or recurring water can involve defrost, drainage, or sealed-system work beyond a safe user check.
-
Check 4
If the freezer has an ice maker or water dispenser, inspect only visible tubing, fittings, and the floor beneath the connection from a dry position. Check for a cracked line, loose visible connection, water appearing during a fill cycle, or no water-system feature at all; do not loosen a fitting or move the appliance to reach the back.
Expected result: Water is concentrated near the ice-maker supply or valve, visible tubing is damaged or wet, a connection leaks, or the leak is not related to a water-connected feature.
Next step: If a visible shutoff is safely accessible without approaching water or electrical hazards, stop the water feed according to the manual or installation instructions and arrange service. Do not tighten, disconnect, or replace a hidden line as a user test.
Stop if: Do not move the appliance, loosen tubing, touch wet electrical parts, or keep the water system operating after a cracked line or repeated connection leak is observed.
Why this matters
Why: A water line or connection can leak independently of the freezer cavity. When no ice maker or water connection is fitted, that branch is inapplicable and attention should return to door, drain, pan, condensation, or an external spill.
-
Check 5
Check whether the freezer is stable and correctly leveled, and whether the water is actually from the appliance. Look for a melting ice cube, spill, nearby plumbing, a full or displaced drip pan, cabinet tilt, or a door that fails to swing or seal normally; use leveling instructions only from the exact manual.
Expected result: The source is external, the cabinet is tipped or unstable, a pan is displaced, or the source remains beneath or behind the appliance.
Next step: Clean an external spill and correct only a clearly documented, stable leveling adjustment. For an inaccessible source, damaged pan, unstable cabinet, or persistent leak, keep the freezer closed and arrange service.
Stop if: Do not pull the freezer out, tip it, remove its door, or reach behind it alone to inspect a connection or drain.
Why this matters
Why: External spills and melting ice are commonly mistaken for freezer leaks. Level and drainage position affect where condensation reaches the pan, but an unstable or heavy appliance should not be tipped or moved by one person.
-
Check 6
Protect frozen food while the leak is being handled. Minimize door openings, check an appliance thermometer if available, and record whether packages remain hard frozen, contain ice crystals, or are soft or thawed. Follow the official frozen-food chart rather than judging safety by smell or taste.
Expected result: Food remains frozen or has ice crystals, or it is thawed, warm, contaminated by leak water, or the freezer cannot hold a safe temperature because the door or cooling system is compromised.
Next step: Move food to safe cold storage if needed, discard items identified as unsafe by FoodSafety.gov, keep the door closed, and arrange service for continued leakage or temperature loss.
Stop if: Do not taste questionable food, eat food exposed to contaminated water, or repeatedly open the freezer to monitor it.
Why this matters
Why: A closed full freezer retains a safe temperature longer, but food safety depends on temperature, ice crystals, and contamination—not odor alone. A leak that accompanies warming needs both food-safety action and appliance service.
-
Check 7
If the leak persists after the applicable door, surface frost, visible connection, external-source, and safe level checks, record the model, leak location, timing, water appearance, frost pattern, door-seal result, temperature, ice-maker status, and any electrical or cooling symptom. Arrange qualified freezer service.
Expected result: The source is recurrent or inaccessible, or the leak stopped after a simple external spill, obstruction, or manual-approved correction and the freezer remains cold.
Next step: Keep the freezer off or water supply isolated when safe for the persistent or hazardous outcome and provide the record to service. Monitor a resolved condition without removing panels or repeating risky tests.
Stop if: Stop user troubleshooting for water near energized parts, exposed wiring, damaged tubing, severe temperature rise, cabinet instability, or any need to open a sealed system.
Why this matters
Why: Recurring or inaccessible leakage can involve a defrost system, drain, pan, tubing, valve, gasket fit, or sealed cooling area. A resolved external spill or clear obstruction is a different outcome, but it should still be monitored.
Use your observations
Decision map
Find the observation that best matches what you see, then follow the next safe action.
-
PATH 01Safety boundary
What you see
Water is near the power cord, outlet, controls, wiring, or another electrical component.
Do this next
Stop use, avoid the water, isolate power only from a dry and safe position if possible, and arrange qualified service.
Why this path and its safety boundary
Safety stop: Continue with the door, drain, water-connection, and external-source checks.
-
PATH 02Safety boundary
What you see
The door is blocked, the gasket is dirty or displaced, or the paper pulls out easily around the seal.
Do this next
Remove only the obstruction, clean or reseat an intact gasket as the manual allows, and verify an even seal; service a damaged or persistently loose gasket.
Why this path and its safety boundary
Safety stop: Look for a defrost drain, drip pan, water connection, level, or external spill source.
-
PATH 03Safety boundary
What you see
Frost or debris is blocking an accessible drain, or heavy frost covers the drain or rear panel.
Do this next
Use only the exact manual's safe defrost or surface-cleaning procedure; arrange service for heavy, hidden, or recurring buildup.
Why this path and its safety boundary
Safety stop: Continue with the drip-pan, water-line, and external-source branches.
-
PATH 04Safety boundary
What you see
The freezer has an ice maker or water connection and water is concentrated at a visible line, fitting, or fill area.
Do this next
Stop the water feed only if the accessible control can be reached dry and safely, do not loosen fittings, and arrange qualified service.
Why this path and its safety boundary
Safety stop: If there is no water feature or no connection leak, return to door, drain, pan, and condensation checks.
-
PATH 05Safety boundary
What you see
The water is from a spill, melting ice outside the appliance, or a displaced visible pan rather than the freezer system.
Do this next
Clean the external source, restore the pan only as the manual permits, and monitor the dry appliance for recurrence.
Why this path and its safety boundary
Safety stop: Treat the source as an appliance leak and arrange service if it cannot be located safely.
-
PATH 06Safety boundary
What you see
Food is soft or thawed, contaminated by leak water, or the freezer temperature is rising.
Do this next
Keep the door closed, move food to safe cold storage, and follow FoodSafety.gov temperature and ice-crystal guidance; do not taste food.
Why this path and its safety boundary
Safety stop: Continue protecting the closed freezer while the leak is corrected.
-
PATH 07Safety boundary
What you see
Leakage recurs after safe external checks or requires a panel, door, tubing, drain, defrost, or sealed-system intervention.
Do this next
Stop user troubleshooting and arrange qualified freezer service with the location, timing, seal result, frost pattern, temperature, and water-feature details.
Why this path and its safety boundary
Safety stop: Document the resolved obstruction or spill and monitor closure, frost, and temperature during normal use.
Helpful context
Understand the symptom
Water location and timing narrow the fault. Water along the door or floor after frost suggests a seal or defrost path; water behind the unit suggests a supply line, drain, or connection when the appliance has an ice maker; water that appears only after filling a tray may come from a spill or external source. Photographing the location from a dry, safe position can help service without repeated door openings.
A freezer should not be treated like a plumbing fixture. The exact model manual determines whether a drain, pan, filter, or ice-maker connection is user-accessible. Do not loosen fittings, remove metal panels, move the appliance to inspect tubing, or use a knife, chisel, heat gun, or hair dryer to clear ice.
Protect food while you diagnose. Keep the door closed as much as possible, check an appliance thermometer if available, and use official food-safety guidance for ice crystals and temperature. Never taste food to decide whether it is safe, and discard food exposed to contaminated water or identified as unsafe by the official chart.
When checks do not resolve it
Need a professional?
Provide the freezer style and model, exact leak location, timing and amount, water-system or ice-maker status, door-seal paper result, frost pattern, drip-pan observations, temperature, food condition, and any wet electrical or structural symptom.
Have this ready
- Have photos taken from a dry, safe position, the model information, recent defrost or installation history, and the safe checks already completed ready for the service provider.
Common questions
FAQ
Why is my freezer leaking water?
Locate the water first. Common paths include a door or gasket gap, frost and a blocked defrost drain, a drip pan, an ice-maker supply connection, condensation from leveling, or a spill outside the appliance. Keep the door closed and arrange service for recurring or inaccessible leakage.
Can a freezer door seal cause water on the floor?
Yes. A gap lets warm moist air in, which can create frost and condensation that later melts. Remove packages, clean and reseat an intact gasket as the manual allows, and use a paper test. A torn gasket or a persistent gap needs service.
How do I clear a frozen freezer drain?
Use only the exact model manual's safe defrost and drain procedure. Do not chip ice, use a knife or direct heat, remove hidden panels, or pour water near electrical parts. Heavy, inaccessible, or recurring frost and drainage problems should be serviced.
What if the leak is from the freezer ice-maker line?
From a dry, safe position, look for water at visible tubing or connection points without moving the appliance or loosening fittings. If a line is cracked or a connection repeatedly leaks, stop the water feed only if safely accessible under the manual and arrange qualified service.
Should I unplug a freezer that is leaking?
If water is near the cord, outlet, controls, or wiring, avoid the water and isolate power only from a dry, safe position if possible; arrange service. Do not touch wet electrical parts or stand in water. If the leak is safely away from electricity, keep the door closed and follow the model-specific path.
Is frozen food safe after a freezer leak?
Keep the door closed and check an appliance thermometer or whether food still has ice crystals. Follow FoodSafety.gov guidance, discard contaminated or unsafe food, and never taste food to determine safety. A leak with rising temperature requires prompt service.
Read the exact guide
Official sources
- What should I do if I suspect my Samsung fridge/freezer is leaking water?Samsung Support · Official Samsung guidance used for general freezer leak mechanisms; exact model instructions control.
- Food Safety During Power OutageFoodSafety.gov · Government food-safety guidance relevant when a freezer leak, open door, or temperature loss may have warmed food.
- Where to Check if Ice Maker is Leaking WaterWhirlpool Product Help · Official ice-maker guidance used only when a freezer or connected appliance has a water supply; exact model instructions control.
- Door is Not Sealing - Forming Frost - Upright FreezerWhirlpool Product Help · Official upright-freezer guidance used for the paper test; chest and drawer models may differ.
- Checking for Items Preventing Door or Lid ClosureWhirlpool Product Help · Official general freezer guidance used for door and frost mechanisms; exact model instructions control.
Community feedback
Share a repair observation
Share a plain-text repair observation. Accepted observations are published automatically; this page may take a moment to update.