
On this page
Start here
Quick answer
Start by separating a cycle or load issue from a heat or airflow fault. Clean and fully dry the lint screen, use a suitable heated or automatic cycle, avoid packing the drum, and check that the vent path is not kinked, crushed, blocked, or venting weakly outside. Maytag also lists power, gas supply on gas models, door latch, level, moisture sensors, and the dryness setting as relevant checks. Warm but damp clothes usually point toward restricted airflow, a load or sensor issue, or insufficient heat. Stop immediately for a burning or gas smell, smoke, sparks, abnormal heat, a damaged cord, or a tripped breaker; leave internal heating, gas, electrical, and chassis work to a qualified professional.
Before you begin
Safety first
- Do not use a Maytag dryer with smoke, burning or gas odor, sparks, abnormal heat, damaged wiring, repeated breaker trips, weak exhaust, or no heat until qualified service has assessed it.
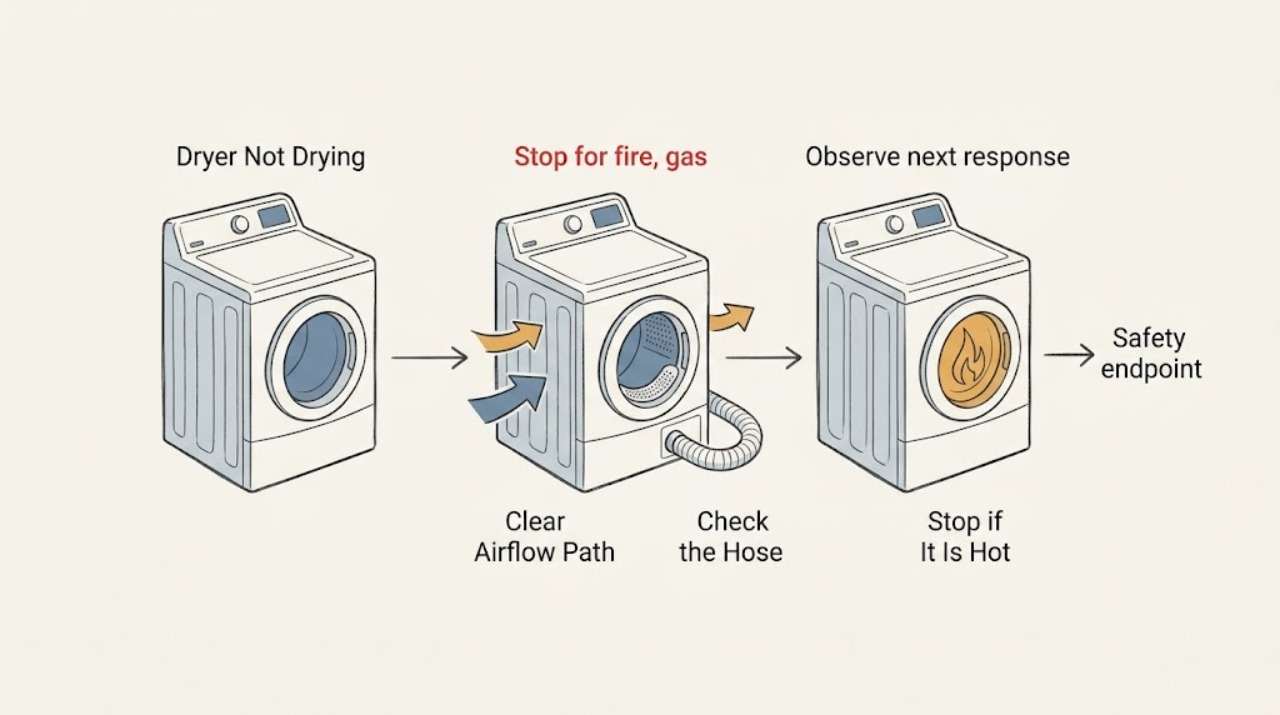
Work through in order
Diagnostic checks
Use only checks that match the exact appliance or system and its official guide.
-
Stop for fire, gas, or electrical warning signs
Before touching the load or vent, stop the dryer if you notice a burning or gas smell, smoke, sparks, scorching, unusual heat, a damaged cord or plug, or a repeated breaker trip. From a dry, safe position, turn it off and isolate power or gas only when that can be done without touching a hazard; do not open the cabinet or keep running it to see whether it dries.
Expected result: No warning sign is present and the dryer is cool enough for low-risk external checks, or a warning sign remains or has occurred.
Next step: Continue only if there is no warning sign. For any warning sign, leave the appliance isolated and arrange qualified appliance/electrical service; for gas odor or fire, follow the local gas or emergency route.
Why this matters
Why: A no-dry symptom can be caused by airflow or settings, but heat, gas, smoke, sparks, or electrical damage can indicate a fire, combustion, or supply fault that ordinary users should not diagnose internally.
-
Check the lint screen and its airflow surface
Remove the lint screen when the dryer is off and cool. Clear lint, then check for a film of detergent or fabric-softener residue that can block airflow. Wash the screen only as Maytag describes for the model, brush gently if needed, rinse, and dry it completely before reinstalling; never operate without the screen.
Expected result: The screen is visibly blocked, coated with residue, damaged or wet, or it is clean, dry, and intact.
Next step: If the screen was blocked, clean it and reassess the same load type using a suitable cycle only if no safety warning exists. If it is clean or the problem persists, inspect the accessible vent path next rather than replacing an internal part.
Why this matters
Why: A blocked or coated screen can lengthen drying and reduce airflow even when lint is not obvious. A clean, dry screen shifts attention to the vent path, load, cycle, sensor, or heat source.
-
Inspect the vent hose and outside exhaust
Unplug or otherwise isolate the dryer before inspecting the rear hose. Look for kinks, crushing, excessive bends, lint at the dryer or wall connection, and flexible plastic or foil ducting where the installation instructions call for rigid or semi-rigid metal. From outside, observe whether the exhaust flap opens and whether air movement is strong during a normal, safe operation only if there are no hazard signs.
Expected result: The hose is restricted, the outside flap barely moves, lint or debris blocks the path, the laundry room becomes unusually hot or humid, or airflow is strong and the path appears clear.
Next step: Clear only accessible lint and restore the vent according to the model installation instructions; arrange professional vent cleaning for a long, hidden, roof, or obstructed run. If the outside airflow remains weak or the dryer overheats, stop using it and arrange service.
Why this matters
Why: Restricted airflow can leave clothes warm but damp and allow heat to build up. Strong airflow with no restriction makes a load, cycle, sensor, heating, or supply issue more likely, but does not prove the internal system is sound.
-
Match the load to the selected cycle
Check that the load is not tightly packed, that similar fabric weights are grouped, and that bulky items can tumble and be repositioned. Compare the selected cycle with the model manual: air-only or low-heat cycles will not dry like a heated cycle, sensor cycles may end at their chosen dryness level, and timed or heavier cycles may suit different loads.
Expected result: The drum is overloaded or mixed, the washer left the load very wet, an air-only/low-heat or unsuitable cycle is selected, or the load and cycle are appropriate.
Next step: Correct one load or cycle variable at a time and compare results without repeatedly running an overheating or abnormal dryer. If suitable loads remain damp, continue with level/sensor and heat observations.
Why this matters
Why: Poor tumbling, excess water entering the dryer, or an intentional low-heat/air cycle can look like a dryer fault. A suitable load and cycle with continued dampness points back to airflow, heat, sensors, or service.
-
Check level, door closure, and moisture-sensor contact
With the dryer off, check that the door closes and latches, the cabinet is stable and level, and no item blocks the door seal or drum. For automatic cycles, use the model instructions to identify the moisture-sensor area and keep it free of residue; do not bypass the door switch or open the cabinet.
Expected result: The door does not latch, the dryer rocks, the sensor area is coated, or the door, level, and accessible sensor area appear normal.
Next step: Correct only a clearly accessible loading, leveling, or cleaning issue supported by the manual. If a door switch, sensor, or mechanical problem remains, arrange service instead of bypassing it.
Why this matters
Why: A door or level problem can stop proper operation or prevent clothes from contacting automatic-cycle sensors. Residue can change sensor readings and cause a cycle to finish with damp items; normal external checks move the diagnosis toward airflow or heating.
-
Check the supply without performing internal electrical or gas tests
From outside the appliance, note whether the controls and drum respond, whether the dedicated breaker has tripped, and whether a gas-model supply valve is open as indicated by the installation and appliance instructions. Do not reset a breaker repeatedly, touch a gas connection, or use a live meter test.
Expected result: The dryer is completely dead, the breaker trips again, the gas model has no confirmed supply, the controls run but there is no heat, or the supply appears normal.
Next step: For repeated trips, damaged supply parts, an unresolved gas supply issue, or a running-but-cold dryer, stop using it and arrange qualified electrical, gas, or appliance service. Do not open the cabinet to identify the failed component.
Why this matters
Why: No response can be a supply or control issue; repeated trips can indicate an electrical fault. A running drum with no heat can involve the heating element, thermal control, ignition, gas valve, or other internal parts, not just the lint screen.
-
Use a safe heat and exhaust observation only when no hazard exists
If the screen, load, door, cycle, supply, and vent appear normal and there has been no warning sign, follow Maytag's model-specific guidance for a brief heated-cycle check. Observe whether the drum warms and whether air exits outside; do not place hands near the exhaust, run with a disconnected vent as a workaround, or continue if the dryer becomes unusually hot.
Expected result: The dryer produces expected warmth with strong outside exhaust, produces little or no warmth, or becomes unusually hot, smoky, odorous, noisy, or electrically unstable.
Next step: Stop immediately for excessive heat or any odor, smoke, spark, or trip. For no heat or persistent poor heat, keep the dryer off and arrange qualified service; do not replace an element, igniter, fuse, or gas part based only on this observation.
Why this matters
Why: Warm air with weak exhaust points to restriction. Little or no heat with adequate airflow suggests a heating, ignition, gas, control, or supply fault. Excessive heat or any warning sign raises a fire-safety concern.
-
Decide when the drying fault needs service
Gather the Maytag model and serial information, cycle used, load type, whether clothes were warm or cool, lint-screen and vent results, outside airflow, door/sensor observations, and any error or warning. Do not keep repeating cycles to prove a fault.
Expected result: A suitable load dries after a safe accessible correction, or dampness remains, the dryer does not heat, an error appears, airflow is weak, or an unusual sound or safety symptom continues.
Next step: Keep the dryer out of service for unresolved or hazardous symptoms and schedule Maytag or qualified appliance/vent service. Provide the notes so the technician can start with the correct model and system.
Why this matters
Why: A repeatable no-dry result after basic airflow and cycle checks needs a professional diagnosis of the heating, motor, sensor, control, gas, or vent system. Maytag specifically recommends service when long dry times persist, the dryer does not heat, an error appears, or unusual noises occur.
Use your observations
Decision map
Find the observation that best matches what you see, then follow the next safe action.
-
PATH 01Safety boundary
What you see
Burning or gas smell, smoke, sparks, abnormal heat, damaged cord, or repeated breaker trip is present
Do this next
Stop immediately, isolate the dryer from a dry safe position if possible, and arrange qualified electrical/appliance service; for gas odor or fire, follow the local emergency and gas-safety route.
Why this path and its safety boundary
Safety stop: Do not restart, reset repeatedly, open the cabinet, or continue drying the load.
-
PATH 02Safety boundary
What you see
The lint screen is blocked, wet, coated, or damaged
Do this next
Clean and dry it using the Maytag instructions, reinstall it correctly, and reassess only with a safe load and cycle.
Why this path and its safety boundary
Safety stop: Do not operate without the screen or use a damaged screen as a temporary workaround.
-
PATH 03Safety boundary
What you see
The dryer heats but the load is warm and damp and outside airflow is weak
Do this next
Stop if overheating is present; otherwise isolate and clear only accessible restrictions, then arrange professional vent cleaning for hidden or persistent blockage.
Why this path and its safety boundary
Safety stop: Do not continue operating a dryer with weak exhaust, excessive heat, or a blocked hidden vent.
-
PATH 04Safety boundary
What you see
The load is tightly packed, mixed in fabric weight, unusually wet from the washer, or on an air-only/low-heat cycle
Do this next
Use a suitable load and model-supported cycle, changing one variable at a time; escalate if an appropriate load remains damp.
Why this path and its safety boundary
Safety stop: Do not use repeated cycles to compensate for overheating or an abnormal smell.
-
PATH 05Safety boundary
What you see
The door does not latch, the cabinet is not level, or the automatic-cycle sensor area is contaminated
Do this next
Correct only the accessible condition described by the owner's manual, then reassess safely.
Why this path and its safety boundary
Safety stop: Do not bypass the door switch, force the latch, or open the cabinet to reach a sensor.
-
PATH 06Safety boundary
What you see
The drum runs but there is little or no heat with adequate outside airflow
Do this next
Keep the dryer off and arrange qualified Maytag appliance service for the heating, control, ignition, or gas path.
Why this path and its safety boundary
Safety stop: Do not test live components or replace an element, igniter, fuse, or gas part based on symptoms alone.
-
PATH 07Safety boundary
What you see
The dryer is completely dead or the supply repeatedly trips
Do this next
Keep the circuit off and arrange qualified electrical/appliance diagnosis; provide the model and the supply behavior.
Why this path and its safety boundary
Safety stop: Do not repeatedly reset a breaker or use an adapter or extension lead as a workaround.
-
PATH 08Safety boundary
What you see
Basic lint, load, cycle, sensor, door, and vent checks are normal but clothes remain damp
Do this next
Schedule Maytag or qualified appliance/vent service and report whether the clothes are warm or cool, the model, cycle, and vent observations.
Why this path and its safety boundary
Safety stop: Do not keep running cycles to prove the problem or ignore a worsening heat, odor, noise, or cooling symptom.
Helpful context
Understand the symptom
Use the clothes and heat pattern as evidence
A Maytag dryer can tumble normally and still leave clothing damp. Warm damp clothes with weak outside exhaust often indicate restricted airflow; cool damp clothes point more toward the selected cycle, power or gas supply, a heating system, or a control fault. Sensor cycles can end when the sensor sees the target dryness even though thick seams or pockets remain damp. Mixed loads, a tightly packed drum, and a washer leaving clothes unusually wet can also extend the result.
Airflow is both a performance and fire-safety check
Maytag's product-help guidance treats a restricted vent as a leading cause of long dry times and points to kinks, crushing, lint at the hose or wall connection, and weak air movement at the outside hood. The CPSC likewise warns that blocked lint paths can raise dryer temperatures. Inspect and clean only the accessible lint screen and vent parts permitted by the installation instructions; internal chassis lint and any electrical or gas fault need qualified service.
Gas and electric Maytag dryers share airflow checks but not heating diagnosis
Maytag's guidance calls for checking the gas valve on gas models and the supply circuit on electric models, while keeping the internal heating diagnosis professional. Do not remove a burner, open the cabinet, probe a live circuit, bypass a thermal safety device, or use a dryer with a damaged cord. A gas smell, smoke, sparks, or abnormal heat changes the answer from troubleshooting to immediate shutdown and the appropriate emergency or qualified-service route.
Only after diagnosis
Potential parts
- heating element or thermal control
Only consider these parts after a qualified diagnosis confirms an electric dryer has a heating-path fault and rules out the supply, airflow, controls, and safety devices.
Confirm the complete Maytag model and electrical specification before ordering; do not access or test the heating circuit yourself. - gas igniter or gas valve component
Only relevant if a licensed gas or appliance professional confirms a heating fault in a gas model and identifies the exact failed component.
Gas components require model-specific identification and qualified installation; do not remove or bypass the burner or ignition system. - moisture sensor or control component
Only relevant when automatic cycles end early or read dryness incorrectly after the lint, load, cycle, level, and vent checks are correct and service confirms a sensor/control fault.
Confirm the full model and control revision with Maytag or the technician; a sensor part is not a substitute for correcting restricted airflow.
When checks do not resolve it
Need a professional?
Provide the model and serial information, cycle and load, whether clothes were warm or cool, lint-screen and vent results, outside airflow, door and sensor observations, error codes, and any odor, smoke, spark, heat, or electrical symptoms.
Safety scope: Do not use a Maytag dryer with smoke, burning or gas odor, sparks, abnormal heat, damaged wiring, repeated breaker trips, weak exhaust, or no heat until qualified service has assessed it.
Common questions
FAQ
Why is my Maytag dryer warm but leaving clothes damp?
Check the lint screen, vent hose, wall connection, outside exhaust, load size, and cycle. Warm damp clothing with weak exhaust often indicates restricted airflow; if airflow is strong, check the cycle, sensor, and load, then arrange service if the problem persists.
Can a Maytag sensor cycle stop before everything is dry?
Yes. Automatic cycles can stop at their selected dryness level, and thick seams or pockets may remain damp. Use the model manual to check the dryness setting and load, but do not ignore a persistent no-dry result after the vent and load checks.
How do I know if the dryer vent is causing long drying times?
Look for a kinked or crushed hose, lint at the connections, a laundry area that becomes hot or humid, or weak air at the outside hood. Isolate the dryer before inspecting the rear; use professional vent cleaning for hidden or persistent restrictions.
What if my Maytag dryer has no heat?
First distinguish an unsuitable air-only cycle from a true no-heat symptom. If an appropriate cycle runs with adequate airflow but produces little or no heat, keep the dryer off and arrange qualified service for the heating, control, ignition, gas, or supply path; do not open the cabinet.
Read the exact guide
Official sources
- Why is My Dryer Not Drying? Troubleshooting GuideMaytag · Maytag dryer lint, vent material and routing, heating element, load, sensor, and drying-cycle guidance
- Dryer is not Drying or Experiencing Long Dry TimesMaytag Product Help · Maytag dryer drying performance, airflow, cycle, load, power/gas, and service guidance
- CPSC Publication 5022 - Overheated Clothes Dryers Safety AlertU.S. Consumer Product Safety Commission · Household clothes-dryer lint, exhaust restriction, overheating, and fire prevention
- Not DryingMaytag Product Help · Maytag dryer lint screen, exhaust airflow, cycle, level, moisture-sensor, and service checks
Community feedback
Share a repair observation
Share a plain-text repair observation. Accepted observations are published automatically; this page may take a moment to update.