
On this page
Start here
Quick answer
A GE dryer that leaves clothes damp may be using a cool or low-dry setting, overloaded or poorly sorted, receiving clothes that are too wet from the washer, or losing airflow through a kinked, crushed, dirty, or blocked vent. A lint filter, sensor-dry load, power supply, gas supply, heating system, or condenser can also affect drying. Start with a correct dry cycle and manageable load, clean the lint filter, inspect the vent and outside hood, and check only safe user-accessible power or gas conditions. Unplug before maintenance or vent cleaning; never operate a gas dryer without its vent, and stop for smoke, burning smell, unusual heat, damaged wiring, gas odor, or a lint-fire concern. If airflow, load, cycle, and safe supply checks do not restore drying, arrange qualified service.
Work through in order
Diagnostic checks
Use only checks that match the exact appliance or system and its official guide.
-
Check 1
Stop the current cycle and check for smoke, a burning smell, an unusually hot cabinet or door, sparks, a damaged cord or plug, visible lint at a hot area, or a gas odor on a gas model. Keep the door closed if heat or smoke is escaping and do not continue testing a dryer with damaged power or gas parts.
Expected result: A fire, gas, electrical, or severe-heat hazard is present, or the dryer is intact and safe to inspect while cool enough to handle.
Next step: If a hazard is present, stop using the dryer, leave the area or avoid switches where gas may be present, and contact the appropriate emergency or qualified appliance service provider. If no hazard is present, continue with the cycle and load check.
Why this matters
Why: A lint, gas, or electrical hazard takes priority over finding the reason for damp clothes. Repeated operation can add heat and fuel to a dangerous condition.
-
Check 2
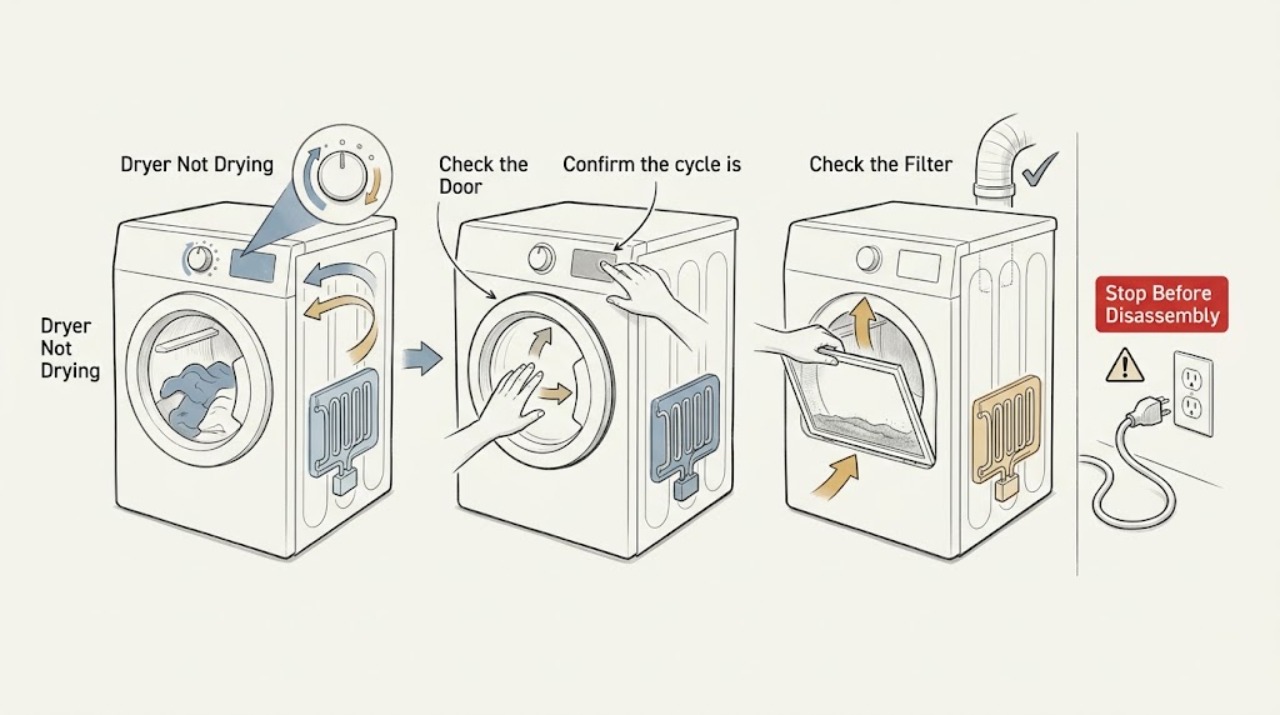
Confirm the cycle is a dry cycle with the intended fabric and temperature setting, not fluff, air, or cool-down. Match the load to the selected cycle, separate heavy items from light fabrics, and avoid combining multiple wash loads. If the washer leaves clothes unusually wet, note its spin result separately.
Expected result: The dryer was on a non-heating or unsuitable cycle, the load is too large or mixed, or the settings and load are appropriate but clothes remain damp.
Next step: Choose the model-supported dry cycle and a suitable load, then monitor one cycle. If clothes still exit damp, continue with the lint and airflow check; if they arrive dripping from the washer, investigate the washer spin or request service for that appliance.
Why this matters
Why: Cycle, fabric, load size, and incoming moisture all change drying time. A correction here can solve damp clothes without a heater fault; a suitable load that remains damp moves the diagnosis to airflow, sensors, and heat.
-
Check 3
With the dryer stopped and disconnected before cleaning, remove and clean the lint filter according to the model instructions. Inspect the filter area and accessible duct for lint buildup, and check the outside exhaust hood or damper from outside for a free opening. Do not reach into the blower or remove panels.
Expected result: The filter or vent is dirty, kinked, crushed, blocked, or the outside hood has weak airflow, or the accessible airflow path is clean and open.
Next step: Clean the filter and accessible duct using the model's safe procedure and correct only a visible kink or obstruction. Arrange professional duct cleaning when the restriction is inside the wall or hood; then continue only if the dryer is safe.
Why this matters
Why: Restricted airflow traps moisture and heat, lengthens drying time, and can allow lint to build up. A clean path makes a cycle, load, power, gas, or internal heating fault more likely.
-
Check 4
Identify whether the dryer is vented or ventless. For a vented model, confirm the front air intake is not blocked and the duct material and routing match the installation instructions. For a ventless condenser model, clean the lint trap and the model-specified sensor bars or condenser only when the appliance is disconnected and cool.
Expected result: The dryer has an obstructed intake or vent, a dirty condenser or sensor area, or the model-specific airflow path is clear.
Next step: Correct only the user-maintainable airflow or condenser condition described by the model guide. If the dryer becomes very hot, shows a vent alert, or the condition returns, stop use and arrange service.
Why this matters
Why: Vented dryers must exhaust hot, moist air, while condenser models collect moisture internally. Applying a vented test to a condenser unit or opening an internal compartment not covered by the manual can create a new problem.
-
Check 5
If the dryer tumbles but does not produce heat, use the correct supply branch without opening the machine. For an electric model, verify the intended dedicated supply and use only the model-directed breaker procedure; for a gas model, confirm only that the accessible gas shutoff is open after a new installation and that the cycle is not air or cool-down. Do not inspect terminals, heating elements, igniters, or gas valves yourself.
Expected result: The supply was interrupted or the cycle was wrong and heat returns, or the dryer runs with correct settings and supply but remains cold.
Next step: If supply or settings were corrected, monitor one safe cycle. If the dryer remains cold, stop repeated starts and arrange qualified electrical, gas, or appliance service.
Why this matters
Why: GE notes that an electric dryer can tumble with incomplete supply and not heat, while a gas dryer needs its gas supply on and the correct dry cycle. Persistent no-heat operation points to a service diagnosis.
-
Check 6
After the cycle, load, filter, airflow, and safe supply checks, run one attended model-supported test with a suitable load. Observe whether air is warm, moisture is leaving through the vent when applicable, the cabinet stays at normal operating temperature, and clothes become progressively drier. Stop immediately for smoke, burning smell, gas odor, abnormal heat, or a new error.
Expected result: Drying improves after a specific correction, or clothes remain damp with normal settings and airflow, no heat, repeated shutdown, a vent alert, or abnormal heat.
Next step: If normal, keep the filter and vent maintained and use model-appropriate loads. If the failure persists or any hazard appears, stop using the dryer and request qualified service with the model and checks completed.
Why this matters
Why: Improvement after a load, cycle, filter, vent, condenser, or supply correction identifies that branch as the leading cause. Continued failure suggests an internal heater, igniter, thermostat, sensor, motor, control, or airflow diagnosis.
Use your observations
Decision map
Find the observation that best matches what you see, then follow the next safe action.
-
PATH 01Next step
What you see
Clothes are damp because the cycle, fabric setting, load size, sorting, or washer spin result is unsuitable
Do this next
Use the model-supported dry cycle and an appropriate load, and correct excessive incoming moisture at the washer before diagnosing the dryer heater.
-
PATH 02Next step
What you see
The lint filter, duct, hood, or vent alert indicates restricted airflow
Do this next
Disconnect the dryer before cleaning the user-accessible filter and duct, clear safe obstructions, and arrange professional duct cleaning for concealed restrictions. Never run a gas dryer without its vent.
-
PATH 03Next step
What you see
A ventless condenser dryer has a dirty lint trap, sensor area, or condenser
Do this next
Follow the exact model maintenance procedure while cool and disconnected. Do not apply a vented-dryer duct test to a condenser model.
-
PATH 04Next step
What you see
An electric dryer tumbles but remains cold and the correct supply and cycle are confirmed
Do this next
Stop repeated starts and arrange qualified electrical or appliance service. Do not remove the terminal-block cover or inspect live wiring.
-
PATH 05Next step
What you see
A gas dryer runs without heat after the dry cycle and accessible gas supply are confirmed
Do this next
Stop testing and arrange qualified gas or appliance service. Do not open the gas valve assembly or operate a gas dryer without its vent.
-
PATH 06Next step
What you see
Smoke, burning smell, gas odor, abnormal heat, sparks, damaged power parts, or heavy lint buildup is present
Do this next
Stop using the dryer immediately, avoid switches where gas may be present, isolate power or gas only when safe, and contact the appropriate emergency or qualified service provider.
Helpful context
Understand the symptom
Separate damp-load causes from a no-heat fault
A dryer may tumble normally while clothes remain damp because the selected cycle is cool or less-dry, the load is too large or mixed, the washer left excess water, or exhaust airflow is restricted. If the drum is running but there is no warmth at all, use the electric or gas branch for the model. If the dryer is hot and slow, prioritize airflow and lint safety before repeated cycles.
Airflow is both a performance and fire-safety check
The exhaust carries hot, moist air and lint out of a vented dryer. A kinked or restricted duct can leave heat and humidity in the drum, increase drying time, and allow lint to accumulate. Clean the lint filter and inspect accessible duct and hood areas with the dryer disconnected; do not defeat a vent or run a gas model without it.
Use model instructions for condenser and electrical work
Ventless condenser dryers use a different moisture path and may need a clean lint trap, sensor bars, and condenser rather than an exhaust-duct test. Electric and gas dryers also have different supply and heating checks. Keep internal terminals, heating parts, gas valves, and wiring closed to qualified service.
Only after diagnosis
Potential parts
- exhaust duct, hood, or lint-filter component
Consider this category only when a qualified duct or appliance professional confirms a damaged or incompatible airflow component after cleaning and installation checks.
Duct routing and filter parts vary by model and installation. Do not use plastic flexible venting or bypass a vent restriction. - electric heating element or thermal safety component
Consider this category only after qualified service confirms an internal heating or thermal fault with correct cycle, airflow, and electrical supply.
Heating and thermal parts are model-specific and mains-connected. Do not open the cabinet or perform live tests. - gas igniter, valve, or flame-sensing component
Consider this category only after qualified gas-appliance service confirms an ignition or gas-heating fault after cycle, airflow, and gas-supply checks.
Gas components are safety-critical and model-specific. Do not test, adjust, or replace the gas circuit from a no-heat symptom alone.
When checks do not resolve it
Need a professional?
Stop and seek professional help for smoke, burning smell, gas odor, sparks, damaged cord or wiring, abnormal cabinet heat, heavy lint buildup, a blocked vent that cannot be safely cleared, persistent no-heat operation, or damp clothes after safe cycle, load, airflow, condenser, and supply checks.
Have this ready
- Provide the full model identity, vented or ventless type, gas or electric type, cycle and load, incoming washer moisture, lint-filter and vent result, outside airflow, condenser or sensor maintenance if applicable, supply observations, errors, and the exact symptom during a safe test. Do not remove covers or run a gas dryer without its vent.
Common questions
FAQ
Why is my GE dryer not drying clothes?
Check the dry cycle, load size and sorting, lint filter, exhaust airflow, and whether clothes entered the dryer unusually wet. Then separate electric and gas no-heat checks. Persistent damp loads or no heat require qualified service.
Can a blocked vent make a GE dryer stop drying?
Yes. Restricted airflow traps hot, moist air, increases drying time, and can create a lint-safety concern. Disconnect before cleaning the accessible filter or duct, inspect the outside hood, and never operate a gas dryer without its vent.
What if my GE dryer tumbles but does not heat?
Use the correct dry cycle, then check only the safe model-specific electric supply or accessible gas-supply condition. If an electric dryer still has no heat or a gas dryer runs without heat, stop testing and arrange qualified service.
When should I stop troubleshooting a GE dryer that is not drying?
Stop for smoke, burning smell, gas odor, sparks, damaged wiring, abnormal heat, heavy lint, or a vent restriction that cannot be safely cleared. Also stop repeated cycles when safe cycle, load, airflow, condenser, and supply checks do not restore drying.
Read the exact guide
Official sources
- Gas Dryer - Ignition SystemsGE Appliances Support · GE gas dryer automatic ignition and safety relationship between igniter, sensor, valve, and gas release
- Ventless Condenser Dryer - How to Maintain Optimum PerformanceGE Appliances Support · GE ventless condenser dryers; lint trap, sensor bars, condenser, loading, location, and model-manual guidance
- Dryer - Check Vent Sensor AlertGE Appliances Support · GE dryer low-airflow alert, heat and humidity retention, lint risk, and user vent-cleaning steps
- Electric Dryer - Runs But Does Not HeatGE Appliances Support · GE electric dryers; electrical supply, cycle, airflow, and service boundary for no-heat symptoms
- Gas Dryer - Runs But Does Not HeatGE Appliances Support · GE gas dryers; dry-cycle selection, airflow, dedicated outlet, gas line, and service boundary
- Dryer - Cycle Dry TimesGE Appliances Support · GE dryer cycle time factors including heat type, load, fabric, incoming moisture, cycle, and exhaust condition
- Dryer - Things To Check For A Venting IssueGE Appliances Support · GE dryer exhaust routing, airflow, hood, installation, location, and gas-dryer vent safety
- Dryer - Taking Too Long To Dry Clothes or Not Drying at AllGE Appliances Support · GE dryers; venting, lint filter, load, cycle, washer moisture, leveling, and service checks for poor drying
Community feedback
Share a repair observation
Share a plain-text repair observation. Accepted observations are published automatically; this page may take a moment to update.