
On this page
Start here
Quick answer
First separate a washer-dryer that is not heating from one that is heating but leaving clothes damp. Check that the selected program actually includes heat, the load is not tightly packed or mixed with heavy items, the lint screen is clean, the door is latched, and the appliance is level if its drying system uses moisture sensors. On vented designs, inspect the accessible exhaust path and outside hood for weak airflow, kinks, crushing, or lint; do not dismantle the duct. A short, model-approved heated test with an empty drum can show whether heat is present, but do not touch exposed parts or continue if there is smoke, burning odor, abnormal heat, or electrical damage. If the dryer section still does not heat, an AF or Check Vent indication remains, or drying stays poor after these checks, arrange qualified Maytag service. [Source: maytag-not-drying; maytag-long-dry; maytag-not-heating; maytag-not-starting]
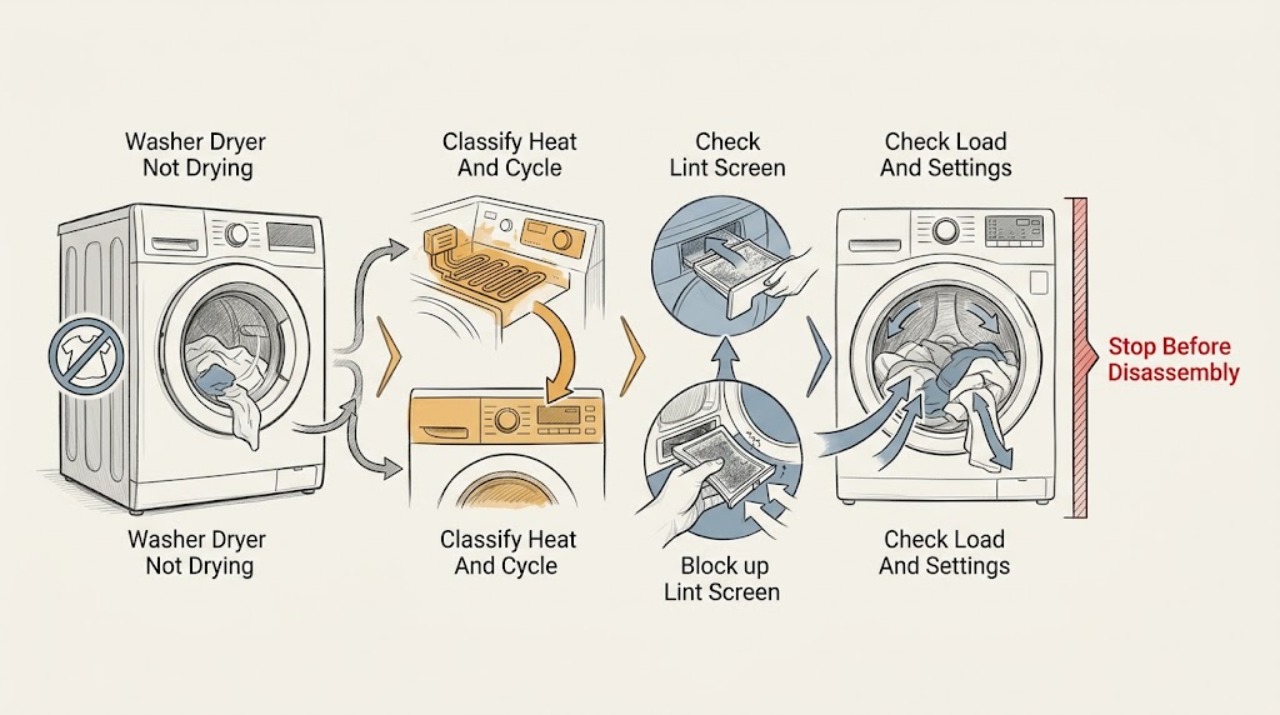
Work through in order
Diagnostic checks
Use only checks that match the exact appliance or system and its official guide.
-
Check 1
Run the drying section only on a model-approved heated cycle or timed dry setting, not an air-only or fluff option. Note whether the drum tumbles, whether the load is warm, and whether the display shows a vent, heat, or control message.
Expected result: A cold load points toward a heat, power, gas-supply, or control branch. A warm but damp load points more toward airflow, load, cycle, sensing, or moisture-removal conditions.
Next step: Record the selected cycle and result. Continue with lint and load checks if heat is present; arrange service if the dryer section remains cold after the safe external checks.
Why this matters
Why: Maytag distinguishes cycles that add heat from air-only options and directs no-heat symptoms to a separate heating check; a cycle name alone does not prove that the dryer section is heating.
-
Check 2
With the drying section off, remove lint from the accessible screen and inspect it for a film or residue from softener products. If the model guide permits washing the screen, clean it with the recommended method and dry it fully before reinstalling.
Expected result: A screen covered with lint or residue can restrict airflow and lengthen drying. A clean, correctly seated screen shifts attention to the load, vent, heat, or sensing system.
Next step: Reinstall the screen and perform a supervised model-approved drying check. Do not operate the appliance with a missing or damaged screen.
Why this matters
Why: Maytag identifies blocked lint screens and residue as causes of longer drying or damp results; the screen is an accessible maintenance point, not evidence of a failed heater.
-
Check 3
Use a load that can tumble freely and group similar fabrics. Check that the selected dryness level, cycle, and options match the load; avoid treating an air-only, delicate, Eco, or static-reduction option as a maximum-heat test.
Expected result: If a smaller, evenly distributed, like-fabric load dries normally, overloading, mixed fabric weight, cycle choice, or an option may have caused the earlier result. If the same load remains damp, continue to airflow and heat checks.
Next step: Use the model manual for cycle and option behavior. If a normal load on a suitable heated cycle remains damp, document the result for service.
Why this matters
Why: Maytag notes that load size, fabric mix, bulky items, cycle type, EcoBoost, and Static Reduce can change drying time or leave wet spots without proving a component failure.
-
Check 4
If the Maytag washer-dryer has an exhaust vent, inspect the visible hose for kinks or crushing and check the outside hood for lint or an obstruction. During a safe supervised operation, observe whether outside airflow is weak and whether the laundry area becomes unusually humid or hot.
Expected result: Warm, damp loads with weak outside airflow suggest a restricted vent path. A clear hose and strong exhaust make a vent restriction less likely, but do not rule out a model-specific internal drying fault. Ventless designs require the manual's own airflow or condenser checks instead.
Next step: Clean only accessible lint and obstruction as directed. Do not disconnect a gas dryer or modify a vent path to keep testing; arrange qualified vent or appliance service if airflow remains poor.
Why this matters
Why: Maytag describes restricted ventilation as a leading reason for long drying times and recommends professional vent inspection when the home duct remains obstructed.
-
Check 5
If the drying system uses automatic or moisture-sensing cycles, check the appliance's level and whether the load is making normal contact with the sensing area. Follow the owner's manual for any leveling adjustment; do not remove cabinet panels.
Expected result: An out-of-level appliance or load that does not contact the sensor can end with damp areas or an inaccurate automatic result. If timed drying also fails with heat and airflow present, sensing alone is unlikely to explain the problem.
Next step: Correct only the model-approved external leveling condition, then compare with a suitable timed or automatic cycle. Persistent poor drying needs service.
Why this matters
Why: Maytag states that leveling affects contact with moisture sensors during automatic cycles, while timed and automatic cycles use different controls.
-
Check 6
Decide whether the dryer section remains cold, the AF or Check Vent indication persists, the same load stays damp after correct setup, an error code appears, the appliance will not start or latch, or unusual noise or heat is present.
Expected result: A recurring no-heat, airflow warning, error code, or damp result after accessible checks means the problem is not resolved by cycle or load selection. Smoke, burning odor, electrical damage, or abnormal heat adds an immediate safety stop.
Next step: Leave the appliance off when a safety symptom is present and arrange qualified Maytag appliance or vent service. Provide the model, cycle, load, heat, airflow, and message observations.
Why this matters
Why: The remaining causes can include a heating element or gas system, sensor, control, fan, vent, condenser, latch, or wiring issue that cannot be safely identified from damp clothing alone.
Use your observations
Decision map
Find the observation that best matches what you see, then follow the next safe action.
-
PATH 01Safety boundary
What you see
The selected drying option is air-only, fluff, delicate, or another low-heat program.
Do this next
Use the model-approved heated or automatic cycle for the load and compare the result before diagnosing a part.
Why this path and its safety boundary
Safety stop: Continue by determining whether the heated cycle is actually producing warmth.
-
PATH 02Safety boundary
What you see
The load is tightly packed, heavily mixed, bulky, or too small for the selected sensing option.
Do this next
Redistribute or reduce the load, group similar fabrics, and use the cycle suited to the load according to the manual.
Why this path and its safety boundary
Safety stop: Continue with lint, airflow, sensing, and heat checks.
-
PATH 03Safety boundary
What you see
The lint screen is blocked or the vented model has weak outside airflow, a crushed hose, or a blocked hood.
Do this next
Stop and clear only the accessible lint or obstruction safely; use qualified vent service for the remaining duct path.
Why this path and its safety boundary
Safety stop: A clear screen and visible airflow make a heating, sensor, condenser, or control fault more likely when clothes remain damp.
-
PATH 04Safety boundary
What you see
The appliance uses automatic sensing and is not level or the load does not contact the sensing area normally.
Do this next
Follow the owner's manual for external leveling and load placement, then compare with a suitable cycle.
Why this path and its safety boundary
Safety stop: If both suitable automatic and timed drying remain poor, arrange service rather than changing parts by symptom.
-
PATH 05Safety boundary
What you see
The dryer section is cold, an AF or Check Vent message persists, an error code returns, or smoke, burning odor, unusual heat, electrical damage, or unusual noise appears.
Do this next
Stop using the appliance and arrange qualified Maytag appliance or vent service; use the appropriate emergency channel for fire, smoke, or an immediate electrical hazard.
Why this path and its safety boundary
Safety stop: Monitor the corrected cycle and follow the model manual's maintenance guidance.
Helpful context
Understand the symptom
Start by deciding whether heat is present
Damp clothes after a cycle can result from an air-only or low-heat setting, a restricted vent, a load that cannot tumble, or a dryer section that never heats. Use the model manual to identify the drying controls, then observe the cycle without opening panels or reaching into moving or hot parts.
Load and lint checks can change the result
Overloading limits tumbling and air movement, while towels, bulky items, and lightweight garments can finish at different moisture levels. Maytag also notes that lint or residue on the screen can extend drying. Use a freely tumbling, like-fabric load and clean the screen as directed.
Venting applies only where the model has an exhaust path
For a vented washer-dryer, weak airflow outside, a crushed hose, a blocked wall hood, or lint in the duct can leave clothes warm but damp. Some ventless or specialized models use a different drying system, so do not disconnect or modify a duct unless the model manual specifically directs a safe check.
Do not guess a part from damp laundry
If a correct cycle, clean filter, normal load, and accessible airflow do not restore drying, the remaining causes may include a heater, thermostat, sensor, control, fan, or model-specific condenser path. Those components require qualified diagnosis and model fitment confirmation.
Safety boundary
Stop conditions
- Stop immediately for smoke, fire, burning odor, abnormal heat, sparking, exposed wiring, a damaged cord, or a breaker that trips again.
- Do not open the cabinet, test live circuits, bypass a door or thermal safety, work on gas or sealed-system components, or reach into moving or hot parts.
- Do not disconnect or modify a vented gas-drying system to keep testing, and do not operate any model without the safety parts and airflow configuration required by its manual.
- If the dryer section remains cold, a vent warning or error code returns, or clothes stay damp after accessible checks, leave the appliance off as appropriate and arrange qualified service.
Only after diagnosis
Potential parts
- heating element, gas heating assembly, or thermal safety component
Only consider this class when qualified testing confirms no heat or a failed thermal component after cycle, power, airflow, and installation conditions are ruled out.
Confirm the exact Maytag model, drying-system configuration, and manufacturer's fit information before ordering any component. - moisture sensor, thermistor, or electronic control
Only consider this class when qualified diagnosis links repeated damp results or an error to sensing or control input after load, level, and airflow checks.
Use model-specific documentation and qualified service confirmation; do not assume all Maytag washer-dryer sensors or controls are interchangeable. - lint screen, vent component, or condenser airflow component
Only consider this class when the applicable drying system has a damaged screen, vent, or condenser path that qualified service confirms cannot be restored by cleaning.
Verify the exact model and drying architecture with the owner's manual or qualified service before ordering.
When checks do not resolve it
Need a professional?
Contact qualified Maytag appliance service when the drying section does not heat, an AF or Check Vent indication persists, a suitable cycle repeatedly leaves clothes damp, an error code or unusual noise appears, or the controls or door do not operate normally. Use professional vent service for persistent exhaust restriction and emergency help for smoke, fire, sparking, or immediate electrical danger.
Have this ready
- Exact Maytag model and serial details
- Whether the unit is vented or uses another drying system and which cycle or options were selected
- Whether the drum tumbles, whether heat is present, and whether the load is warm but damp or completely cold
- Load size and fabric mix, lint-screen condition, leveling observations, and any sensing behavior
- AF, Check Vent, or other display messages and whether outside airflow was weak if the model is vented
- Any smoke, odor, unusual heat, electrical symptom, error code, door or latch issue, or unusual noise
Common questions
FAQ
Why is my Maytag washer-dryer leaving clothes damp?
Check for an air-only or low-heat setting, a tightly packed or mixed load, a blocked lint screen, restricted venting on vented models, and leveling or sensing issues. If the load stays cold or damp on a suitable cycle after these checks, arrange service.
How can I tell whether the Maytag drying section is heating?
Use the model-approved heated cycle and observe the result without opening panels or touching parts. A cold load points toward a heating or power issue; a warm but damp load makes load, airflow, cycle, or sensing conditions more likely.
Can a vent problem cause a Maytag washer-dryer to dry slowly?
On vented models, weak outside airflow, a crushed hose, or a blocked hood can leave laundry warm but damp. Check only the accessible path and use the model manual for non-vented designs; persistent restriction needs professional vent service.
Read the exact guide
Official sources
- Dryer is Not Heating - Product HelpMaytag · Maytag dryer no-heat checks for heated cycles, airflow, power, and gas supply; use the model manual for washer-dryer-specific controls.
- Dryer is not Drying or Experiencing Long Dry TimesMaytag · Maytag dryer long-dry troubleshooting; power, heat, load, lint, venting, cycle selection, and service escalation. Confirm applicability to the drying section of a washer-dryer model.
- Not Starting or Not Operating - Dryer - Product HelpMaytag · Maytag dryer door latch, controls, power, cycle selection, and service checks; use the washer-dryer model manual for combination-unit differences.
- Not Drying - Product HelpMaytag · Maytag dryer drying performance; lint, vent, cycle, leveling, sensing, static-reduction, and service guidance. Confirm applicability to the drying section of a washer-dryer model.
Community feedback
Share a repair observation
Share a plain-text repair observation. Accepted observations are published automatically; this page may take a moment to update.