
On this page
Start here
Quick answer
If a washer-dryer sensor cycle ends with damp clothes or seems not to dry, first separate a sensing decision from a heat or airflow problem. Clean and fully dry the lint filter and accessible moisture-sensor bars, use a load that can contact the sensors, select a cycle and dryness level suited to the fabric, and avoid mixing thin and bulky items. Check the vent, condenser, or drain path only as the manual allows. If a humidity-sensor error returns, there is no heat, airflow is restricted, water cannot drain, or drying remains poor after these checks, stop using the appliance for repeated tests and arrange qualified appliance service.
Before you begin
Safety first
- A technician can test the moisture sensor, thermistor, heater, blower, vent or condenser path, drain pump, controls, and sealed components safely. Keep homeowner work to power isolation, accessible filter and sensor cleaning, load selection, visible hose checks, and one attended manual-directed test.
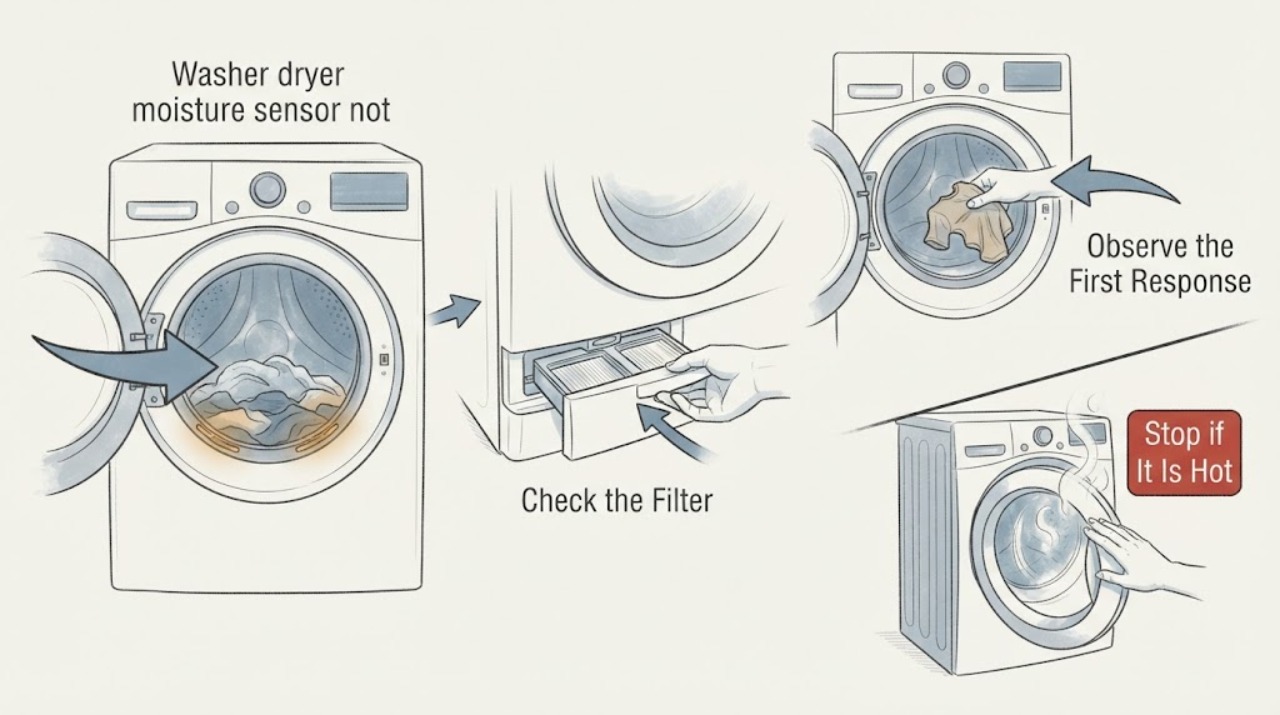
Work through in order
Diagnostic checks
Use only checks that match the exact appliance or system and its official guide.
-
Check 1
Stop the cycle, turn the washer-dryer off, disconnect power as the manual permits, and wait until the drum and accessible surfaces are cool before cleaning the filter or sensor area.
Expected result: The drum is hot, there is a burning smell, smoke, water is pooled, the appliance has an electrical warning, or it is cool and dry with no safety warning.
Next step: Leave the appliance disconnected and arrange qualified appliance service for smoke, burning odor, water near electrical parts, repeated trips, or abnormal heat. Otherwise continue with the filter and sensor inspection.
Why this matters
Why: Heat, smoke, water, and electrical warnings make a sensor cleaning a poor next step and can indicate a heater, wiring, drain, or control fault. A cool dry appliance permits only non-invasive, manual-directed checks.
-
Check 2
Remove and inspect the lint filter and accessible sensor bars or humidity-sensor area; clean them using only the appliance manual's soft-cloth method and let all cleaned surfaces dry completely.
Expected result: The filter is packed with lint, the sensor bars have dryer-sheet or detergent residue, the filter is wet or damaged, or the filter and sensor area are clean and dry.
Next step: Reinstall the filter correctly after it is fully dry and do not scrape, bend, spray, or remove sensor hardware. If the filter will not seat or the sensor area is damaged, stop using the appliance and arrange service.
Why this matters
Why: Lint restricts airflow, while residue or moisture on sensor bars can distort moisture detection. A clean dry path shifts attention toward load selection, vent or condenser flow, drain conditions, heat, or a sensor circuit fault.
-
Check 3
Sort a test load by similar fabric thickness, avoid a single tightly balled item, and choose a sensor cycle and dryness level that match the load; use a manual or time-dry program when the load is too small for dependable contact.
Expected result: The cycle ends while thick items remain damp, the load is tiny or tangled, mixed fabrics dry unevenly, or a correctly sized similar-fabric load also remains damp.
Next step: Retest once with a balanced load and the manual's cycle guidance. If the suitable load remains damp, stop repeating sensor cycles and continue with airflow and heat observations.
Why this matters
Why: Early cutoff from thin items or poor sensor contact is more likely in the first patterns. Dampness in a suitable load suggests airflow, heat, condensation, drain, or sensor trouble rather than load geometry alone.
-
Check 4
Run the appliance's documented drying or time-dry check with a safe load and note whether the drum warms, air moves through the intended lint and vent path, and any vent, condenser, heat-exchanger, or drain indicator changes.
Expected result: The drum stays cold, airflow is weak, the vent or filter warning appears, the machine is warm but moisture remains, or airflow and heat appear normal.
Next step: Clean only the user-accessible filter and vent or condenser surfaces described by the manual. Do not open the heater, electrical cabinet, refrigerant circuit, or internal duct. Arrange service for no heat, persistent warning, restricted airflow, or dampness after a suitable test.
Why this matters
Why: No heat points toward a heater, power, thermostat, or control issue; weak airflow points toward lint or duct restriction; warm air with damp clothes points toward moisture removal, load, sensor, or drain conditions. Normal visible airflow and warmth do not clear hidden components.
-
Check 5
For a ventless or condenser washer-dryer, inspect the visible drain hose, collection area, or condenser access indicated by the manual for a kink, full container, lint buildup, or a blocked path; do not open sealed panels.
Expected result: Moisture is not leaving the appliance, the drain hose is kinked or frozen, a collection area is full, the condenser or filter is restricted, or the moisture path looks clear.
Next step: Correct only a visible hose route or empty and clean an accessible component as the manual directs, then retest once. If water remains, a drain error returns, or access requires panels, arrange appliance service.
Why this matters
Why: A blocked condensation or drain path can leave humid air and water in the appliance even when the drum feels warm. A clear visible path makes a hidden pump, sensor, heat, or control fault more likely.
-
Check 6
Record the exact display message, model, program, load type, remaining-time behavior, and whether cleaning or a balanced-load test changed the result before trying any reset.
Expected result: The message specifically identifies humidity sensing, a filter or airflow path, drain or condensation, heat or temperature, or no exact code appears.
Next step: Follow one model-specific reset only if the manual recommends it and the appliance is cool, dry, and safe. If the message returns, do not clear it repeatedly or replace a part by code alone; arrange service with the display and observations.
Why this matters
Why: A specific message narrows the next step only within that model's manual. A humidity message with an unusually long cycle differs from a filter or vent warning; no code leaves sensor, load, airflow, heat, and drain observations as the useful evidence.
-
Check 7
After one clean-filter, clean-sensor, suitable-load, and accessible-airflow check, run one attended cycle and stop if the same symptom or warning returns.
Expected result: The load dries normally, the cycle still ends damp, the sensor error returns, the cycle runs unusually long, or the appliance leaks or overheats.
Next step: Stop repeated testing and arrange qualified appliance service for persistent dampness, a sensor error, long abnormal cycles, no heat, restricted airflow, leaks, or overheating. Provide the exact code, cycle, load, and what changed.
Why this matters
Why: Normal drying supports a load, residue, or accessible airflow cause. Persistent dampness or a repeated code indicates a sensor, control, heat, airflow, drain, or condensation fault that needs diagnosis; leaks and overheating add immediate risk.
Use your observations
Decision map
Find the observation that best matches what you see, then follow the next safe action.
-
PATH 01Next step
What you see
The sensor area or lint filter is coated or damp, and drying improves after gentle cleaning and complete drying.
Do this next
Keep the filter and sensor area clean and dry according to the manual. If the symptom returns with a clean path, arrange service rather than scrubbing the bars more aggressively.
Why this path and its safety boundary
Why it matters: Residue or airflow restriction is more likely than a failed moisture-sensor circuit, though recurring buildup can signal an underlying ventilation or detergent-sheet habit.
-
PATH 02Next step
What you see
A tiny, tangled, or mixed-thickness load ends early while a suitably sized, similar-fabric load dries normally.
Do this next
Sort by thickness, avoid overloading or single-item sensor cycles, and use manual or time dry when contact is unreliable. If normal loads remain damp, continue to professional diagnosis.
Why this path and its safety boundary
Why it matters: Sensor contact and load selection are more likely than a sensor failure; thin items may satisfy the cutoff before thick items are dry.
-
PATH 03Next step
What you see
The drum is warm but moisture remains, airflow is weak, filters or vent paths are restricted, or condensation or drain indicators appear.
Do this next
Clean only accessible filters, vents, condenser surfaces, or visible drain routes as the manual directs. If airflow, condensation, or drain performance does not return, arrange appliance or plumbing service as appropriate.
Why this path and its safety boundary
Why it matters: Moisture removal or airflow is more likely than a simple sensor-reading problem. In a ventless combo, a drain or condenser restriction can have the same practical result.
-
PATH 04Next step
What you see
The drum remains cold, a heat or temperature warning appears, or a suitable load stays damp despite a clean filter and sensor area.
Do this next
Stop opening or testing the appliance internally and arrange qualified appliance repair. Do not bypass thermostats, access wiring, or infer a heater replacement from a cold drum alone.
Why this path and its safety boundary
Why it matters: A heater, power supply, thermistor, control, sensor circuit, or other internal fault is more likely than load contact alone.
-
PATH 05Next step
What you see
A humidity-sensor error persists after the manual-directed cleaning, the appliance leaks, overheats, trips power, smells burnt, or requires sealed-panel access.
Do this next
Disconnect power as the manual permits, keep the appliance out of service, and arrange qualified appliance repair. Use a plumber too when the household drain or supply path is the source of water.
Why this path and its safety boundary
Why it matters: The symptom exceeds a user-accessible sensor check and may involve electrical, thermal, water, or control hazards.
Helpful context
Understand the symptom
Sensor drying is a feedback decision
A sensor cycle does not simply run for a fixed duration. Moisture bars or a humidity sensor detect what the load presents to them, and the control ends or adjusts the cycle at the selected dryness level. A tiny load may not touch the bars consistently; a thin item can reach the cutoff before a thick item is dry; and residue on the sensor can distort the reading. Damp laundry can therefore reflect sensing, load, airflow, drain, heat, or fabric conditions.
Clean the sensor and lint path without opening the cabinet
Turn the appliance off and let it cool. Remove lint from the filter and clean the accessible moisture-sensor bars with the method in the owner's manual, usually a soft damp cloth, then let the bars and any washable filter dry completely. Do not scrape the bars, spray cleaner into the drum, or remove covers to reach hidden sensors. A filter or sensor that remains damp or coated can change airflow and moisture readings.
Choose a load that gives the sensor useful contact
Sensor drying works best when the selected load can tumble and repeatedly touch the sensing area. A single small item, a tightly balled blanket, or mixed thin and thick fabrics can end the cycle early while heavier pieces remain damp. Sort similar weights, avoid overloading, and use the manual or time-dry option when a load cannot maintain reliable sensor contact.
Check airflow, heat, and condensation as separate paths
If the load is damp after a suitable sensor cycle, determine whether the drum becomes warm and whether air can move through the lint filter, vent, heat exchanger, or condenser arrangement. Ventless and heat-pump combos may route moisture to a drain or collection system rather than an exterior duct. A sensor cannot compensate for restricted airflow, missing heat, blocked condensation, or a drain that cannot remove extracted water.
Treat the exact display message as model-specific
An error that mentions humidity, a filter, a vent, a drain, temperature, or power is not interchangeable across brands. Record the exact message and when it appears. For example, a humidity-sensor message may cause an unusually long cycle, while a filter or airflow message points elsewhere. Use the appliance's exact manual and do not replace a sensor based only on a generic code list.
Safety boundary
Stop conditions
- Stop and disconnect power as the manual permits for smoke, burning odor, abnormal heat, repeated power trips, water near electrical equipment, or an active leak.
- Do not scrape or bend sensor bars, spray cleaner into the drum, remove cabinet or heater panels, probe wiring, bypass thermostats or interlocks, or open a sealed heat-pump or refrigerant system.
- Stop repeated sensor cycles when the load remains damp after a clean suitable-load test, a humidity or heat error returns, airflow is restricted, moisture cannot drain, or the appliance runs abnormally long.
- Arrange qualified appliance service for an internal sensor, heater, thermistor, pump, control, vent, condenser, or sealed-panel diagnosis. Use a plumber for a blocked household drain or supply problem.
Only after diagnosis
Potential parts
- moisture or humidity sensor assembly
Consider this only after a qualified diagnosis confirms that clean, dry sensor surfaces and suitable loads still produce a sensor error or incorrect sensing.
Match the exact appliance model, sensor shape, mounting, wiring, and manual or service documentation; do not select a sensor from a code alone. - lint filter or condenser filter
Consider this only when the filter is cracked, missing, cannot seat, or remains restricted after correct cleaning; a dirty filter should be cleaned first.
Confirm exact model, filter stage, mesh, frame, and access arrangement before choosing a replacement. - drain hose or drain pump component
Consider this only when tracing shows a damaged or persistently restricted drain path, or a qualified diagnosis confirms pump or hose failure affecting condensation removal.
Match the exact appliance and connection type; use appliance or plumbing service when water must be drained from the cabinet or household drain.
When checks do not resolve it
Need a professional?
Safety scope: A technician can test the moisture sensor, thermistor, heater, blower, vent or condenser path, drain pump, controls, and sealed components safely. Keep homeowner work to power isolation, accessible filter and sensor cleaning, load selection, visible hose checks, and one attended manual-directed test.
Common questions
FAQ
Why does my washer dryer sensor cycle end with damp clothes?
The sensor may have ended the cycle after thin items reached the cutoff, the load may be too small or tangled to maintain contact, or thick and thin fabrics may have dried unevenly. A dirty sensor, clogged filter, restricted airflow, drain issue, or no-heat fault can also leave clothes damp.
How do I clean the moisture sensor in a washer dryer?
With the appliance off and cool, use the owner's manual to locate the accessible sensor bars and wipe them with the permitted soft damp cloth. Let them dry completely before running a cycle. Do not scrape them, spray cleaner into the machine, or open panels to reach hidden parts.
Can a small load confuse a dryer moisture sensor?
Yes. If the items do not consistently touch the sensor bars, the cycle may decide the load is dry or end earlier than expected. Use a manual or time-dry setting for a load that cannot maintain sensor contact, following fabric-care guidance.
Does a dirty lint filter affect sensor drying?
It can. Lint restricts airflow and moisture removal, while residue or moisture on the sensor can distort the reading. Clean the filter and accessible sensor area as directed and let washable components dry before reinstalling them.
When should I call for washer dryer drying repair?
Call when a humidity-sensor or heat error returns, the drum remains cold, airflow or condensation is restricted, water cannot drain, the appliance leaks or overheats, or a suitable load remains damp after the filter, sensor, cycle, and visible-path checks. Do not replace a sensor or heater from a generic code alone.
Read the exact guide
Official sources
- Clothes are not dry after using Samsung dryerSamsung Support · Samsung sensor-dry dryers; exact sensor location, load guidance, and controls vary by model
- LG Dryer - Error Code ListLG USA Support · LG dryer error messages; codes and procedures are model-specific
- LG Dryer - How to Clean the Humidity SensorLG USA Support · LG dryers and related sensor-dry designs; sensor location and care vary by model
- LG Dryer – Why is My Dryer Not Heating, Not Drying or Taking a Long Time Drying?LG USA Support · LG dryers; washer-dryer combo drying systems may use different vent and heat arrangements
- LG Dryer drying time: The drying time is extendedLG USA Support · LG dryers and washer-dryer combos; vent, condenser, and cycle details vary by model
Community feedback
Share a repair observation
Share a plain-text repair observation. Accepted observations are published automatically; this page may take a moment to update.