
On this page
Start here
Quick answer
Washer-dryer combos often dry differently from vented dryers: they may use condensation or a water-assisted process, take longer, and have a smaller drying capacity than washing capacity. First check that a real dry mode is selected, the load is below the model's drying limit, the required water supply is on, and the drain hose is not kinked or holding water. Clean only user-accessible filters described in the exact manual. If the dry cycle will not start, clothes remain wet after a correctly loaded test, the unit shows an error, or heat, airflow, water, or draining is abnormal, stop repeated tests and arrange appliance service. Do not remove panels, test live circuits, bypass a safety device, or replace a heater, fan, or sensor based only on damp clothes.
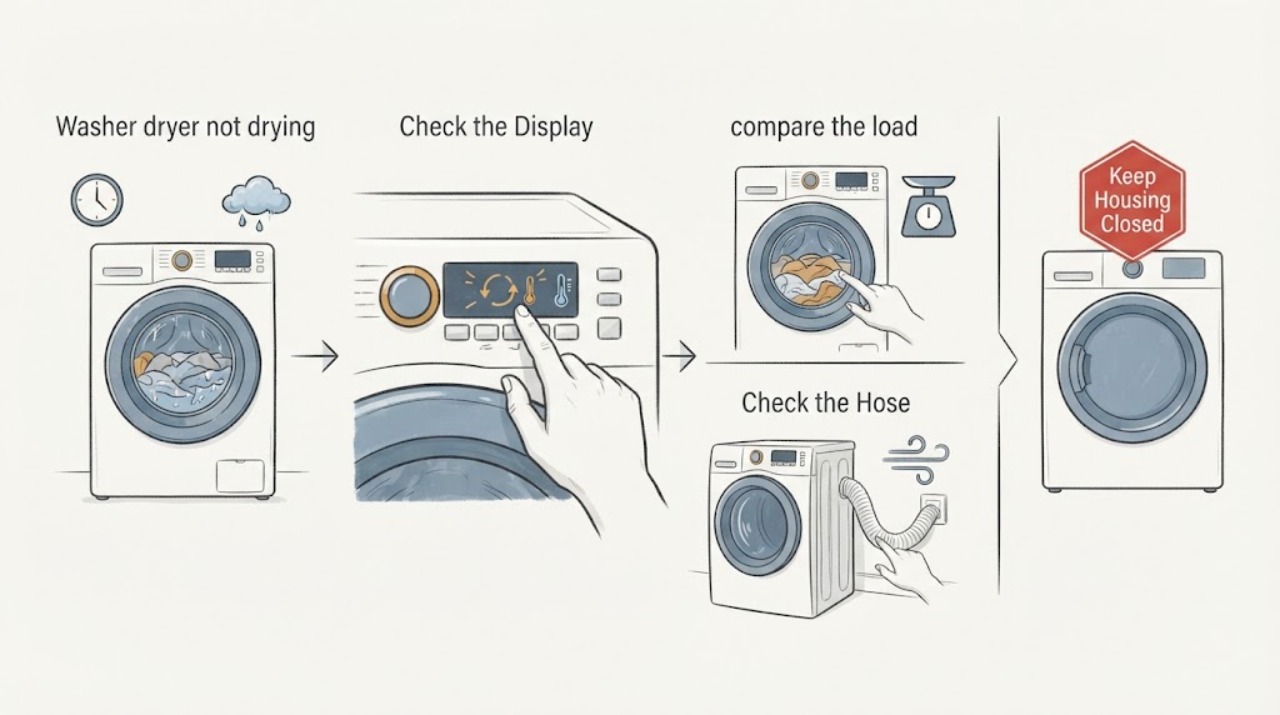
Work through in order
Diagnostic checks
Use only checks that match the exact appliance or system and its official guide.
-
Check 1
Read the selected program and drying setting before starting another test. Confirm that the cycle includes drying or that a Dry Only mode is selected, and note whether the display shows air/no-heat, damp-dry, timed, sensor, or another model-specific option.
Expected result: Drying is off, an air/no-heat option is selected, the cycle is only wash or spin, the unit stops before drying, or a genuine dry mode is selected but clothes remain wet.
Next step: Record the exact setting and display message, then use the model manual to choose a comparable dry mode. Do not keep changing settings randomly or bypass a lock, sensor, or warning.
Stop if: Stop if the display shows a safety fault, burning smell, smoke, water leak, repeated breaker trip, or a requirement to open the appliance.
Why this matters
Why: A disabled or non-heating setting can look like a failed dryer. If a genuine dry mode is selected and the cycle still will not start or complete, the issue moves toward water supply, door or filter interlock, power, drainage, or an internal fault.
-
Check 2
With the drum stopped, compare the load with the model's drying-capacity marking or manual. Separate bulky or thick items, unfold fabric, and run a small compatible load only if the manual permits; make sure the wash portion has spun the items adequately before drying.
Expected result: The drum is heavily loaded, the load contains thick folded items, the load is mixed with very different fabrics, or a small evenly distributed load dries better than the original load.
Next step: Use the manual's capacity and fabric-care guidance, and record whether the smaller test changes the result. If a small compatible load is still wet, continue with the water and drain checks rather than increasing heat or cycle time indefinitely.
Stop if: Do not dry items that the care label or model manual excludes, overload the drum, or run repeated tests with a hot or leaking appliance.
Why this matters
Why: Combo drying capacity is commonly lower than wash capacity, and dense or folded fabric can stay damp even when the appliance is working. Improvement with a smaller load points to load and extraction conditions, not proof that a heater or sensor is defective.
-
Check 3
From a dry, accessible position, verify that the water supply valves required by the combo are open and that the inlet hoses are not visibly kinked or reversed. Do not loosen a hose or reach behind a wet appliance; use the exact manual if the connection arrangement is unclear.
Expected result: A required valve is closed, an inlet hose is kinked, the hot and cold connections appear reversed, water is not entering during drying, or the supply looks normal.
Next step: Correct only an obviously closed valve or accessible hose position as allowed by the manual, then document whether the dry cycle changes. If water does not enter as expected or the connection needs disassembly, arrange service.
Stop if: Stop if the area is wet, a hose is under tension, a connection leaks, the valve cannot be operated safely, or the next check requires panel removal or live electrical access.
Why this matters
Why: Some combo drying systems use water to condense moisture, so a supply problem can reduce or prevent drying even when washing appears normal. A normal-looking supply does not rule out an inlet valve, pressure, or internal control fault.
-
Check 4
Look at the visible drain hose and its route without disconnecting it. Check whether it is sharply kinked, crushed, blocked by an object, or arranged so water can pool in a U-shaped section or high loop; do not force the appliance away from the wall.
Expected result: Water may be trapped in the hose, the hose does not descend smoothly, the drain is slow or backs up, a tapping or thumping sound occurs, or the hose route appears clear.
Next step: Follow the model manual for any safe external hose-routing correction and record the before-and-after position. If the hose must be detached, the drain path is blocked, or water backs up, stop using the unit and arrange service.
Stop if: Do not disconnect the drain hose, remove a pump filter against resistance, use drain chemicals, reach into the pump, or move a heavy appliance over a wet floor.
Why this matters
Why: In combo systems, trapped drain water can interfere with removing humid air or steam and can reduce drying performance. A clear visible route does not rule out an internal pump, drain restriction, or other fault.
-
Check 5
When the appliance is cool and dry, clean only the lint filter, heat-exchanger screen, or other user-accessible filter named in the exact manual. Inspect for lint or residue without removing covers, heater shields, fans, sensors, or wiring.
Expected result: A specified filter is visibly coated, a heat-exchanger area is restricted, the filter is clean, or cleaning does not change drying performance.
Next step: Refit the cleaned filter exactly as directed and record whether a small compatible load improves. If the filter is damaged, will not seat, or the unit remains wet, provide the model and observations to a technician before ordering a part.
Stop if: Stop if the filter is hot, wet, sharp, damaged, stuck, or located behind a panel, or if cleaning would expose moving parts, wiring, or a heater.
Why this matters
Why: Restricted user-maintenance surfaces can reduce airflow or heat transfer, but a clean filter does not clear the fan, heater, condenser, moisture sensor, or control. Internal access is a repair task.
-
Check 6
Note the final condition and any message after one correctly configured, model-appropriate test: clothes warm but damp, cold and damp, unusually hot, cycle not starting, cycle ending early, unusual noise, or an error code. Do not repeat a failed full-load cycle to force a comparison.
Expected result: The unit tumbles but stays cold, produces abnormal heat or noise, stops with a code, never enters drying, or remains damp despite normal settings, load, water, drain, and filter observations.
Next step: Stop using the dry function and arrange model-specific service. Give the technician the model number, exact code, load and cycle, water-supply and hose observations, filter condition, temperature/noise description, and photos from a dry safe position.
Stop if: Stop immediately for smoke, burning odor, damaged wiring, water leakage, a repeated breaker trip, exposed moving parts, or any need to test energized components.
Why this matters
Why: These patterns help a technician separate a settings or airflow issue from a possible heater, fan, moisture-sensor, pump, door-interlock, or control fault. No single symptom proves which component failed.
Use your observations
Decision map
Find the observation that best matches what you see, then follow the next safe action.
-
PATH 01Next step
What you see
Drying was disabled, an air/no-heat setting was selected, or the test used a wash-only or spin-only program.
Do this next
Use the exact manual to select a real drying mode and record the result with a small compatible load. Do not infer a failed heater from a non-heating setting.
-
PATH 02Next step
What you see
A smaller, evenly distributed load dries better, while an overloaded or thick load remains damp.
Do this next
Treat load size, fabric thickness, and spin extraction as the leading explanation. Follow the model's drying-capacity and care-label guidance; do not exceed the stated limit.
-
PATH 03Next step
What you see
A required water valve is closed, water connections are reversed or kinked, or the combo does not receive the water its drying system requires.
Do this next
Correct only an obvious external condition allowed by the manual. If the connection, inlet valve, pressure, or internal water path needs disassembly, stop and arrange service.
-
PATH 04Next step
What you see
The drain hose holds water, is sharply routed, drains slowly, backs up, or produces abnormal drain-related noise.
Do this next
Stop repeated drying tests and have the drain route, pump, and internal moisture path checked. Do not detach the hose, use chemicals, or reach into the pump.
-
PATH 05Next step
What you see
The dry cycle will not start, remains cold, overheats, stops with an error, or leaves a small compatible load wet after the safe checks.
Do this next
Stop using the drying function and arrange qualified appliance service for the heater, fan, sensor, pump, interlock, control, or another model-specific fault. Do not open panels or perform live tests.
Helpful context
Understand the symptom
Why a combo can leave clothes damp
An all-in-one washer-dryer has to wash, spin, and dry in one drum. Ventless or condensing designs move moisture through a condenser and drain path instead of sending it through a conventional exhaust vent, so a longer cycle can be normal for that model. Damp results can still indicate a wrong dry setting, an oversized or thick load, poor spin extraction, a closed water supply, water trapped in the drain hose, a blocked user-accessible filter, or an internal heating, airflow, sensor, or control fault. The symptom alone does not identify a replacement part.
Use a model-safe test
Use the owner's manual for the unit's dry options, load limit, filter locations, and any required water or drain arrangement. A small, fabric-compatible load is a better comparison than a full drum of towels or thick bedding. Make one change at a time and record the cycle, load type, water supply, drain-hose position, and result; repeated long cycles can add heat, moisture, and wear without identifying the cause.
Only after diagnosis
Potential parts
- washer-dryer combo heater
Consider this only if model-specific diagnosis confirms that the heater is not producing the required heat after settings, load, water, drain, and filter conditions are verified.
Match the exact model, heater design, electrical specification, seals, and manufacturer fitment; a cold or damp load alone cannot identify the heater. - washer-dryer combo fan motor
Consider this only if a qualified diagnosis confirms an airflow or fan-motor fault and rules out a blocked user-maintenance path or drain-hose problem.
Confirm the exact model, fan assembly, connector, airflow direction, and service instructions before ordering; ventless and vented designs are not interchangeable by appearance. - washer-dryer combo moisture sensor
Consider this only if model-specific testing shows that the moisture-sensing system is misreading or ending the cycle incorrectly after load and cycle settings are verified.
Match the exact model and sensor assembly, and use the manufacturer's diagnostic and calibration procedure; do not assume a short or damp cycle proves sensor failure.
When checks do not resolve it
Need a professional?
Arrange appliance service when the dry cycle will not start, a small model-appropriate load remains wet after the settings, water, drain, and filter checks, the unit is cold or abnormally hot, an error persists, or the diagnosis requires panels, wiring, a heater, fan, sensor, pump, or control access. Seek prompt help for smoke, burning odor, water leakage, damaged wiring, or repeated breaker trips.
Have this ready
- Provide the appliance model and serial information, exact cycle and dry setting, load type and approximate fullness, whether a spin cycle ran, water-valve and hose observations, drain-hose route, filter condition, final temperature or noise, display code, and photos taken with the appliance cool and dry.
Common questions
FAQ
Are washer-dryer combos supposed to take longer to dry?
Often, yes. Ventless or condensing combos use a different moisture-removal path from a conventional vented dryer, and their drying capacity can be lower than their wash capacity. A long cycle is not automatically a fault, but a small compatible load should still be evaluated against the model's manual.
Why does my washer-dryer combo need water during drying?
Some combo designs use water to condense moisture or steam during drying. If the required water supply is closed, misconnected, or not reaching the unit, drying performance can suffer. Check only the accessible valves and hoses described by the model manual.
Can a drain hose problem stop a washer-dryer combo from drying?
Yes. If water pools in the hose or the route is kinked or too high, moisture or steam may not leave the appliance properly. Inspect the visible route without disconnecting it, and have a technician handle a blocked internal drain or pump.
Should I replace the heater when clothes come out damp?
Not based on damp clothes alone. First verify the dry setting, load size, spin extraction, water supply, drain-hose route, and user-accessible filter. If a correctly configured small load remains wet or the unit is cold, overheating, noisy, or showing an error, arrange model-specific diagnosis before ordering a heater, fan, or sensor.
Read the exact guide
Official sources
- Dry Cycle Will Not Run - All-In-One Washer DryerWhirlpool Product Help · Supports checking that the dry cycle is selected, the door is closed, the drain-pump filter is in place, and the water supply is connected and on when a Whirlpool all-in-one dry cycle will not run. Electrical supply diagnosis remains qualified work and all checks are model-dependent.
- LG Washer Dryer Combo - Troubleshooting Poor Drying PerformanceLG USA Support · Supports the water-free or condensing drying explanation, checking for water trapped in the drain hose, avoiding a U-shaped hose route, confirming water supply and hose order where applicable, and keeping the load below the model's drying line. It states that the guide's images or content may differ by product, so model instructions control.
- Dryer Not Drying or Long Dry Times - All-In-One Washer DryerWhirlpool Product Help · Supports explaining that ventless or condensing drying can take longer, checking model-appropriate load size and cycle choices, understanding that moisture is condensed and drained through the washer drain path, and treating closet ventilation as model-installation context. The settings and clearances are not universal to every combo unit.
- [LG Washer] Dryer Performance TroubleshootingLG USA Support · Supports checking drying capacity, fabric suitability, spin extraction, water supply during drying, and visible drain-hose routing. The guidance is broad LG combo information and should be reconciled with the exact model manual.
Community feedback
Share a repair observation
Share a plain-text repair observation. Accepted observations are published automatically; this page may take a moment to update.