
On this page
Start here
Quick answer
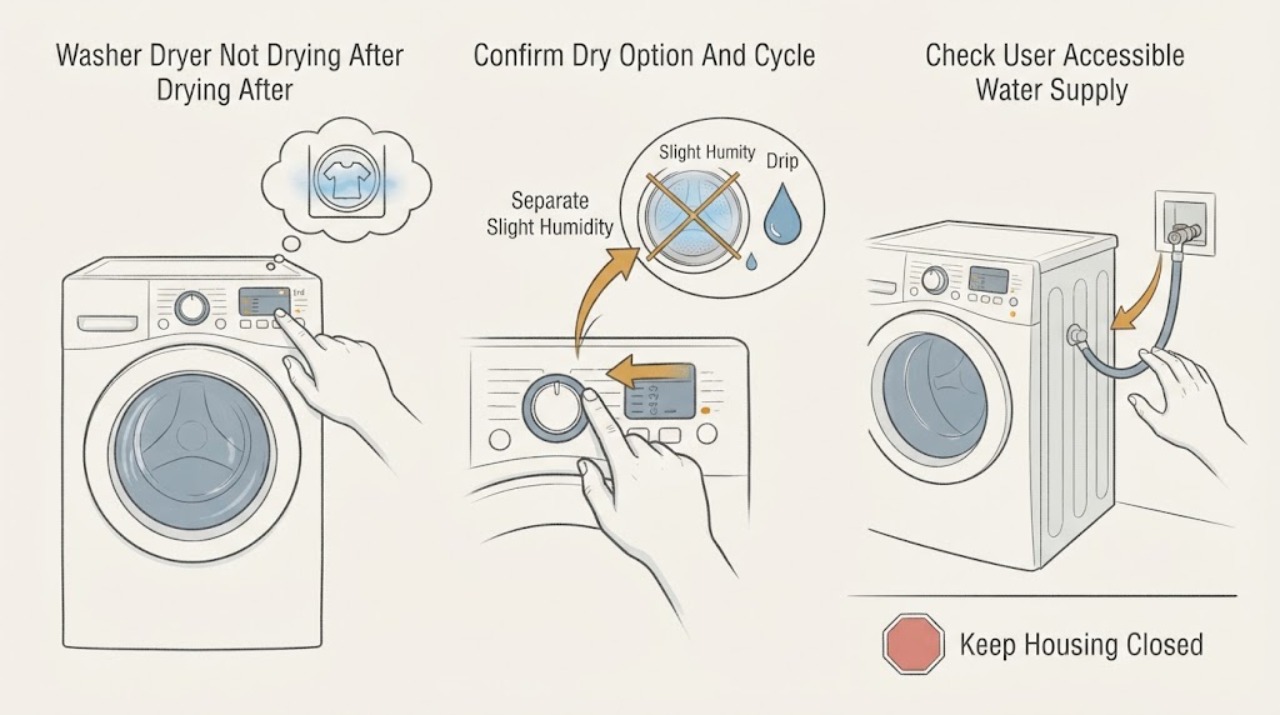
A completed wash cycle does not prove that the drying portion ran or that the load reached its intended dryness. Washer-dryer combos may use a low-heat, sealed, or water-assisted drying process, and the dryer capacity is usually lower than the wash capacity. First confirm that a dry option was selected, then check whether the load is drip-wet or only slightly humid, whether the final spin was strong, whether the user-accessible water supply is open, and whether the external drain hose can empty without kinks or pooled water. If a small, balanced, model-approved dry-only load still comes out very wet, a pump, inlet, heater, sensor, heat-pump, or control fault needs professional diagnosis. Stop using the appliance for smoke, burning odor, a leak, exposed damage, or an electrical warning sign.
Work through in order
Diagnostic checks
Use only checks that match the exact appliance or system and its official guide.
-
Check 1
Read the completed-cycle display and the selected options. Confirm that the program included drying, or select the exact model's dry-only or additional-dry option for a small test load if the owner instructions allow it. Do not add detergent to a dry-only run. Note whether the display shows a dry stage, a cooldown or sensor stage, an error, or only a wash completion.
Expected result: The dry option was off, the program was wash-only, a dry stage is shown, the cycle ended unusually early, or an error or warning is displayed.
Next step: Use only the exact model's documented dry setting and retry once with a reduced, balanced load when there is no leak, odor, or warning. Record any code or abbreviated display message; if the correct dry program will not start or repeatedly ends with an error, arrange appliance service.
Stop if: Do not bypass a displayed safety warning, repeatedly restart a faulted cycle, or open the cabinet to force a drying mode.
Why this matters
Why: A wash-only selection explains a wet load without a component failure. A completed dry stage with very wet clothes shifts attention to load moisture, water and drain paths, or a drying-system fault. An early end or error makes the model's fault procedure more important than repeating the same cycle.
-
Check 2
Remove one or two items at the end of the cycle and assess the actual moisture. Compare a light item with a thick or folded item, and note whether the drum is crowded, the load contains unlike fabrics, or the items are dripping wet. Check the care labels before any additional drying.
Expected result: Items feel slightly humid but not wet, thick items are folded or clumped, the load is at or above the dry-capacity mark, or all items are soaked.
Next step: Shake out light items, separate thick pieces, and run the model-approved additional-dry option only within the stated dry capacity. For soaked items, redistribute the load, use a rinse-and-spin or spin cycle if the manual permits, and then test a smaller similar-fabric load.
Stop if: Do not dry fabrics marked unsuitable for the selected heat or air treatment, and stop if the load becomes unusually hot, smells scorched, or the appliance shows a warning.
Why this matters
Why: Slight humidity can occur briefly in a sealed, low-heat combo and may clear after items are shaken out. Thick, crowded, or mixed loads make moisture harder to remove. A uniformly soaked load is more consistent with poor final spin, drainage, or a drying process that did not operate.
-
Check 3
From the outside of the appliance, verify that the household water supply valves used by the combo are open and that the accessible inlet hoses are not kinked or obviously reversed. Do not loosen a hose or remove an inlet screen. Note whether the cold supply is restricted, a valve is closed, or the hose routing does not match the model instructions.
Expected result: A supply valve is closed, water flow is restricted, an inlet hose is kinked or reversed, or the external supply and hose routing appear normal.
Next step: If it is clearly safe and the valve is a normal user control, restore the documented water-supply position and retry the small test load. If the valve, hose, connection, or inlet screen needs disassembly, or the supply is still restricted, stop and arrange appliance or plumbing service.
Stop if: Do not disconnect pressurized hoses, force a seized valve, or work on internal inlet wiring.
Why this matters
Why: Many ventless combos use water to condense moisture during drying, so a closed or restricted supply can leave clothes wet even though washing completes. Some newer designs use a different water-free process, so normal hose routing does not rule out an internal fault and the exact manual controls.
-
Check 4
Inspect the visible drain hose and the floor around the combo. Look for a kink, a section holding pooled water, an obstruction at the standpipe, or a leak. If the model's manual identifies a user-accessible pump filter procedure, follow that procedure exactly and prepare for residual water; otherwise do not remove the filter or hoses. Note any drain warning, slow emptying, or water left in the drum.
Expected result: The drain hose is pinched or holds water, the standpipe backs up, a pump-filter warning appears, the drum retains water, or the external drain path appears clear and dry.
Next step: Straighten only an obviously pinched external hose and correct a visible user-level placement issue. Use the pump-filter procedure only when the model manual expressly permits it; if water remains, a standpipe backs up, or service access is required, stop and call an appliance technician or plumber as appropriate.
Stop if: Do not pull the appliance out against its hoses, remove a filter without the model procedure, or continue a cycle with an active leak or standing water near electrical parts.
Why this matters
Why: A restricted drain can leave the load too wet after spin and can also prevent some combo designs from expelling humid air or steam. A clear external path with no retained water makes an internal pump, heat-exchange, sensor, or control problem more plausible, but does not identify a failed part by itself.
-
Check 5
Review the final-spin behavior and the load arrangement. Note a spin warning, repeated rebalancing, a load containing one heavy item with several light items, or a drum packed beyond the model's drying-capacity marking. When the appliance is otherwise safe, redistribute similar fabrics and run the model-approved spin or rinse-and-spin cycle before a small dry test.
Expected result: The load was out of balance, the spin was weak or skipped, the drum was overfilled for drying, or a small balanced load still remains very wet after spin.
Next step: Retest with the load below the marked drying capacity and with thick pieces unfolded. If the same wet result occurs after a successful spin and the water and drain checks are normal, stop user troubleshooting and provide the observations to a qualified appliance technician.
Stop if: Do not hold the door open during a running cycle, reach into a moving drum, or keep operating the combo if it bangs violently, walks, leaks, or smells overheated.
Why this matters
Why: A weak final spin leaves much more water for the drying stage to remove, and an overfilled or mixed load can prevent even tumbling and moisture sensing. If a small balanced load is still soaked after a good spin, the problem is less likely to be ordinary loading and more likely to involve water removal, drainage, or the drying system.
-
Check 6
Record the appliance model, the wash and dry selections, the load size and fabric mix, the final-spin result, whether water enters or drains during drying, any display code, and whether the drum or clothes become warm. Keep the cabinet closed while collecting these observations.
Expected result: The dry cycle runs but produces no meaningful drying, the cycle stops with a code, the appliance never reaches its dry stage, or the pattern changes with load size.
Next step: Arrange qualified appliance repair and provide the recorded pattern instead of buying a generic replacement part. A technician can test the internal drying and drainage circuits with the correct model documentation and safety controls.
Stop if: Do not remove panels, probe internal wiring, defeat interlocks, or attempt to service refrigerant or sealed-system components.
Why this matters
Why: A repeatable failure with a small balanced load and normal external water and drain conditions is not safely narrowed to one part from symptoms alone. Possible internal areas include the pump, inlet, heater or heat-pump assembly, temperature or moisture sensing, airflow, and controls; the model service information is needed to distinguish them.
Use your observations
Decision map
Find the observation that best matches what you see, then follow the next safe action.
-
PATH 01Next step
What you see
The cycle completes, items are only slightly humid or cool to the touch, and they dry after being removed and shaken out.
Do this next
Use the model's additional-dry setting for items that still need it, keep loads within the dry capacity, and follow fabric care labels. If the items remain genuinely wet rather than briefly humid, continue with the water, drain, and spin checks.
Why this path and its safety boundary
Why it matters: A low-heat, sealed-drum combo design can leave a short-lived humid feel without a failed dryer.
-
PATH 02Next step
What you see
The wash completes and the display shows no drying stage, or the dry option was not selected.
Do this next
Use the exact model's dry-only or combined wash-and-dry selection with a small, care-label-safe load. If a documented dry program will not start, record the display and arrange service.
Why this path and its safety boundary
Why it matters: The appliance may have performed exactly the selected wash program; a wet load alone does not show that the drying hardware failed.
-
PATH 03Next step
What you see
Clothes are dripping wet, the load was out of balance or overfilled, and the final spin was weak or skipped.
Do this next
Redistribute similar items, run the documented spin or rinse-and-spin cycle, reduce the load to the dryer-capacity marking, and retest. If a small balanced load still exits soaked, move to the drain and service branch.
Why this path and its safety boundary
Why it matters: Excess water entered the drying stage, so loading and spin performance are more likely than a failed drying heater.
-
PATH 04Next step
What you see
A supply valve is closed or restricted, the drain hose holds pooled water, the pump filter warning appears, or the drum retains water.
Do this next
Correct only an obvious external valve or hose position that the model instructions identify as user-safe. Use a manual-approved pump-filter procedure only when available; otherwise arrange appliance or plumbing service.
Why this path and its safety boundary
Why it matters: A water-assisted condensation path or inadequate drainage can prevent the combo from removing moisture even though the wash portion completes.
-
PATH 05Next step
What you see
A small balanced load has a good spin, the selected dry cycle runs, external water and drain paths are normal, but clothes remain very wet or an error repeats.
Do this next
Stop user troubleshooting and arrange qualified appliance repair. Provide the model, settings, load size, moisture pattern, water and drain observations, codes, and any unusual heat, noise, or odor.
Why this path and its safety boundary
Why it matters: The remaining possibilities are inside the model's drying, pump, sensing, airflow, or control system; symptoms alone cannot identify which component has failed.
-
PATH 06Next step
What you see
There is an active leak, standing water near electrical parts, smoke, burning odor, scorching, damaged wiring, violent banging, or a control that becomes hot or behaves erratically.
Do this next
Stop using the combo and arrange qualified appliance service; use local emergency guidance for smoke, fire, or active electrical danger. Do not resume testing until the hazard is assessed.
Why this path and its safety boundary
Why it matters: This is a safety condition, not a drying-performance adjustment. Continued operation can increase water, fire, or electrical risk.
Helpful context
Understand the symptom
Why the wash can finish while drying still disappoints
A washer-dryer combo shares one drum but does not dry like a conventional vented dryer. Depending on the design, moisture is condensed with water or removed through a sealed heat-pump and airflow system. The display can therefore show a completed wash while a dry option was not selected, the load was left too wet after an unbalanced spin, or the drying system could not move water and humid air. A cool-feeling load is not automatically proof of a failed heater: some sealed low-heat designs intentionally feel less hot, and a little humidity immediately after opening can clear when items are shaken out.
Start with the pattern, not a replacement part
The most useful split is the moisture level at the end of the cycle. Drip-wet items point toward spin, load balance, drainage, or water-removal problems. Slightly damp items that become dry after being removed may reflect the normal low-heat or sealed-drum behavior of that design. If a reduced, balanced load fails in the same way after the safe external checks, the remaining causes are inside the appliance and should be diagnosed against the exact model instructions.
Only after diagnosis
Potential parts
- model-specific drain pump or pump filter assembly
Consider this only if the model's user checks or a technician confirms restricted drainage or a pump that cannot remove water after the external drain path is clear.
Pump and filter designs vary by model, revision, and drain system. Confirm the exact model documentation and diagnosis before selecting a part. - model-specific drying-system component
Consider an internal heater, heat-pump, temperature or moisture sensor, inlet component, or control only after a qualified diagnosis isolates that area on the exact appliance model.
Combo drying systems differ substantially between ventless, water-assisted, and heat-pump designs. Do not select an internal component from a visual match or symptom alone.
When checks do not resolve it
Need a professional?
Arrange qualified appliance repair when a correctly selected dry cycle repeatedly leaves a small, balanced load very wet after a good spin, when an error repeats, when the water or drain path needs disassembly, or when an internal pump, inlet, drying, sensor, airflow, control, or sealed-system diagnosis is needed. Stop using the washer-dryer combo for an active leak, standing water near electrical parts, smoke, burning odor, scorching, damaged wiring, violent banging, or an unusually hot or erratic control; use local emergency guidance for fire or active electrical danger. Do not open panels, probe wiring, defeat an interlock, disconnect pressurized hoses, or service refrigerant or sealed-system components.
Common questions
FAQ
Why does the wash finish but the clothes are still wet?
The program may have completed washing without a drying stage, or the combo may have entered drying with too much water after a weak spin. Overloading, an out-of-balance load, a closed or restricted water supply on water-assisted designs, retained water in the drain path, and an internal drying fault can also leave clothes wet. Check the selected cycle, load and spin pattern, water supply, and visible drain path before requesting service.
Is it normal for combo-washer clothes to feel slightly damp or cool when the cycle ends?
Some ventless combos use low heat and a sealed drum, so clothes or the air inside may feel slightly humid or less warm immediately at the end. Remove and shake the items, then reassess. Clothes that remain genuinely wet, drip, or fail a small balanced test load need further troubleshooting.
Does a washer-dryer combo need water to dry?
Many water-assisted condensation designs use a small amount of cold water during drying, while newer models can use a different water-free or heat-pump design. Check the exact model instructions. If the model requires water, a closed valve, restricted inlet, or reversed hose connection can reduce or prevent drying.
Can an overloaded or unbalanced load cause poor drying?
Yes. Drying capacity is lower than wash capacity on many combos, and a heavy or mixed load may not spin and tumble evenly. Reduce the load to the model's drying-capacity marking, unfold thick items, use similar fabrics, and run the documented spin or rinse-and-spin cycle when the load is unusually wet.
When should I call an appliance professional for a washer-dryer that will not dry?
Arrange service when a selected dry cycle repeatedly leaves a small balanced load very wet after a good spin, an error repeats, the drain or water path needs disassembly, or an internal pump, inlet, drying, sensing, airflow, control, or sealed-system diagnosis is required. Stop using the appliance for a leak, standing water near electrical parts, smoke, burning odor, scorching, damaged wiring, violent banging, or an unusually hot or erratic control.
Read the exact guide
Official sources
- Long Dry Time - Washer / Dryer Combo UnitLG USA Support · LG washer-dryer combo water-assisted drying, hose and inlet checks, pump filter, drying capacity, and spin guidance
- GE Profile™ UltraFast Combo Washer/Dryer - Clothes Not Dry When Drying Cycle is CompleteGE Appliances · GE Profile UltraFast combo drying behavior, humidity, load balance, pump filter, drain installation, and service boundary
- GE Profile™ UltraFast Combo with Ventless Heat Pump Technology Washer/Dryer - FAQsGE Appliances · GE Profile combo low-heat sealed-drum moisture behavior and service guidance
- LG Washer Dryer Combo - Troubleshooting Poor Drying PerformanceLG USA Support · LG washer-dryer combo drying performance, drain hose, water supply, load capacity, and thick-clothing guidance
- [LG Washer] Dryer Performance TroubleshootingLG USA Support · LG washer-dryer combo drying capacity, fabric-care, dry-button, water-supply, and drain-hose guidance
Community feedback
Share a repair observation
Share a plain-text repair observation. Accepted observations are published automatically; this page may take a moment to update.