
On this page
Start here
Quick answer
Start by describing the result precisely: stains remain, colors transfer, residue is left behind, the load smells, or the washer is not moving clothes through water. Then check the load size and sorting, choose a cycle and temperature that suit the fabric and soil, use the measured amount of HE detergent, and make sure the dispenser and water supplies work. If residue or odor is recurring, run the model's Clean Washer cycle as directed. Keep hands away from moving parts, never mix cleaning chemicals, and stop for service if there is a leak, hot-water injury risk, smoke, burning smell, arcing, or an electrical problem.
Work through in order
Diagnostic checks
Use only checks that match the exact appliance or system and its official guide.
-
Check 1
Before troubleshooting, stop and look from a dry position for a leak, water near the outlet or controls, smoke, a burning or electrical smell, visible arcing, a hot or damaged cord, or a washer that is violently moving.
Expected result: The washer and floor are dry and stable, or a hazard is present.
Next step: If any hazard is present, stop using the washer, keep clear of wet electrical equipment, close the water valves if safe, and arrange qualified help. Otherwise continue with the result and load check.
Why this matters
Why: A dry, stable appliance allows low-risk checks. Water near electrical equipment, fire signs, or violent movement is a safety fault and not a cleaning-performance adjustment.
-
Check 2
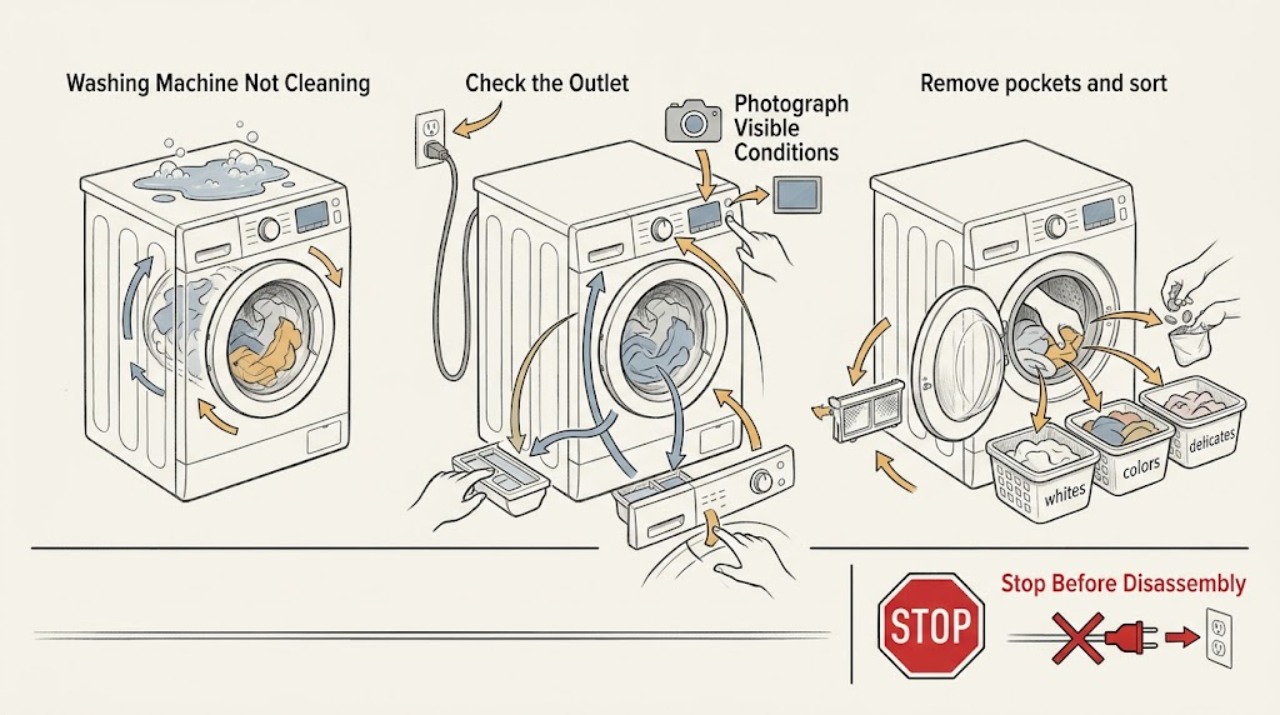
Classify the complaint before changing settings: stains or body soil remain, the load looks gray or colors transferred, white detergent residue remains, lint or pet hair is left, an odor persists, or clothes are clean but feel poorly rinsed. Photograph the result and note the selected cycle, temperature, soil level, and load size.
Expected result: One result repeats with a particular load or cycle, or the result changes from load to load.
Next step: Use the next check that matches the result; do not add more detergent or water simply because the issue is not yet identified.
Why this matters
Why: A repeatable result points to a setting, product, load, water, dispenser, or maintenance path. Variable results may reflect fabric, stain age, sorting, or load size rather than one failed component.
-
Check 3
Remove pockets and sort the load by color, fabric, construction, lint behavior, and soil. Load the basket in loose heaps so items can move freely around the washplate or drum; do not tightly pack it or wash one heavy item by itself unless the manual provides a suitable cycle.
Expected result: The clothes were tightly packed, mixed with incompatible fabrics or colors, or unable to move freely; or the load was loose and appropriately sorted.
Next step: Reduce or rebalance the load and select the cycle for its heaviest or bulkiest fabric. If the same result occurs with a small, correctly sorted load, continue to detergent, water, and cycle checks.
Why this matters
Why: Maytag says restricted movement reduces cleaning and rinsing, while mixed colors can create dye transfer that looks like poor cleaning. A loose, sorted load removes a common non-mechanical cause.
-
Check 4
Check the detergent label and measure the amount for the load size, soil level, water conditions, and concentration. Use only detergent labeled HE in an HE washer, and do not exceed a dispenser's Max line. If residue or excess bubbles are visible, do not add more detergent.
Expected result: The product was non-HE, over-measured, under-measured, old or poorly dissolving, or correctly measured HE detergent was used.
Next step: Use the detergent manufacturer's dosage and the washer manual on the next small test load. If suds or residue remain, use the permitted rinse or maintenance procedure rather than mixing cleaners; persistent problems need service or water-quality advice.
Why this matters
Why: Non-HE or excess detergent can create suds, slow or reduce rinsing, leave film, and worsen cleaning. Concentration levels differ, so a small measured amount may be correct and a large amount may be harmful.
-
Check 5
Inspect the dispenser drawer or cups from outside after the washer is off. Look for a blocked cup, hardened detergent, a bulk-dispenser concentration setting that does not match the product, or an additive placed in the wrong compartment. Clean the dispenser only as the model manual permits.
Expected result: The dispenser is blocked or misconfigured, or detergent and additives are delivered to the correct compartment.
Next step: Clear accessible residue with the manual's method, dry and reseat the drawer, and run one correctly measured test load. If the dispenser does not flush, leaks, or needs internal access, stop and request service.
Why this matters
Why: A blocked or incorrectly set dispenser can release too early, too late, or not at all, leaving soil and residue behind. Some models do not accept every product in every dispenser.
-
Check 6
Choose the cycle, soil setting, spin option, and temperature from the garment labels and the model's Cycle Guide. For heavy soil, use the longer or stronger soil option only when the fabric allows it; for a small quick wash, use only a few suitable items. Do not use a hot setting that can damage the load.
Expected result: The load was run on a short, low-soil, cold, or fabric-inappropriate setting, or the selected cycle matches the fabric and soil.
Next step: Run one correctly sorted, correctly loaded test load using the appropriate cycle. If the result remains poor, check incoming water and washer movement rather than repeatedly increasing detergent.
Why this matters
Why: Maytag documents that cycle and soil settings change wash time and that warmer water may improve cleaning when it is safe for the fabric. A quick cycle is not intended for a heavily soiled full load.
-
Check 7
For a cycle that seems to use no water or produces detergent residue, verify from outside that the required household water valves are open, inlet hoses are not kinked, and the hose connections are dry. Do not remove a pressurized hose or reach into a wet electrical area.
Expected result: Water supply is normal, flow is weak or absent, or a connection leaks.
Next step: Correct only an accessible valve or hose-position issue, dry the area, and test once. If flow remains weak, a hose leaks, or inlet screens or valves need disassembly, stop and use qualified service.
Why this matters
Why: Insufficient flow or an inlet restriction can prevent the selected wash action and rinsing. A leak is a water-safety issue, not a reason to keep running the washer.
-
Check 8
If the complaint is odor, film, or residue after otherwise normal loads, empty the washer and inspect the door seal, basket, washplate area, dispenser, and drain area for visible buildup. With the machine empty, run the model's Clean Washer cycle using only the cleaner or bleach procedure named in its manual.
Expected result: Buildup is visible, the Clean Washer cycle is available, or no user-accessible buildup is found.
Next step: Complete the maintenance cycle without mixing products and leave the door or lid open afterward as directed. If odor, film, or poor cleaning persists, arrange service to check drainage, water levels, or internal circulation.
Why this matters
Why: Maytag recommends regular interior cleaning to reduce detergent and fabric-softener residue; a maintenance cycle also addresses buildup that is not visible. The exact product and procedure are model-dependent.
-
Check 9
If lint, pet hair, or detergent remains on clothes, inspect the load size, sorting, dispenser delivery, and rinse selection. Remove loose debris from pockets and use an extra rinse only when the model and fabric permit it; do not compensate for excess detergent by adding another chemical.
Expected result: The load was overloaded, lint-producing and lint-catching fabrics were mixed, or residue remains with a small correctly sorted load.
Next step: Run a small test load with the correct measured detergent and suitable rinse. If residue or poor rinsing returns, record the result and request service.
Why this matters
Why: Tight packing can trap detergent and soil, while fabric combinations affect lint and residue. Persistent residue with a properly loaded test cycle points toward water, dispenser, drain, or mechanical circulation concerns.
-
Check 10
After the washer is dry, stable, and free of hazards, perform one model-documented reset only if the manual recommends it, then run one supervised test load with the corrected load, detergent, and cycle settings. Do not repeatedly reset a breaker or continue testing a leaking, overheating, or electrically abnormal machine.
Expected result: The corrected test load cleans normally, or the same result returns despite correct loading, product, water, cycle, and maintenance checks.
Next step: If the fault returns, stop using the washer and provide the model, result type, cycle, temperature, load, detergent, water observations, and any noises or codes to qualified service.
Why this matters
Why: A single reset can clear a transient control state, but recurrence after controlled changes indicates a supply, dispenser, sensor, drain, washplate, motor, or control fault that cannot be selected by guesswork.
Use your observations
Decision map
Find the observation that best matches what you see, then follow the next safe action.
-
PATH 01Safety boundary
What you see
The load is tightly packed, mixed by color or fabric, or cannot move freely
Do this next
Reduce and sort the load, place items loosely, and use the cycle intended for the heaviest fabric.
Why this path and its safety boundary
Safety stop: Continue to detergent and cycle checks.
-
PATH 02Safety boundary
What you see
Detergent residue, excess bubbles, or poor rinsing is visible
Do this next
Verify HE detergent and measured dosage, clean the dispenser as directed, and do not add more product or mix chemicals.
Why this path and its safety boundary
Safety stop: Continue to water-temperature and cycle selection checks.
-
PATH 03Safety boundary
What you see
The cycle or temperature does not match the fabric and soil
Do this next
Use the model Cycle Guide and garment labels to select an appropriate soil level, cycle, and safe temperature.
Why this path and its safety boundary
Safety stop: Continue to incoming-water and dispenser observations.
-
PATH 04Safety boundary
What you see
Water flow is weak, absent, or leaking at a visible connection
Do this next
Stop if there is a leak, keep water away from electricity, and arrange service for persistent low flow or internal inlet work.
Why this path and its safety boundary
Safety stop: Continue to maintenance and mechanical-action checks.
-
PATH 05Safety boundary
What you see
Odor or film returns after normal loads
Do this next
Run the model's empty Clean Washer cycle with one permitted cleaning method, then leave the door or lid open as directed.
Why this path and its safety boundary
Safety stop: Continue with the controlled test load.
-
PATH 06Safety boundary
What you see
A small, correctly loaded, correctly dosed test load still is not cleaned
Do this next
Stop changing products at random; record the result and request model-specific service for water, dispenser, circulation, drain, or control diagnosis.
Why this path and its safety boundary
Safety stop: Keep the corrected load, cycle, dosage, and maintenance routine for future loads.
Helpful context
Understand the symptom
A modern high-efficiency washer may use less visible water than an older machine. Clothes should still move freely through the wash action. A small amount of water in the basket is not, by itself, proof that the washer is failing. The useful diagnosis is the visible result and the part of the process that could have caused it: soil treatment, load movement, detergent delivery, temperature, or buildup inside the washer.
Keep garment-care labels and the washer's model-specific Cycle Guide in view. The same stain can need a different treatment from ordinary soil, and some fabrics cannot safely tolerate a hotter wash. Do not pour concentrated chemicals directly onto clothes or combine bleach with another cleaner.
Safety boundary
Stop conditions
- Stop immediately for smoke, a burning or electrical smell, visible sparks or arcing, a hot or damaged cord, or a breaker that trips again.
- Stop if water reaches the outlet, plug, cord, controls, or another electrical connection; do not touch wet plugged-in equipment.
- Stop for a burst, uncontrolled, or repeated leak, standing water that cannot be safely contained, or water entering the cabinet.
- Stop for violent shaking, walking, persistent metal-on-metal noise, or a washplate or drum that appears to strike the cabinet.
- Do not mix bleach, washer cleaner, detergent, or other chemicals; do not remove panels, test live wiring, or reach into moving or hot parts.
Only after diagnosis
Potential parts
- water inlet valve
Consider only if household valves and hoses are adequate but a model-specific flow test confirms an inlet valve or screen fault.
Confirm the exact model and fit information; internal water work should be performed with the appliance isolated and dry. - dispenser assembly
Consider only if the accessible dispenser is clean and correctly configured but a model-specific test shows detergent or additive is not delivered correctly.
Dispenser designs vary by model; confirm compatibility before ordering and do not substitute products in unsupported compartments. - washplate or drive component
Consider only when a correctly loaded test cycle has inadequate wash motion and qualified diagnosis rules out settings, load, detergent, and water supply.
Do not infer a drive part from poor cleaning alone; model-specific testing and fit confirmation are required. - drain or circulation component
Consider only if poor rinsing, residue, standing water, or slow drainage remains after the accessible hose and load checks.
Water containment and model fit are required; internal pump or circulation work belongs to qualified service.
When checks do not resolve it
Need a professional?
Arrange qualified appliance service when a correctly loaded and dosed test cycle still leaves the same result, water flow or dispensing remains abnormal, the washer leaks or fails to circulate, or any safety stop condition occurs.
Common questions
FAQ
Why does my Maytag washer leave stains behind?
Check the soil level and cycle, temperature safe for the fabric, load size and movement, sorting, and measured HE detergent. A short cycle, tightly packed load, unsuitable temperature, or excessive suds can reduce cleaning. If a small correctly loaded test load still fails, request service.
Can using more detergent make a washer clean better?
Not necessarily. Non-HE or excess detergent can create suds, reduce rinsing, leave film, and worsen cleaning. Use the HE product and measured amount specified by the detergent and washer instructions instead of adding more by guesswork.
Why is there residue on clothes after washing?
Common paths include too much or poorly dissolving detergent, a blocked dispenser, a tightly packed load, unsuitable temperature, or insufficient rinsing. Check the dispenser and run a small, loose test load with correctly measured HE detergent; do not mix cleaning chemicals.
How often should I run the washer cleaning cycle?
Maytag recommends routine interior cleaning about monthly, with the exact cleaner and procedure determined by the model manual. Run the empty cycle as directed and never combine washer cleaner, bleach, detergent, or another chemical.
When does poor cleaning require a technician?
Request service when the same result remains with a correctly sorted and loaded test load, measured HE detergent, suitable cycle and temperature, adequate water, clean dispenser, and permitted maintenance. Stop sooner for leaks, smoke, burning smell, arcing, electrical problems, or violent movement.
Read the exact guide
Official sources
- HE Detergent use in a Washer - Product Help | MaytagMaytag Product Help · Maytag HE detergent selection, dosage, concentration, and regular washer cleaning guidance
- Not Cleaning Clothing - Product Help | MaytagMaytag Product Help · Maytag top-load washer cleaning performance, temperature, soil level, detergent, additives, load, and Clean Washer guidance
- CPSC Urges Flood Victims to Take Steps to Prevent CO Poisoning, Electrocution, Explosion and FiresU.S. Consumer Product Safety Commission · Electrical safety around wet appliances and electrical equipment
- Cleaning the Interior - Front Load Washer - Product Help | MaytagMaytag Product Help · Maytag front-load washer Clean Washer cycle, dispenser cleaning, and residue-control guidance
- Not Cleaning Clothing - Front Load Washer - Product Help | MaytagMaytag Product Help · Maytag front-load washer cycle, temperature, HE detergent, load movement, sorting, and cleaning-performance guidance
- Owner's ManualMaytag · Maytag washer detergent, inlet-hose, temperature, maintenance, and Clean Washer procedures
Community feedback
Share a repair observation
Share a plain-text repair observation. Accepted observations are published automatically; this page may take a moment to update.