
On this page
Start here
Quick answer
If a Kenmore washer leaves clothes dirty, first separate a load problem from a washer-maintenance problem. Sort the load by color, fabric, and care-label temperature, pre-treat stains, leave enough room for the garments to move, and select a cycle and soil or temperature setting that fits the load. Use the detergent type and amount stated for the detergent and the exact Kenmore model; on a model documented for high-efficiency detergent, use HE detergent and do not add extra soap. Check the dispenser, visible inlet hoses, and accessible drain route without opening the cabinet. If the washer itself has residue or odor, run only the model-approved empty washer-clean cycle and never mix cleaning chemicals. Stop for a leak near electricity, smoke, burning odor, sparks, or chemical fumes. Persistent poor cleaning after these checks, or a basket, agitator, or impeller that does not wash, needs Kenmore or qualified appliance service.
Before you begin
Safety first
- Keep checks to ordinary safe access. Do not open the cabinet, contact wet electrical areas, reach into moving parts, bypass a lid or door interlock, mix cleaning chemicals, or work on energized wiring.
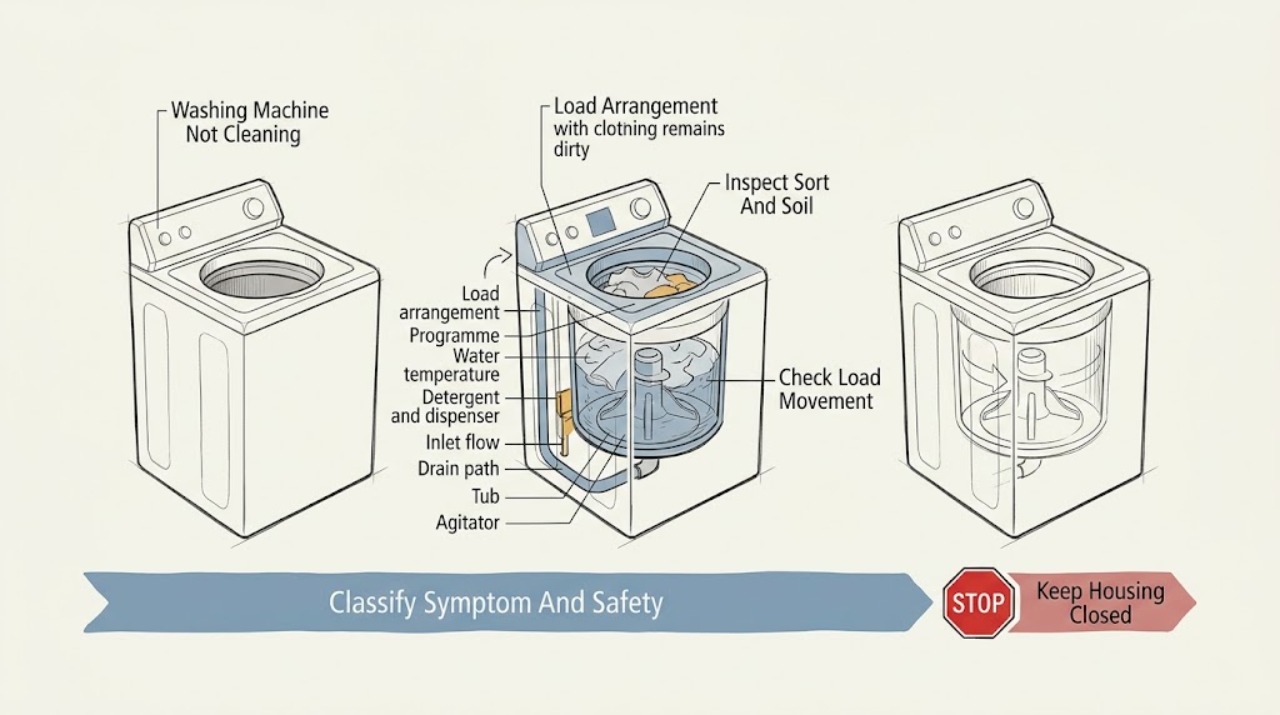
Work through in order
Diagnostic checks
Use only checks that match the exact appliance or system and its official guide.
-
Check 1
With the washer stopped, identify whether the complaint is dirty clothes, residue or odor inside the washer, water left after a cycle, or several of these; inspect only from a dry, ordinary-access position.
Expected result: Note whether there is a leak, water close to the power connection, smoke, a burning smell, sparks, chemical fumes, a damaged cord, or an unusually hot cabinet, and note whether the basket, agitator, or impeller moved during a safe prior cycle.
Next step: Stop use and arrange appropriate professional help for a safety symptom. If the area is dry and safe, continue by separating the clothing result from a washer-cleaning result.
Why this matters
Why: A safety symptom or water near electricity is not a cleaning adjustment. Dirty clothes without a hazard can proceed to load and programme checks, while standing water or no wash motion may point to a drain or mechanical fault.
-
Check 2
Review one representative load against its care labels: separate lights and darks and separate fabrics that need different temperatures, then check whether stains were pre-treated as soon as practical.
Expected result: If only one fabric group, color group, or heavily stained item is affected while lightly soiled items are clean, record the soil type and the care-label limits rather than treating the washer as failed.
Next step: Run a small, compatible load using the care-label-safe cycle and temperature recommended by the detergent and the model manual; do not use a hotter setting that the fabric cannot tolerate.
Why this matters
Why: Mixed fabrics and untreated stains can make a normal wash look ineffective. A repeat load with compatible items and suitable pre-treatment is a better diagnostic than changing several washer controls at once.
-
Check 3
Check how the load sits in the basket before starting: distribute items instead of packing the drum, and follow the model manual's loading instruction for a top-load or front-load design.
Expected result: A packed basket, one bulky item, or garments that cannot move through the wash water indicates a loading problem; a normally sized load that tumbles or circulates yet remains dirty points to the next checks.
Next step: Reduce or rearrange the load and repeat the same suitable cycle. If the basket cannot move the load, or the washer repeatedly makes abnormal impact noise, stop and request service rather than forcing more water or opening the cabinet.
Why this matters
Why: Overloading can prevent water, detergent, and mechanical action from reaching the fabric. Kenmore offers different washer designs and capacities, so capacity and loading guidance are model-specific rather than a universal fill line.
-
Check 4
Record the selected programme, soil level, temperature, and any soak, stain, steam, or deep-clean option, then compare them with the fabric care labels, detergent directions, and the exact Kenmore manual.
Expected result: If the cycle is a short or delicate programme for a heavily soiled load, or the temperature and soil setting do not fit the fabric and soil, the controls explain the result; if a suitable cycle produces the same result on a small load, continue to water and detergent checks.
Next step: Use one model-supported cycle that matches the load and record the outcome. Do not repeatedly switch between cycles while also changing detergent or load size, because that hides which condition changed.
Why this matters
Why: Cleaning time, temperature, water movement, and stain features vary by model. Kenmore describes several washer cleaning features, but a feature shown on the product overview is not proof that a particular model has it.
-
Check 5
Read the detergent and washer manual labels, verify whether this model is documented for high-efficiency detergent, and inspect the dispenser for dried product or a blocked compartment without mixing cleaners.
Expected result: Too much detergent, the wrong detergent for a documented HE model, a clogged dispenser, or persistent suds can leave residue and interfere with rinsing; a clean dispenser and model-correct amount shift attention to water flow and mechanical action.
Next step: Use the documented detergent type and amount, clean only the removable or user-accessible dispenser parts allowed by the manual, and repeat a controlled load. Never combine bleach, vinegar, descaler, or other cleaners.
Why this matters
Why: More detergent does not compensate for a full load or unsuitable cycle. The exact dose depends on the product, soil, water, and model instructions, and the word HE should not be assumed for an unidentified design.
-
Check 6
From a dry, safe position, verify that both water supply taps are open and that the visible inlet hoses are not kinked or crushed; consult the Kenmore manual before touching any inlet screen.
Expected result: A closed tap, restricted hose, unusually slow fill, or an inlet warning can reduce the water and rinsing needed for cleaning. Normal fill with a suitable load means this check did not identify the cause.
Next step: Correct only a visible, safe hose restriction and follow model instructions for any user-accessible screen. If flow remains low, the hose leaks, or water is near electrical parts, stop and arrange service.
Why this matters
Why: Insufficient or unbalanced water flow can make detergent and soil removal ineffective, but the hose and screen arrangement differs by model and must not be guessed from another washer.
-
Check 7
If water, lint, or dirty residue remains after the cycle, observe the visible drain hose route and its connection without disconnecting a water-filled hose or reaching into the washer.
Expected result: A kinked or visibly displaced drain route, slow emptying, or dirty water left in the basket supports a drain-path problem; a fully empty basket with dirty clothes sends the diagnosis back to load, cycle, detergent, and wash-motion checks.
Next step: Correct only a plainly visible routing issue allowed by the manual. If the washer will not drain, repeatedly shows a drain fault, leaks, or requires internal access, stop and request qualified appliance service.
Why this matters
Why: Poor draining can leave soil or detergent behind and can also prevent later wash steps. A concealed pump or internal blockage cannot be safely confirmed by opening the cabinet.
-
Check 8
For a washer that has odor, film, or residue inside, look up the exact model and run an empty Clean Washer, Tub Clean, or equivalent cycle only if that cycle and its cleaning product are specified in the manual.
Expected result: If the empty approved cycle removes the odor or residue, the clothing complaint may have been maintenance-related; if residue returns, the cycle is absent, or the washer cannot complete it, record that result for service.
Next step: Allow the washer to finish and follow the manual's ventilation or door guidance. Stop for chemical fumes, a leak, smoke, burning odor, sparks, or an unexpected control or mechanical fault.
Why this matters
Why: Kenmore models differ in controls and cleaning features. An empty maintenance cycle is not a substitute for a wash cycle and must never involve mixing bleach, vinegar, descaler, or other chemicals.
-
Check 9
Run one small, compatible test load after changing only the identified condition, and record the model number, cycle, temperature, detergent type and amount, water-fill behavior, drain result, and final clothing condition.
Expected result: Improvement after a loading, cycle, detergent, flow, drain, or empty-clean correction identifies that branch. No improvement with a correctly loaded and supplied washer, or no normal basket, agitator, or impeller action, indicates a concealed appliance fault.
Next step: If the result remains poor, use Kenmore Customer Care or qualified appliance repair and provide the recorded observations. Do not open the cabinet, bypass an interlock, or work on energized wiring.
Why this matters
Why: A repeatable controlled result helps Kenmore support or a technician distinguish user settings from a dispenser, inlet, drain, drive, wash-motion, sensor, or control problem without unsafe disassembly.
Use your observations
Decision map
Find the observation that best matches what you see, then follow the next safe action.
-
PATH 01Next step
What you see
There is a leak near electricity, smoke, burning odor, sparking, chemical fumes, a damaged cord, or unusual heat.
Do this next
Stop operating the washer, keep people away, and use the appropriate emergency or professional service from a safe, dry location. Do not touch wet electrical areas or perform internal checks.
-
PATH 02Next step
What you see
Only a mixed, bulky, or heavily stained load remains dirty.
Do this next
Sort by fabric and color, pre-treat within care-label limits, reduce or rearrange the load, and repeat a compatible model-supported cycle.
-
PATH 03Next step
What you see
There is residue, excess suds, a wrong detergent type, or a blocked dispenser.
Do this next
Use the detergent type and amount documented for the product and model, clean the accessible dispenser as directed, and never mix cleaning chemicals.
-
PATH 04Next step
What you see
The washer fills slowly, a hose is restricted, dirty water remains, or draining is incomplete.
Do this next
Correct only visible safe routing issues permitted by the manual; otherwise stop and arrange service for inlet, valve, pump, hose, or concealed blockage diagnosis.
-
PATH 05Next step
What you see
The washer itself has odor or residue but is otherwise safe and the manual specifies an empty cleaning cycle.
Do this next
Run that model-approved empty cycle with the specified product only. Do not mix bleach, vinegar, descaler, or other chemicals.
-
PATH 06Next step
What you see
A correctly loaded test load remains dirty, the basket or wash motion is abnormal, or several different cycles fail after the basic checks.
Do this next
Contact Kenmore Customer Care or qualified appliance repair and provide the model, symptoms, settings, detergent, water and drain observations, and any safe photos. Do not disassemble the cabinet.
Helpful context
Understand the symptom
First identify what is not cleaning
Clothes that still have stains, soil, or detergent marks point first to loading, sorting, cycle choice, water, detergent, or drainage. A washer that smells musty or leaves residue in its basket is a separate maintenance symptom. Record which items are affected, whether the problem is on every cycle, and whether water remains in the tub before changing several settings at once. Kenmore's product and support pages show that cleaning features and controls vary across washer designs, so use the complete model number to retrieve the matching manual.
Keep the check model-specific
The Kenmore manual finder asks for the full model number and provides the use-and-care information for that appliance. Do not assume that a Clean Washer cycle, deep-fill option, dispenser layout, agitator, or impeller exists on every Kenmore washer. Treat the manual as the authority for cycle names, detergent requirements, cleaning products, and any filter or hose access.
Only after diagnosis
Potential parts
- detergent dispenser assembly
Consider this only if the exact model manual identifies the dispenser as removable or serviceable and residue remains after correct detergent use and safe cleaning.
Confirm the complete Kenmore model number and manufacturer fit information before ordering any part. - water inlet valve or inlet screen
Consider this only after a model-specific diagnosis confirms restricted or abnormal fill with the taps and visible hoses correct.
Do not infer fit from appearance; a qualified technician should confirm the model-specific part. - drain pump or drain hose
Consider this only when the drain route is not visibly restricted and the washer leaves water or residue after a model-specific drain diagnosis.
Verify model fit and have service handle internal water-path work. - agitator, impeller, or wash-drive component
Consider this only when a safe observation confirms missing or abnormal wash motion after loading, cycle, water, and detergent causes are excluded.
Top-load designs and drive parts vary; do not order without the exact model and professional diagnosis.
When checks do not resolve it
Need a professional?
Stop and seek professional help for leaks that approach electrical parts, water contact with electrical connections, smoke, burning odor, sparks, chemical fumes, a damaged cord, repeated tripping, abnormal mechanical impact, an uncompleted drain, or a washer that still fails a controlled, model-correct test after the visible checks. Do not open the cabinet, reach into a moving basket, bypass a door or lid interlock, or work on energized wiring.
Safety scope: Keep checks to ordinary safe access. Do not open the cabinet, contact wet electrical areas, reach into moving parts, bypass a lid or door interlock, mix cleaning chemicals, or work on energized wiring.
Common questions
FAQ
Why are my Kenmore washer clothes still dirty after a normal cycle?
Start with sorting, pre-treatment, load movement, cycle and temperature, detergent amount, water fill, and draining. If a small correctly loaded test load is still dirty, the washer may have a concealed wash-motion or water-path fault that needs service.
Can I use extra detergent or a hotter cycle to make a Kenmore washer clean better?
No. Use the detergent type and amount specified for the product and exact model, and keep the temperature within the fabric care label and model instructions. Extra detergent can leave residue, and a hotter cycle can damage unsuitable fabrics.
How do I clean the Kenmore washer itself?
Look up the complete model number and run an empty Clean Washer, Tub Clean, or equivalent cycle only when the manual specifies it and names the cleaning product. Never mix bleach, vinegar, descaler, or other chemicals.
When should a Kenmore washer that is not cleaning be serviced?
Arrange service for persistent poor results after a model-correct controlled test, missing wash motion, incomplete draining, repeated fill or drain faults, leaks, or any smoke, burning odor, sparks, chemical fumes, or water near electrical parts.
Read the exact guide
Official sources
- Laundry Appliances | Washers & Dryers | KenmoreKenmore · Kenmore laundry product overview; individual washer features vary by model.
- Find Your ManualKenmore · Kenmore appliances; enter the complete model number to retrieve the matching documentation.
- Customer CareKenmore · Kenmore appliance support and repair pathways.
- Tips for Washing Extra Large Loads of LaundryKenmore · General Kenmore laundry guidance; the exact washer manual controls for a particular model.
Community feedback
Share a repair observation
Share a plain-text repair observation. Accepted observations are published automatically; this page may take a moment to update.